


Custom Integrations

I’m always looking for projects where I’m brought in to design the entire exterior environment, complete with hardscape, planting plans and watershapes. Working this way gives me a straight shot at integrating all of these major elements into cohesive designs that fit the setting.
But I believe in collaboration, too, and in giving interested clients an opportunity to participate in the process. I listen carefully to what they say, factor in their budgets and then start working toward a suitable design. This integrated approach often requires intensive and extensive interaction with homeowners. Through it all, I’m flexible – but I’m also confident in my abilities, experience and expertise and generally end up installing something that closely matches my sense of the way things should be.
When it works, everything goes smoothly. In the case of the project pictured in these pages, however, the process has been much more involved and is, 18 months into it, still ongoing in some areas. Lots of what you see here is different from my original design, and the process has sometimes been frustrating – but I’ve taken everything in stride as simple tests of my adaptability, creativity and problem-solving skills while staying focused on keeping everything headed in a positive direction.
A TRI-LEVEL APPROACH
When I first visited the site, the clients let me know that they wanted a spa, a natural cascading rock waterfeature, a sun deck and associated landscaping. The primary issue from the clients’ perspective was that they wanted to see the waterfeature from the formal living room, which opens to the backyard.
My initial thought was that this would work, but that the expansive yard needed a more substantial watershape to fit the overall scale of the space. So we talked about expanding the project: Because the homeowners have grown children who often visit with several grandchildren, the idea of including a swimming pool made sense to them. With the kids in mind, we also decided to include a pond as part of the rock waterfeature to double as a shallow wading pool.
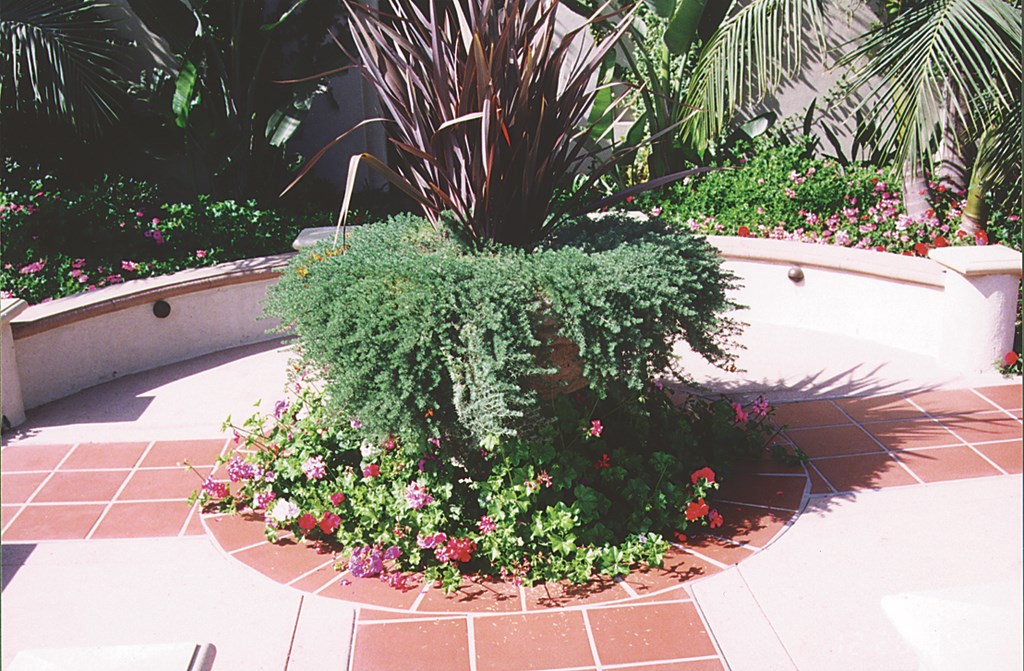
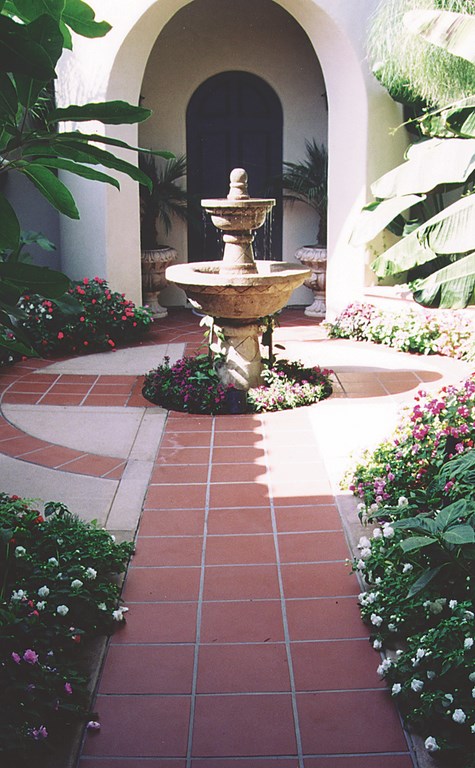

| The home’s design and feel led me to work with a controlling set of lines and circles that start out front of the entry courtyard with a small cantera-stone planter (left) and then move to the front door around a small courtyard fountain (middle). We picked up the line and materials in the backyard with a fire pit (right). |
From the outset, the clients were adamant about wanting lots of natural rock with water flowing in various and interesting ways. I suggested that it would be interesting to develop a design that would be seen differently from various vantage points in the yard. I did so because one of the primary challenges I saw here was making an elevated rock waterfeature in the center of a flat yard appear to occur naturally. This is where the “tri-level” feature of the design came into play.
|
Design Attitudes As a designer, I strive to provide my clients with plans that accommodate their desires but that also reflect my abilities and expertise. Sometimes establishing that balance requires give and take as I find out what the clients like and don’t like. At those moments, I see that I’m almost like a lens through which my clients discover what it is they’re really after. On the project described in the accompanying text, the result of these interactions was a series of important alterations to my plans. Some didn’t matter to me at all, such as their insistence on using travertine for the barbecue’s countertop. Yes, concerns about using a material that’s so difficult to keep clean gave me second thoughts, but it was what the clients wanted and makes them happy. By contrast, numerous changes they insisted on in the planting plan almost certainly will cost them, sooner or later. In demanding lushness right away, they’ve left no room for the plants to grow to maturity – and there will be problems as the densely planted specimens compete with each other for sunlight, water and space beneath the ground. Some plants will die; others will need to be removed. So I wouldn’t have used travertine, and I would have worked the plantings differently. But in the grand scheme of things these are maintenance issues rather than fundamental design compromises. I can live with this sort of disappointment! — K. M. |
Balancing all these factors, I proposed a design that included a raised spa alongside an “island” of decking that would be completely surrounded by water. From its own level, the pool would spill into a small, rocky pond via a rock waterfall. This placed bodies of water on three levels, all woven together with cascades, rockwork, finish materials, colors, textures and plantings.
The pool, spa and waterfeature were at the core of the design – the culmination of styles and materials that would be woven throughout the entire exterior program. The plan also integrated the backyard with lines of sight established in the front yard: The waterfeatures stood in alignment with the courtyard at the front entrance to the house and fit neatly within the primary visual flow through the interior of the home itself.
We went through several different design iterations, making dozens of adjustments both large and small. Many of these changes occurred later, during work on site. We focused a lot of attention on elevation changes, for example, moving from relatively formal structures to organic shapes, and from tile and other hardscape material to natural rock and plantings.
As we went back and forth (and back and forth) with this set of ideas, the original plan to create rocky spillovers from pool to pond morphed further into a pair of vanishing edges – a strategy that enable us to take advantage of the elevated swimming pool.
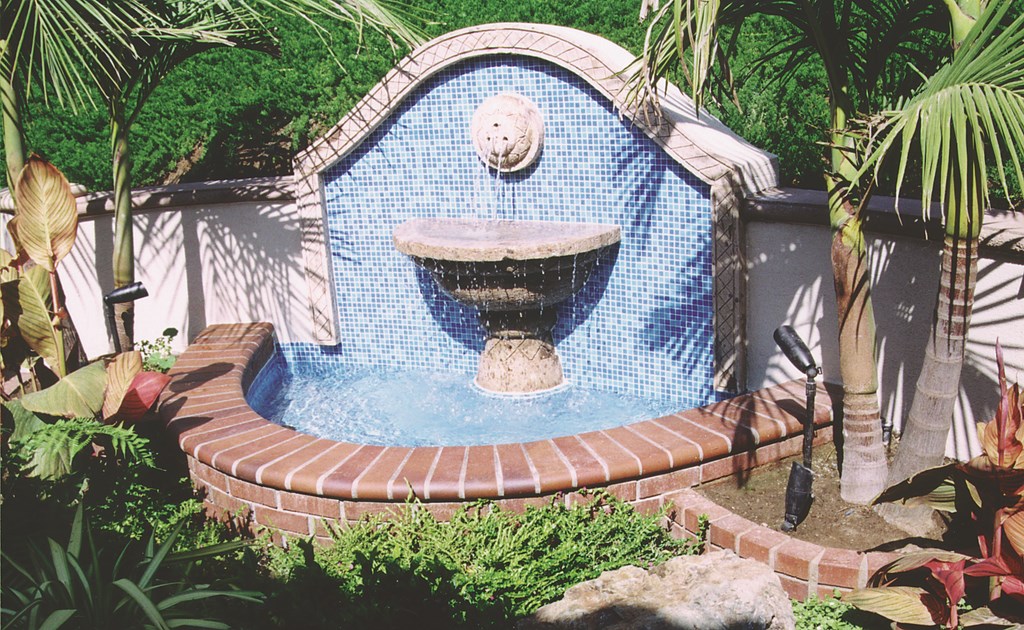
| Along the side of the house, we set another cantera-stone detail, this one a wall fountain. This is where we introduce visitors to the look of the blue glass tile used in the spa and pool. |
I accepted these alterations because the bones of the project were intact. In fact, the homeowners loved the idea of the island deck surrounded by water on different levels and also really liked the concept of creating a structure that would look different from every angle. In other words, I had plenty to work with here.
As the design progressed, it truly became a three-dimensional piece: The three small vanishing edges (the two from the pool and another one from the spa), the asymmetrical shapes, the rockwork cascades and the plantings all began working together to create a complex set of focal points and views.
FLOWS OF INTEREST
There’s a lot going on in this backyard, and it’s that way for a reason: Although this is an elaborate, estate-sized home in an upscale, gated community, the surrounding views and adjacent homes are all pretty drab. That’s why the design focused on the drama that comes with elevation changes, right from the start.
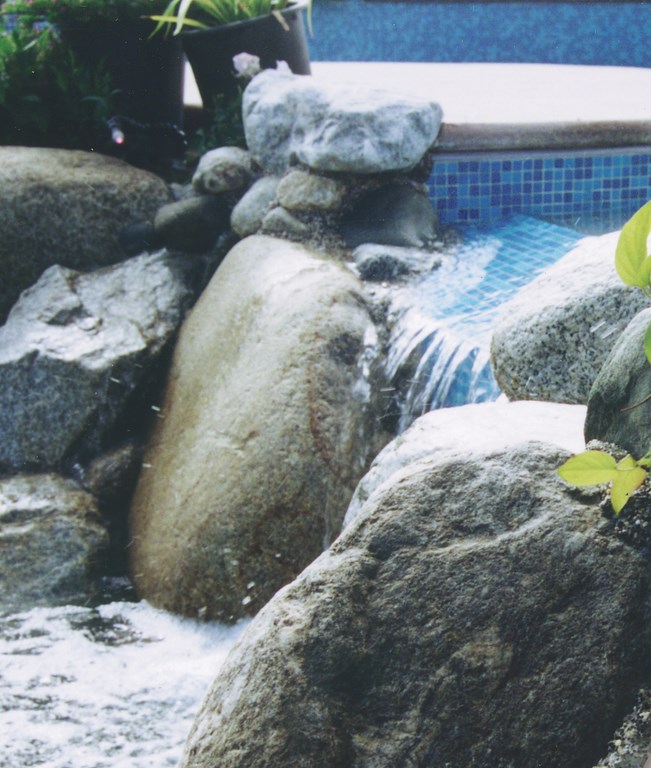
To achieve that effect – and to make the elevations seem as though they were there before the house was built – we had to do a great deal of grading and shaping. We also focused a lot of attention on the rock waterfall at the front of the watershape: As you come through the French doors on the back of the house, you immediately see the waterfall alongside the sweeping contours of the steps leading up to the spa.
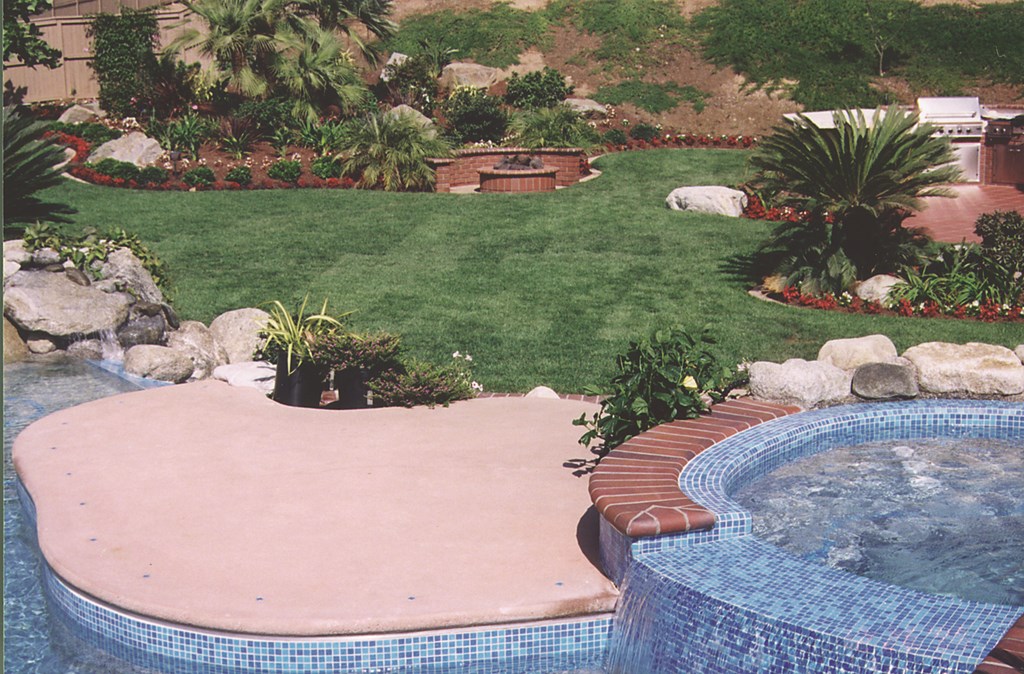
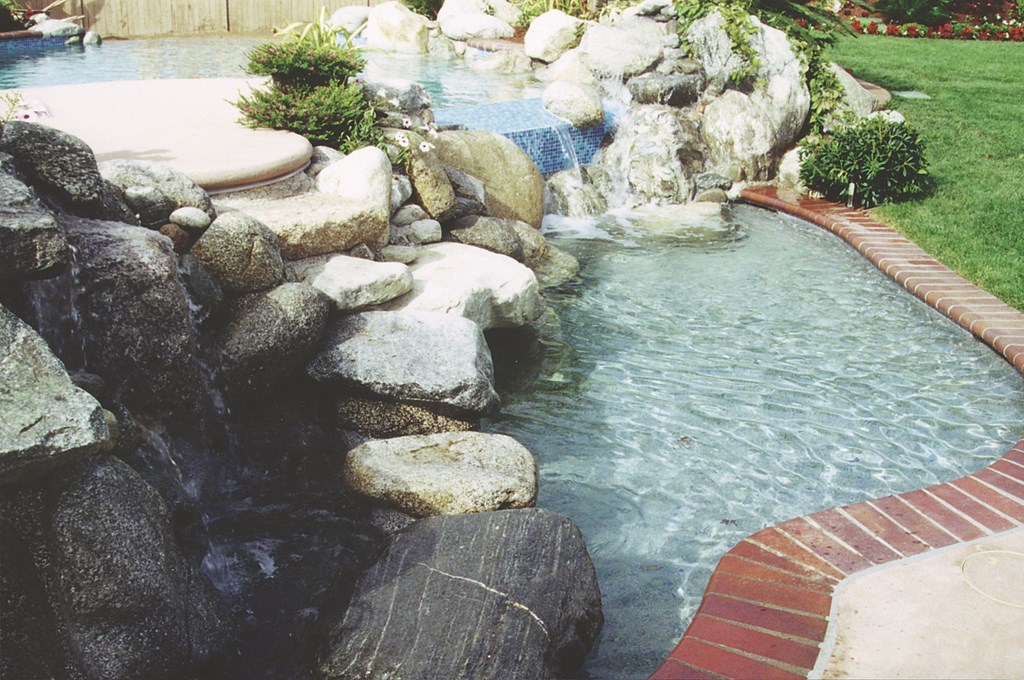
| The island of decking is at the heart of the design (left) – the place from which the whole of the design radiates. You reach it via the natural “stepping stones” that cross in front of the waterfall and through the pond (right). |
Our desire was to use this naturalistic cascade as an instant attention-getter, a destination spot that would draw visitors through the house to explore the spaces outside. Once visitors stepped through the French doors, the attraction would be augmented by the flowing curves of the staircase – a key transition point that would sinuously introduce the more formal aspects of the hardscape.
|
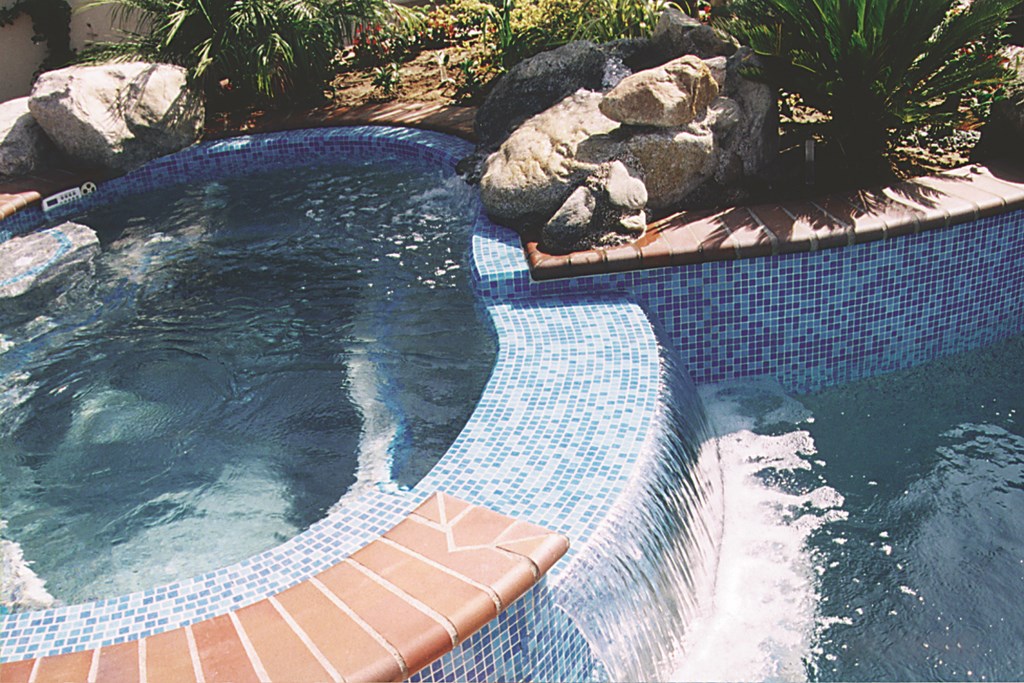
Singing the Blues I’m not a big fan of the familiar, single line of blue tile used at the waterline in standard swimming pools, so I resisted when my clients fell head over heels in love with the blue glass mosaic tiles we ended up installing on this pool. The challenge with this material was integrating the look with the natural rock boulders and the bullnose brick coping they also wanted.
As we reviewed our mosaic options with my tile supplier, we didn’t see the right mix: They offered one pattern that was close, but it was a bit light, so we asked the supplier to create a custom mix by replacing the lightest-colored tiles with darker ones. This shift in hue made the whole surface much deeper and richer. As can happen with any custom order, we ran short by a few square feet. Instead of waiting for an entire new order to be filled, we made our own mosaic by mixing up individual tiles we had and placing them in an appropriately random pattern – a learning process in itself! — K. M. |
Working out this relationship of natural and formal in the watershapes was the biggest challenge in developing an exterior design that flowed through the interior and exterior spaces of the Mediterranean-style home. In doing so, I emphasized the hardscape plan as a means if integrating visual elements that begin in the front of the house, flow through the house and the side yards and move to the back around a barbecue area and, finally, the swimming pool.
The basic program involves straight lines moving into circles, giving the design a crisp geometry that lends the work its formal feeling. (This formality is also expressed through the use of tile.) We started with the grand entry staircase at the front of the property and a supplemental entry path from the driveway that leads you to the front of the house.
These paths converge at a small circular patio in front of an arched, gated portal to the formal courtyard entry. Here we placed a cantera-stone planter that introduces the custom shape of a cantera-stone fountain set inside the courtyard (and of one of two fire rings in the backyard). Throughout the pathways and patios are low walls with small pilasters at the ends, all topped with light-colored concrete capstones.
The fountain flows as an intimate trickle befitting its formal shape and creates a beautiful visual and aural centerpiece for the enclosed space. There’s also a small wall fountain in a side yard that provides an interesting point of transition between the front and the back yards: It picks up the cantera stone used in the front planter and courtyard fountain – and introduces a vibrant blue glass tile found later in the pool.
FLUID COMPLEXITY
This focus on integration – on flow from front to back and on use of common themes and visual links throughout the setting – was a major task for us as we worked out the visual balances of the project. At the same time, we also had an amazing challenge in working out the hydraulics that would make all these watershapes actually function.

| From below, the rock-encrusted watershapes have a “natural” feel. Up on the deck, however, the expanses of blue tile and crisp elevations lend the setting a much more formal look that blends much more easily with the style of the house. Finding the right perceptual balance between formal and natural was the principle design challenge we faced. |
To put it mildly, the hydraulic design here was not simple. For example, the small rock waterfeature feeding the spa circulates hot water and is completely separate from the rest of the waterfall systems. It’s a small trickle compared to the main cascading waterfall feeding the pond, but we needed to make it appear as though it was part of the same system.
We also had to accommodate the fact that the pool was to be much larger than the pond, which led us to install two intermediate surge tanks behind the vanishing-edge trough on the backside of the pool. This approach let us manage all the movement of water and potential surge over the two edges without having to worry about large changes in the pond’s water level or in that of the vanishing-edge trough. We also set up three skimmers in the pond area to function like gravity-fed drainpipes into the surge tanks and the automatic leveling system.
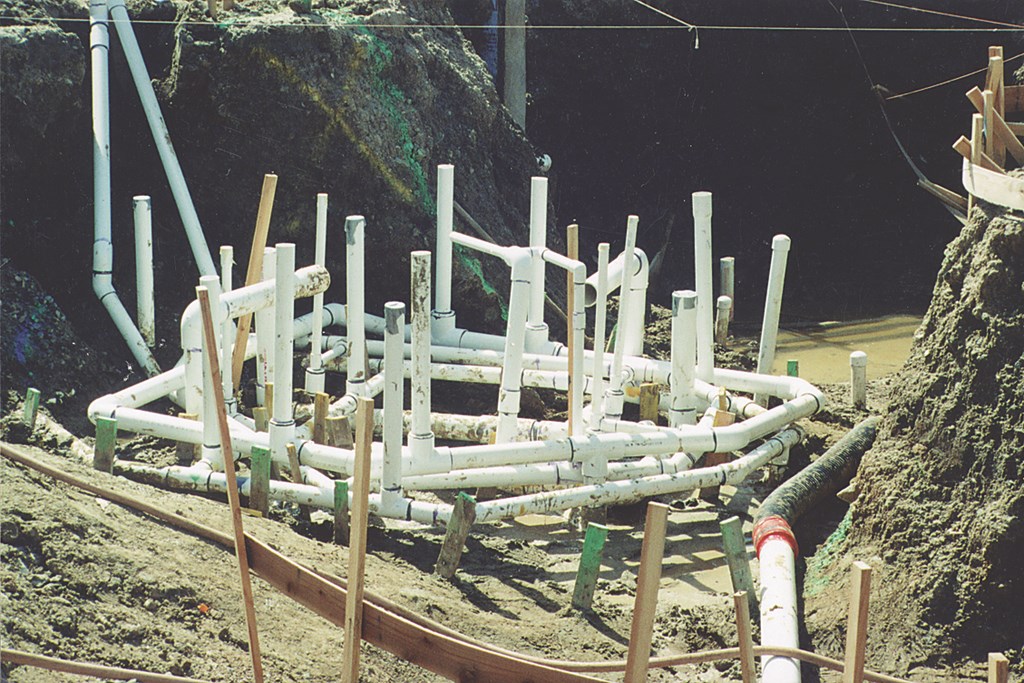
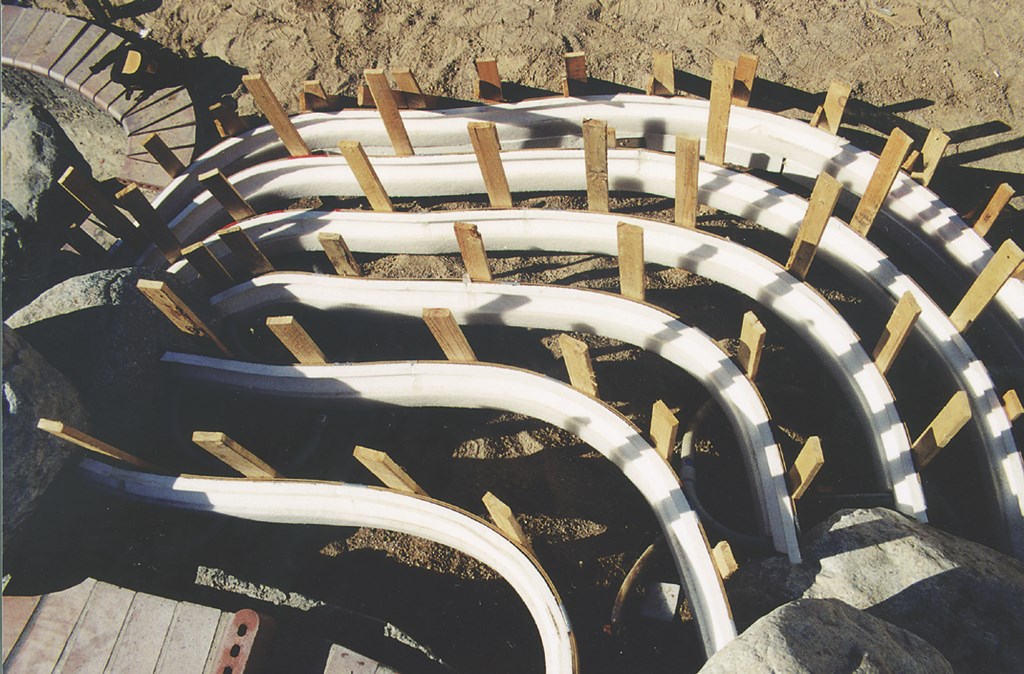
| Making complex designs work is no small task. In this case, the combination of multiple levels, lots of waterfalls, lots of returns, an in-floor cleaning system and multiple hydrotherapy jets turned our pipe formations into porcupines, especially under the spa (left). We also spent a lot of time figuring out the line of steps leading up to the spa. As the forms show (right), the shapes are meant to project natural contours that might have been found on the undisturbed site. |
Once we hit on this alignment of vessels, troughs, skimmers and tanks, there was still lots of work to do in establishing positions for the skimmers and in setting the elevation of the surge tanks in relation to the equipment pad and the water level in the pond. We also needed to work out the basic circulation plan, which was complicated by the fact that were installing an in-floor cleaning system with its own, independent requirements.
|
Coming and Going The project described in the accompanying text comes with a fairly complex hydraulic system. The waterfeature alone has three pumps: Pump No. 1 draws from the pool and returns water to the spa in a floor-jet loop. This flow causes the spa spillway to overflow into the pool and also feeds the spa’s recirculating waterfeature. Pumps No. 2 and/or No. 3 are part of the gravity-feed system with suction from the surge tank. Water is returned via a looped manifold (with ball valves on each of eight separate return lines) to the pool to run the vanishing edges and five rock waterfeatures. One vanishing edge overflows into a trough that empties directly into the surge tanks below it. Water flowing over the other vanishing edge (and several of the rock waterfalls) flows into the pond and is then gravity-fed via three skimmers (each with its own four-inch pipe) back into the tanks. — K. M. |
Jeff Freeman, a hydraulics consultant with Fluid Logics in Southern California, did much of the heavy lifting on the hydraulic design. He tackled the critical issues of plumbing and tank size and configuration, pump sizing, equipment selection, valve placement and equipment-pad layout. We also spent a great deal of time together figuring what would happen in different scenarios and in troubleshooting the overall plumbing schematic.
When we fired things up for the first time, we ran into a small glitch that had to do with the automatic leveling system. Beyond that, the system worked as planned.
STUBBORN PERFECTION
People who know me will tell you that I’m a perfectionist and that I don’t yield easily when I believe I’m right. In this case, however, the key to success involved a great deal of bending on my part. My clients did their fair share of bending, too – and yielded complete control to me in areas where I felt it was most important.
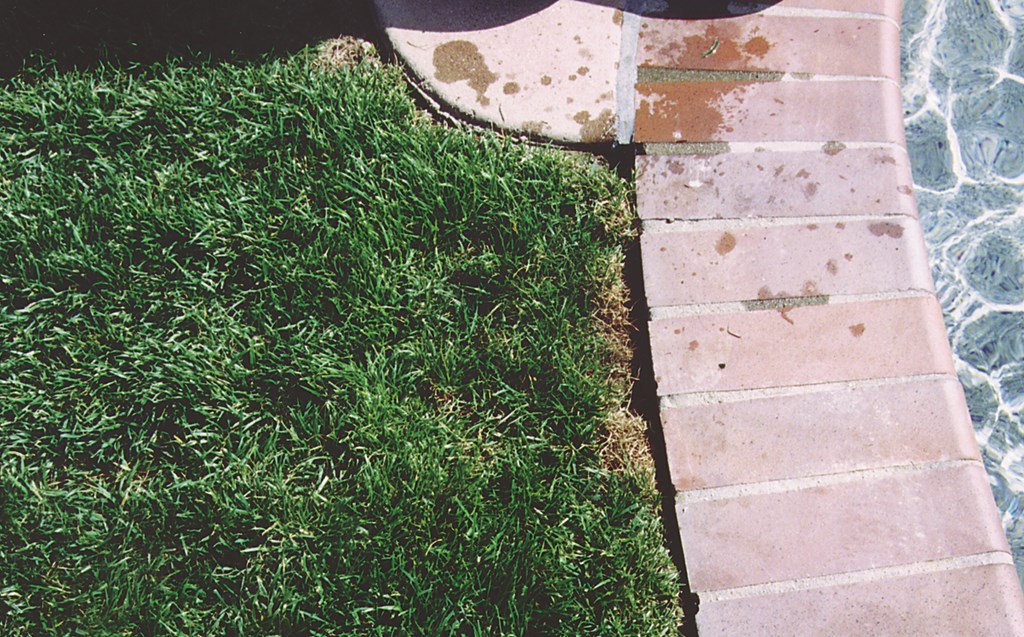
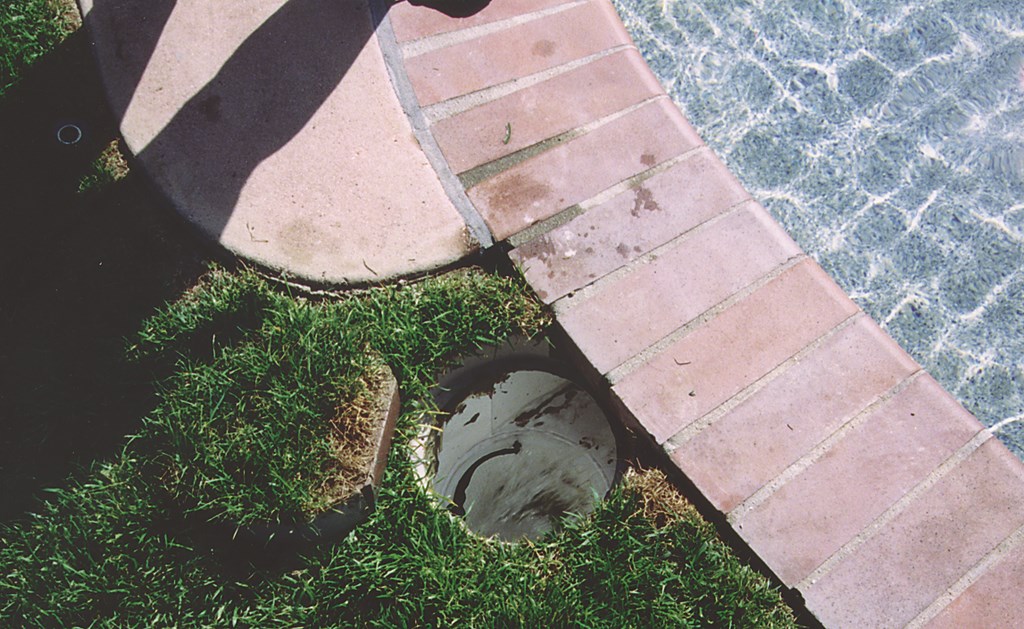
| There’s a fun detail we developed to hide one of three skimmer lids: We used a specialty skimmer lid that’s about two inches deep. Typically you would pour matching deck material in this lid, but in this case because the skimmer was placed in a lawn area, we put sod in the lid (left). Lid and tray lift off easily to allow access to the skimmer (right). |
There are parts of this design that are many steps away from my original vision, but the result is a project that works – visually, stylistically and functionally – as a unique amalgam of design elements and ideas. Most important, it’s a project that makes my clients proud and happy.
Especially at night, when everything’s quiet except for the sounds of water and when the water’s edges, the landscaping and steps are articulated by fiberoptic lighting, the frustration evaporates and sense of integration is quite complete.
Kathy Marosz is owner and president of Enviroscapes, a landscape design and construction firm in San Diego, Calif. Marosz founded her company, which focuses on hardscape design, planting plans and creative installations of swimming pools and other watershapes, more than 12 years ago after studying landscape architecture at Cal Poly San Luis Obispo. Before joining the watershaping and landscaping trades, she enjoyed a successful career as a singer as a musician – experience she says helped develop her ability to connect with and inspire clients.