


Instant Geology

Some may disagree with me, but I don’t see faux rockwork as a “sculptor’s art form.” For more than 25 years, I’ve made sure that Mother Nature is the one who does the detail work; what I do is take copies of her artwork to job sites and install them in creative and interesting ways.
A long time ago, I developed a method of making castings of real rocks using my own formulation of fiberglass and epoxy. These are exact replicas of the real thing: Once mounted on steel structures in swimming pools or other hardscape applications, the panels are blended together to make artificial rock formations that take full advantage of Mother Nature’s eye for detail and texture.
I don’t mean any disrespect to people who make their faux rocks on site and acknowledge the fact that trying to recreate with your hands what nature does through the eons is no small feat. But I’d also say without hesitation that using rock castings is the only sure-fire way to make certain the work looks real each and every time.
TAKING IT EASY
For 20 years, our firm used this technology strictly for our own projects. We’ve installed rockwork on pools and other watershapes throughout the United States and around the world using our inventory of rock panels – and we’ve done it in an endless array of combinations and configurations.
These days, we still do a good bit of rock design and installation work, but we’ve also made the panels available to contractors for use in their projects. Although this is a relatively new direction for our business, so far the people who’ve adopted our method are having success with it – and say they enjoy skipping the labor-intensive processes involved with creating their own faux-rock formations from scratch.
|
Flexible Stone The on-site labor with our rockwork is focused on mounting and backfilling the stones – a fact that frees the designer and/or contractor to spend his or her time making creative decisions about the final placement of the stones. Of course, this design/placement process can be a challenge on its own, because we now have more than 100 castings of rock formations on hand – and each of these can be cut into pieces, combined and recombined in an almost limitless range of configurations. Even a few panels enable the designer to create unique compositions. That’s a flexibility the contractors who work with us enjoy – and it’s a benefit they pass on to their customers in every project. – R.E. |
The best thing about what we do is that it starts with nature: The rocks are selected in the field and come in an array of surprising shapes with fascinating contours, cracks and crevices, and the process of finding these specimens often sends me hiking through the hills and canyons of California and elsewhere searching for interesting rocks and formations to copy.
When I find something that catches my eye, I’ll bring in my crew and make an impression of the rock structure. And this means more than individual boulders or stones: We’re after whole rock structures, not just isolated shapes. Back at our shop, we use these molds to create exact replicas of the originals. Once on site, we bring in finishers who color and do the final texturing on the panels to ensure their realistic appearance.
It’s a neat process, but the best of it is that, when we step on the job site, the hardest part is done. All that’s left at that point is the installation and finishing, which is what this step-by-step pictorial is all about.
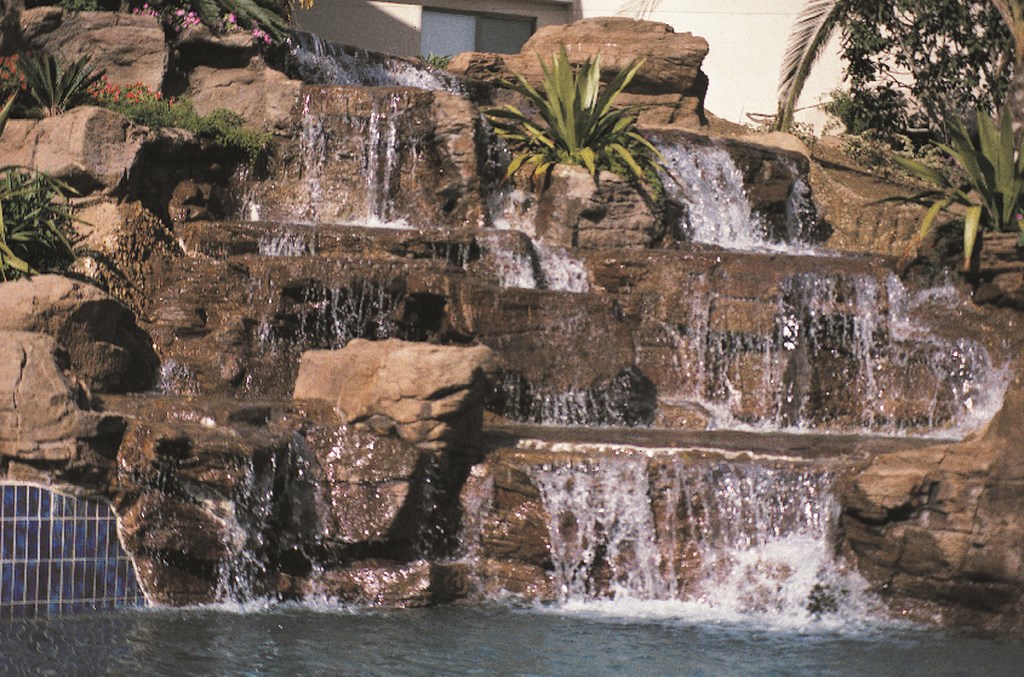
Note: With the exception of the image on the opening pages of this article, the photos here were all taken on the same project; in some cases, however, various stages of the process were captured in different places around the job site.
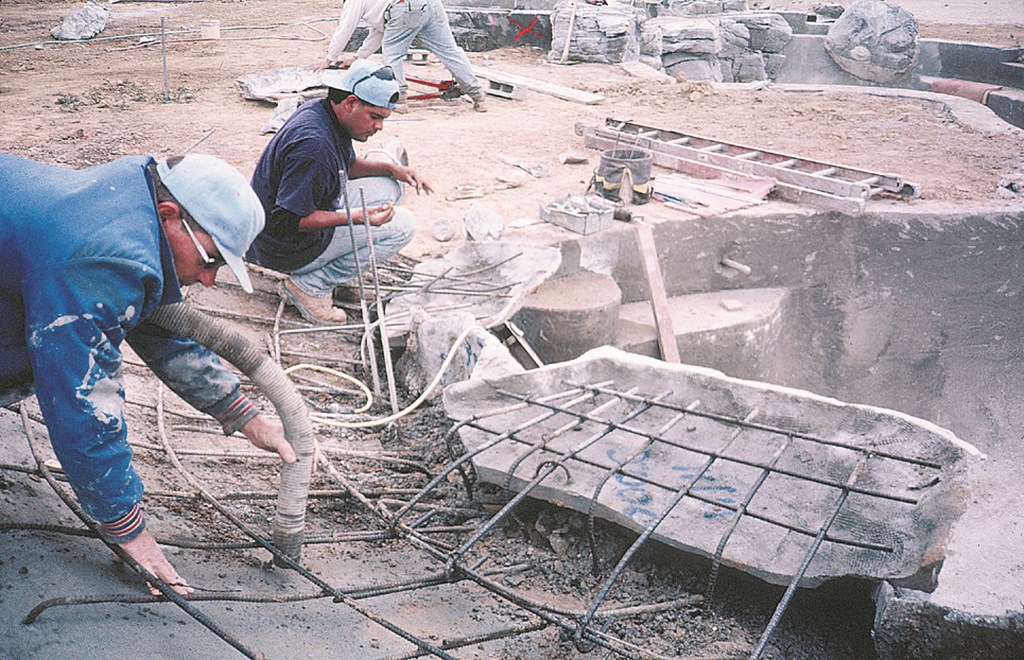
Gunite and Steel
We backfill our rock panels with concrete – a significant issue because the weight of the rockwork requires proper structural support. This calls for preplanning and the designing of generous steel support into the shell and into our rockwork.
In the case of the residential installation shown here, the bond beam was significantly widened to accommodate the rockwork’s load. The beam slopes toward the vessel from the back edge to preserve the integrity of the shell’s circumference while giving us room to set up our rockwork and the extensive steel cages we position behind the panels before backfilling.
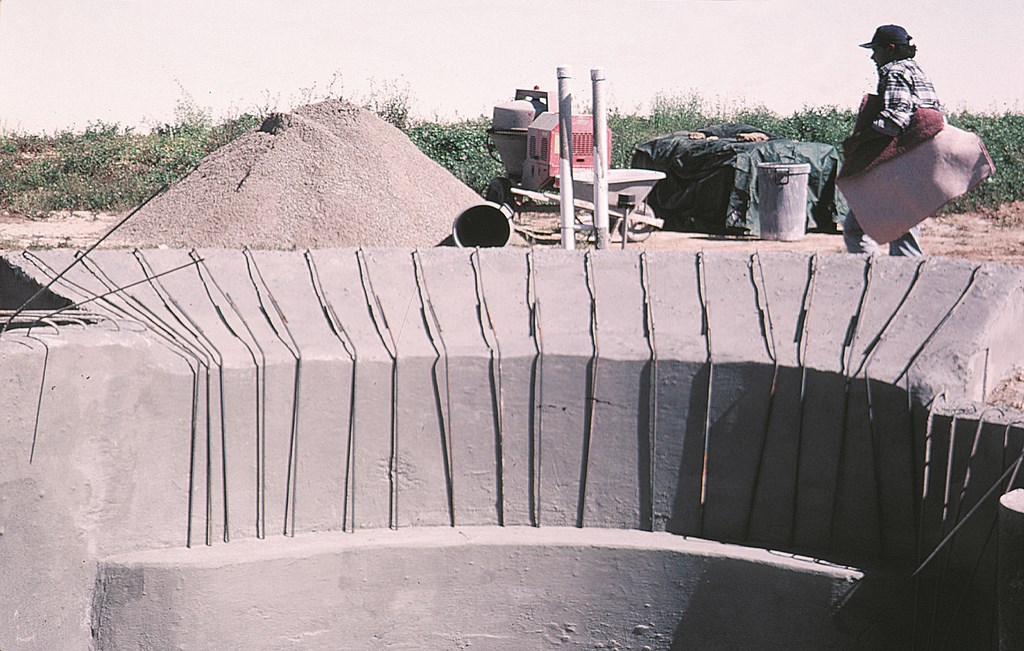
As seen here, the shell already has been treated with three coats of waterproofing Thoroseal (left). We carefully followed the label instructions, applying a single coat each day in a three-day period. Next, the panels are locked into place with steel cages tied to the shell’s steel (right).
As shown here, the cage of #4 bars will support a two-foot cantilever section in the watershape. It is important that the steel be part of the pool structure not only for strength, but also to provide for proper bonding. (In cases where we need to core drill and dowel the steel into place, we run a separate bond wire from the new rebar to the watershape’s bonding bus.)
Anchored in Place
The method I use for mounting the rock panels is pretty straightforward: Anchor fittings mounted in the gunite accept threaded tie rods of varying lengths that extend through the face of the rock panels.
We start by hoisting panels into place and then use a hammer drill with a 5/8-inch drill bit to create holes in the panels that reach through to and mark our positions on the gunite beyond (left). After drilling corresponding holes in the shell, we place 1/2-inch, drop-in anchor fittings in the gunite (middle left). The anchor is set with a drift pin that, once it is hammered into the anchor to set the expansion bullet, locks the anchor in place. Once they’re all set, we’re ready for panel installation.

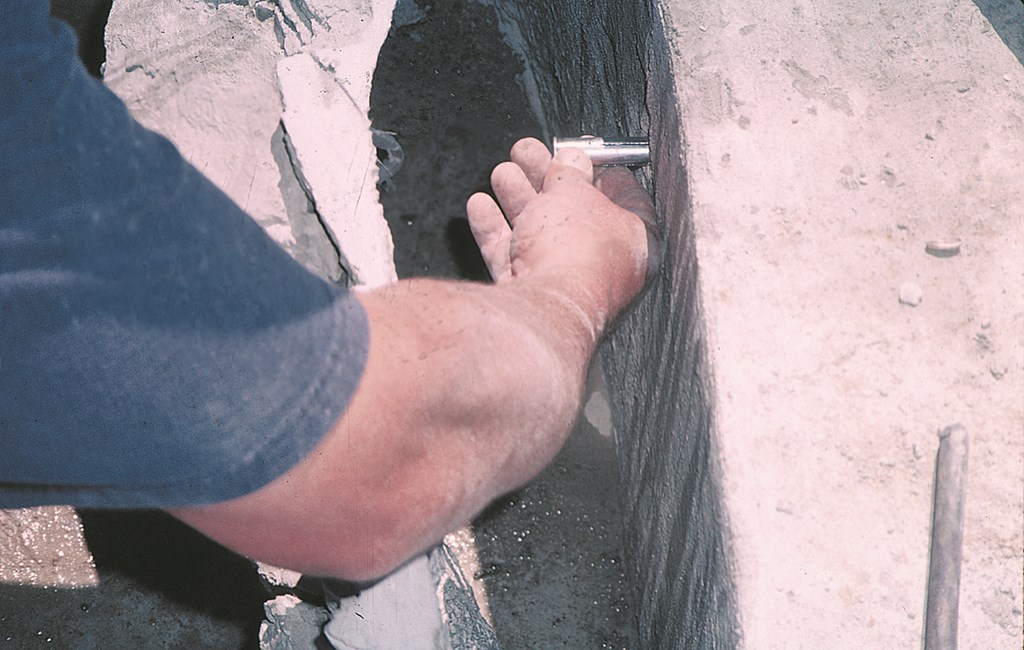

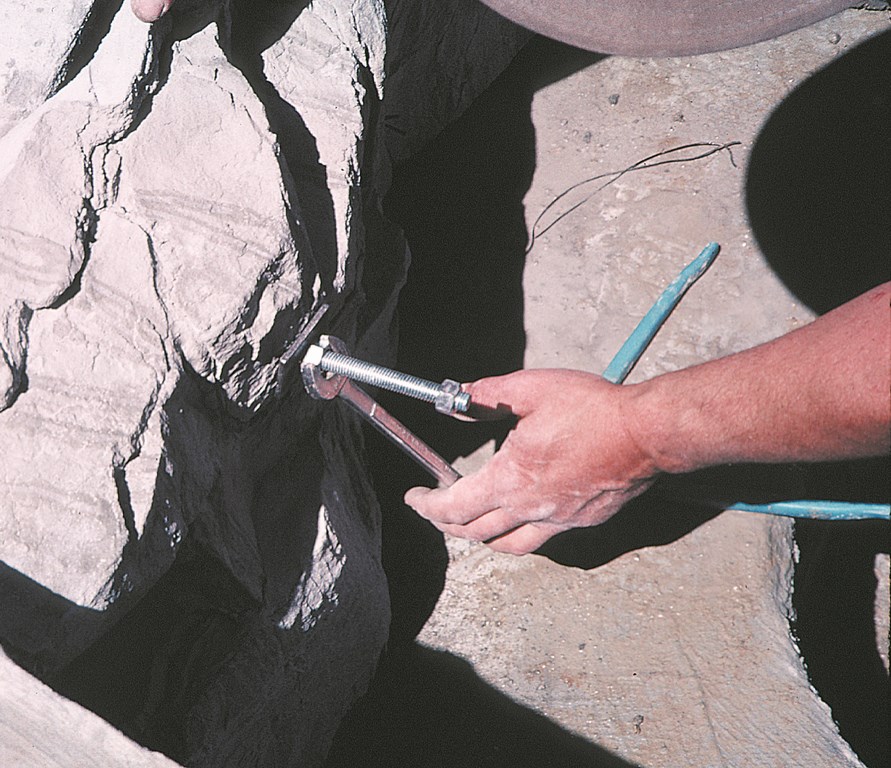
We typically work in four-foot increments for ease of mounting and backfilling. Here we see the 1/2-inch threaded rod and its nut and washer being inserted through the panel into the corresponding anchor (middle right). Once the alignments are straight, we secure the rock panel to the shell using stainless steel all-threaded rod, washers and nuts (right) and then seal the rod in place with a watertight sealing caulk.
Extra Support
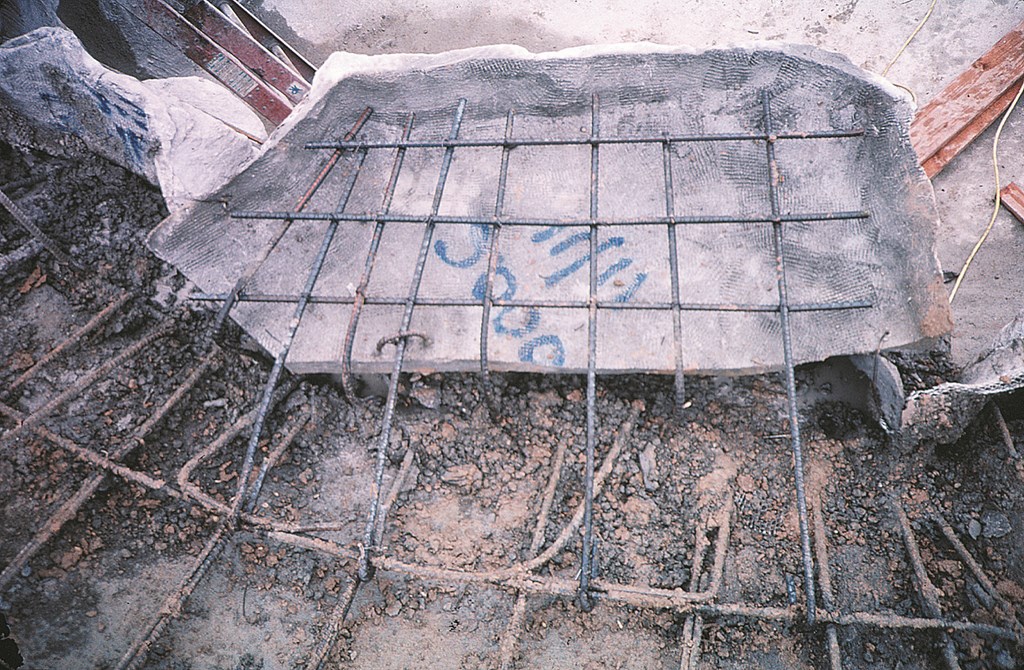
Because of the nearly two-foot cantilever, this section of rock face requires temporary support during the backfilling stage in the form of 2-by-4-inch wood framing (left). The need for this support is obvious: We’ll be pouring a large amount of concrete on top of the panel before we’re done (middle).
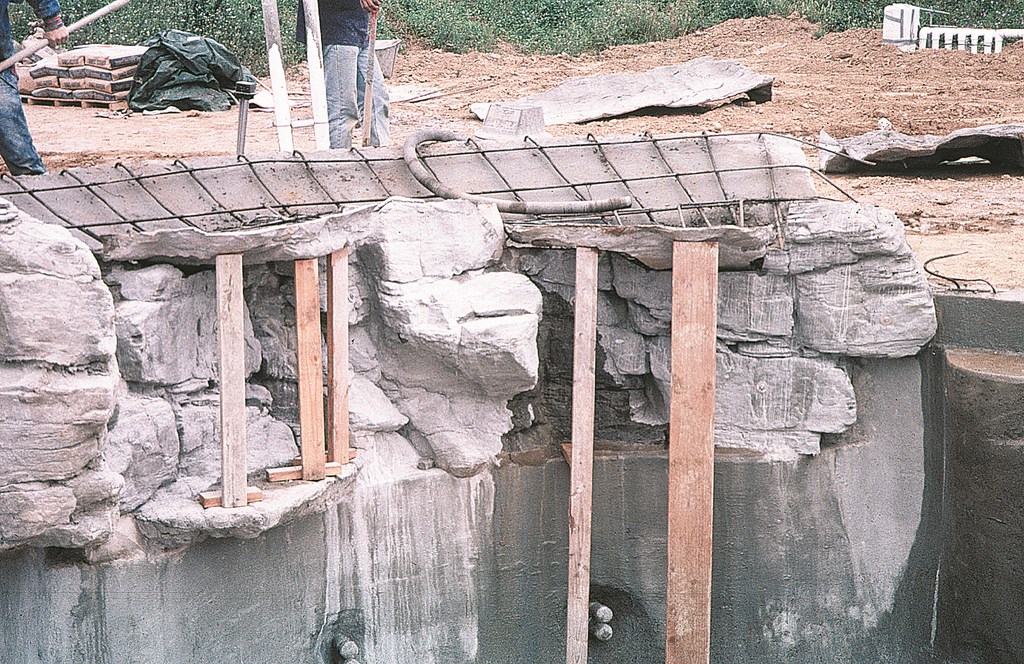

Before we get to the backfilling, however, we use rapid-set cement to lock in bottoms and sides of the rock panels (right). If any of the spaces between panels exceeds four inches, the gap must be bridged with wire mesh.
Filled and Finished
The key to the finished appearance of these panels is blending them together along the seams and effectively hiding the nuts, washers and rods.
As mentioned, the panels are joined together using quickset cement troweled into the spaces between the boulders. Once the panels have been backfilled, we apply a rich, one-to-one mixture of gray cement and sand, feathering it over the seams. While this cement is setting, special embossing pads are used to create a detailed imprint in the cement and visually blend the seams with the surrounding panels and their textures.
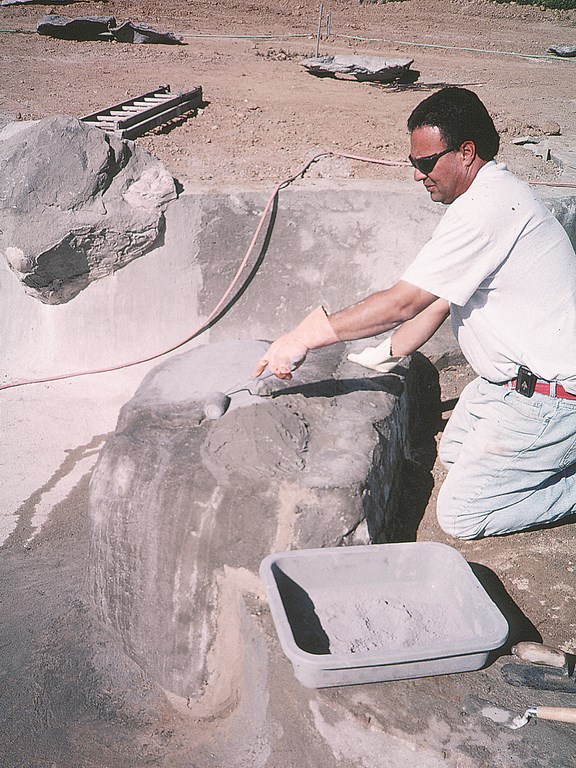
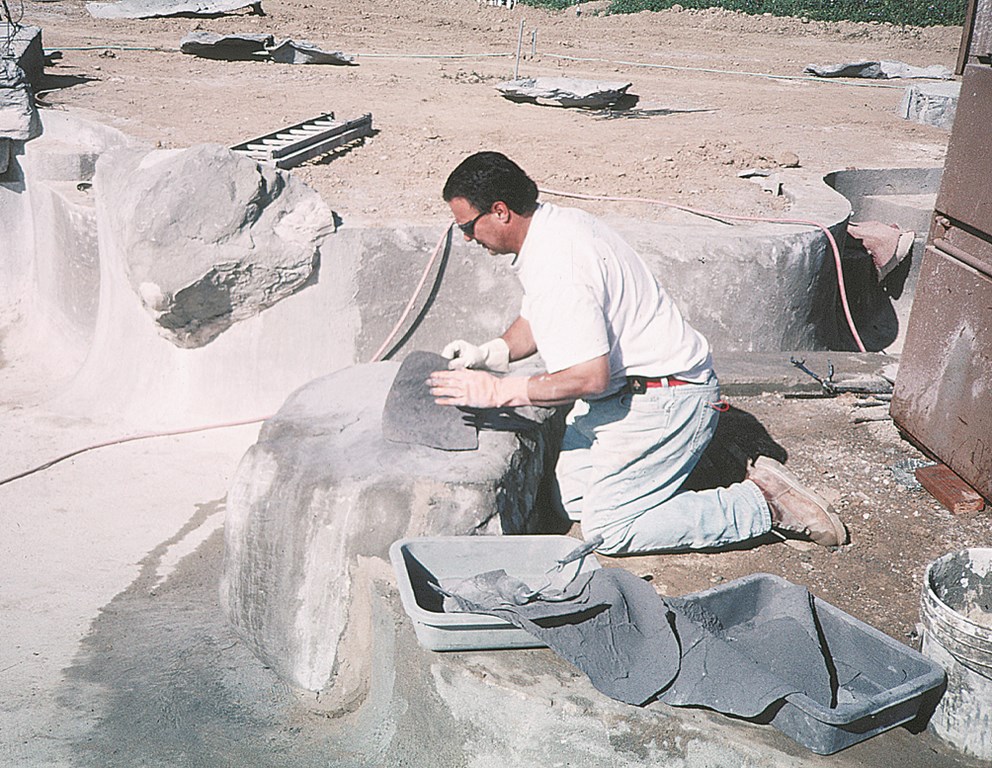

The process is simple: A releasing agent is applied to the topcoat of cement (left) that enables the installer to imprint the cement using a stamped embossing sheet – without having the cement stick to the rubber sheet (middle left). Note the way we pick up details from the boulder and carry small lines and cracks into the embossed area (middle right) and pay special attention to hiding the anchors.
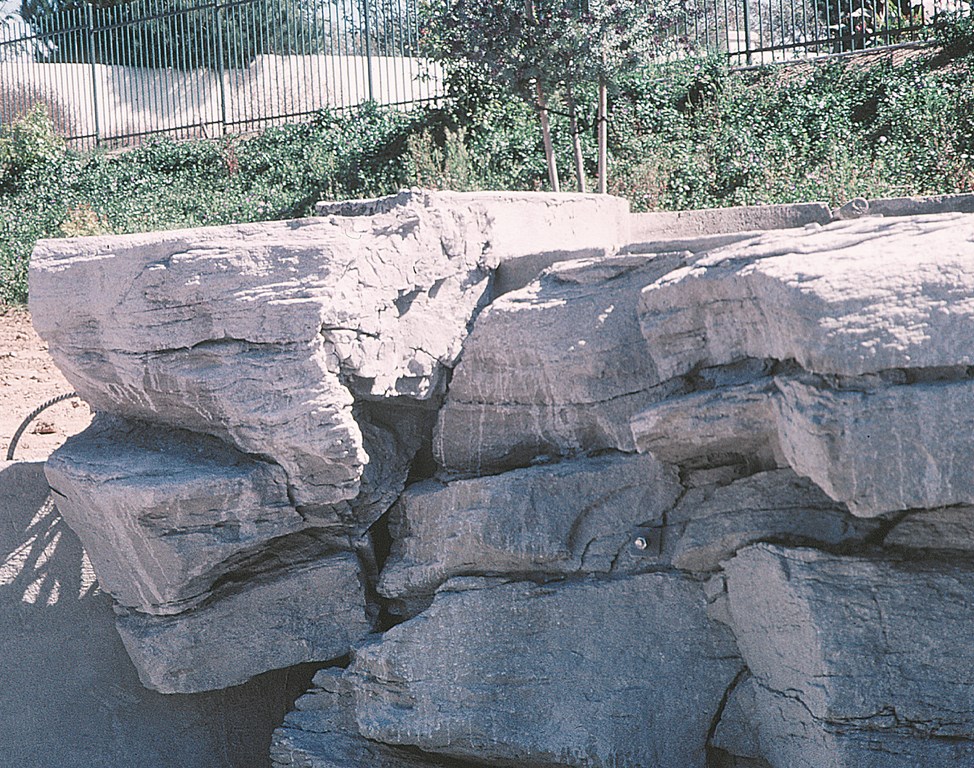
The overall effect is compelling: Here we see three installed panels once the concrete has set and the supports have been removed (right). Note the natural sedimentary stratification – and a remaining anchor bolt to be disguised!
Rodger Embury is president of Rock & Water Creations in Fillmore, Calif. A retired Los Angeles firefighter who got his start in the watershaping industry 25 years ago, he initially worked part-time between shifts at the fire station. Since then he has traveled the world over, designing and installing rockwork in commercial and private watershaping projects. Once purely a faux-rock contractor, Embury’s firm has recently entered a new phase and is now manufacturing rock panels and training contractors how to successfully install the products on their own.