The Hidden Source
Cascades and waterfalls are different from most other types of watershapes. In ponds, for example, the quiet reflective surface of the water serves to accentuate elements within the water, such as the plants, fish and rock materials, while reflecting the features surrounding it. That same reflectivity is a hallmark of pools as well.
Our purpose in setting up cascades and waterfalls is, by contrast, to highlight the water itself, and specifically the beauty of water in motion. As it flows over and around rocks and descends through natural weirs and cascades, the water itself creates interest, excitement and soothing sounds.
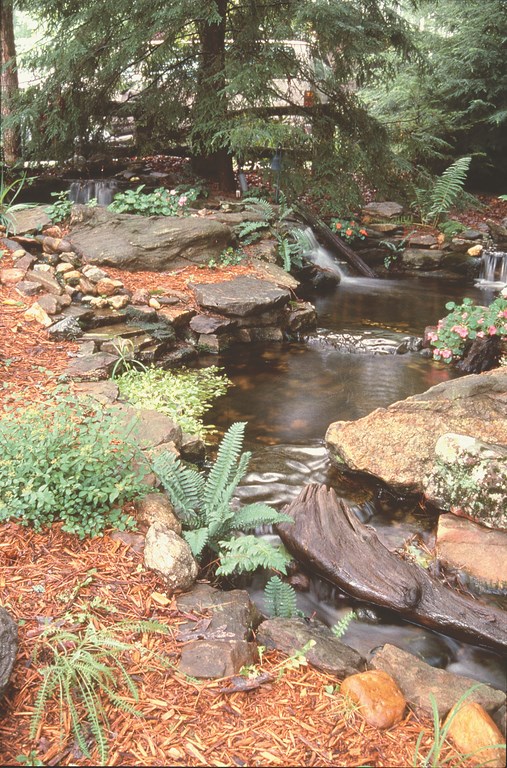
There’s also a greater sense of variety when you make the water move. Within relatively small spaces, we set water up to rush and meander, cascade and roll, tumble and trickle – all by way of conjuring impressions of a natural stream moving down a grade.
Using moving water in this way – in mimicry of nature – is a true watershaping specialty, and volumes could be written about what it takes to make these scenes believable. For now, however, let’s focus on setting up headwaters – a feature we at Xstream Ponds in Cashiers, N.C., have come to see as the key to cascade credibility.
BEAUTIFUL ILLUSIONS
When you spend time with people near moving watershapes, you can tell right away whether or not the illusion is working. All too often, I find that the obvious presence of the water source tells the viewer that a waterfeature is artificial.
This is why I’m so pleased with our own projects when people ask if they’re looking at a natural stream. I play it cool and don’t let on how flattered I am that they would even ask the question, but inside I’m truly thrilled. After I confess that the work is artificial, what happens almost invariably is that the observers look more closely.
As I watch their eyes moving up, down and across our work, I eagerly await what is almost always the next question: “Where does all the water come from?” That’s the moment I know that we have succeeded in creating a believable natural watershape.
I’m proud of what I do and know that many techniques I’ve meticulously applied in assembling the components of any given cascade from top to bottom have gone into making this overall impression, but I also know that there’s a small visual trick that’s crucial to my success: There are many things you can do to create a natural-looking waterfeature, but none is as important as hiding the point at which the water enters the system!
Doing this successfully requires planning from the outset of the project and requires an answer to what might seem like a dumb question: Do you want the waterfeature to appear artificial, or are you trying to make it look natural? The answer to that basic question influences every aspect of the design in aesthetic terms as well as on a variety of technical levels, including the physical layout.
To appreciate this point, consider the way most fountain designers would answer the question. They know the viewer will understand that the fountain is artificial, so the designer highlights the entry point of the water by making it spray, splash or squirt. But if you’re building a natural watershape, what you want instead is to make the water’s entry point as subtle as possible in order to highlight the naturalistic features of the design.
Water rarely emerges from a discernable source in nature, so emulating nature means mastering the art of concealment. That seems an obvious-enough point, but it’s overlooked all too often – much to the detriment of otherwise beautiful work.
Far too often, what you find is a dump-truck-size load of dirt mounded up with water spewing out of a PVC pipe or over a straight weir set and displayed as though the installer actually wanted to call attention to it. Water then travels straight down from the top of the mound along what best can be described as a drainage ditch before reaching the base pond. It’s the dreaded “volcano effect.”
Suddenly, an otherwise well-crafted body of water has taken on a new look, and it isn’t very appealing!
INKLINGS OF DOUBT
When the design completely eliminates a clear sense of the water’s source, wonderful things happen. Basically, this bit of concealment keeps the mind’s eye from drawing quick conclusions about whether or not a water system is man-made.
What you’ve done as a designer in this case is create an illusion and impose an element of doubt in the eye of the beholder. It may be temporary, because even the best artificial systems will reveal their true nature under close scrutiny, but the longer you can draw out the illusion, the better – and the easier it will be for observers to ignore the fact that they’re looking at something man-made.
This is why it’s important to pay just as much attention to the headwaters as you do to the base waters. Even if you merely conceal the source with rock material (a simple solution I see from time to time), it still takes the viewer a valuable moment to figure things out – better than nothing, although I’d say not the best of solutions.
The fact of the matter is that concealing headwaters isn’t that difficult, especially when you plan for it from the outset of a project. The easiest approach is simply to hide the point of origin by separating the view of the origination point from the view of the base water. In other words, when looking at the entire watershape from the principle vantage point, you should not be able to take in the starting point and the ending point in one view: It kills the illusion.
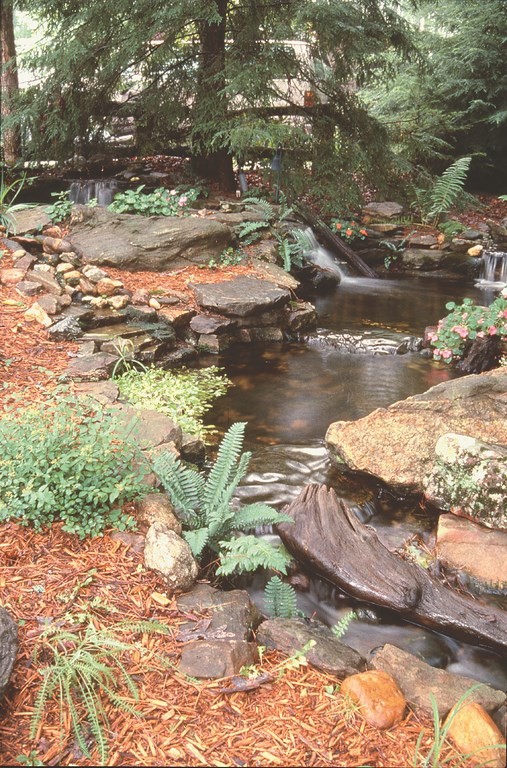
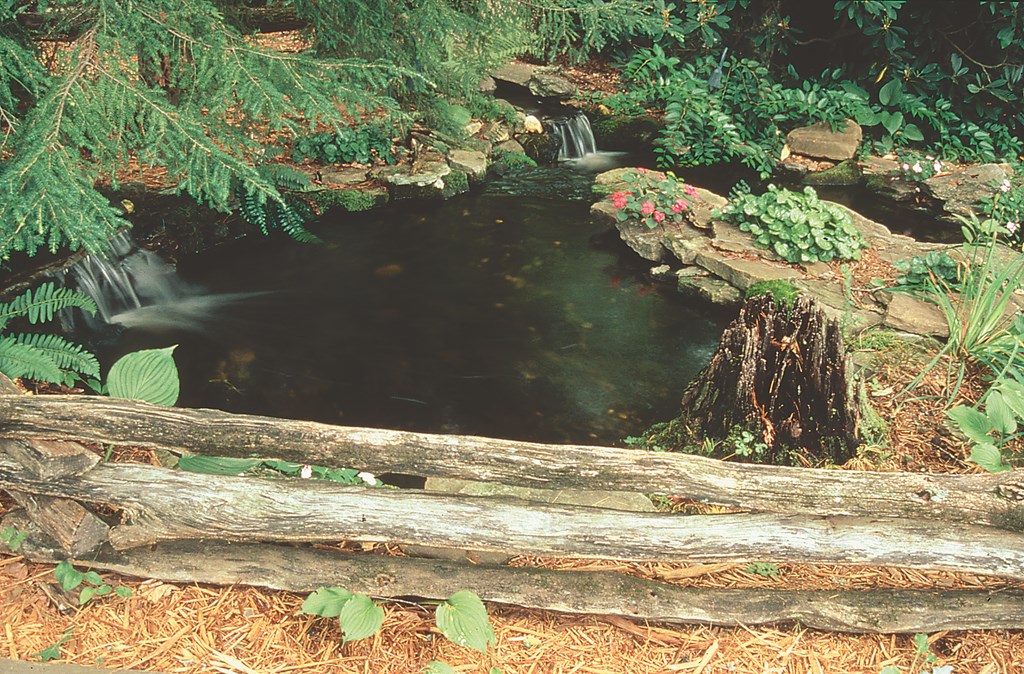
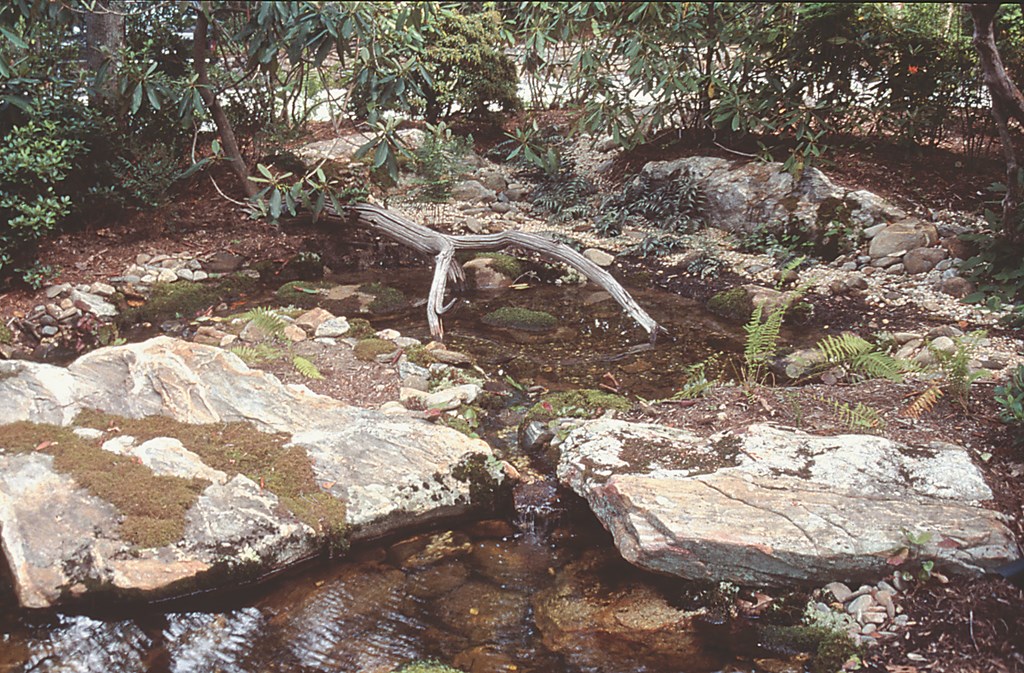
Instead, if you move the point at which water enters the system out of the range of view from the base water, you create doubt in the mind and preserve the illusion. This can be achieved quite easily by “bending” the flow – something as simple as winding the cascade around a bush (Figure 1, below) or as elaborate as starting your watercourse around the corner of a building. In one case, I concealed my source beneath a wooden porch (Figure 2, below).
| Figure 1 (left) and Figure 2 (right) |
Often, however, this sort of geographical misdirection isn’t an option and you’ll need to use some other form of concealment. If the system contains fish, for example, off-the-shelf biological filters can be used in a couple of useful ways. First, they give you an area for colonizing bacteria that are essential in the nitrate cycle and crucial to the health of any living system. Second, biofilters provide a concealable point of entry for water into your watershapes.
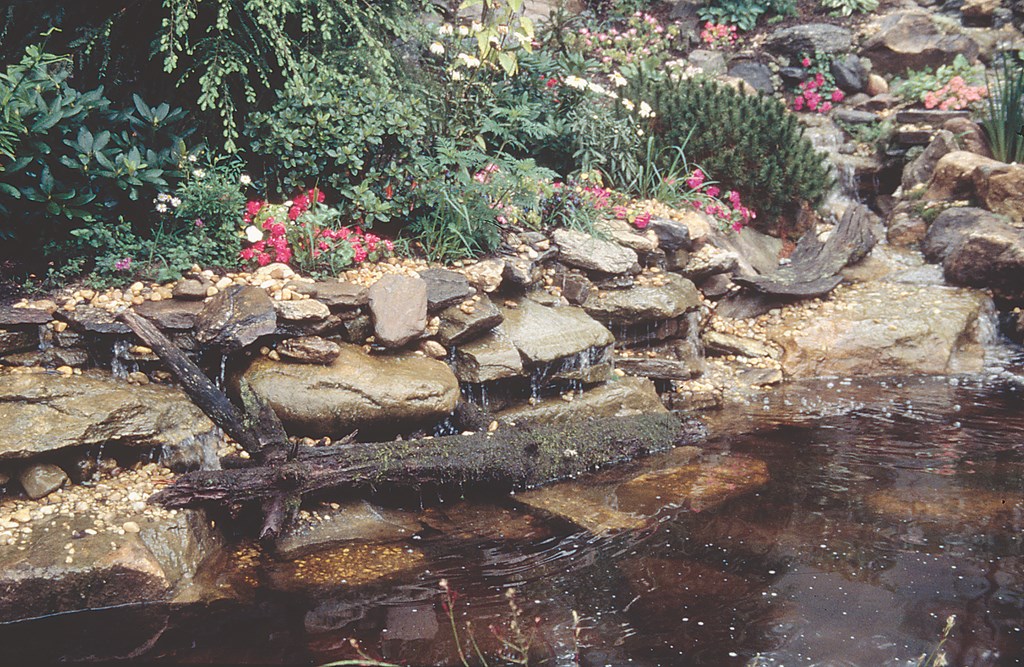
Helpfully, some suppliers have added synthetic waterfall stones to their biofilter units to help create that first cascade of water and offset the undesirable effect of water spilling over a straight weir. These boxes serve their primary function well and can also be made to work aesthetically (Figure 3, below).
| Figure 3 (left), Figure 4 (middle) and Figure 5 (right) |
Sometimes I’ll conceal a pre-fabricated biofilter by breaking up the initial flow pattern using complex cascades directly in front of its weir (Figure 4, above). I also “naturalize” the area surrounding the point of origin by introducing a variety of plant, rock and wood material and making sure to provide natural visual backdrops above and behind the water source (Figure 5, above).
UP FROM A BOG
An even better option from an aesthetic standpoint involves building a custom biofilter in the form of a natural-looking bog – or a “bog garden” as we call it at my company. When done correctly, this design creates an uncannily subtle entry point – the impression of a spring welling up from the ground.
Bog gardens can be sized to fit the filtering and aesthetic needs for any feature, and they are not difficult to build or fit within a design. Better yet, they give you the opportunity to include a variety of marsh-type plants that will thrive in a boggy environment – a perfect blend of form (by hiding your headwaters) and function (by acting as a vacuum cleaner in removing nutrients from the water).
| Figure 6 (left) and Figure 7 (right) |
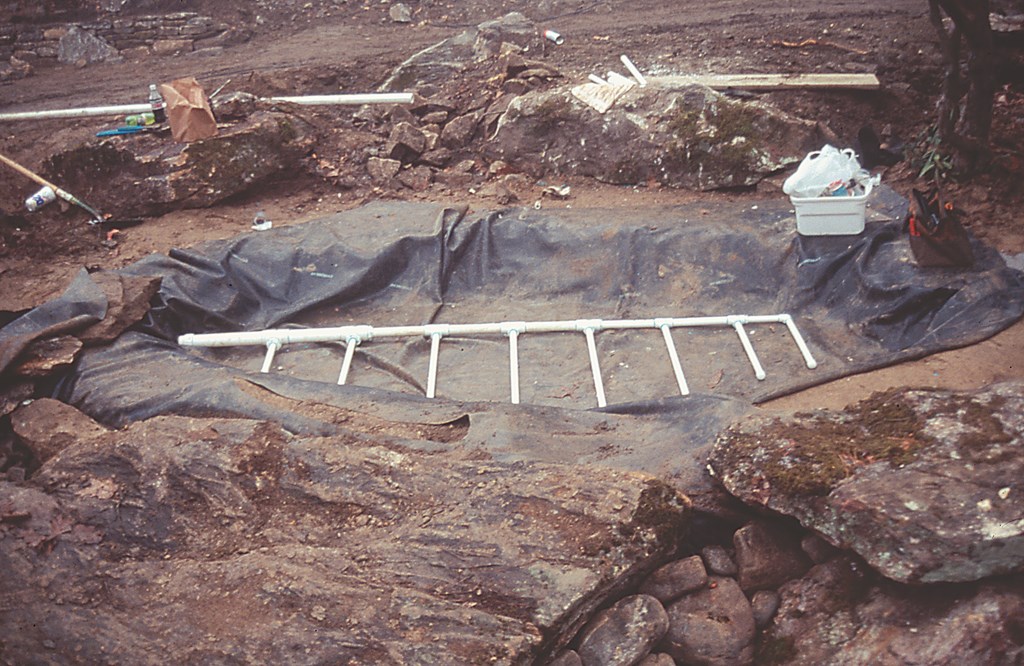
In other words, custom bog gardens offer huge returns in terms of aesthetics and the all-important natural illusion – and the fact that they’re easy to set up makes it easy to include them. All that’s required is setting up a flat-bottomed pond at the head of the watercourse about five to eight inches in depth (Figure 6, above).
Just set up a bulkhead fitting to bring the water from the pump in through the side of the liner at the bottom of the bog garden, then put together a manifold system with PVC pipe to distribute the water flow equally across the bottom of the pond (Figure 7, above).
We usually drill 3/4-inch holes in the manifold system so that any debris sucked through the pump will also pass through and not clog the system. We also cover the manifold system with two or three inches of rough-textured gravel to establish a stronghold for nitrifying bacteria.
| Figure 8 (left) and Figure 9 (right) |
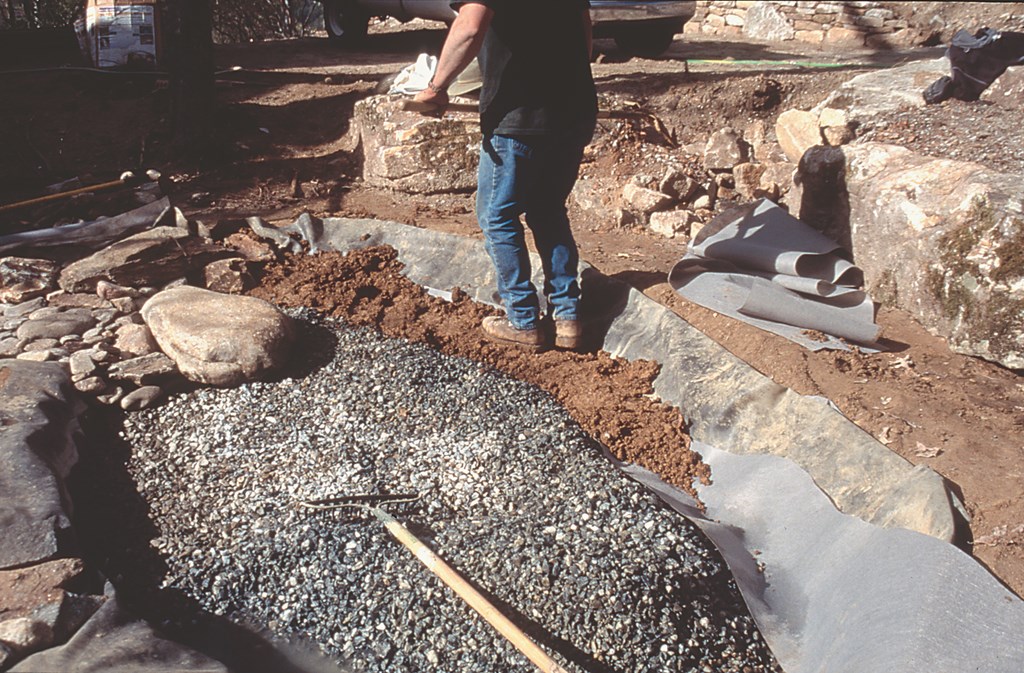
In addition, we often use dirt to create the walls of the bog garden instead of rock – another naturalistic touch. To do this, we create a depression in the gravel around the perimeter of the bog garden and line it with underlayment fabric. This holds the dirt bank together and keeps it from settling to the bottom of the bog (Figure 8, above). Next, we add dirt to form a gradual slope out of the bog garden and into the surrounding landscape – bearing in mind, of course, that we need to keep the overall pond liner’s edge above water level.
With or without fish, a bog garden is a great way to start a waterfeature and keep the water healthy and clean at the same time – not to mention, the planting possibilities are endless. Water wells up from the bottom of the bog and spills over a lowered edge and onto cascades that diffuse the flow and guide it to the lower portions of the installation (Figure 9, above).
WEEPING WALLS
If introducing the water through a bog garden is not an option because of space or slope factors and there’s no practical way to take the entry point of the water out of view of the rest of the feature, a weeping wall is always an option. The concept is to take the originating volume of water and distribute it over a horizontal area where it flows slowly over an expanse of carefully placed rocks.
The longer the horizontal run, the more the volume of water is split. Thus, the water flow can be tailored to create an originating effect that complements the rest of the watershape without overwhelming it.
| Figure 10 (left), Figure 11 (middle) and Figure 12 (right) |
To create a weeping-wall effect, take the water-entry pipe and create a horizontal manifold system, again taking care to level the system so it distributes the water evenly (Figure 10, above). Stack a rock wall in front of the manifold system, foaming any voids where you don’t want the water to flow and thereby forcing it over the front of the rock wall (Figure 11, above). Remember, the longer the manifold run, the more of a trickle effect you’ll create.
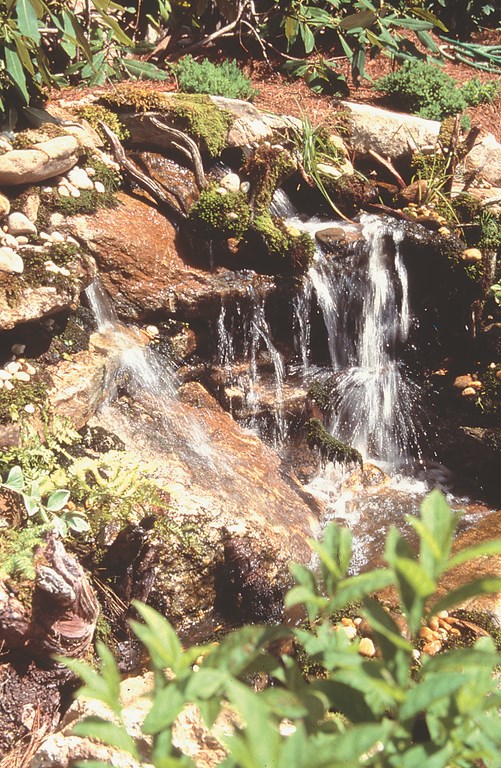
The weeping wall is yet another way of creating a grand illusion that water is finding its way from underground, through native rocks and soils and into your system (Figure 12, above). Personally, I like this design because of the wide variety of cascades it lets me establish and the capability it has to capture observers’ attention with delicate, intricate flows.
Absolutely, there are more ways than these to introduce water into watershapes. No matter what those other options are, the basic principles should always be the same: Try to break up or hide the water’s source. However you decide to tackle the overall design challenge, paying proper attention to the headwaters is critical – a detail that, sooner or later, everyone will take time to notice.
Bob Dews is founder and president of Xstream Ponds in Cashiers, N.C. His focus is on designing and engineering watershapes that emulate the natural streams and cascades of the mountainous areas where he lives in western North Carolina, and he credits the abundance of these natural waterfeatures for his past and continuing education in the field. During the past several years, Dews has conducted seminars and written extensively in the pond industry to help educate the trade in the importance of “naturalizing” artificial water systems. When not designing and engineering his distinctive brand of watershapes in the Blue Ridge Mountains, Dews and his family operate a small motel they own in Cashiers.


