Shaping the Night
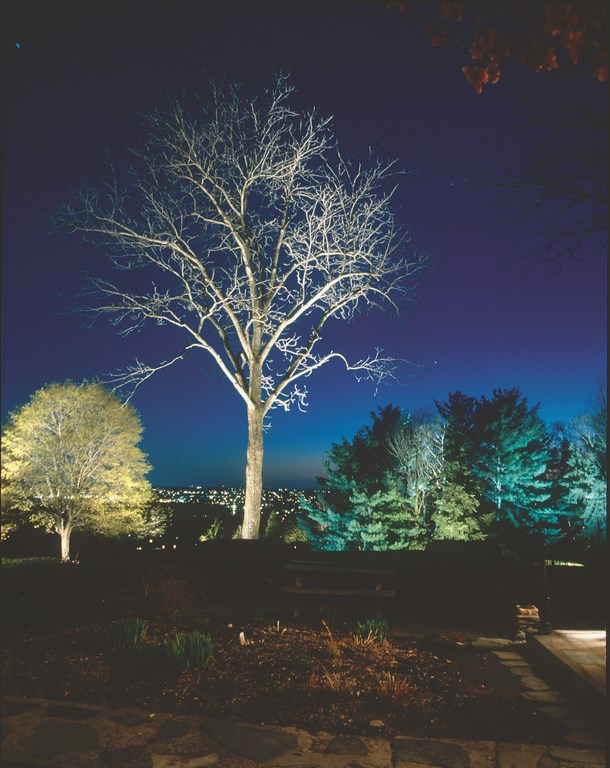
We all know that plants are beautiful in daylight. Perhaps less well known is the vast visual potential they posses when carefully and thoughtfully lit at night.
It’s no small challenge. Indeed, maximizing the beauty of most any landscape while also ensuring that your lighting design works well throughout the lifetime of the landscape requires a keen understanding of both plant materials and the lighting techniques that will bring them to life when the sun goes down. Furthermore, surrounding watershapes with well-lit spaces and foliage will add a distinctive aesthetic dimension to the overall design.
To my mind, there’s no substitute for paying attention to every plant in the plan, because overlooking any of them or ignoring the role each has to play in the overall landscape will almost invariably detract from the effectiveness of the lighting design. You can’t overlook technology, either, or the need to sort through the variety of techniques that can be used to light plants while keeping an eye on a wide range of practical, aesthetic and creative issues.
When you encompass all of this successfully, the results will often redefine a landscape during dark hours and lend a whole new dimension of interest and excitement to the space – an achievement that absolutely increases the clients’ enjoyment and appreciation of their landscape.
BASIC TECHNIQUES
Determining the right approach to lighting a specific plant is a matter of considering that plant’s role in the overall lighting composition, evaluating its structural or “architectural” characteristics and then creating the desired visual effect. Again, that’s no small task, as there are many variables to consider in making such determinations. These include:
[ ] The direction of the light, which can be broken down to choices among up-lighting, down-lighting or side-lighting. The path you take greatly influences the plant’s appearance: The key here is assessing the availability of fixture locations and accepting the fact that sometimes a desired location does not exist.
| A well-considered lighting scheme can highlight the differences between a plant’s daytime and nighttime appearance and can bring a level of drama to the nightscape that forever alters a client’s perception of what landscape lighting is all about. In the daytime shot, you can see the location of two uplighting fixtures; there’s also a downlight that provides “ground plane” lighting of the plantings to make the space more understandable and light the edge of the driveway for safety. (Unless otherwise indicated, lighting designs by Janet Lennox Moyer. Photo by Kevin Simonson) |
To down-light a tree, for example, you need either another tree or a structure that is taller than the tree you want to light. Similarly, up-lighting might not work in a space where a pathway or perhaps a watershape is too close to the base of the tree.
In designing a lighting system, you also must decide whether the plant should retain its daytime appearance or make a new statement at night. In that context, down-lighting produces shadows on the underside of the leaves, just as sunlight does, while up-lighting typically will change the plant’s appearance by lending a glow to the foliage as the light shines upwards through it. This produces shadows over the tops of the leaves in a way that emphasizes the form or texture of the foliage.
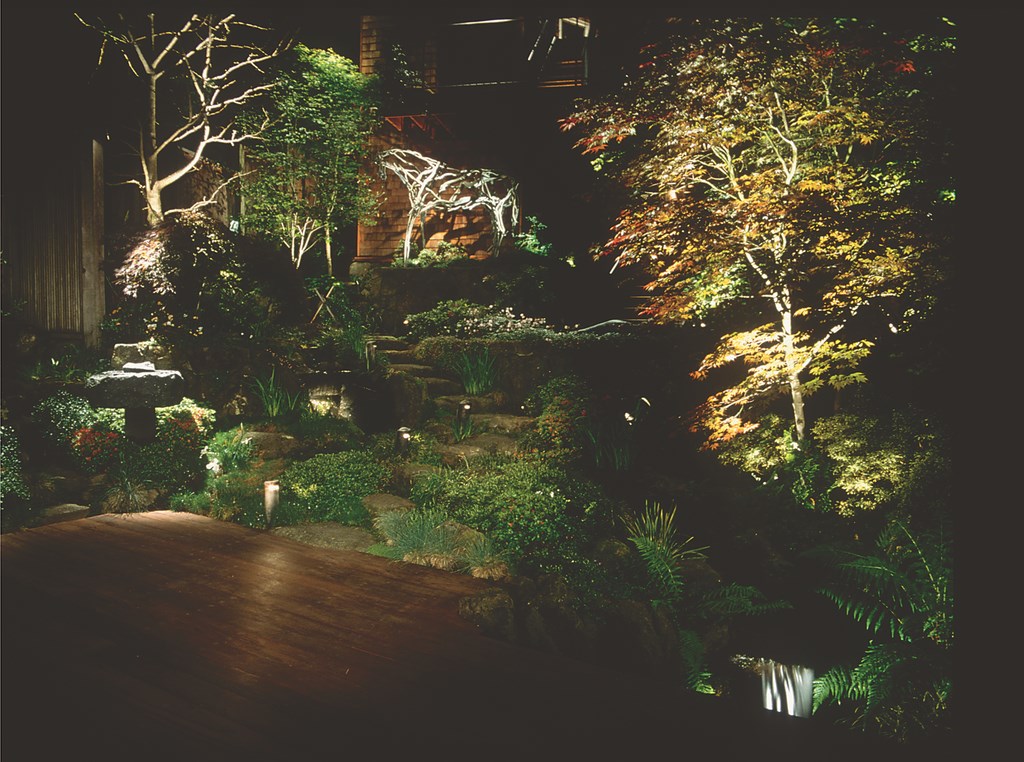
| It’s all about composition: Here, the lighting draws attention to three focal points – the stone sculpture on the left, the horse at middle back and the maple on the right – and fills in the gaps with softer up- and downlighting on other elements, including a soft layer of stair/path lighting to ensure safe travel through the space. The location, aiming and shielding of fixtures is critical in this sort of installation because of the many fixtures and viewing locations. (Photo by Kenneth Rice, www.kenricephoto.com) |
[ ] Fixture location requires consideration of the luminaire’s position relative to the plant, be it in front, to the side or behind – or some combination. This decision further affects the shape, color, detail, three-dimensionality and texture of the plant being lit.
[ ] The quantity of light is mostly about finding the right level of illumination for a plant based upon its importance in the overall design. As a rule, the more important the plant, the more illumination it should receive. The characteristics of the plant also come into play here: The human eye sees reflected light, and you generally will need to adjust how much light you shine on the plant based on its role in the landscape and on its reflective characteristics.
SEEING PLANTS
The point – and it can’t be stressed enough – is that the effective lighting of a landscape is about the plants rather than being strictly about the technology you use to light them at night. There is no “standard” approach, and you must determine the relative importance each plant plays in the landscape composition to plan any decent sort of lighting scheme, whether simple or complex.
There’s always some sort of visual hierarchy, and some plants will serve as featured elements while others will play secondary roles. Some will need to be lit to create visual focal points, while others will serve as background and a few will remain unlit.
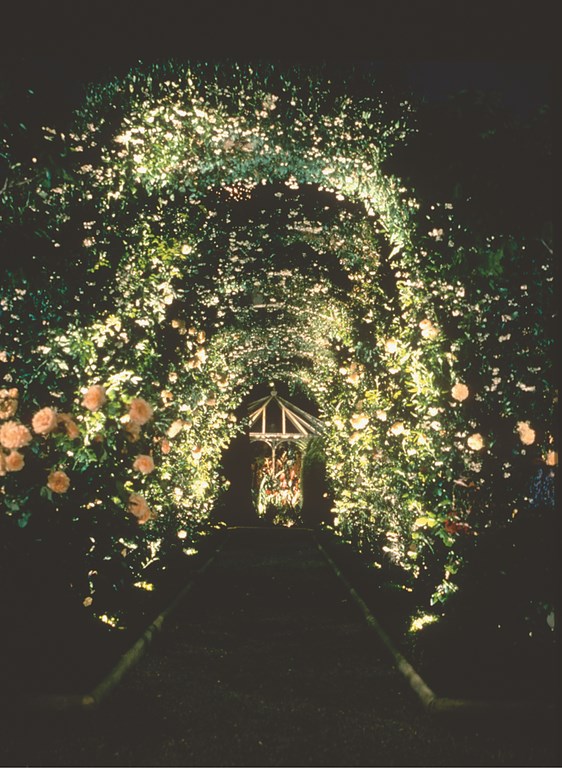
| It’s also about setting a stage: Here, the location, aiming and shielding of the fixtures establishes a three-dimensional view to the orchid greenhouse and provides enough light to allow for a comfortable walk along the arbor. Lighting down onto and from within the greenhouse creates a visual destination that helps people feel at ease inside the arbor. (Photo by Kenneth Rice) |
It’s absolutely essential to consider each and every element of the planting plan with those sorts of considerations in mind. Just as an interior designer considers the role of a piece of furniture relative to the visual roles of complementary accessories, a lighting designer processes all of this information about the planting plan and fits it into an image, an overall lighting composition.
This careful process of examination is invaluable in helping you understand each plant’s role as well as its relationships to others. You’ll spot useful relationships as well as potential conflicts between plants and lighting equipment. A plant, for example, may be positioned in one case to conceal a lighting fixture; in another spot in the same garden, that plant’s position may interfere with a desired lighting location.
You also have to consider the obvious fact that plants grow. In an immature garden, a particular plant may have no influence on the distribution of light from a given fixture. As it grows, however, it may well block the light from reaching the intended target plant.
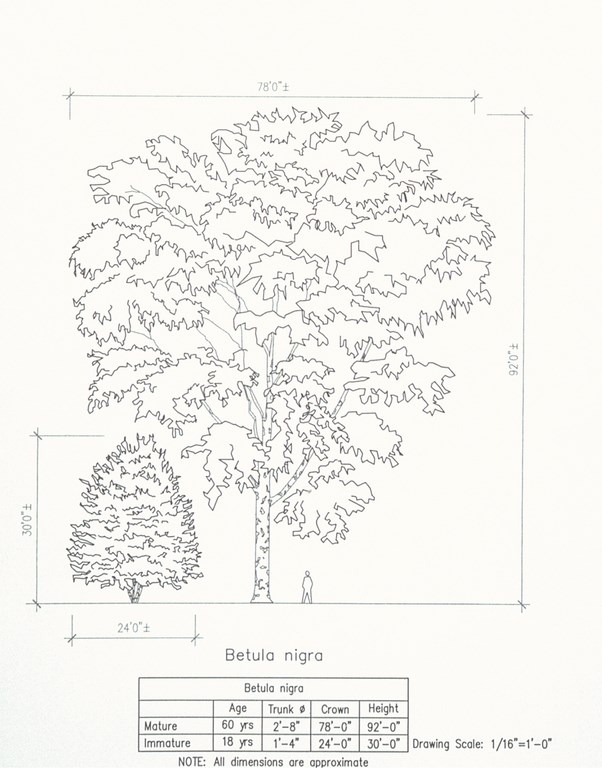
| Knowing the genus, species and variety of each plant is critical to developing an effective lighting plan. In this case, for example, the mature Betula nigra (left) is profoundly different from the mature Betula nigra ‘Trosts dwarf’ (right). You don’t want to be surprised when you see the tree on site, and you would certainly light these two trees in different ways. |
This is why, in studying a planting plan, it’s critical to consider the overall shape, growth rate and mature size of all the plants. You can learn this from experience, of course, but it’s also possible to compile information on plant material by speaking with nursery personnel or consulting reference books (of which there are many).
Finally, studying the characteristics of each plant allows the lighting designer to factor in the specific visual effects that are possible. With some plants, for instance, the structure or leaf characteristics may well limit how light should be applied, while the characteristics of other plants may open out to a variety of possibilities.
Consider a tree with deeply furrowed bark, a dense canopy of foliage that’s impenetrable by light and branches starting at roughly ten feet above the ground: In this case, locating a fixture near the base of the tree will highlight the texture of bark and will create a visual link between canopy and ground. With the same tree, locating a fixture farther away from the base will have the entirely different effect of washing the canopy with light.
PHYSICAL CHARACTERISTICS
The challenge with this sort of analysis is that almost every plant presents a different profile. This means there are no short cuts, no alternatives to studying various plant species to understand their physicality as it relates to lighting.
To organize your thinking amid this garden of variables, it’s helpful to break things down into a couple of broad, physical characteristics:
[ ] Texture: This requires a somewhat subjective overview of a range of features, including leaf size and form, branching patterns, overall scale and the openness of leaf overlapping.
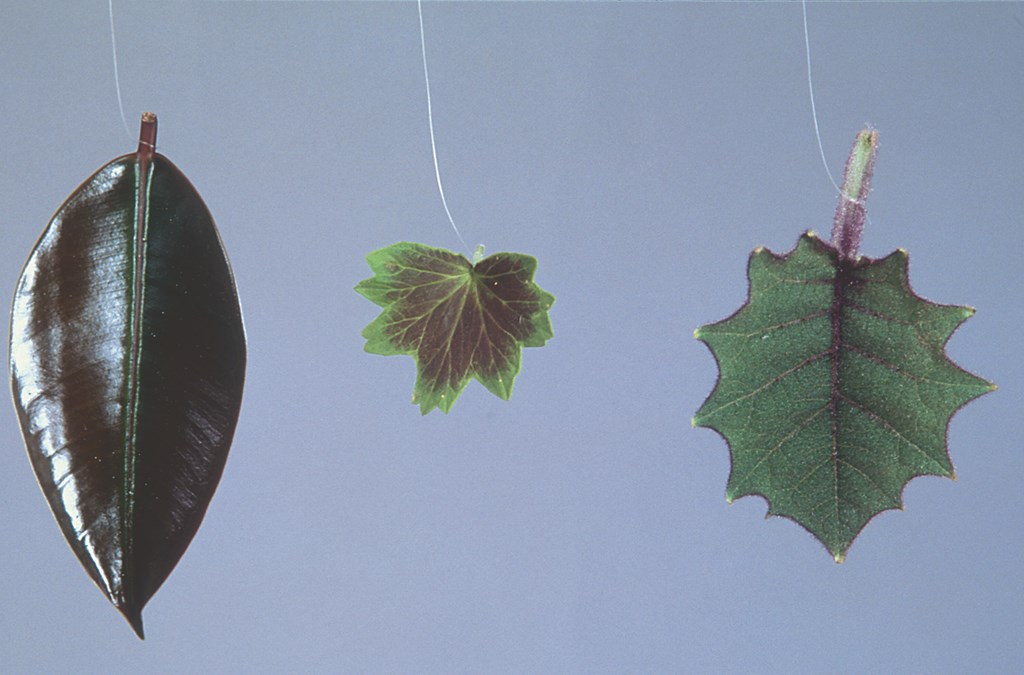
| Leaves seen backlit from the top (above) and the bottom (below) show the kinds of contrasts that occur – and define a need to pay attention to both sides of any leaves in deciding how best to illuminate a plant. (Photos by Kenneth Rice) |
[ ] Leaf type: Here, you consider shape, color, size, patterns of overlapping, density, translucency and opacity. Leaves may be thick and leathery or thin and diaphanous. They may have a dull or shiny “finish” on one or both sides. To a large extent, these particular characteristics are prime factors in the choice of lighting techniques.
[ ] Branching patterns: The plant may have dense branching or open branching, a pattern that, in either case, may be inherently beautiful (again a subjective determination) or a tangled mess that should not have attention brought to it. Branching patterns should be considered equally for both evergreen and deciduous plants – and for deciduous plants in both the dormant and “leafed out” states.
[ ] Foliage color: This translates in lighting terms to reflectance characteristics and is all about ways you can enhance colors. To do so, it’s important to find out whether or not the color changes with the seasons or stays basically the same. Some foliage also changes dramatically as it transitions from fresh growth to mature growth and when it moves into dormancy or goes through a flowering period.
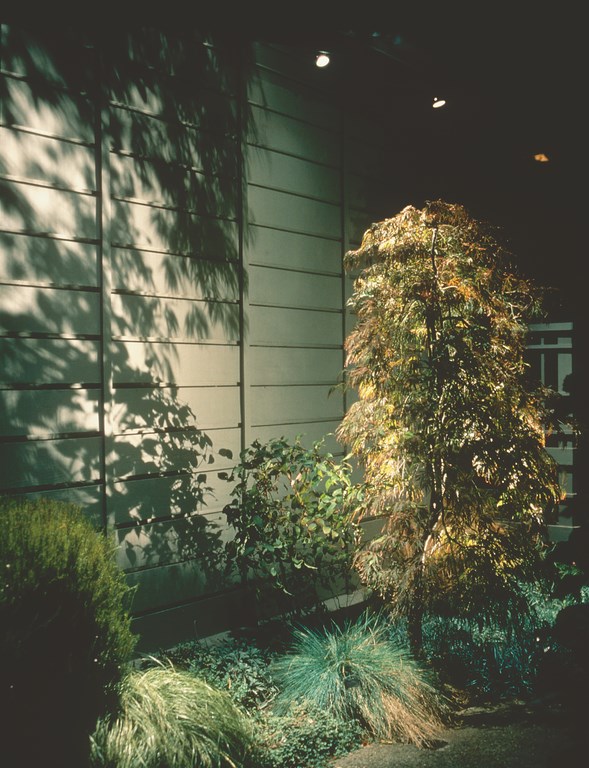
| At the same time lighting can be used to play up differences of leaf color and texture in even a small garden space, in this case uplighting from a fixture located at ground level in front of the Acer palmatum dissectum ‘Crimson Queen’ casts shadows on the wall, visually linking together two areas of the composition along an otherwise plain surface. (Photo by Kenneth Rice) |
Some plants will vary in color from one side of the leaf to the other. Several varieties of Southern Magnolia, for example, have a tan-colored, wooly growth on the underside of the leaf, and up-lighting makes them look dead. By contrast, other species, including the Silver Maple and some Birches and Poplars, have a silvery underside to their leaves that makes the plants almost sparkle when up-lit.
[ ] Branch/trunk characteristics: The woody parts of some trees have colors, patterns or formations that offer a great deal of visual interest and beauty – especially when lit. A trunk may be striped, or its bark may be peeling, flaking, furrowed or cracked. When lighting deciduous plants in particular, emphasizing these characteristics with lighting is a wonderful way to add interest to a landscape during dormant periods.
[ ] Flowering characteristics: It’s important to consider when a given plant flowers during the year, for how long and the color and shape of the flower. Ask yourself, “Is the flower striking or inconspicuous?” This information will help you determine the light source to use and the nature of the emphasis, if any, that the flowers should be given in the lighting composition.
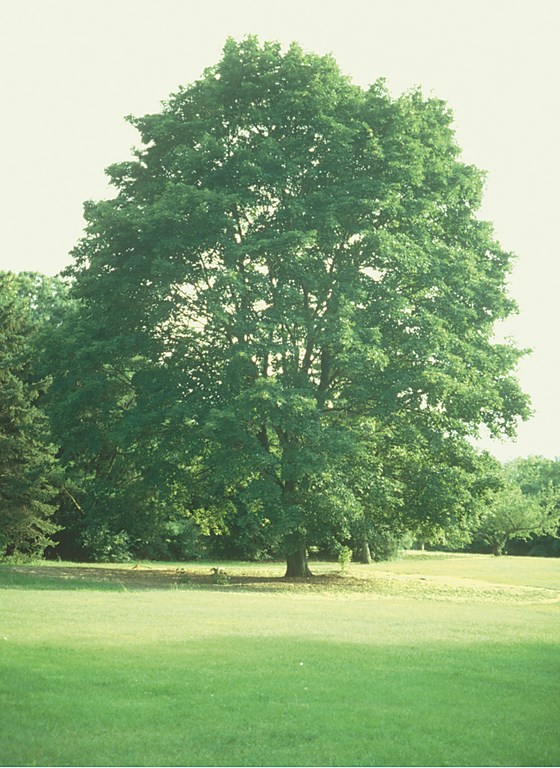
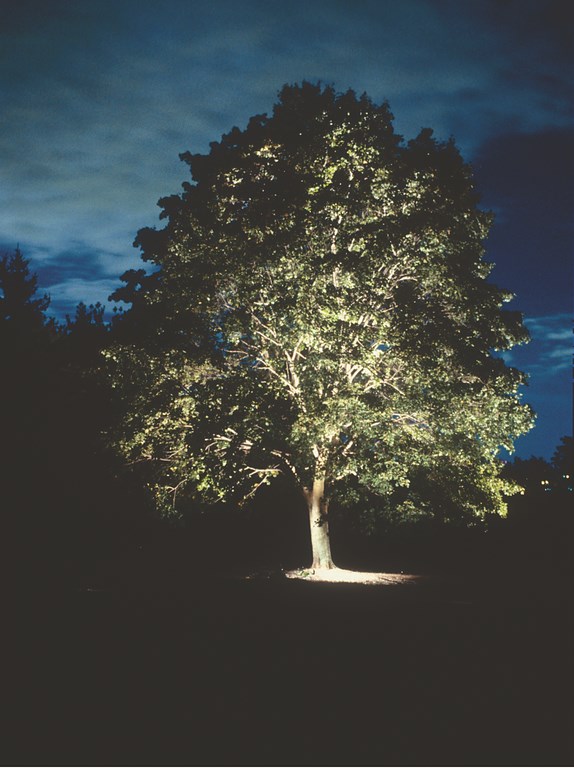
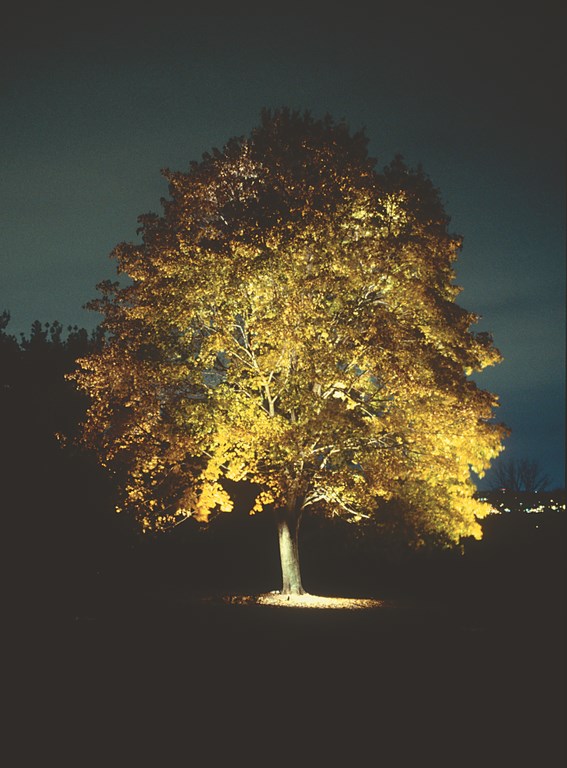
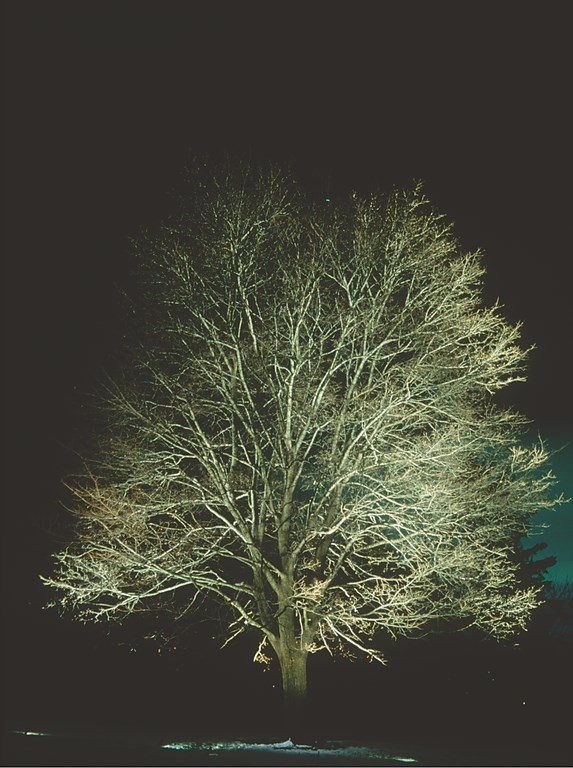
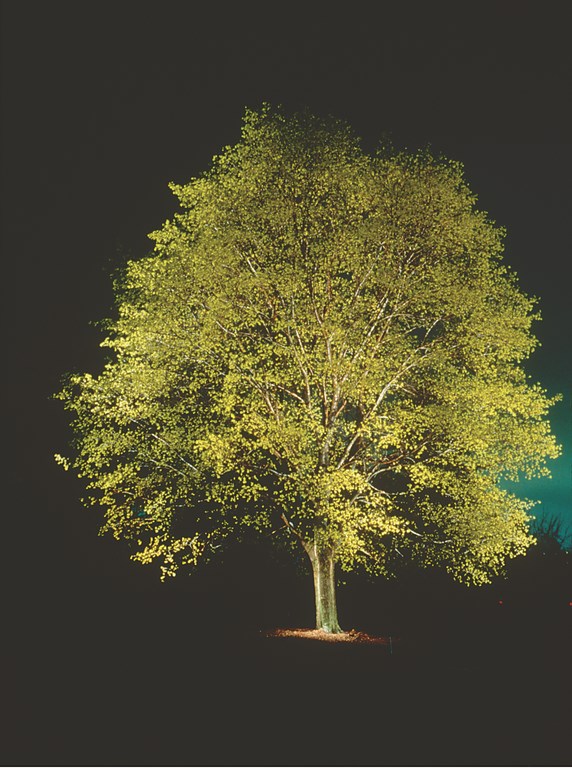
| This sequence of images shows the same tree in daylight (top left) and lit in summer (top middle left), fall (middle right), winter (right), covered by snow (bottom left) and in spring (bottom middle left). It’s all the same lighting of the same tree, but when captured at night the seasonal distinctions take on a new immediacy – and value for clients. (Lighting design by C. Brooke Carter, Dan Dyer, Eve Quellman and Kami Wilwol. Photos by Kenneth Rice, Dan Dyer, Kevin Simonson and Janet Lennox Moyer) |
[ ] Growth rate: Determine how quickly and by how much the plant will vary in size and shape over its lifetime. Some plants will grow only a few inches each year, while others will grow by several feet. Some may start out at three feet and only increase to four to five feet, while others may shoot up from a modest start to attain heights of 100 feet or more. Whatever it is, this growth rate is something you need to know and consider in shaping a lighting design.
[ ] Dormancy characteristics: Some plants will go dormant in fall and lose their leaves, while others die out completely. Some in their dormant state will look spectacular, while others do not. When working with annuals, perennials or biennials, bare dirt may will be the norm for many months – a fact that may influence your control strategy to such an extent that you might deactivate portions of the lighting system during these periods.
[ ] Shape: The basic shape of a plant also provides hints on lighting technique. Tree shapes, for example, can vary significantly from young form to mature state. Some are quite inconspicuous when young but will develop dazzling shapes as they grow. Others will shift from one distinct shape to a completely different one at maturity.
PHYSICAL APPEARANCE
All of the important characteristics described just above will determine how a plant should be lit. If a particular plant has dense, overlapping leaves, for instance, this suggests that fixtures be located outside the tree canopy to wash the foliage in light. By contrast, when a tree has translucent leaves, lights mounted below the canopy will make the plant glow.
Likewise, the mature size and shape of a plant will significantly influence the choice of lighting technique. Plants with narrow, uprights shapes and dense branching will best “express” their shape when light by grazing light.
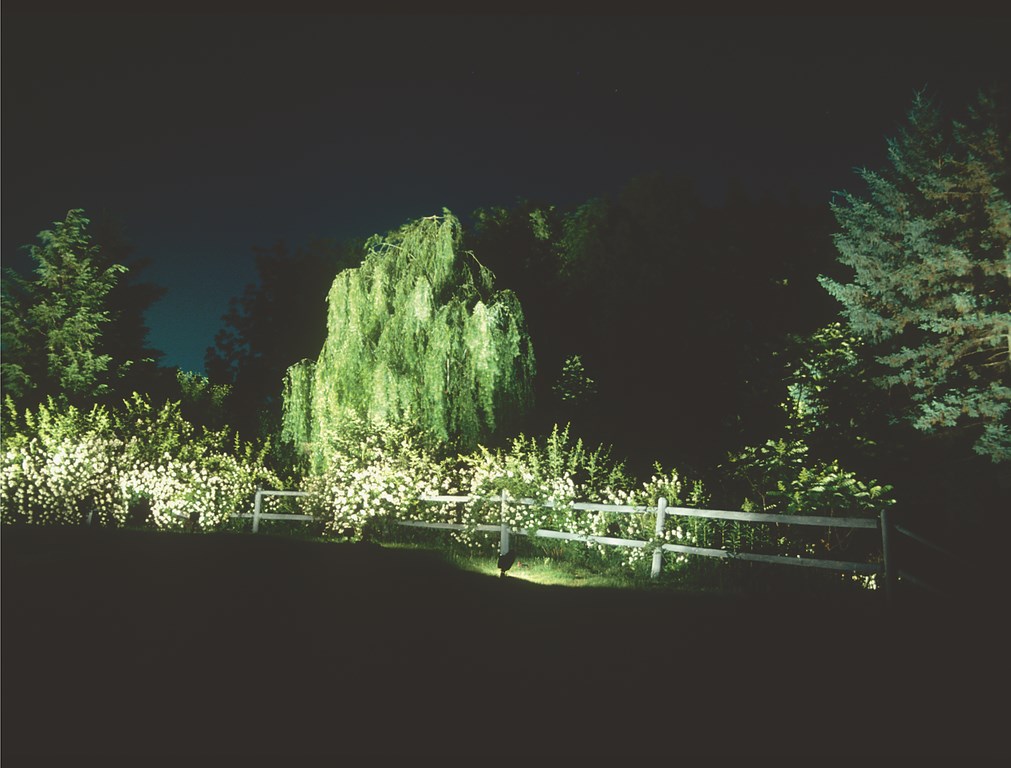
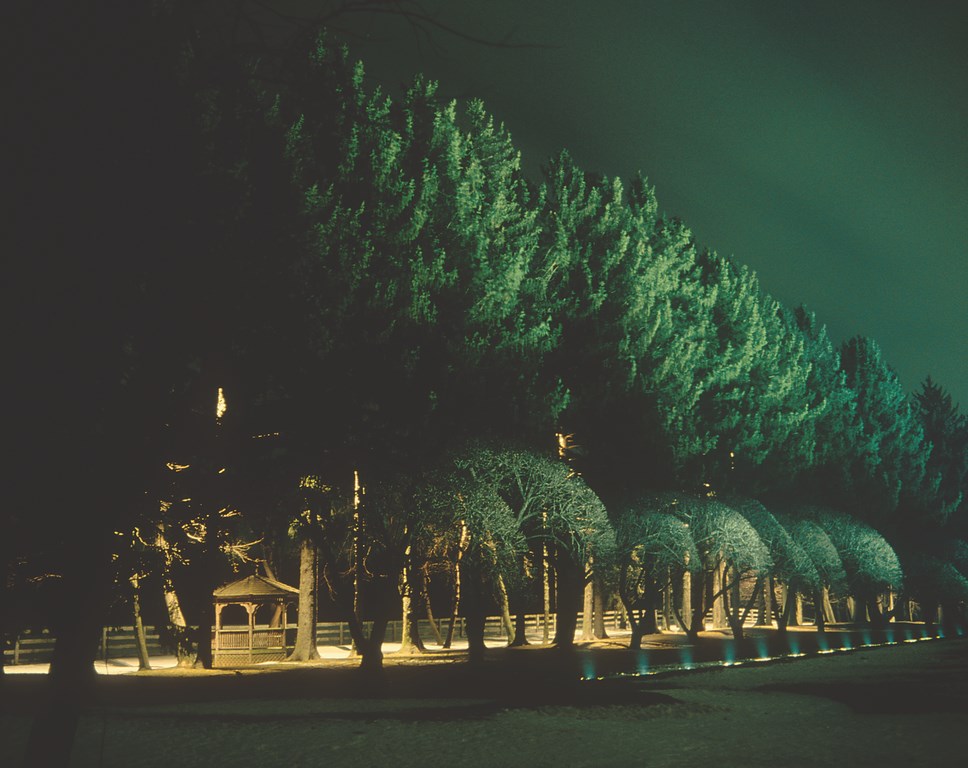
| The quantity of light focused on an object is affected by the reflectance of the object and has a direct effect on our perception of brightness – a factor that complicates lighting plans in which plants have widely differing colors and textures. That’s the case here, where the design team created a framework for a willow they used as the focal point from this viewing angle. The framing is achieved by lighting the two conifers on either side and then filling in between by lighting the hedge. (Photo by Kenneth Rice) |
Some Yews, for example, have an extremely stiff, upright shape. When they are pruned to maintain that shape, lighting fixtures placed close to the edge of the tree will bring out their rough texture. The upright shape also allows the light to reach the treetop, although this requires careful fixture location and aiming to scrape or graze the form without over-saturating the plant with too much light. (This is true for most upright trees, especially tall Palms.)
By contrast, trees with pyramidal shapes, including many conifers, look their best when fixtures are moved back from the edge of the tree. The optimum distance will vary anywhere from a few feet to ten or even 20 feet away, depending on the angles in the tree’s overall shape and its height.
For their parts, plants exhibiting a rounded form with a dense leaf overlap and thick foliage can benefit from a “wall wash” technique. Moving the lighting fixtures away from the canopy will accentuate the shape of the tree (but diminish the sense of its texture), while lights placed beneath the canopy will create a wash of light only on the bottom of the canopy because the light won’t penetrate the branches.
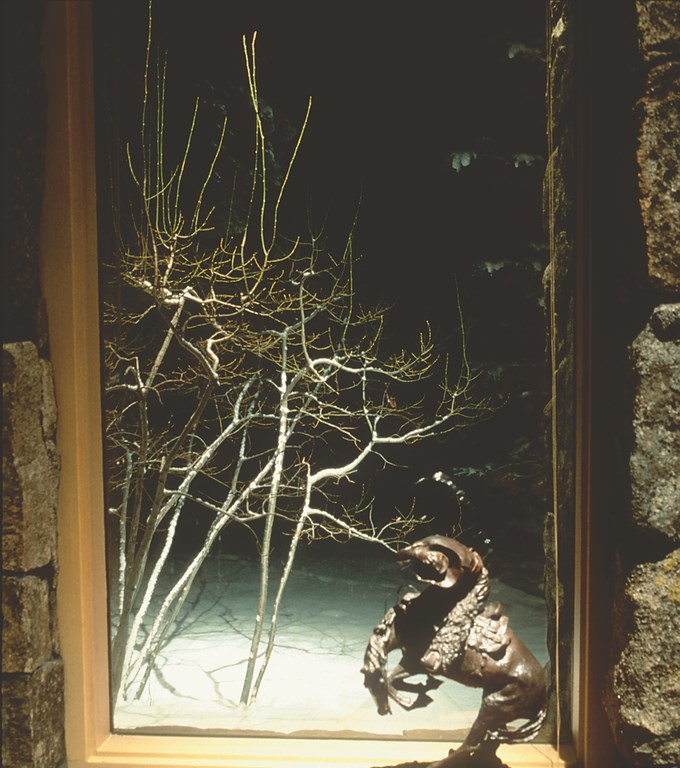
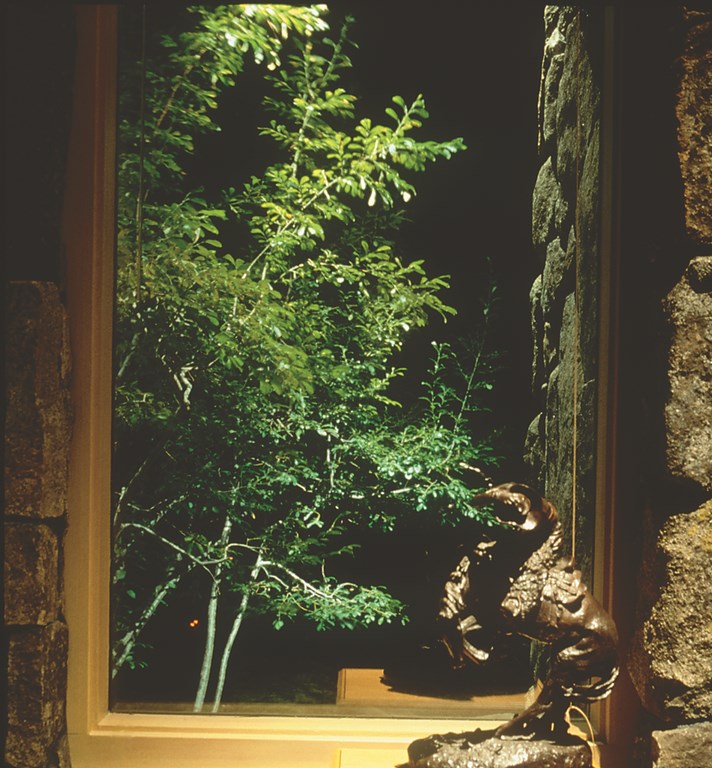
| When seen in leaf through the window, the color and fullness of the foliage dominates, appearing like a framed photograph or painting. In the winter with no leaves, it assumes a more sculptural appearance and reveals its branching structure. Note that the view has significantly more depth with the snow on the ground. (Photos by Kenneth Rice) |
As mentioned above, trees with translucent leaves and open branching will glow when lit from underneath their canopies. The light filters up through the branches, accentuating the tree’s shape and three-dimensional qualities and creating a particularly sensational effect in a garden where the tree is a key focal point.
An exception to this rule is found with rounded, open trees that have interesting characteristics at the outer edge of their canopies. Crape Myrtles, for example, produce long, cone-shaped flowers at the end of their branches. The tree’s open form and its somewhat translucent leaves might suggest up-lighting, but in this case locating fixtures outside the canopy will provide light for the flowers while also filtering some light through the canopy.
As a rule, when a tree produces branches close to the ground, fixtures should be placed away from the canopy to light the tree from bottom to top. In this case, the aiming angle can be relatively flat because the tree itself will block glare.
ROLES IN THE GARDEN
While the approach outlined here includes a long list of considerations and suggests that you need to keep an awesome amount of information in mind as you develop a landscape-lighting program, the most significant determinations you must make have to do with considering the role each plant plays in the overall garden.
How each is used in the composition will determine beyond any other factor the amount of light that it should receive. Will it be a major focal point? A minor focal point? A transition element? A background element? Is the beautiful tree that forms the heart of a daytime view best suited after dark to blend into the background and lead the eye to another location in the landscape? Answering these questions calls on you to know the characteristics of the tree, its location in the landscape and the requirements of the composition (day and night).
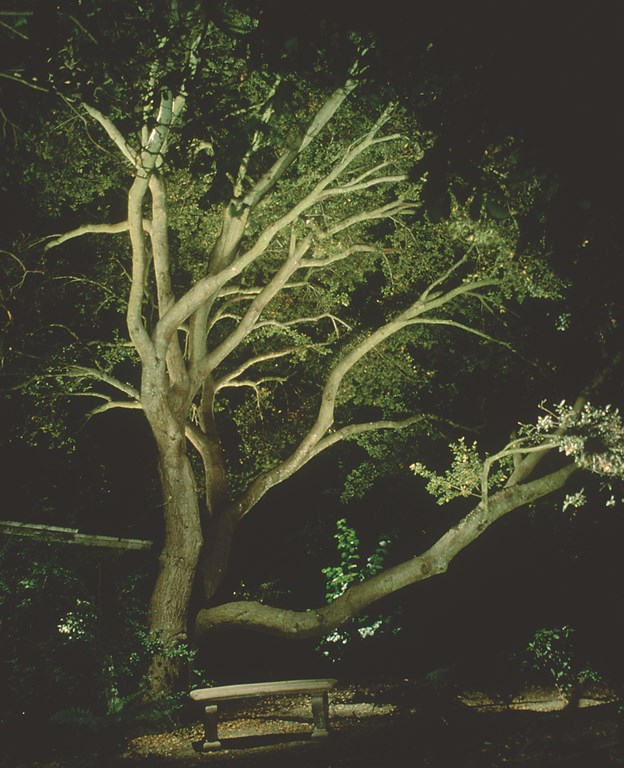
| The uplighting of this Oak serves as a visual destination from a backyard patio, so the lighting levels are soft and point to the bench as a focal point in the composition. Note how the dense canopy of the Quercus agrifolia stops light inside the canopy: This is important, as it means that there will be no spillover of lighting into the neighbor’s yard. (Photo by Kenneth Rice) |
Trees that appear as major focal points should be lit so that they appear brighter than less-important elements that surround them. How far you go is a matter of determining what it will take to put the tree in that role. Plants with dark leaves, for instance, will require more light than will trees with light-colored leaves. Conversely, to avoid distracting a viewer’s eye from a dark tree, use restraint in selecting the wattage to light secondary plants if they have lighter-colored leaves.
The location and how a plant will be viewed also bear consideration. If a tree will be seen from only one viewing direction, you can place fixtures in front of that portion of the canopy that will be visible from that perspective. If people will view all sides of the tree, then fixtures should be placed around the entire canopy.
You also need to think about whether you want to show the plant naturally or work with lighting to create a new artistic appearance. As a rule, it’s best to show focal-point trees as naturally as possible and leave the artistic touches to secondary plants. Again, this will be dictated to a large extent by fixture location.
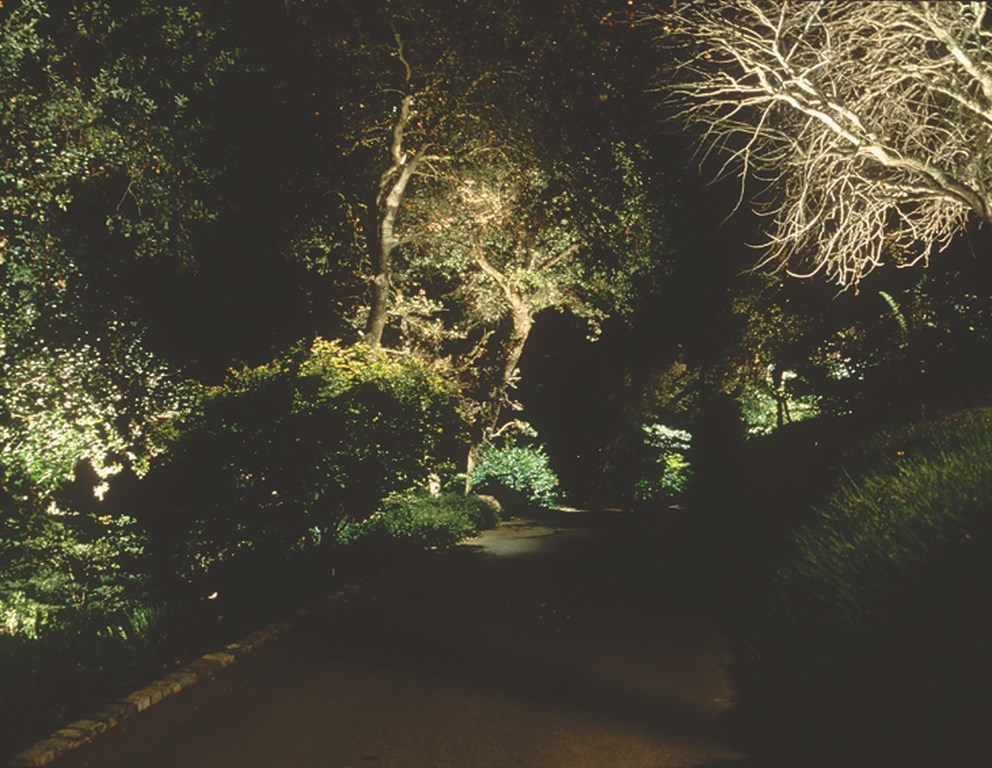
| Lighting can be used to define spaces, lead the eye, create a sense of direction and point out destinations while calling the viewer into the distance. These settings look great in daylight, but something truly special is happening at night, mainly because of the dappling effects of the downlighting. There’s also some uplighting, too: It accents selected specimen trees to create a sense of direction. (Photo by Kenneth Rice) |
Front-lighting will show or create shape, tie areas together and provide detail and color. Back-lighting lends more visual interest to a scene, adding depth by separating a plant from the background, completing the shape established by the front lighting or emphasizing the shape of the plant using the “halo” technique. For its part, side-lighting will bring texture to the plant and create shadows on its opposite side.
Keep shadows in mind, too. They can distract from the composition if used carelessly, but when used well they will add interest by filling in to tie focal points together or create interesting patterns on the plain surfaces of walls, lawns or paving.
Additionally, whether the plant is up-lit or down-lit can have a huge influence on appearance. You can create a variety of effects with either technique, setting up a wash, grazing, texture highlighting, halos and silhouetting. Creating a glow in foliage can be achieved with up-lighting, while casting shadows on the ground can be achieved with down-lighting. Accentuating detail and color is best accomplished with down-lighting.
CAREFUL DECISIONS
I’ve offered this brief list of possibilities by way of illustrating the point that a huge variety of effects are dictated by a simple choice between up-lighting and down-lighting of a single plant in an expanse of landscape. The list is by no means exhaustive, and further particulars run well beyond the scope of this discussion.
We haven’t considered, for example, the range of issues having to do with big decisions about fixture placement and the concealment of electrical wires; these will be taken up in future articles with a more practical focus.
| It’s a tall order, but familiarizing yourself with the lists of factors and considerations defined in the accompanying text is the key to developing lighting programs that reward close attention, engage the viewer on aesthetic levels not found in daylight and introduce clients to a new and distinctive form of art. (Photo by Kenneth Rice) |
My purpose this time isn’t to be prescriptive or give lots of tips: What I’ve tried to do is open you to the near-limitless possibilities that arise when you take a serious look at the way your landscapes present themselves to your clients. As with most design tasks, visual compositions often incorporate several effects and techniques, and in almost every case, the “answer” to the design challenge will be individualized to the setting, the clients and, above all, the planting plan.
Even so and for all of its complexity and range of considerations, the lighting of plant material is still only one element in the landscape and must integrated with the rest of the composition.
If you consider how people will view the plants, when the plants will be seen (and from which locations) and how the plants look from different points of view, areas or even elevations, you’re on the right track. If you keep your attention focused on enhancing the appearance of the plant material while keeping it in balance with the rest of the surroundings, you’re on the right track.
Finally, and as is the case with good watershape design, you’re really on the right track if what you do increases your clients’ enjoyment and the value of their gardens.
Janet Lennox Moyer is founder and principle designer for MSH Visual Planners, a landscape-lighting-design firm in Brunswick, N.Y. She started her career as an interior designer for commercial and residential clients before shifting her focus exclusively to landscape lighting in 1983. Since then, she has designed a broad array of highly prestigious projects worldwide. In 1991, she wrote The Landscape Lighting Book (John Wiley & Sons, Inc.), the second edition of which will be published in 2005. Moyer has lectured extensively and is widely considered one of the world’s foremost experts in the field of landscape lighting.


