Shaping Perfection
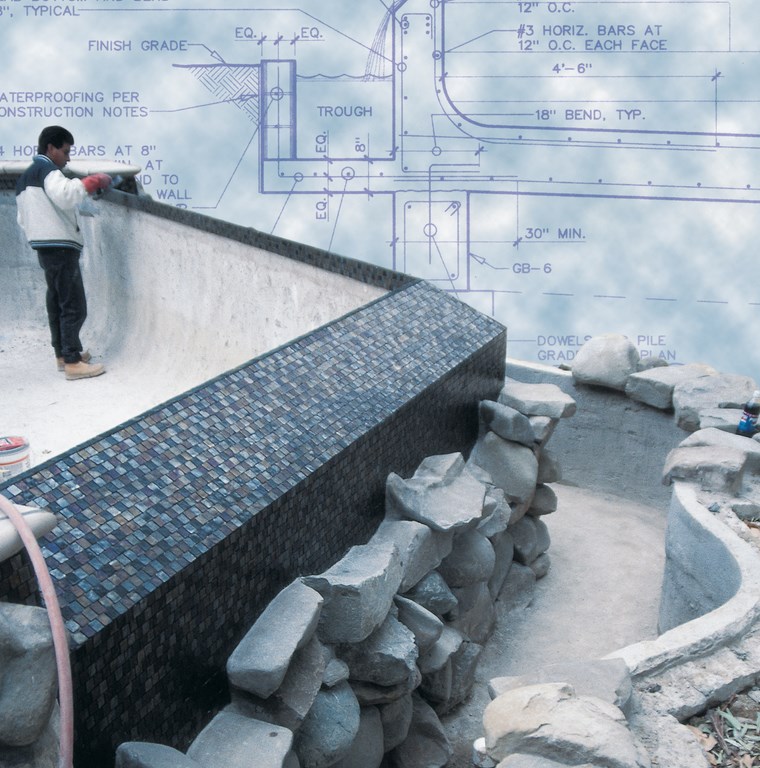
When I talk with prospective customers about hillside installations, more often than not I’ll find myself saying “A good foundation deserves a great pool” at some point during our conversations.
In fact, I view all of my pools as works of art, whether they’re installed on a hillside or on flat land. The design can be a simple rectangle (which in my opinion are some of the most beautiful pools built) or an elaborate oceanscape with all sorts of bells and whistles. Regardless of location, style or complexity, I build my pools with first-rate foundations engineered for the specific soil conditions, and I give my clients the best pool I possibly can.
As I explained in the first part of this series (see “Integrity Below Grade” in the February 1999 issue), on this project we set up a massive substructure while replacing a pool that had failed because of severe soil instability. In this article, we’ll cover what was involved in forming, caging, plumbing and guniting with the same sort of above-standard construction principles we applied to the substructure of piles and grade beams.
Some might question whether this sort of high-end, upgraded construction is necessarily the way to go. I’d argue that it is, on both practical and philosophical terms: I want my installations to look good when I’m done, and I also want them to last for decades, perhaps even centuries to come. This is the only way I feel comfortable doing things, so that’s the only way I do them, each and every time I put my stamp on a pool, spa or waterfeature.
Setting the Forms
Before we began setting up forms for the shell, we backfilled around and between the grade beams knowing that the soil would act as no more than a form for the gunite we’d eventually apply. In fact, the soil has no structural bearing at all: Everything above will be anchored and supported solely by the beams and piles.
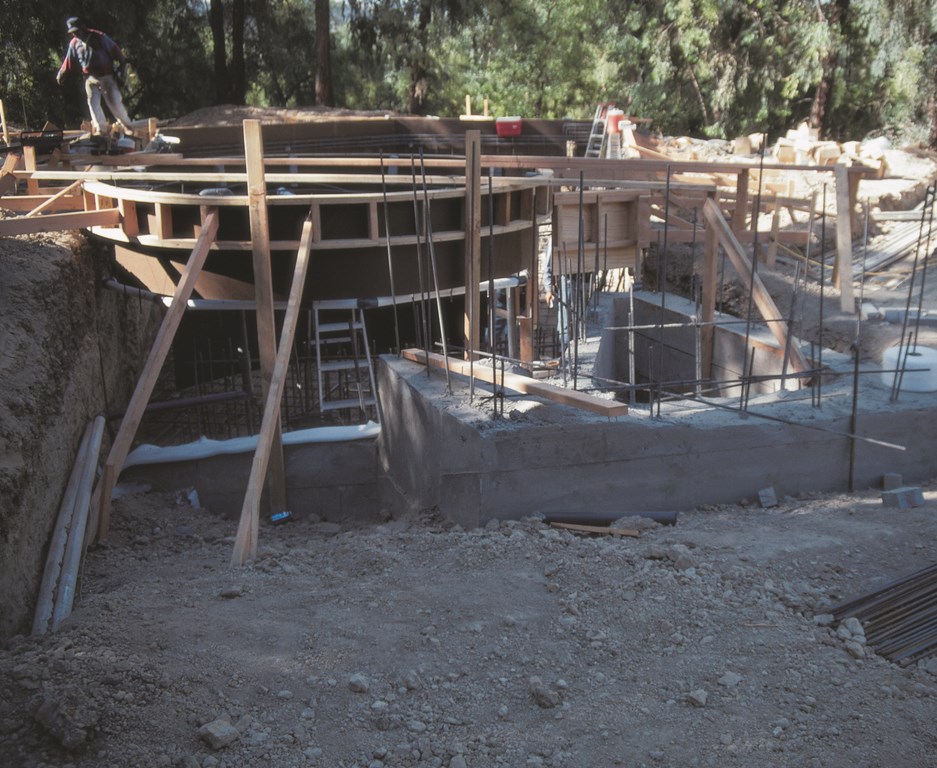
In forming, we use only two-by-fours in setting the dimensions, with kickers every 24 inches to keep the forms from moving. Sticking with our principles of high-grade construction, we use no one-by-threes or bender board in our forms; they are simply too flexible to ensure our tight tolerances.
This is a critical construction step: To me, in fact, the second biggest error people consistently make in building pools is failing to adhere to proper dimensions and geometry in laying out pools. (The biggest, by the way, is failing to understand a site’s soil conditions.) As a result of accepting “close enough” as a standard, radiuses are wrong, shells are out of square – and these mistakes are only amplified when the forms swell, contort and move as the other construction phases continue.
We focus on complete precision, strength and stability at this stage: We know that the forms determine the actual dimensions of the vessel – that is, the thickness and positioning of the walls and beams – so we work to tolerances of just plus or minus 1/16th of an inch. Once the framework is up, we line it entirely with tempered Masonite, which makes stripping the forms easy.
Shaping the Spa
We formed the spa using plywood we’d cut into two radiuses to ensure the exact dimensions. And because we knew we’d be working with a precast coping that had to align perfectly on both the inside and outside edges, we tightened our tolerances for the spa-wall dimensions to plus or minus 1/32nd of an inch.
What you see here is a 10-1/2-foot diameter that is absolutely dead on. You also can see the tempered Masonite we use for ease of stripping.
Laying the Structural Deck
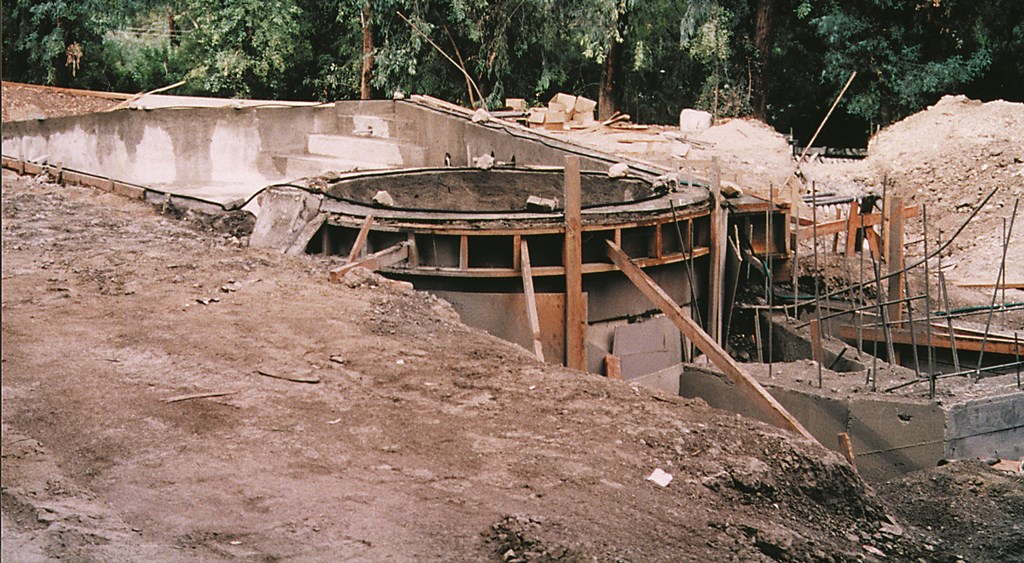
Along with the substructure for the pool and spa, we also set up a cantilevered extension of the grade-beam system between the spa and the house to support a structural deck. As with the grade beams for the rest of the project, these were poured in place with (minimum) 3,000-psi concrete.
We used this approach at our engineer’s recommendation to avoid any problems related to a hinging effect or any ground movement. As a result, the deck sits over its own pile and grade beams cantilevered to the substructure for the pool and spa – and we have no concern at all about cracks in this critical portion of the overall installation.
The pool, spa and structural deck are in turn isolated from surrounding deckwork by expansion joints that will allow the deck to move (if it moves at all!) independent of the pool, thus preventing any cracking of the pool. And we leave nothing to chance: The location of all the joints was carefully planned in consultation with our engineer long before we started building the deck.
Within the Walls and Floors
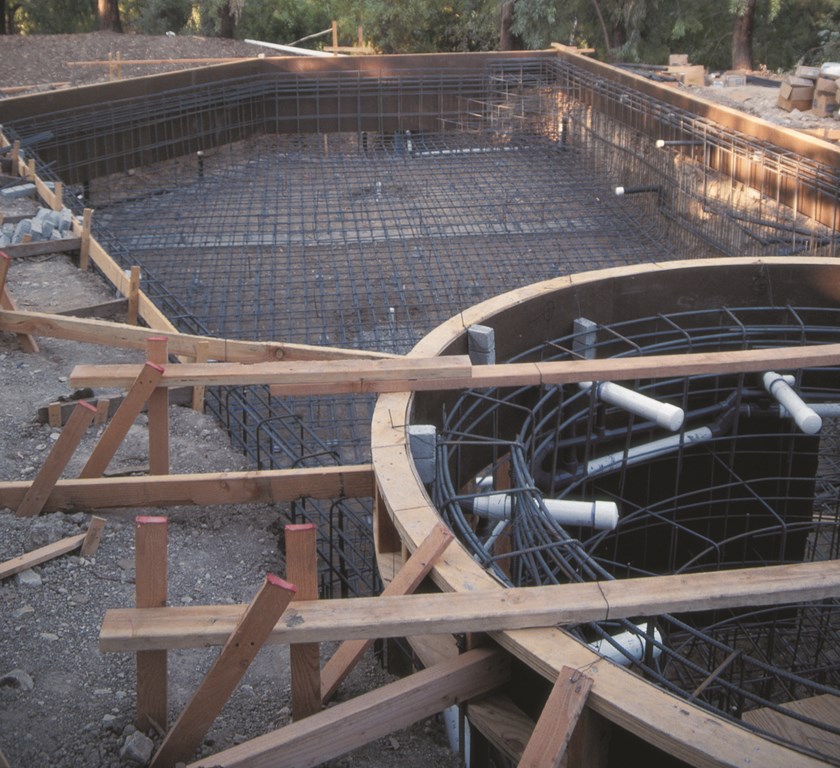
With the pool formed and the steel in place, we moved on to plumbing. Everything is schedule 80, both white and gray, to a maximum of 2-1/2 inches. All the fittings are schedule 80 as well (left).
I insist on this upgraded piping to gain the advantages of schedule 80’s superior strength and durability compared to the usual schedule 40 piping used in most pools. It raises costs considerably (as much as four to five times), but I believe what you gain in reliability over the life of the pool makes it worth every penny.
|
Stepwise Certainty A brief note on steps: Many pool contractors use rebound or overspray to form the steps; after all, they aren’t a structural part of the pool in most installations – and I figure this saves between $200 and $1,000 on most jobs. By contrast, we build the steps so that they are a structural part of the pool: All of the rebound is removed, the steps are formed with steel and shot under pressure, just like the rest of the shell. It’s another step I take to build the best pool I possibly can. – D.T. |
There are five return lines, a separate pump system for the water effects in the spa and a separate system for the vanishing edge. We installed split main drains to avoid any chance of suction entrapment. We also set up three hydrostatic relief valves in the pool. Given the weight of the shell, popping is unlikely – but I never take chances.
A lot of that weight is inside the shell, where we tied nearly nine tons of steel, including a double mat of #5 steel rebar in the floor (middle). The verticals are all #5s with #3s at three inches on center. Note the six-bar bond beam: I always treat walls as though they were to be free-standing and therefore must withstand lateral pressure of 87 psi. I’ve seen pools built with three bars in the beam and others with four, but I go for strength and rigidity in the face of expansive soils and won’t compromise inside my bond beams.
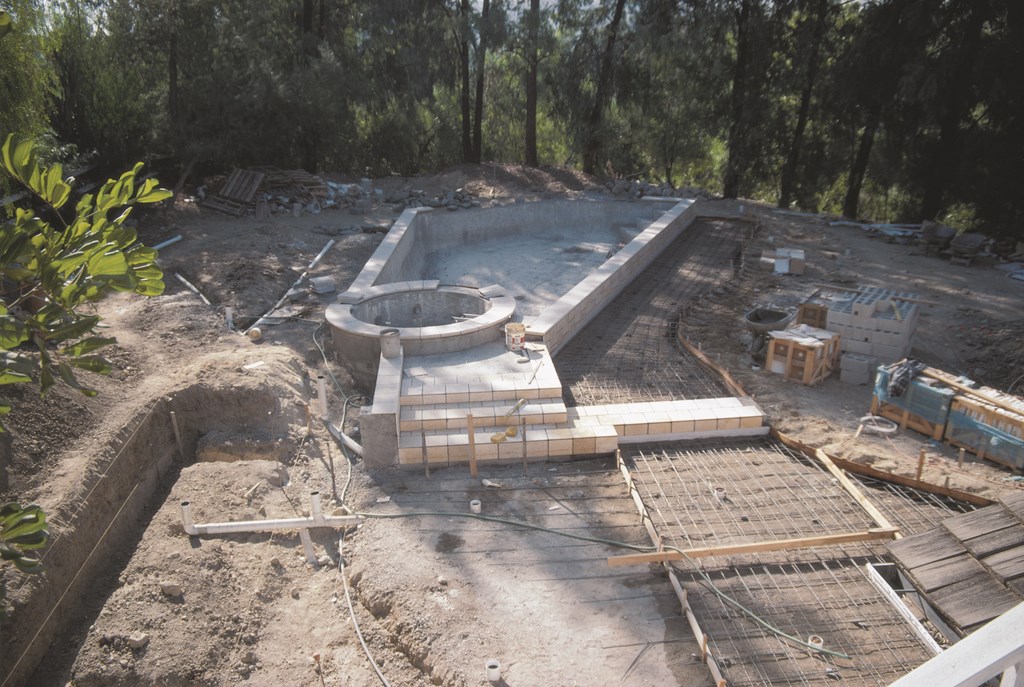
All walls are 12 inches thick rather than the standard 6 inches, and the floor is 10 inches thick. Just for the pool, we shot approximately 140 tons of 3,000 psi gunite (right).
Working on Surfaces
With the major structural components of the pool in place, we began working on many of the finish elements including the decks, the tile and rock on the vanishing edge – not to mention the tile in the spa and the barbecue area.
The decks are Jerusalem stone, a type of limestone; each piece has been tumbled to soften the edges, which adds considerably to the cost but which also enhances the warm appearance of the decking. The upper edge of the pool is finished with a precast, dry-cast coping, while the spa will be lined with 1-inch-square glass tiles and its radiuses tiled with glass quarter rounds.
Isolating the Decking
As mentioned previously, only part of the project’s deckwork is structural. That meant we had to isolate much of the deckwork from the pool/spa structure – something we accomplished by setting foam in the narrow boundary area.
Once the deck sections were poured, we removed the foam, filled the void with mastic, then covered it before it dried with a silica sand that matched the grout used with the tile. That way, you can’t see transitions. And because the deck was all laid out in the plans, we could pour in individual sections, confident that the expansion joints were right where they needed to be.
The deck itself is built for strength, complete with #3 rebar installed 12 inches on center in both directions. We also used a 6×6-10×10 welded wire fabric (wire mesh) that we tied to the top of the rebar. We then set small blocks beneath the rebar and wire fabric in order to raise it up a couple inches so that the reinforcing steel would be in the center of the concrete when it was poured. We then set footings around the entire deck perimeters to keep dirt from moving from beneath the deck, knowing that such movement could create voids and cause structural problems.
Building a deck this way adds considerably to the cost – as much as $1 or $1.50 or more per square foot – but the advantages in terms of strength and durability through years of trouble-free performance generally lead my customers to make the investment.
Vanishing Edge as Waterfeature
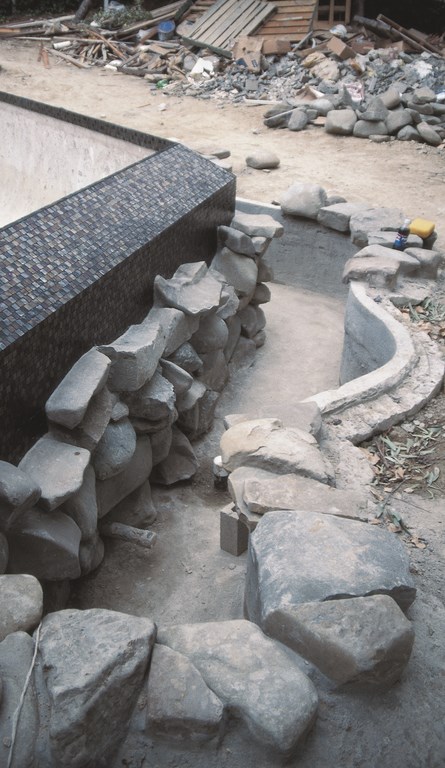
The vanishing edge in this installation serves two distinct aesthetic functions. From the house (left), all you’ll see is water falling over the edge, cutting a clean visual line at the water’s surface. This is the classic vanishing-edge detail that has become so popular in the past ten years or so. By contrast, downslope from the pool, you’ll see a beautiful waterfall flowing into a freeform reservoir (middle).
There’s a great detail here where tile meets stone: The glass tile beautifully reflects light under all sorts of conditions and in all sorts of ways and also provides a visual transition frown the dark plaster to the more rustic stones that cap the reservoir for the vanishing edge.
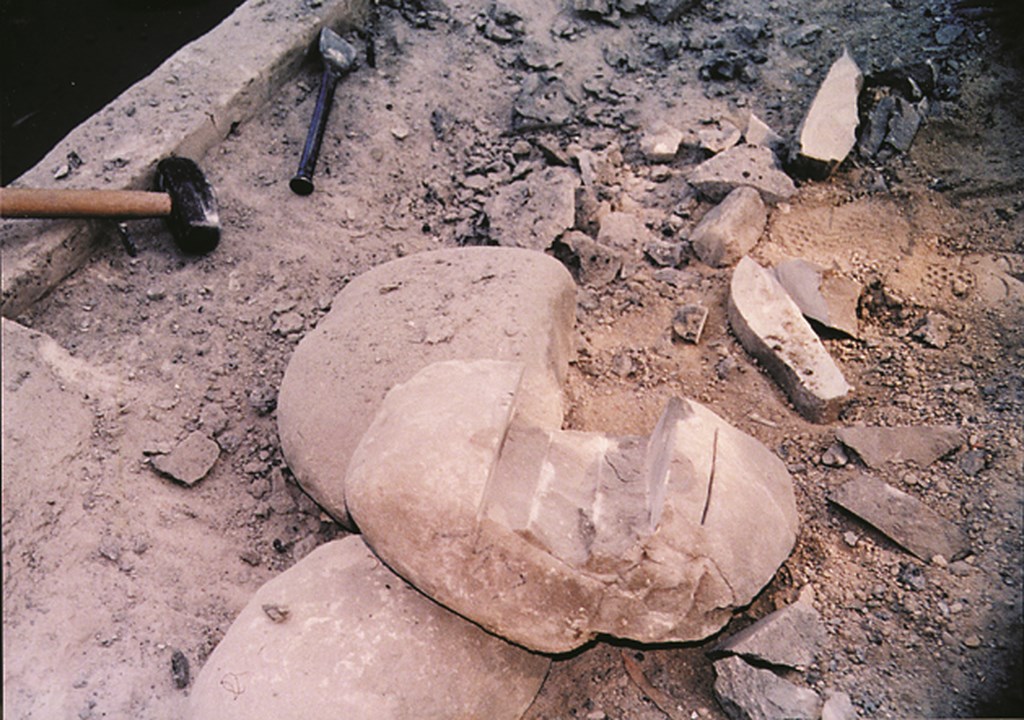
We also cut notches on the undersides of the stones we selected so they’d straddle the wall (right). This put the inside edge of the rockwork below the waterline, adding to the natural appearance of this free-form waterfeature. And all of this rustic splendor will be visible from a pathway that eventually will lead down past the pool to another small deck.
|
Investing in Quality Ernest Hemingway said something that sums up my philosophy about a great many things – pool design, engineering and construction among them. He said, “Anything that was ever any good, you pay for.” Amen! A number of the construction details highlighted in the accompanying text are built well beyond any standard accepted within the pool and spa industry. From two-by-four form construction and the amount of steel in the pool to the thickness of the walls and the schedule 80 plumbing, this pool is built to be the best pool that I can build, period, in terms both of durability and appearance. A lot of people have asked me why I build this way. After all, it drives up the cost, requires more effort in working with engineers and inspectors, and involves me in much closer project management than might otherwise be the case. Frankly, I don’t think I’m smart enough to do it any other way. And let me be clear about something: I didn’t build this particular pool so far beyond industry standards because the poor soil conditions left me no choice. Rather, I build all of my pools, spas and waterfeatures to the high standards my customers enable me to build them. Yes, if this pool had been located in more stable soil, the foundation would have a different design that was appropriate to the prevailing soil conditions – but the quality, strength and stability would be exactly the same. I build every project to last, and I build the bent best pool I can every time, no exceptions. I rest easy at night knowing that when I leave a site, my pool will not crack, break or leak. I’m also proud that my pools don’t deviate from the plans I draw, that they’re shaped properly when it comes to details like steps and dam walls, that the coping and tile will stay put and that the pool will function well hydraulically. To my mind, it’s the only way to go. When you build a pool to lesser standards, you always face the possibility that you’ll need to defend your construction practices. Rather than go that route, I avoid worry and save my customer the anguish and expense of having to fix any mistakes later on. It’s that simple. Yes, I’m proud to say that my pools are good, very good. And I make no bones about the fact that I categorically refuse to do substandard or minimum anything. My customers know it, and they’re willing to pay accordingly. – D.T. |
A Time to Dine
One of the driving ideas with this project was to set the pool back in the yard as a distinctly separate recreation area (and thereby avoid the cliché of having the pool confront you the second you walked outdoors). This also gave us space to design and install a dining and entertaining area.
As planned, the area closest to the house will have massive overhangs that will shade the large patio and lead the eye first to a dining area and barbecue off to one side of the pool before you take in the water-recreation sections of the yard.
The 19-foot barbecue seen under construction here will have an overhang coming directly out of it that will tie overhang, deck and barbecue together. The barbecue itself will have a wet bar, grilles, refrigerator, warming tray – the works.
And there are two levels here, one a rounded seating area you’ll step up to and the other a lower seating area in the front that will act like a bar. Again, the barbecue will structurally isolated from the deck by way of foam-formed expansion joints. (You can see the roll of foam in the photograph.) Note also that before the deck is poured, all of the steel will be raised off the soil to ensure that the steel will be fully encased in gunite.
Spa Notches
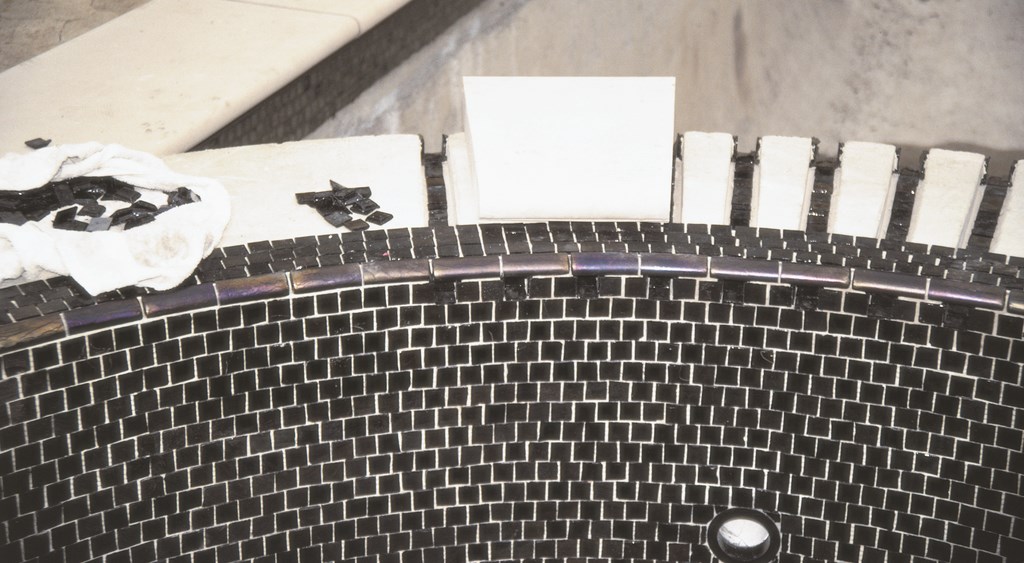
One of the most arresting visual features of this project is the notched dam wall. We cut 21 notches in all, each lined with glass tile to create streams as the water cascades into the pool below.
The notches then will be solidly covered with the same precast, dry-cast coping stones used around the rest of the perimeter. We also installed a 3-inch tile detail between the water line and the rear of the coping on the inside of the spa, creating a smooth ledge between the bather and the coping. This is a detail I use often for the comfort of those sitting in the spa.
From inside the spa, the holes feeding the notches are located below the waterline, giving a momentary sense of wonder at where the spouts originate. Of all the special touches we’ve added to this pool spa complex, this is perhaps my favorite. I can only imagine how much satisfaction my customer will find in sharing this visual and auditory pleasure with his or her family and friends.
Next: all the finish details for this project, from installation of the tile and coping to setting up the equipment pad and completing the decking, barbecue and fountain.
David Tisherman is the principal in two design/construction firms: David Tisherman’s Visuals of Manhattan Beach, Calif., and Liquid Design of Cherry Hill, N.J. He can be reached at tisherman@verizon.net. He is also an instructor for Artistic Resources & Training (ART); for information on ART’s classes, visit www.theartofwater.com.


