Reaching for Permanence

The approach I took to this five-part series of articles on dry-stacked stone walls was a bit out of order – and I did it that way for a reason.
If you’ll recall, in the last article I set aside any discussion of the drainage issues involved in stacking these walls. I did so both because it would have made a long article even longer, but it also had to do with the fact that I wanted the information about drainage to be placed after a discussion of the monumental amount of work that goes into actually assembling these walls.
In this slightly shifted context, in other words, I trust you’ll take what I have to say about drainage with all of the seriousness it requires – then I’ll wrap everything up with the details of capping these amazing walls and fences.
Working Walls
So far in this series, we haven’t made big distinctions between walls and fences, basically because the approaches to site and base preparation are similar, as are the processes of installation. Where the two diverge most significantly is in the fact that a retaining wall must not only stand, but also needs to resist the pressures of the slope it is retaining.
In that light, the biggest enemy of any retaining wall is water, whether in liquid form (as hydrostatic pressure) or solid form (as frost heave). One advantage of a dry-stacked stone wall, of course, is that it allows some water to weep out of its face – but this is not enough. Indeed, the more crushed stone you can place behind a wall, the less chance there is that moisture will be retained behind it.
As a general rule of thumb, we dig the area behind the wall back to the soil’s angle of repose – that is, the point at which it is self-sustaining. (Picture a pyramid of soil sitting on a flat surface: The sides of the pyramid do not collapse so long as there are no other outside influences affecting it.) In general, this angle is about 45 degrees.
Using this as guide, if you know the height of your wall, you can dig back into the slope so that the distance from the back of the bottom of the wall is about two feet into the slope (to allow for crushed stone at the base of the wall), while the distance from the back of the top of the wall is two feet plus the height of the finished wall.
All of this area should be filled with a large crushed stone (we use #2 crushed stone at a minimum – good-sized chunks). If the wall will have plants on top, we typically fill with stone to within about 12 or 18 inches of the top, lay down a soil-separating landscape fabric and finish up with a layer of good topsoil. (The fabric keeps the soil from filtering down into the crushed stone.)
In most situations, this backfilling will suffice. In critical applications, however, we’ll double up and insert perforated drain pipes wrapped in landscape fabric, and send the water to a safe surface outlet or into the property’s overall drainage system.
No matter what’s involved, this process is reasonably straightforward and simply must be done. Unfortunately, it’s something too many installers trip over, the result being walls that are doomed to failure.
Topping Things Off
With drainage attended to and the stones mostly in place, we’re left with one final detail in the process of building either a wall or a fence: the coping.
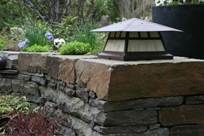
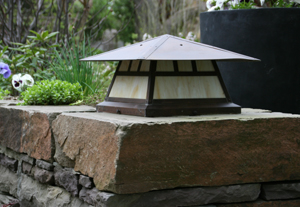
 The most common way to cope or cap a wall or fence is to select stones that are large enough to span the structure’s full width (Figure 1). These stones are then carefully cut, leveled and placed on top in such ways that they make full contact with the material below on both sides – the thought being, the tighter the stones are fitted, the less water and debris they’ll allow into the core of the wall or fence.
Quite often, we simplify the selection process when coping by working with flagstone as caps. We buy this material (called “stand up” because it is placed on edge on pallets as it is quarried) by the tractor-trailer load. The stones range in thickness from about one-and-a-half inches on up to three inches and are typically used for paving pathways, walkways, patios and other large, flat surfaces.
When we take delivery, we separate out the really thick pieces and save them for capping our fences and walls. This way, we end up with large-scale planes of stone that make for nice seat-walls or tabletops.
When we place them, we typically use shim-rocks to level them up. Sometimes, however, we’ll use mortar for the purpose, inserting it so it doesn’t show along the face of the fence or between the coping stones. Over time, of course, the mortar will separate from the stone, but that doesn’t matter because it still will act as a perfectly formed shim.
One other common coping technique involves setting the stones on edge on top of the wall, lined upright like soldiers. This is a time-consuming approach and makes the fence unusable for sitting, but it is a classic and can be a beautiful look.
Grace Notes
This long sequence of articles on dry-stacked stonework has only scratched the surface, but I hope by illustrating some of the basic techniques used in making these walls and fences, your eyes have been opened to their potential. They can be utterly beautiful, and if you set them up the right way, they will be there far longer than almost anything else on a property.
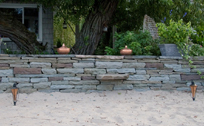
 As you get into it, you’ll find that there are some great extras you can offer. If, for example, you have a bunch of stones that are at least two feet longer than the fence is wide, you can set them up as a staircase leading to the top of a retained slope or over a fence (Figure 2).
Or you can use similarly large stones as benches. Sometimes, in fact, we’ll place six-foot-long slabs of stone into our retaining walls, projecting them out from the face of the wall about 18 inches. Here, the bench itself is the proverbial tip of the iceberg, with more than four feet of stone buried in the wall and the gravel beyond – and you can be certain none of this will move!
For countless centuries, stone walls and fences have proved their worth with beauty, structural soundness and tremendous longevity. When I travel and see these structures, I stand in awe of the faceless masons who built them. I can only hope that far in the future, someone will smile as he or she marvels at what my staff and I accomplished long ago.
Bruce Zaretsky is president of Zaretsky and Associates, a landscape design/construction/consultation company in Rochester, N.Y. You can reach him at [email protected].


