Applied Arts
One of the things I like most about working in the watershaping business these days is how clever and creative designers and builders have become at what they do.
It’s not just the big details such as vanishing edges, play-pool configurations, sun shelves or swim-up bars. And it’s about more than beach entries, grottos, laminar jets and cool spillways. Those are all great, every one of them, but what I’m talking about here is the attention to the small things – the subtle ways more and more watershapers are finding to make cool visual statements with their work.
I’ll be discussing two of these details in this article, both of which appear in a project designed and built by Doug Johnston of Stonecrest Pools (Ft. Worth, Texas). He brought us at Rock Solid Tile (Calabasas, Calif.) in on the project knowing how much we love fresh and unusual challenges.
In fact, this huge indoor pool/spa composition was just our cup of tea: We specialize in high-level tile work, and this pool and spa needed plenty of it.
A CRITICAL GAP
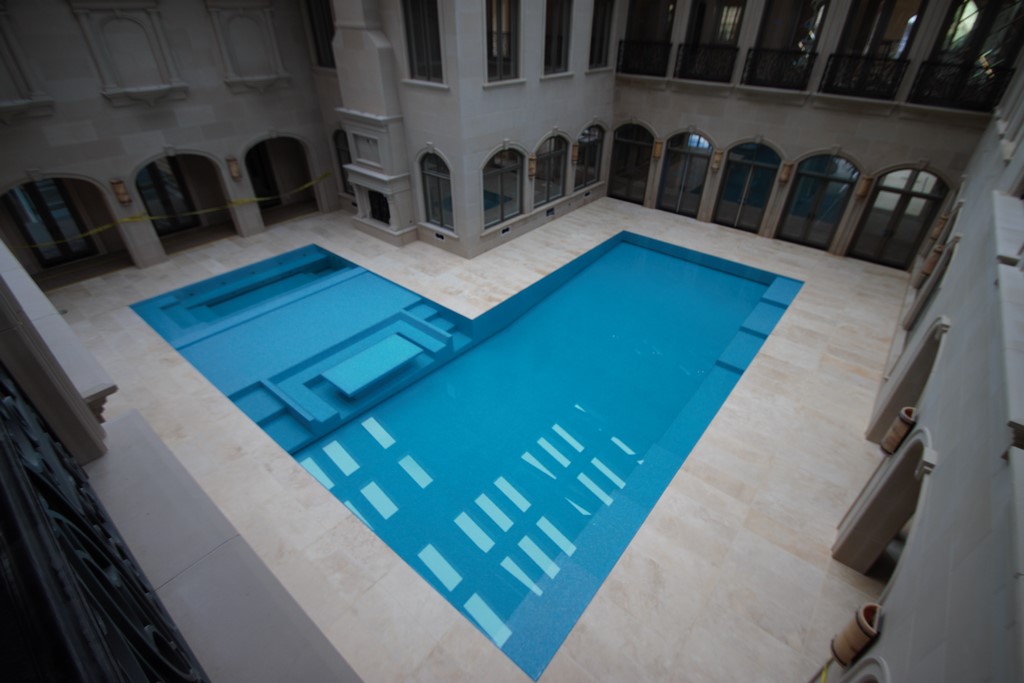
The composition occupies a huge interior space in a grand home in Dallas, Texas. The ceilings are high, the pool is unusually large and there are details so cool and so numerous that WaterShapes could probably pull together several articles about it with no trouble at all. From the design and engineering stages through to execution, it’s just too much.
My crew was intimately involved with every square inch of the project, because we tiled all of the interior surfaces of the pool and spa and all of its unique amenities. But there are two details – the full perimeter toe kick and the wrapping of the banquette-style seats in the in-pool dining area – that stand out in my mind because they’re both inspired and maybe a bit insane.
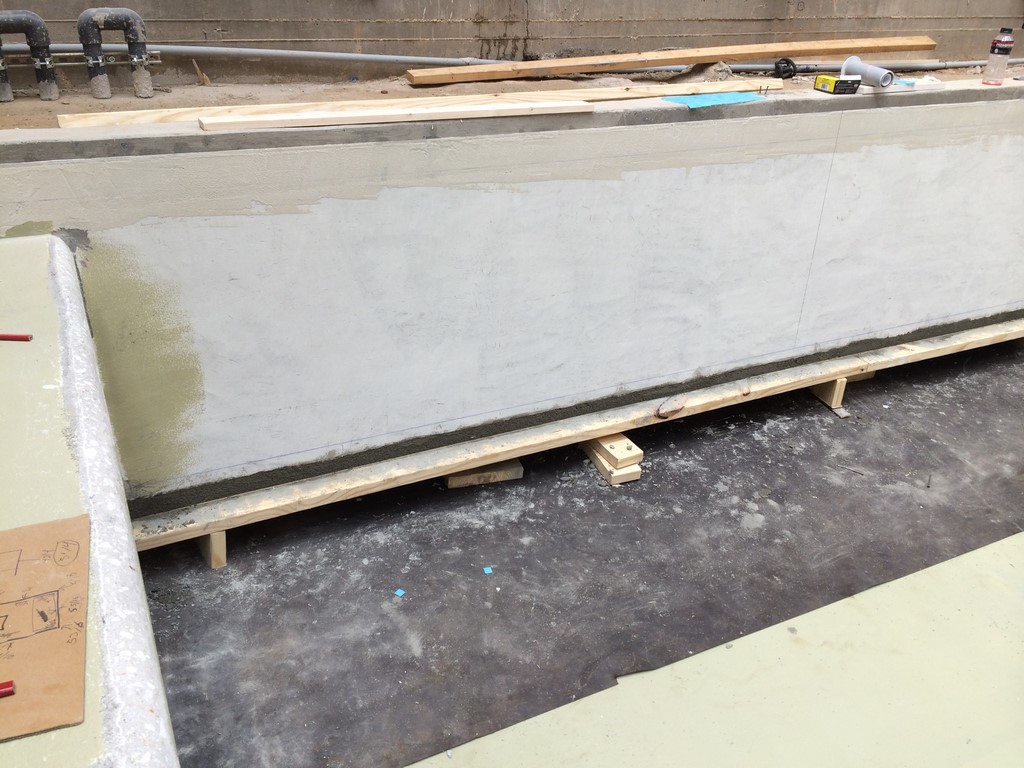
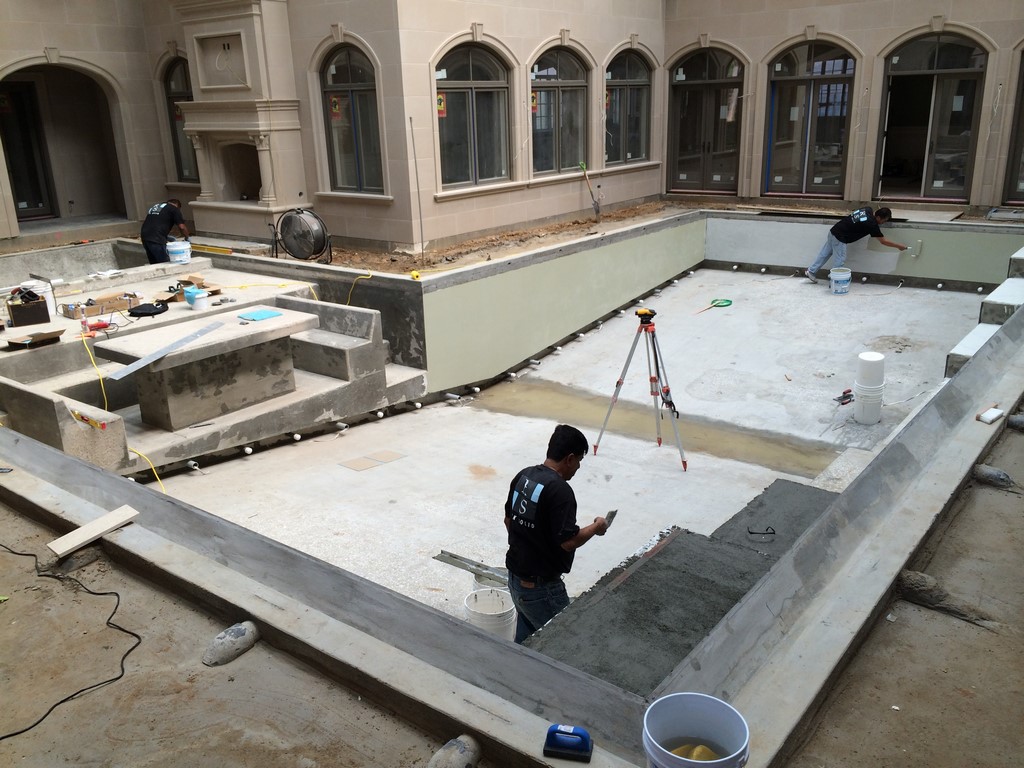
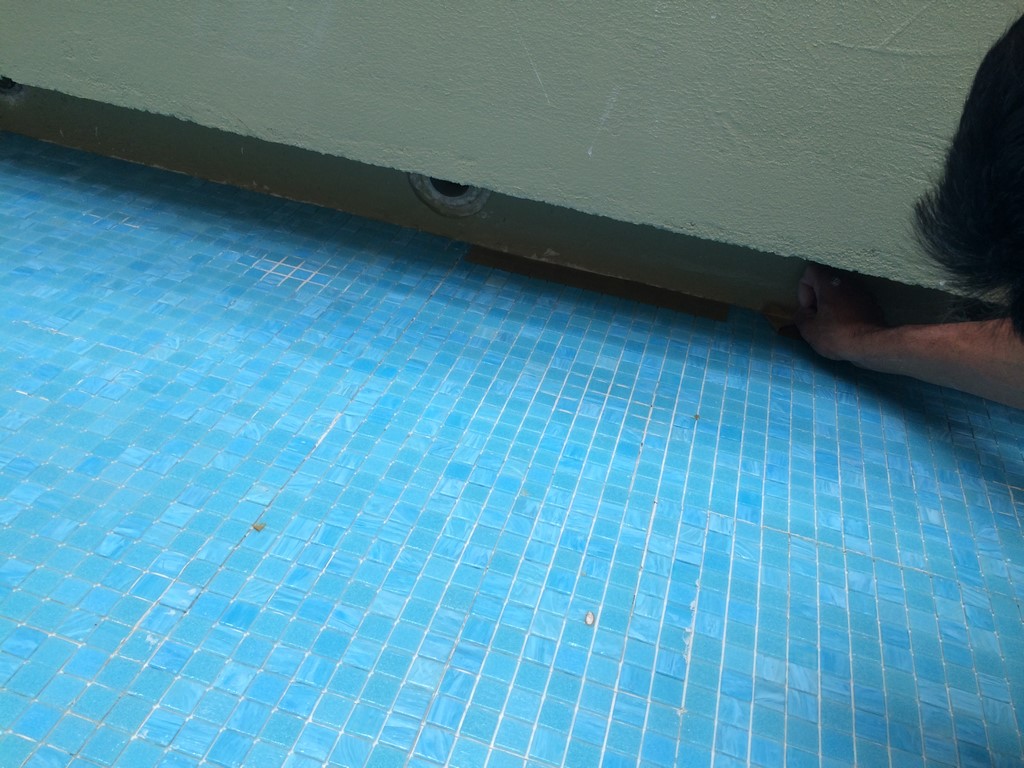
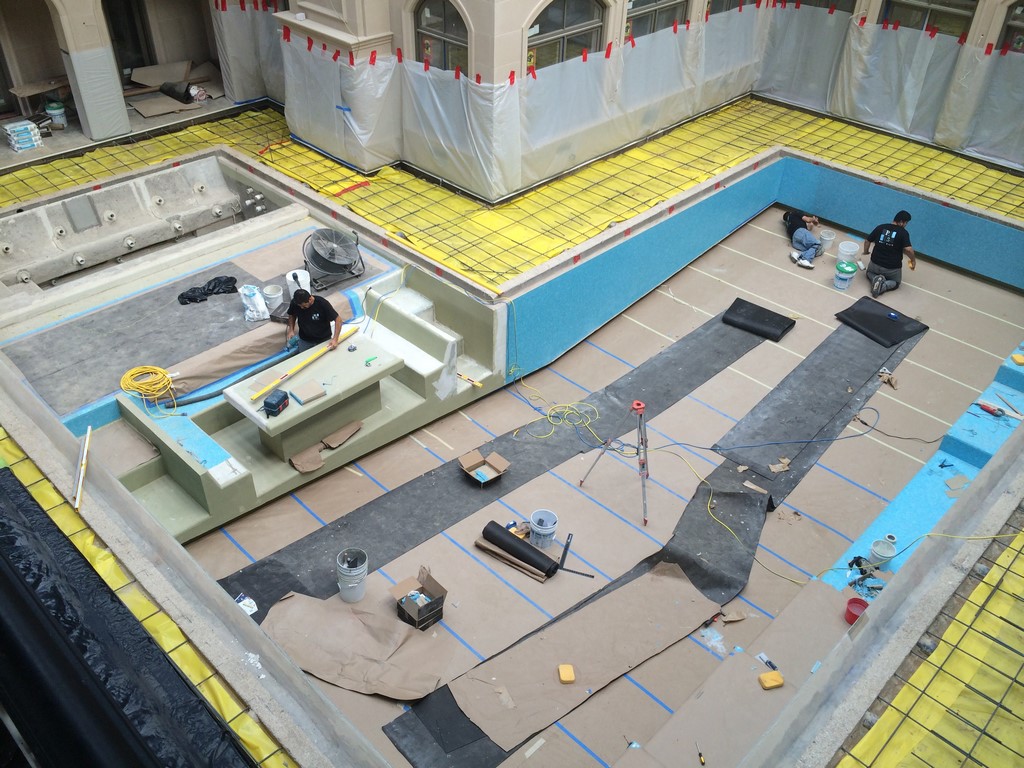
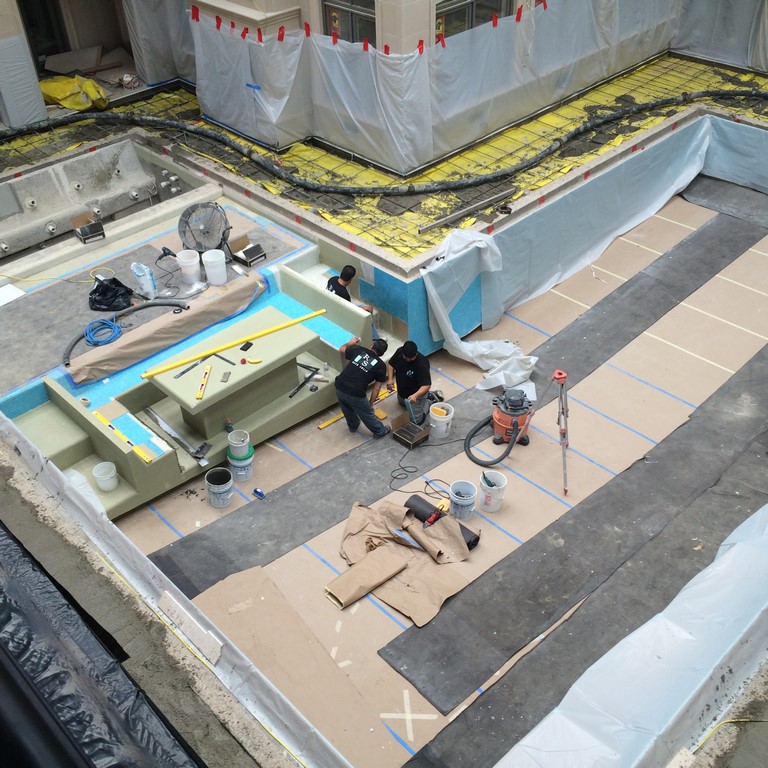
| Preparing surfaces for tile application is among the most exacting of all the precision tasks we tackle on site. In this case, not only did this involve working with and waterproofing the usual wall and floor surfaces, but also setting forms to correct imperfections we found along the leading edge of the pool’s full-perimeter toe-kick area. Although using this recessed detail represented lots of extra work, its ability to conceal all of the usual in-pool penetrations – for suction and return lines as well as lights – made it all worthwhile. |
And yes, the entire perimeter of both the pool and spa have the toe-kick detail – a basic four-by-four-inch space in which all of the physical penetrations of the shell (other than the strategically placed jets in the 20-person spa) are neatly hidden from view. This includes all of the suction and return points and all of the lights – whatever could be concealed so that the pool’s interior would offer an unimpeded flow of beautiful tile.
Several builders are now executing this detail, which on the easiest level requires insertion of foam blocks that are chipped out once the concrete is placed and cured to create a void. The trouble with this detail – at least at this stage of its development – is that it’s very difficult to set the plumbing lines exactly where they need to be. Until somebody develops a jig or template or some other construction aid, the approach I’ve seen involves making the space deeper than it needs to be so that a second fitting can be secured to the original one to compensate for the slight alignment errors that commonly occur.
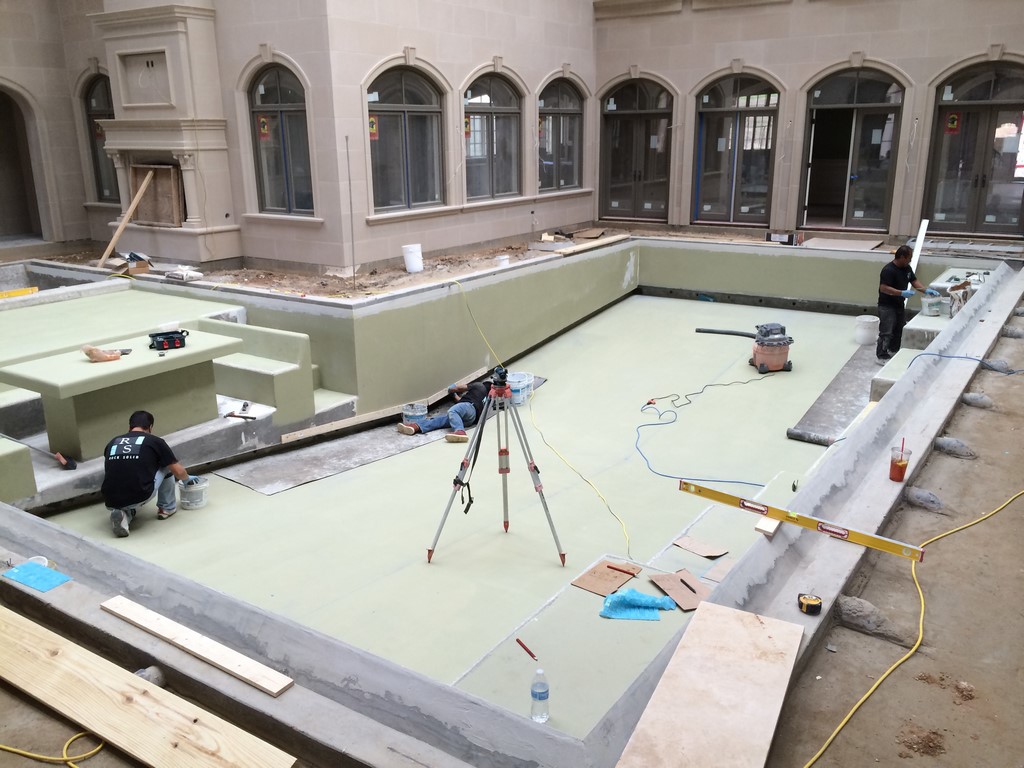
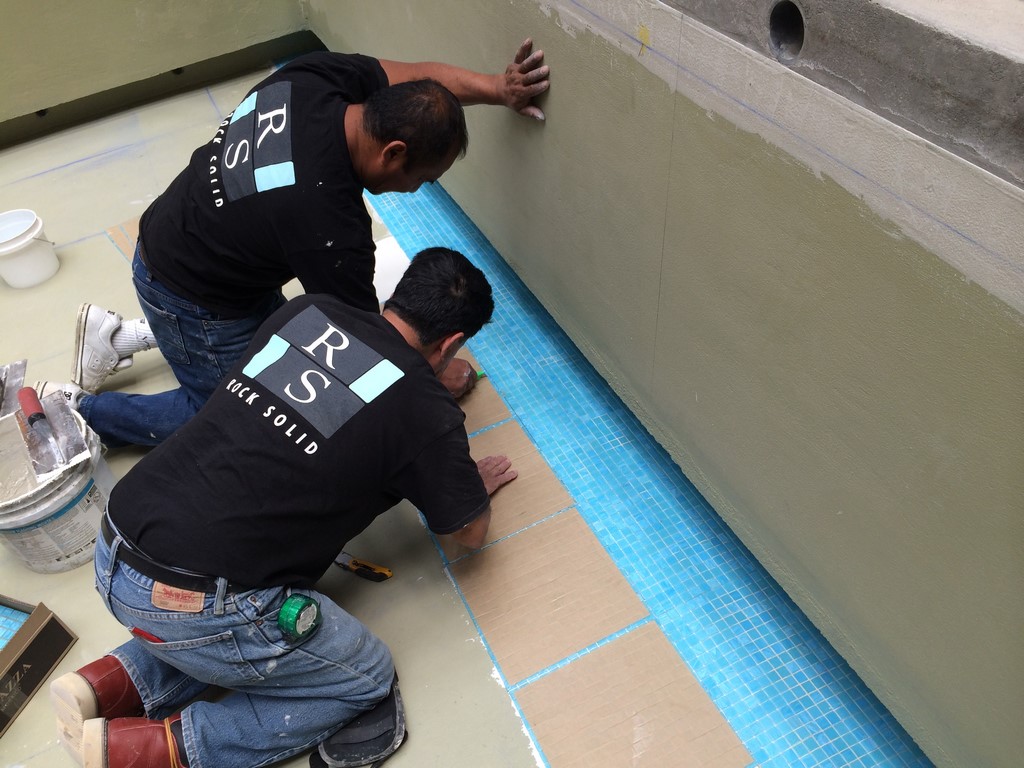
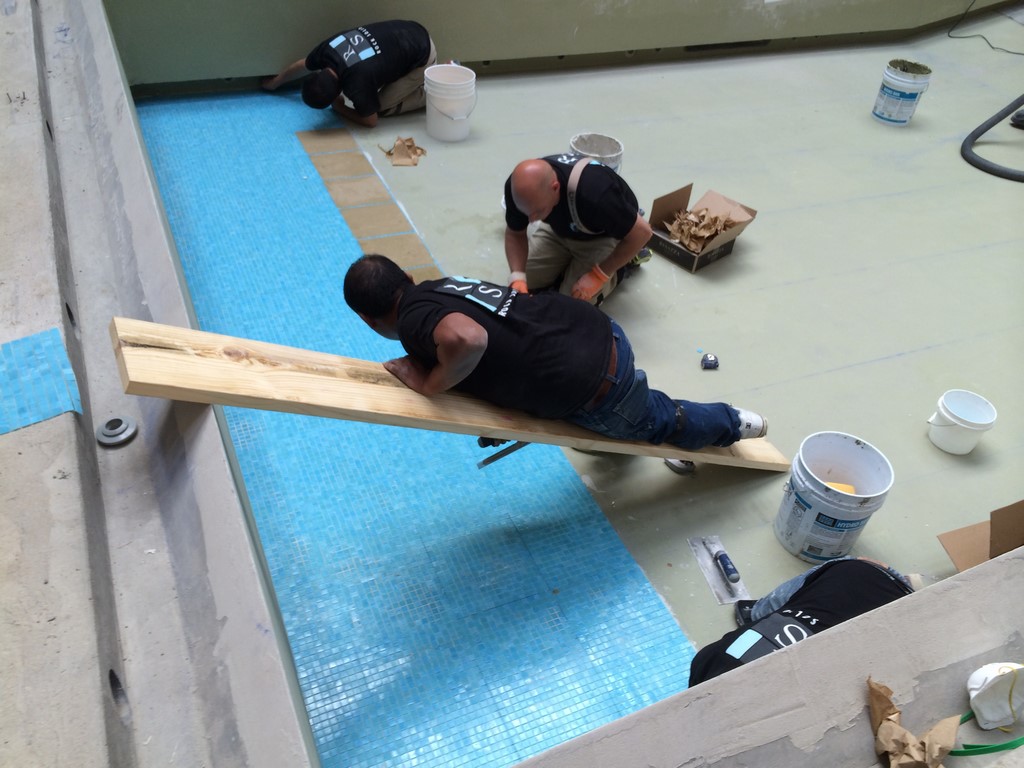
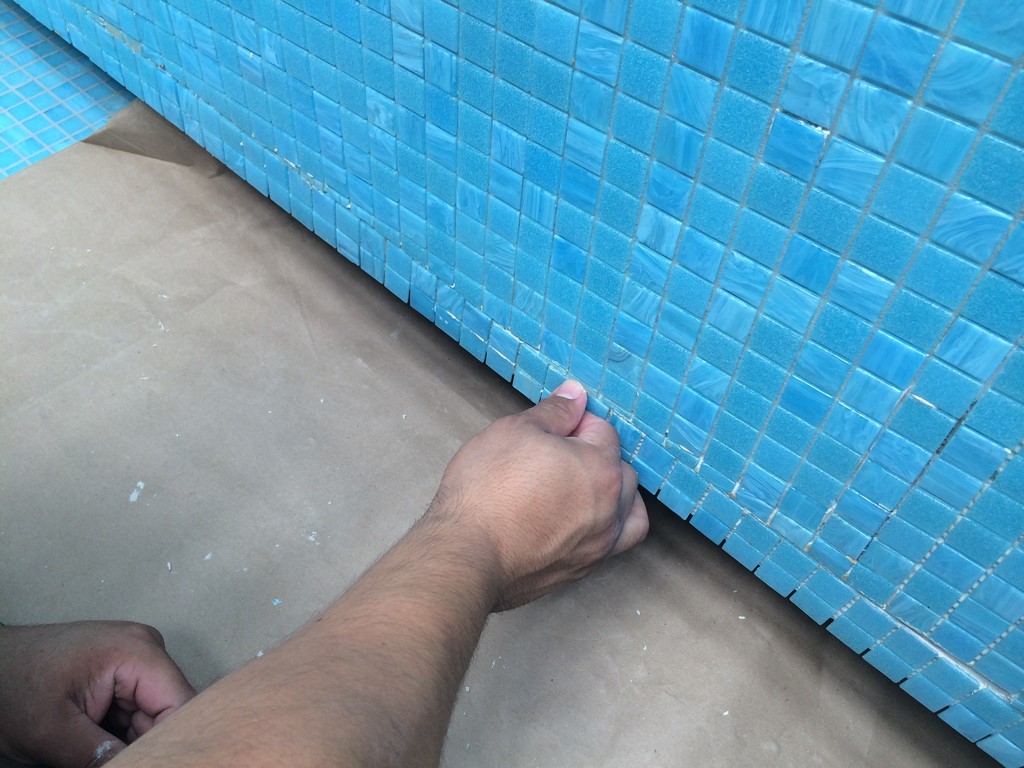
| Once all of the work of sealing and leveling the toe-kick penetrations was complete, we focused on tiling the floor – a task that occasionally called for an improvised scaffold. To be sure, tiling within the toe-kick area was laborious, whether it was about removing remnants of the tile backing or the cramped tile-application space around the pool’s full perimeter. But again, the polished look it provided made it well worth the effort. |
That may seem like a lot of extra work, especially when you consider that the foam itself basically needs to be cut away chunk by chunk once the concrete cures. But the look itself is amazing: By day, there are shadow lines that define the perimeter in a visually arresting way; by night with the lights on, the pool has an otherworldly appearance you just can’t achieve with wall-mounted points of light.
For an all-tile project such as this one, the foam inserts need to give us about an inch beyond the nominal four-by-four finished dimensions to work with so we can build up the surface and fit all of the grout lines into the overall grid. It takes a tremendous amount of patience and concentration to work in such confining spaces at such low levels, but the results are so cool that it’s worth it.
BENCHMARKS
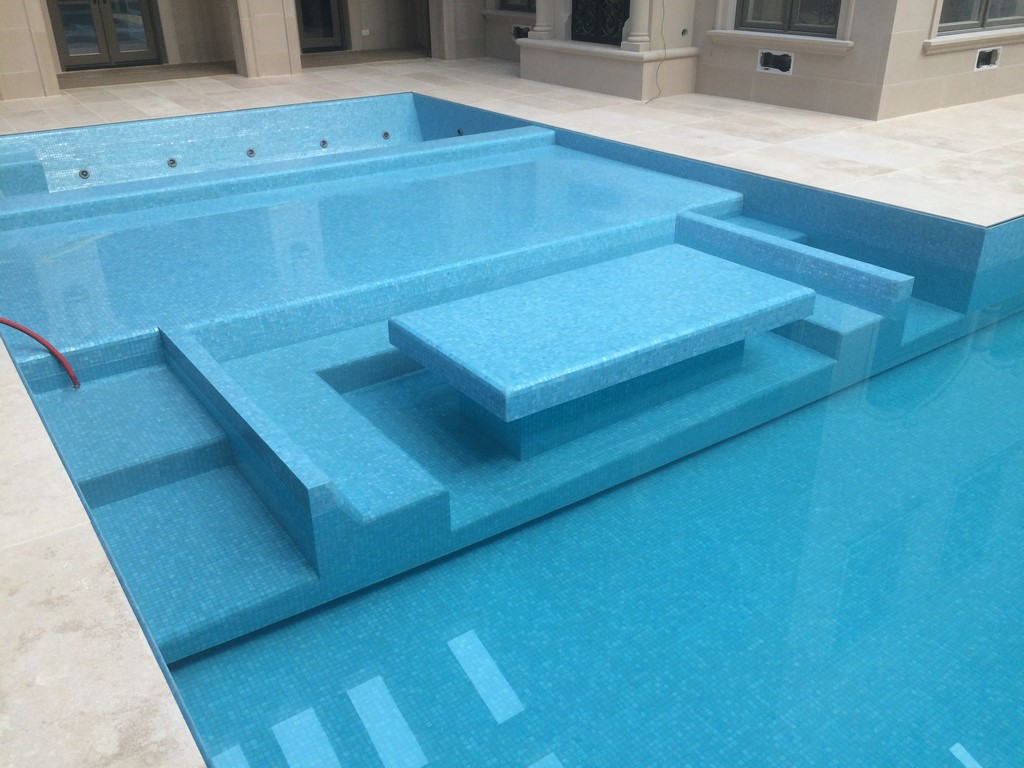
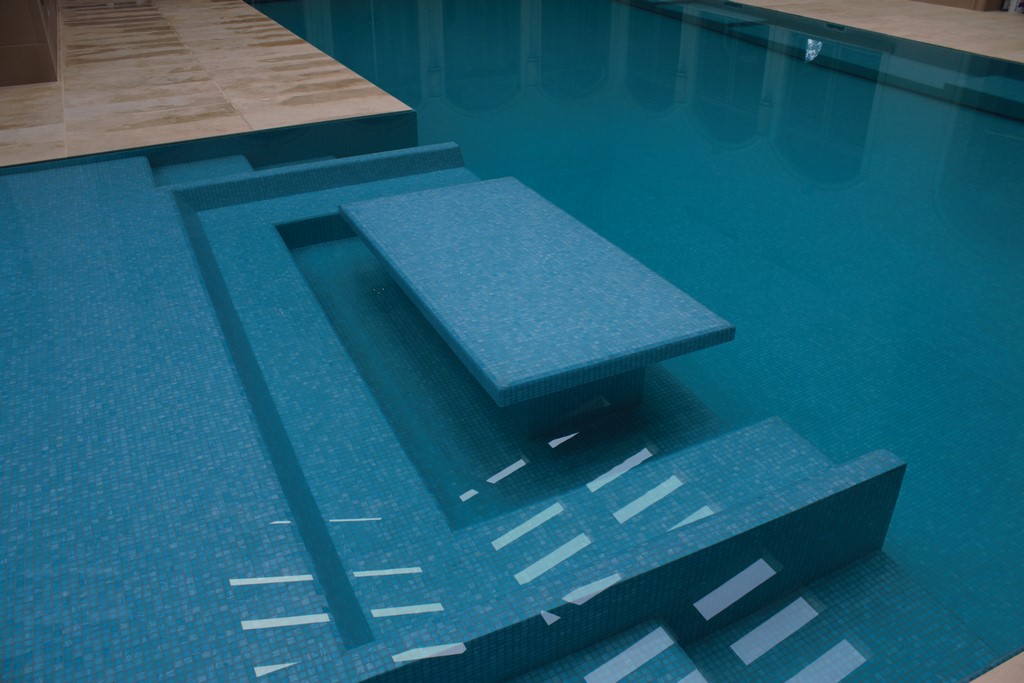
For this project, the other detail I want to discuss is also amazing – that is, the banquette seating in the in-pool dining area.
When I first saw the plans, I wondered why anyone would want to sit to eat at a tabletop just a bit above the pool’s waterline. I could only imagine the negative effects an accidental wave might have – a sneeze-generated tsunami?
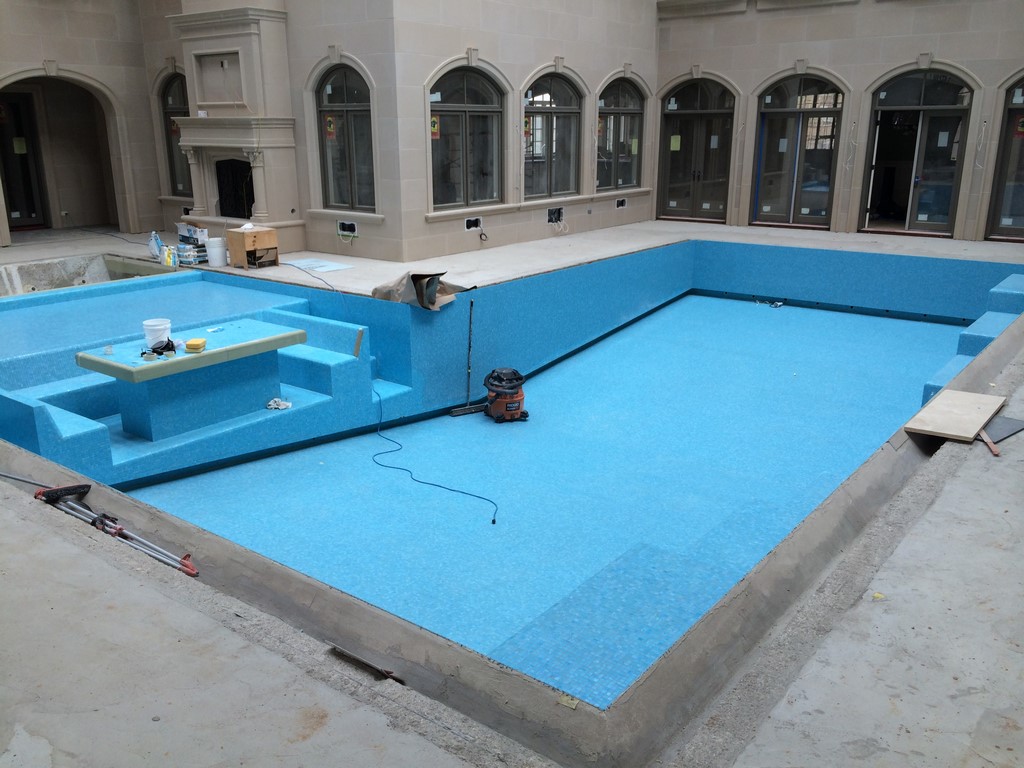
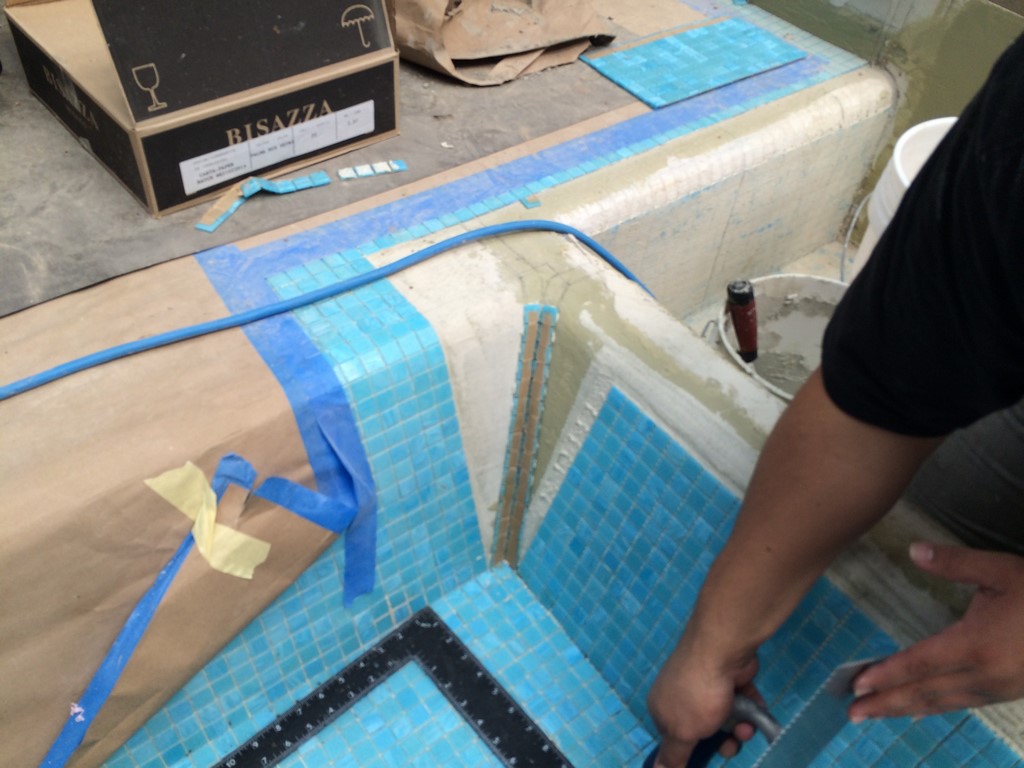
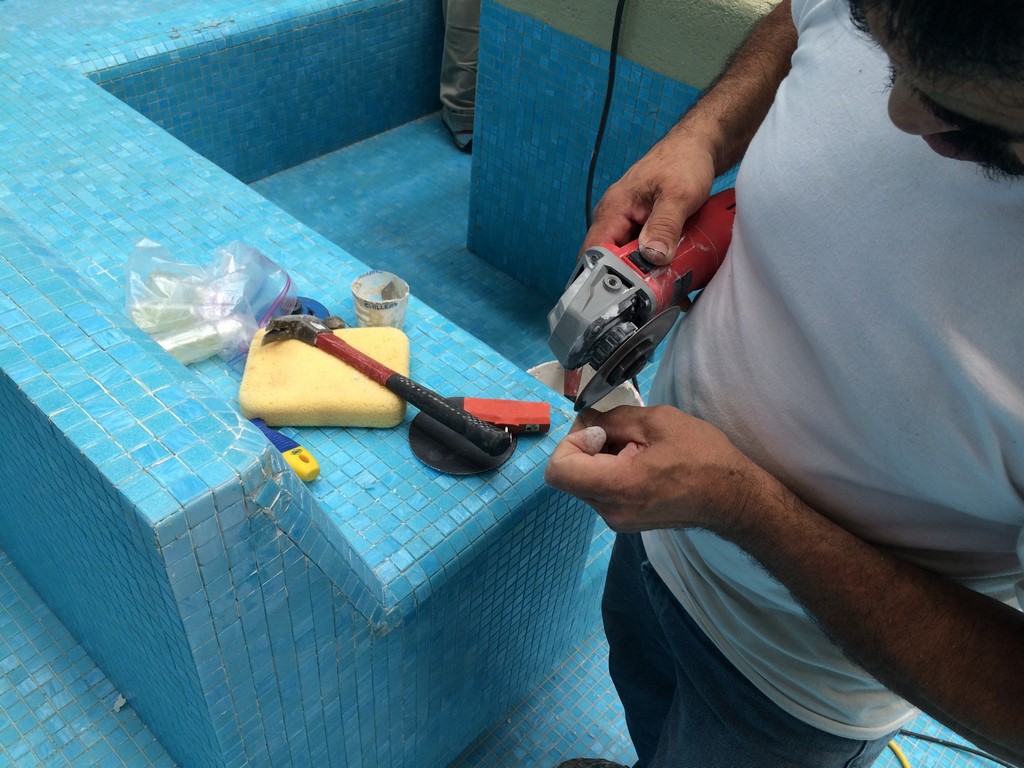
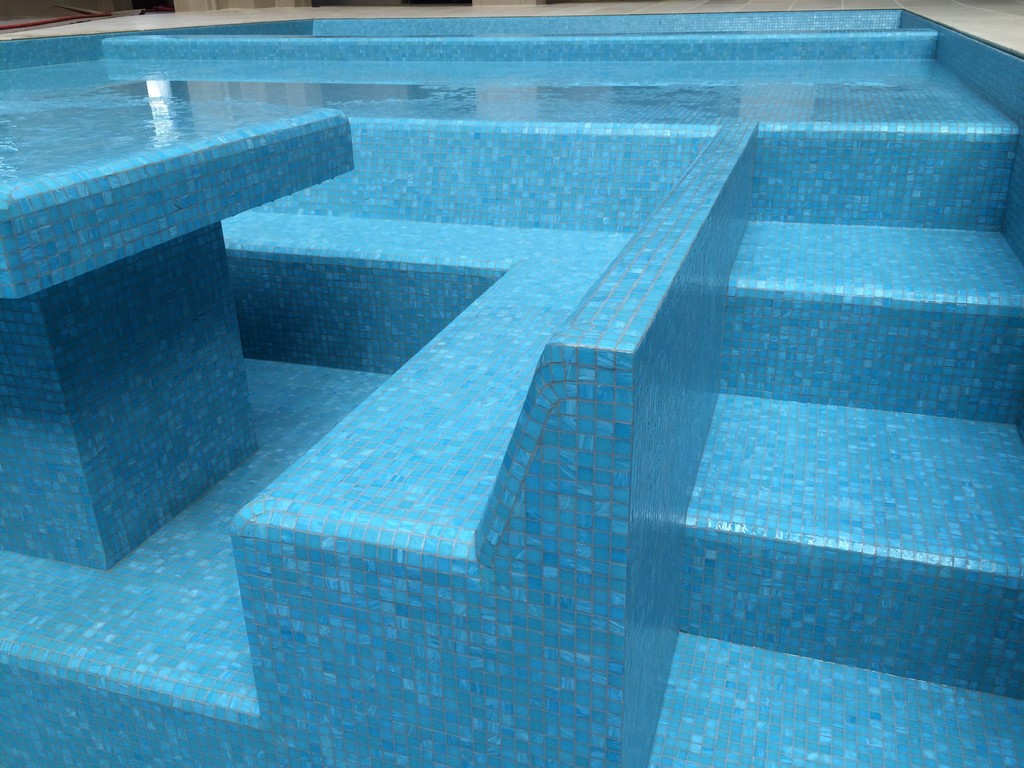
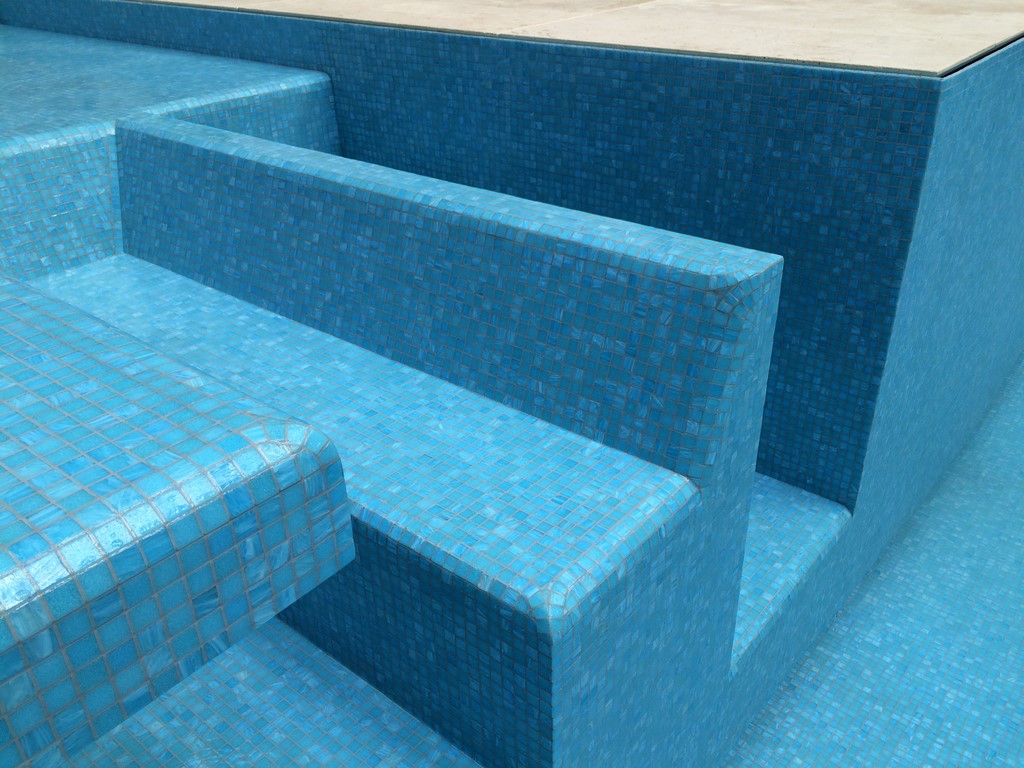
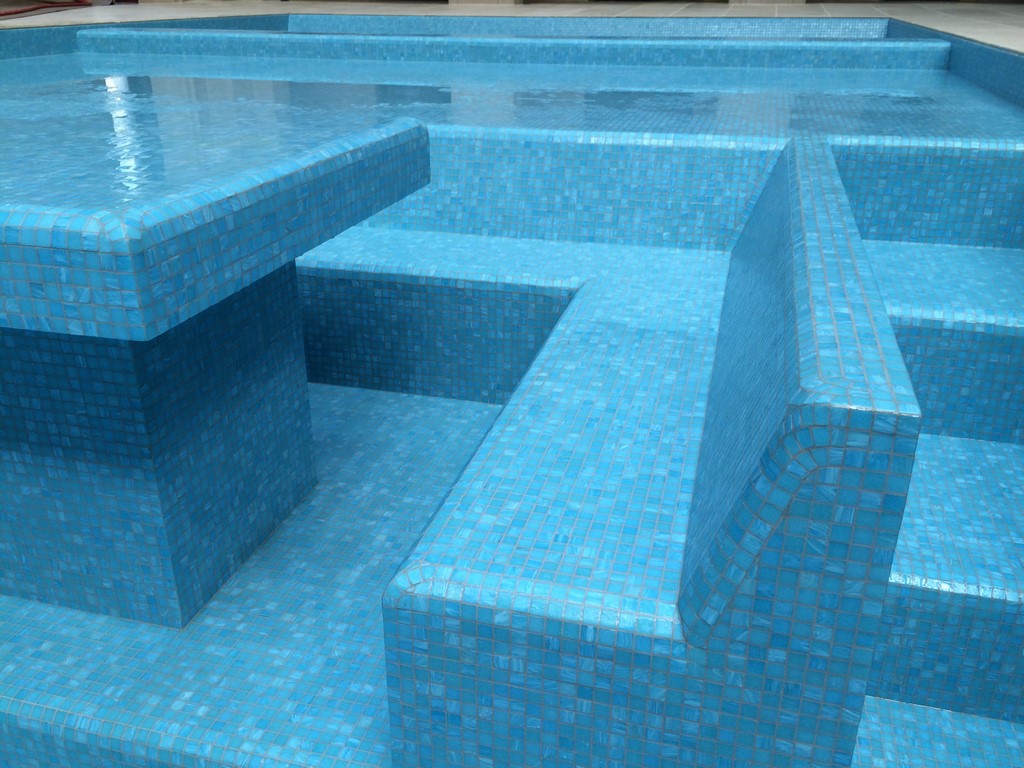
| The banquette seating and tabletop offered the usual set of challenges when it came to dealing with interior and exterior contours and edges. We started by ensuring that all dimensions were correct, then worked up to transitions where tile cutting became necessary. The inside corners were pretty straightforward, but making the outside edges look ‘upholstered’ required extra work – and insane, steady-handed skill with a grinder. |
But as it sank in, I recognized that what Doug Johnston was after was a re-creation of the sort of overstuffed, leather-covered benches that were a staple of “fancy” restaurants through the 1950s and ’60s. In our business, we’re often asked to put mosaic-tile rugs on the bottoms of pools and tanning shelves. This was the first time anyone had ever asked us to “upholster” a chair – truly an interesting challenge because tile isn’t an elastic material.
| The beauty of these tile-wrapped surfaces – all worked out so that no compromises were ever made – is a defining characteristic of our work on this massive project. We may still have our doubts about the tabletop’s utility as a dining surface, but the visual effect achieved by having it float over the toe kick just can’t be beat: refined, sleek and expressive. |
We did our homework and used our skills to translate our observations into the pool. We used lines of tile at the edges, for example, to suggest the piping that binds upholstered seams. And while there was no practical way to include diamond tucks in the “fabric” of the banquettes, we rolled the top to simulate the correct profile and were pleased that the toe-kicks were there to complete the structural impression. It’s not literal, but it’s very cool.
This is a project of a sort that only comes around once in a great while. These are opportunities for all of us at Rock Soild Tile to express ourselves as craftspeople and technicians – and also as artists who use tile as our medium.
Jimmy Reed is president of Rock Solid Tile, a tile design/installation firm based in Calabasas, Calif. He founded the company in 1985 after spending his teens and early 20s learning the tile-installation trade. In between, he attended Art Center College of Design (Pasadena, Calif.) and spent several years working in the entertainment industry. For the past 20 years, Reed has focused most of his creative energy on designing and installing tile finishes for high-end custom watershapes, a process that has seen him work with some of the industry’s leading designers and builders. He may be reached through his web site: www.rocksolidtile.com.


