Bent to Last
Watershapes come in lots of configurations and sizes, but when you get right down to it, they mostly share two basic materials of construction – concrete and steel – that in combination have the potential to withstand generations of use.
Fashioning these structures is at the heart of what watershapers do: Every-thing else, from the plumbing or the plaster to the tile or the decking, is really secondary. Sure, the pool won’t function without plumbing or look pretty without tile, but it wouldn’t even exist without its skeleton of steel and its concrete flesh.
For all that importance, however, most people tend to give the steel in particular little thought or care. It’s invisible once the gunite is in place, so there’s a tendency even among those who know better to blow it off and save a few bucks by using too little steel or by doing quick, sloppy work. And why should you care? No one will ever see what you’ve done, right?
Actually, given the role that steel plays in the durability and viability of the concrete structure, this should be the last place to compromise or slack off. To me, good steel is an insurance policy: It’s a way of guaranteeing that the structure of the watershape will do what it’s supposed to, for the long haul.
GOOD STEEL, GOOD PLANS
There’s a lot to good steel work, as we’ll explore here in detail, but all of it begins with a sound structural plan. That’s so fundamental that it would seem to go without saying, but in practice many problems start either with a plan that fails to meet structural needs or soil conditions – or with a contractor who can’t follow a good plan made by someone who knows what needs to be done.
In our work, we have the luxury of working with great engineers, including Ron Lacher, who’s written for WaterShapes, done seminars on structural engineering and is well known for getting structural engineering right. Whenever we get a plan from Lacher’s office, we know it is right for the soil conditions and the design – and that it will tell us exactly what to do, from spacing, sizing and radiuses to all of the design details, from skimmers to vanishing edges.
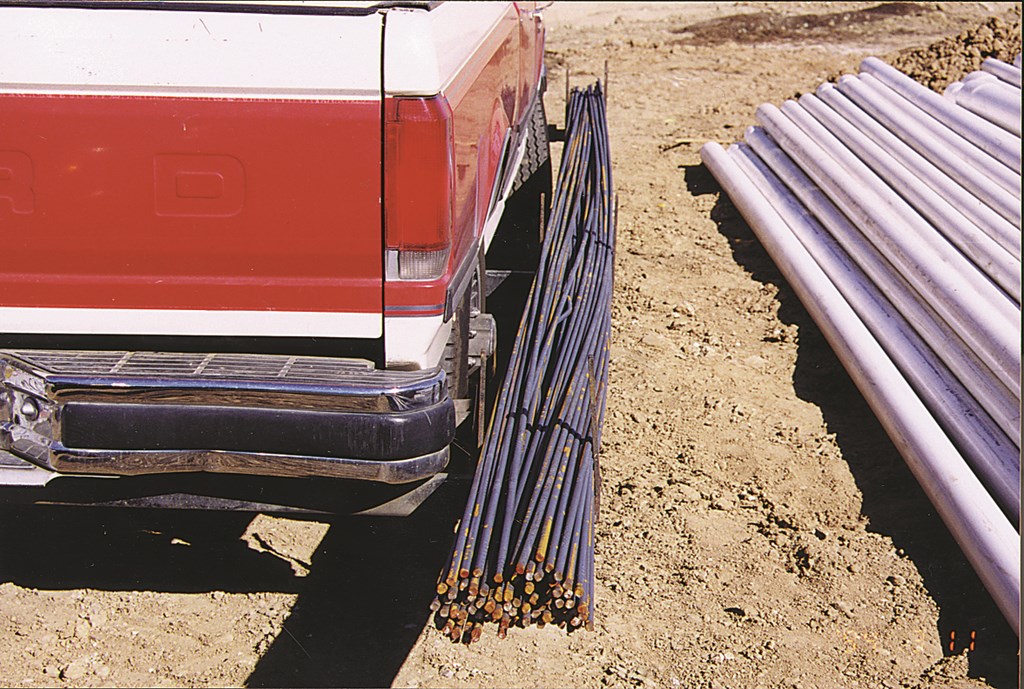
| We deliver our steel on site using special racks mounted on the sides of our trucks. The low height makes transferring the heavy rebar a much easier proposition – but it’s still hard work. |
Let me make an important point right up front: Even though watershapes of all types are growing in complexity when it comes to features, elevations and visuals, most of the structural elements – no matter how complex – are made up of what can be considered as “standard” design elements. This isn’t a minimum standard by any means; rather, what I’m saying is that many of these structural features are repeated over and over again from job to job.
For example, most residential pools built in our area have a standard 12-by-12-inch grid pattern, with additional reinforcement of the radius in the deep end with #3 or #4 rebar at 6 inches on center. That’s what I mean by “standard.” Of course, there are variations for deeper pools and watershapes set in challenging soil conditions, but you keep seeing standard structural details for skimmers, benches, edges and beams even in work that is otherwise highly customized.
|
Inside and Outside There are two basic ways to tie steel: You can either tie “bottom up” or you can tie “top down.” Here’s the distinction – and reasons why I prefer the former method to the latter. Working bottom up, you start by bringing the steel into the pool and then run it up in the deep end, splicing 20-foot bars along the full length of the pool and bending them to conform to the contours of the bottom. Then you place horizontal bars and work up the sides to the very top. With all the steel in the bottom of the pool, you bend the steel over at the forms to create the bond beam. That’s the way most people do it. The other way, top down, is where you first bend the right angles for the bond beam and hang them from the forms. After they’ve been hung all the way around the pool, then you splice onto these and criss-cross your way around the pool. Some people like that way because it looks a little neater. In a bottom-up pattern, however, there are far fewer splices, because you usually splice in the middle and go up the side and then bend it over the beam. In a top-down approach, there’s usually a lot more cutting and splicing. These approaches have nothing to do with the eventual structural integrity of the pool. It’s just about the way the steel looks before it’s shot – something that matters to some people. – L.L. |
Most of the mistakes made by steel companies occur because they haven’t followed these standard schemes – particularly when it comes to clearances.
If the plan calls for steel to be installed in a 6-inch-thick wall, the steel must be properly raised away from the dirt so that it will end up exactly in the middle of the wall, 3 inches from the inside and 3 inches from the outside. And it must be right on the button: If you’re off by just an inch, which is not hard if the steel crew isn’t careful, now you have 2 inches on one side and 4 inches on the other, and the structural integrity of the shell is compromised as a result.
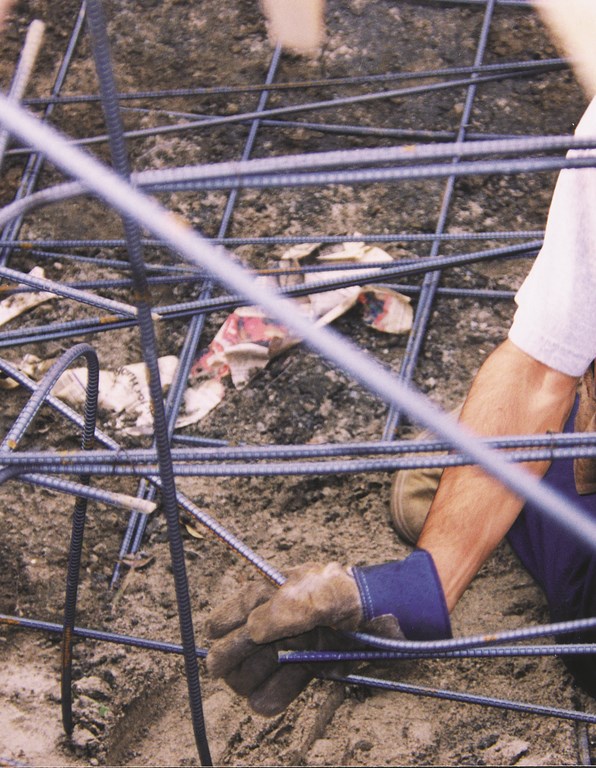
Getting the right clearances isn’t difficult. You take 2-by-3-inch concrete blocks and place them at regular intervals around the pool beneath intersections of steel bars. If the steel needs to be 2 inches off the soil in a 4-inch wall, you lay the blocks on their sides. If you need 3 inches, then you stand them up. If you need 4 inches, you stack two blocks flatways – and so on for whatever clearance you need.
It’s a simple concept, but it’s often ignored and results in shells in which the steel isn’t where the engineer says it should be – an error that can cause all sorts of problems.
STANDARD VARIATIONS
As I just mentioned, beyond the basic structure of walls and floors and bond beams, most watershapes will feature one or more details that must first be shaped in steel.
If the shell is to be set up in special conditions – on an upslope or downslope, for instance, or with a vanishing edge or a raised spa – then you should be given a plan detail that spells things out clearly. It always amazes me (and scares me, frankly) to see steel guys making these shapes without a proper plan. There’s no reason for it, because most of those details are also highly standardized.
Take the downslope situation: The big difference here is that the walls will be thicker, with perhaps 6-1/2 inches of clearance behind the steel and 4-1/2 inches in front. All that extra concrete is in the radius, which is where the shell needs more support. In these situations, it’s critical to work per plan. If you don’t, the pool might fail: “Close” simply isn’t good enough under such conditions.
(Our company has installed steel on more than 35,000 pools, many on hillsides and in expansive soils and all of them in seismically active Southern California. As far as I know, our failure rate is practically zero – not a single crack we’re aware of, and we know it’s all because we follow plans that have been set up with proper engineering principles and in response to surrounding conditions.)
| A tool called a Hickey bar is truly indispensable when it comes to bending small-gauge steel on site. With two of them in hand, the steel can be turned to any angle you need – particularly handy in setting up beams. |
Beyond ensuring the structural integrity of a pool, adherence to plans is especially crucial at the steel stage because this is where the important dimensions of the pool are truly being established. Inspectors are supposed to monitor this and make certain dimensions are right.
The first inspection comes after steel and plumbing are done, and one of the key things the inspectors look for is proper blocking. This is a good thing, because sometimes the plumbers will come in after us, step on the steel, rotate the cage a bit and knock bars off of the blocks. At that point, we’re called back to reposition the blocks.
But in my experience, the inspectors who follow steel crews often do not look at the details closely enough, so we believe it is incumbent upon us to go in and make sure what we’re doing exactly reflects what the engineer has put on the page before the concrete is applied. The way we look at it, if we don’t catch the mistakes, the job will proceed and the resulting shell may not be built according to specifications.
Of course, there’s a step that happens before the steel company comes on site that also has a lot to do with the overall quality of the execution when it comes to dimensions and elevations – that is, the excavation, which we’ll discuss next.
DOWN IN THE DIG
Accuracy in steel configuration absolutely flows from accurate excavation – and, once again, from the plans created by the designer or builder.
As the pool is dug, the soil is carved according to these plans. By the time the steel contractor arrives on site, the shape of the soil and forms should define the interior contours of the watershape and elevations – at which point we step in to “tie” the vessel according to the dig.
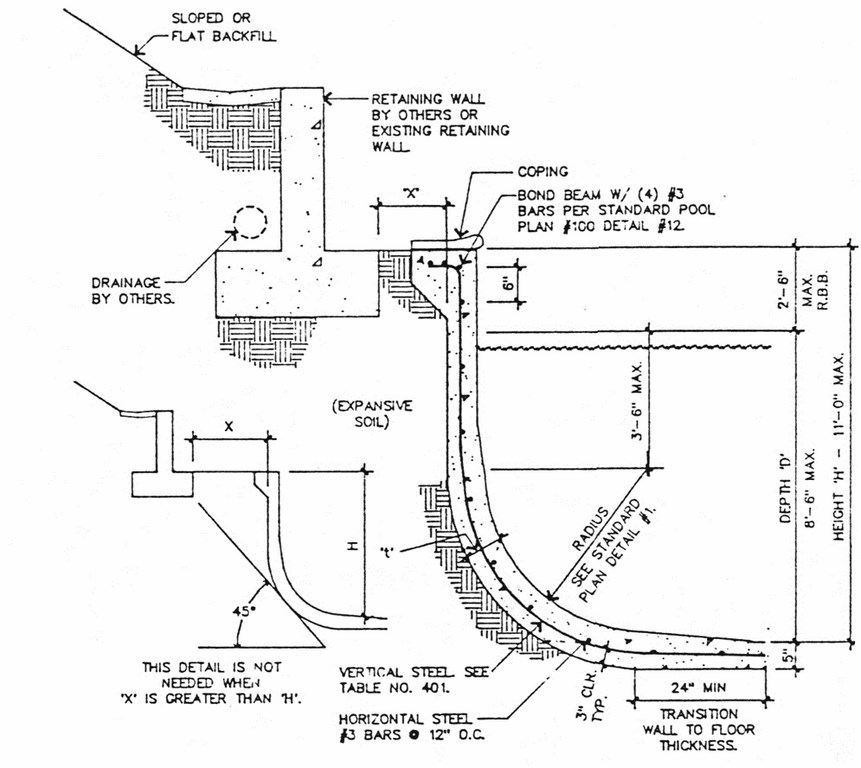
| The work of a steel crew is much simplified if the designer/engineer provides adequate, accurate plan details, such as those shown here. These plans offer guidance for everything from simple structures such as a standard wall section in expansive soil (left) to critical ones such as those designed to work in proximity to slopes and retaining walls (right). |
The first thing we always do is check to see if the dig conforms to the plans we have in hand. That’s vitally important: You’d be surprised by the mistakes we find – a missing love seat, for example, or an elevation or position that’s slightly off. We’ve found that it pays to watch plans very carefully at this stage to be sure that the features the customer wants are actually reflected in the excavation.
If adjustments need to be made, now’s the time to make them. At this point, it’s relatively easy to change the shape of the watershape, eliminate a feature or add a new one. It’s also possible here to “alter” the design a bit rather than go back and correct a problem – an especially common solution when it comes to the dig being slightly out of position on the site. Regardless of what decision eventually is made, it’s our responsibility to point out any mistakes the excavator has made so that the builder and the customer can decide how best to proceed.
|
Before or After? In addition to the excavator and the gunite contractor, the plumber links his or her performance on our ability to lay out steel. The main issue between our trades is one of timing. Sometimes plumbers come in after the steel is installed; other times, they’ll install the plumbing in the hole before the steel goes in; in still other cases, the two trades work on site concurrently. In our experience, it works best when we install the steel after the plumbers have run their lines – and I think most plumbers would agree. Still, there’s really no right or wrong way to do it, so long as all eyes are fixed on the plan. When plumbers show up after the cage is in, for instance, we’re always careful to recheck spacing and clearances after they’ve left. It’s also a good idea to tie every other intersection of steel if you know a plumber will follow you. It doesn’t add that much time to the project – and it really makes sense when it comes to being sure that nothing will be knocked out of place. There are some obvious instances where it makes more sense for plumbers to come in after the steel has been set, such as when they’re hanging jets in a spa’s dam wall. If there’s no steel cage there, it can be very difficult for them to eyeball the location of the wall. Once the steel is there, however, the cage acts as a guide. Otherwise, if we have to conform that wall to the plumbing, the spa might turn into an oval rather than the circle everyone wanted. If work is being done concurrently, we’ve found it best to coordinate the installation so plumbers are busy in areas where we aren’t. We’ll have them set up the main drain while we work in the shallow end, for example, and on the skimmer before we get to the bond beam’s steel. – L.L. |
Getting back to the elevations for a moment: When a watershape is built, the elevations should always be within 1/4 to 1/16 of an inch or less. That’s not rocket science, but it’s a pretty tight construction tolerance over a long perimeter. We’re always aware that it’s easy to knock things out of level once work begins – and that if we don’t catch the errors, then the gunite contractor might come out and shoot the pool according to steel and forms that aren’t set correctly.
From this point forward, the problems associated with errors multiply in severity. Shell elevations relate to things like slopes, adjacent structures, proper drainage and associated slabs, and “missing” even by as much as 1/16 of an inch can matter. (It should come as no surprise that missed elevations account for the most expensive of all mid-project corrections.)
What should happen (and does happen when you work with quality people) is that every trade should come in and check for deviations from the plan – but that doesn’t always happen. We’ve also seen instances where a major detail like a raised bond beam hasn’t been accounted for at all or hasn’t been set at the right level. That’s a huge mistake, but you do run into these things – and my point is that it’s easy to miss even these huge details if you aren’t following a plan.
There also are times when the plans don’t give us a detail we know we need. For example, if we’re working in a downslope configuration but the plans do not include a detail of the sort we’re accustomed to seeing, we’ll go ahead and include the extra steel in accordance with a standard plan we work with all the time.
We feel confident and comfortable making these decisions on site because we know that if we don’t address the problem in the here and now, it’s almost certain the inspector will make the call and insist that more steel be added in certain locations. That will certainly hold up the job, so we’ll find the necessary plan and often take it upon ourselves to do the job correctly.
WORKING WITH THE PLAN
There are certain features with which this need for plan details often arises. If a design includes artificial rock or an elevated waterfeature of some kind, for instance, you can be certain of a need for added structural reinforcement and should ask for a plan detail if it’s not there. Or if we’re installing a vanishing edge, we want to be sure we know the exact elevation of the edge. And if we’re working with an octagonal spa, we’ll be sure that the sides are formed at precise angles and lengths.
Experience is a huge help here. Every job we do offers us measures of guidance in all the other jobs we do, and we always strive to get things right knowing that all the trades that follow us right through the entire construction process will echo any mistakes we’ve made.
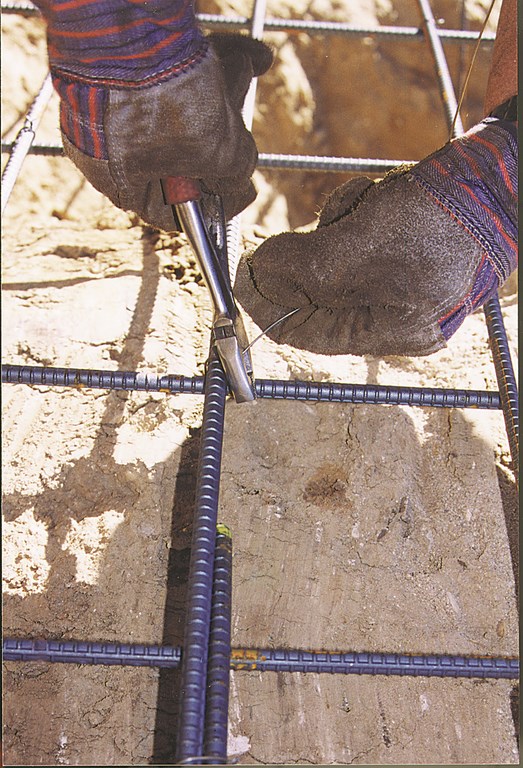
| Tying steel isn’t so much an art form as it is a skill that requires attention and care. We bind about 50% of the intersections in our watershapes, basically because we don’t want anything at all to move once we’re ready to turn things over to the next crew. |
Given the seriousness of that responsibility, it’s nice to know that what’s appropriate for a tiny rectangle is generally appropriate for a free-form goliath in structural terms. In fact, shape and style don’t make nearly the difference that surrounding soil conditions do. True, when you get to greater depths (such as those you’ll find in a commercial pool) you’ll see increased radiuses, more steel and thicker walls. But again, the basic engineering required to make a watershape work in given soil conditions at a given depth will remain the same from job to job.
Experience also teaches us that following a plan doesn’t necessarily mean going with the bare minimums. At 8-1/2 feet, for example, you’re going to have a 5-foot radius with steel installed on 6-inch centers in the radius and a 6-1/2-inch gunite thickness. If you have expansive soils, however, that thickness should be 9 inches.
The difference in cost here is insignificant, so we recommend that people always build for expansive conditions. What’s a yard of concrete weighed against the extra stability it gives the shell? (Personally, I divide quality builders from the rest of the pack by their willingness to do it the right way and not stick to the minimums.)
The great thing here is that all of these factors, variables and dimensions are known to engineers and experienced steel contractors. This standardization helps streamline the estimating and planning of jobs.
We estimate materials based upon perimeter and square-footage measurements. If you have a 15-by-30 foot rectangle, we’d count that as 90 perimeter linear feet and about 500 square feet in surface area. We know that’s going to take about 1,500 pounds of steel – just about average for residential pools installed in our area. If we do a 20-by-40 foot rectangle, which is 120 perimeter feet and 800 square feet, the steel requirement rises to nearly one ton.
MAKING THE SHAPE
Once we’ve signed on, the steel work comes together pretty quickly.
We have a yard at our facility where steel is delivered in 25-ton loads. Two-person crews transfer the steel required for any given job to our own vehicles for transportation to the site. These vehicles feature low, side-mounted racks so the material doesn’t have to be moved too far or lifted too high.
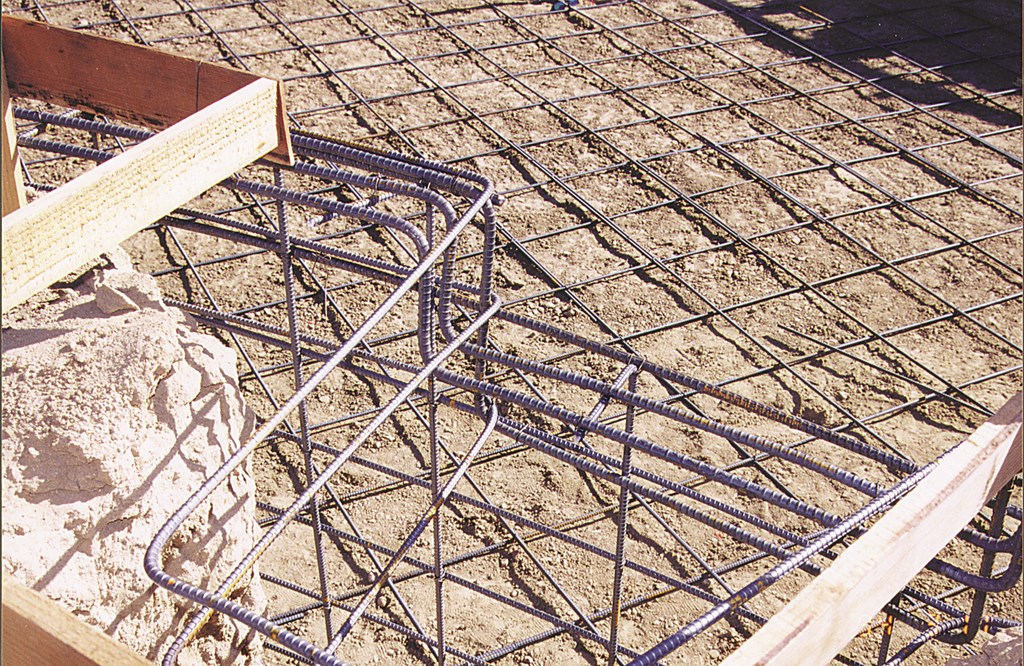
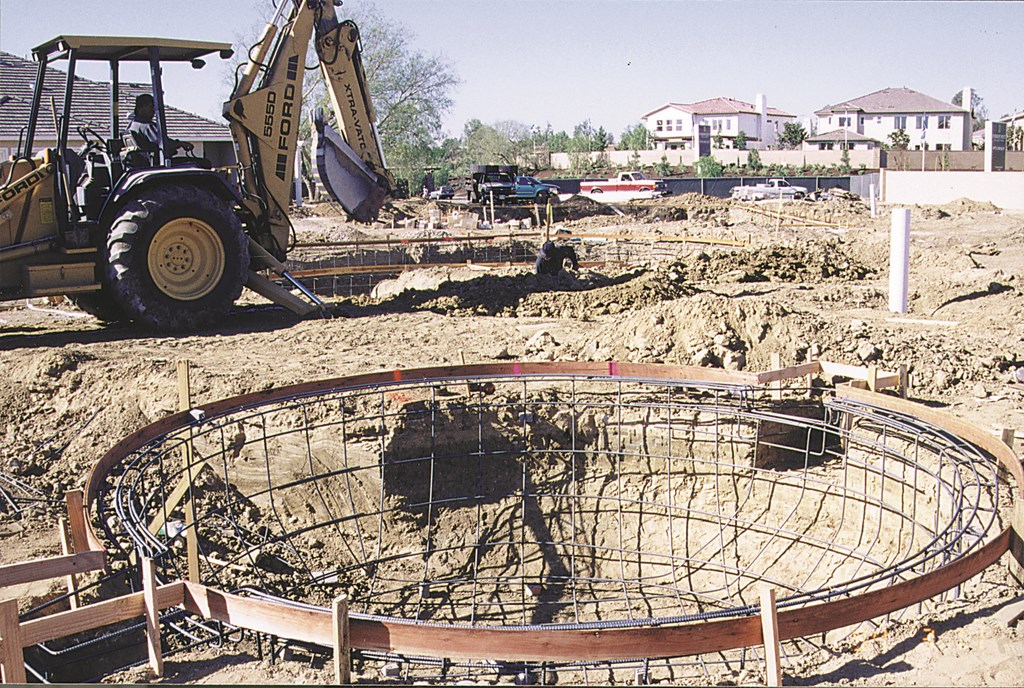
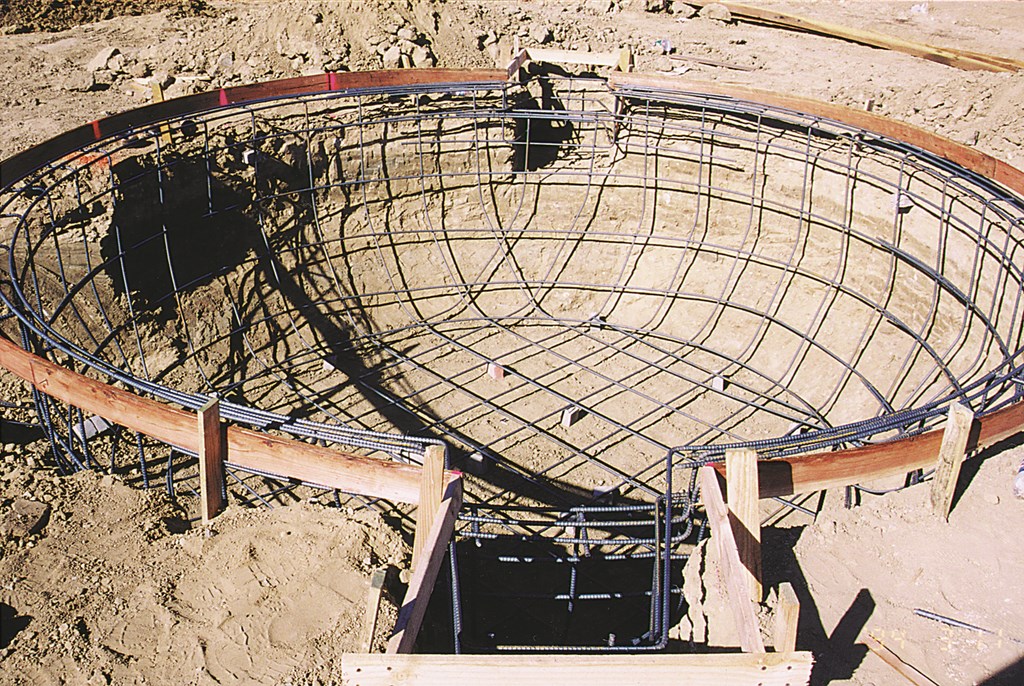
| True circles are easy to fashion when the dig is good and the forms are true. Note that we work about six inches below the forms in setting up the cage (left). When we insert the blocks (right), the cage rises up in the hole to just the right elevation. |
As delivered, the steel comes in 1-ton bundles, but it’s also sub-bundled for easier handling and loading. When we get to the job, the crew normally unloads the steel where the tractor comes in. We lay the bars, which we always get in 20-foot lengths, in one spot and then move them as needed to all parts of the backyard.
|
All Tied Up There’s no code governing steel ties and how often they should be made, so inspectors aren’t concerned. As a rule, however, most companies tie a minimum of about 30% of the intersecting points of the steel, although I’ve heard of some people doing as little as 10%. For my part, I always tell my people to go the extra distance and tie at 50% of the intersections, basically because it helps the steel stay in place through thick and thin. After we leave, all sorts of people will be walking on our work and using it to climb in and out of the pool. As a result, there are lots of opportunities for the steel to be moved or to be knocked off the blocks before the gunite is shot. If every other junction has a tie, we’re fairly certain things won’t move enough to matter. It’s an insurance policy. Beyond the frequency question, the main issue in tying is how you “dress” the tie once it’s done. In our case, we don’t want to leave pieces of wire dangling off the tie, nor do we want to leave any of the trimmings behind. The thinking is that they might rust and cause cosmetic problems later on. Frankly, I think that any time you see rust from a tie wire, it’s most likely because the gunite was applied too thinly across the top of the steel. It shouldn’t even be close: That’d be one wild piece of wire sticking up above the steel more than three or four inches! As for the tying itself, there’s no real trick to it, just a matter of wrapping, twisting and snipping the wire. We use 16-gauge black annealed tie wire – pretty standard. – L.L. |
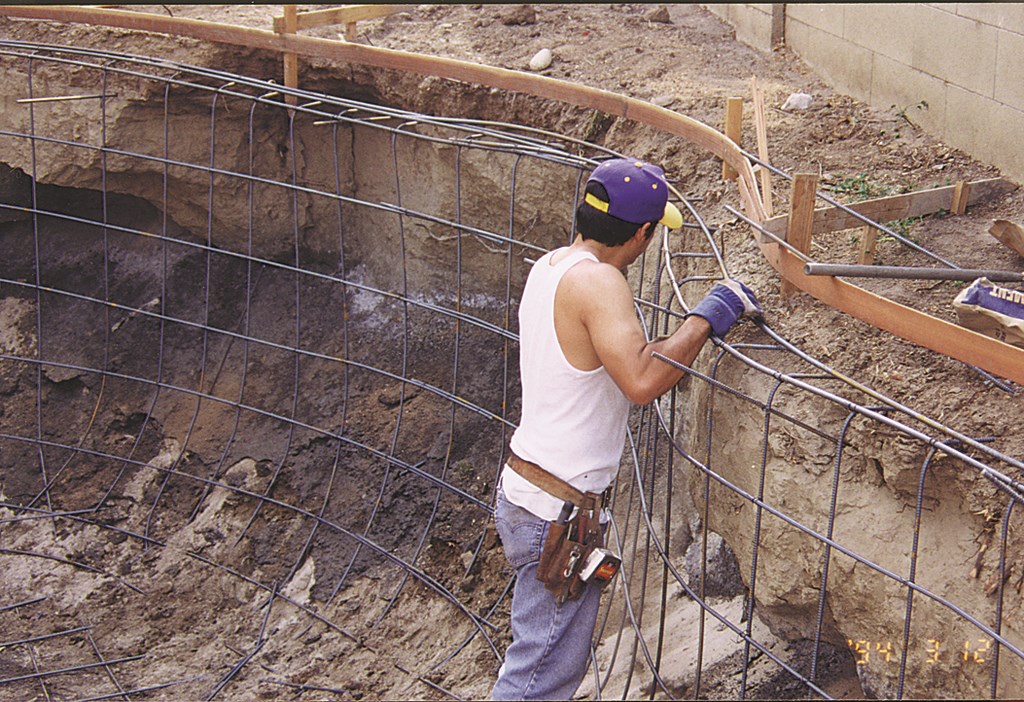
People often compare building steel cages to basket weaving, and I think that’s a pretty good analogy. We’re working with bendable material placed in intersecting patterns. And just as making baskets is easier when you have a form to guide you, bending steel to its proper shape is really pretty easy when you have a nice excavation: You simply bend it to mimic the contours of the excavation.
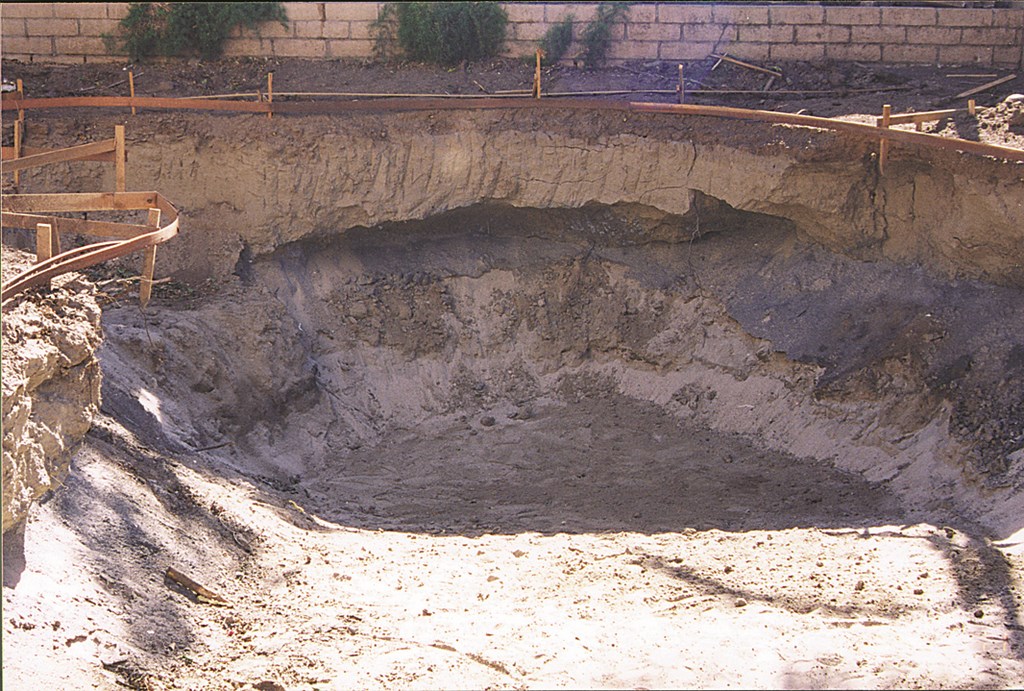
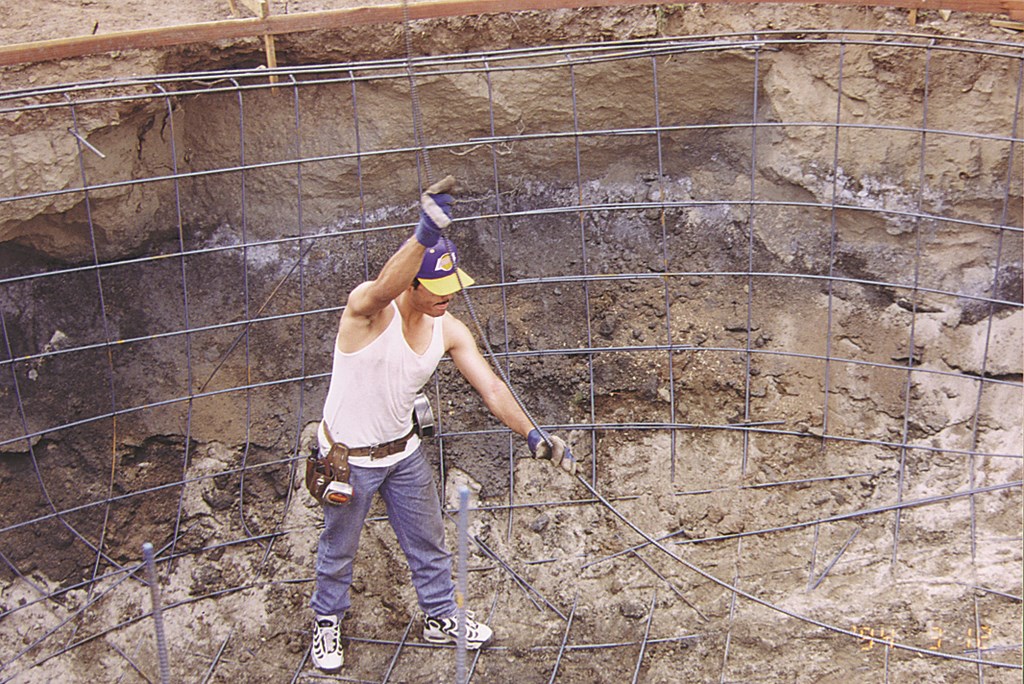
With a good dig, we just follow along, check the plans and maintain the proper clearances, spacing and elevations. Things get tougher, however, when you have to eyeball it – as with a deep-end ramp. Here, we have to build freestanding walls just as though the dirt were there, visualizing and following the shape of the pool to create the feature with the steel cage. It also gets tricky if sections of the dig collapse – as shown in the in the four pictures below, for example. These are times that truly test your eyeballing abilities.
Again, the standardization factor really works in our favor: There simply aren’t too many of these details we haven’t seen before – many times. So long as we have a good set of plans and a Hickey bar to bend sharper angles, we’re on our way. On a typical pool, we’ll set up the steel cage 6 inches below the top of the forms, then elevate the whole cage 3 inches by blocking it up. Now it’s 3 inches below the forms, right where it should be – and we’re just about done except for our final, pre-gunite inspection.
TOUGH WORK
In all of this discussion of how simple setting up a steel cage can be – with good plans and a good dig, that is – I have yet to mention that installing steel is one of those jobs that can be both physically grueling and mentally demanding.
It’s truly hard to find people who are good at steel work and will do it for very long. It’s stoop labor: You bend over a lot of the day and are constantly lifting, positioning and wrestling with heavy material. It can get old in a hurry.
In our company, we’ve been lucky enough through the years to hire experienced people, but for the most part we train our own crews. And when we find people who are really good at this work, we do all we can to take care of them and keep them happy, because they’re hard to replace.
| It’s a real pain: Excavated walls sometimes collapse (left) and make an unholy mess of wooden forms (middle left). In these cases, the steel crew must have the ability to ‘fill in the blanks’ and shape the cage as though nothing were the matter (middle right and right). This skill in eyeballing contours is one of the hallmarks of a capable steel contractor. |
To be good at it, you have to work smart and take care of yourself. We constantly remind our people to lift only what the body will handle and not to move too fast, but rather to work steadily and efficiently. The reasons for this are obvious: With such hard work, it’s easy to get tired, which in turn leads to injuries or mistakes of the kind we all try to avoid by taking care to follow the plan.
We take pride in the fact that good steel jobs, along with good excavation work beforehand and good gunite application afterwards, really create watershapes. As the intermediate stage of the process, we see our role as the pivotal one and get a lot of satisfaction out of knowing that what we do makes concrete shells stable for the long haul.
Larry Long is founder and president of Long’s Swimming Pool Steel in Anaheim, Calif. He began his career as a teenager, working part-time and tying steel with his father in the 1960s. Long founded his own company in 1972 and has since installed the steel for approximately 35,000 residential and commercial swimming pools in Orange County. Today, the firm not only ties steel but also offers services in excavation, remodeling and artificial-rock fabrication. Long now runs his company with his son, Larry Long, Jr.


