


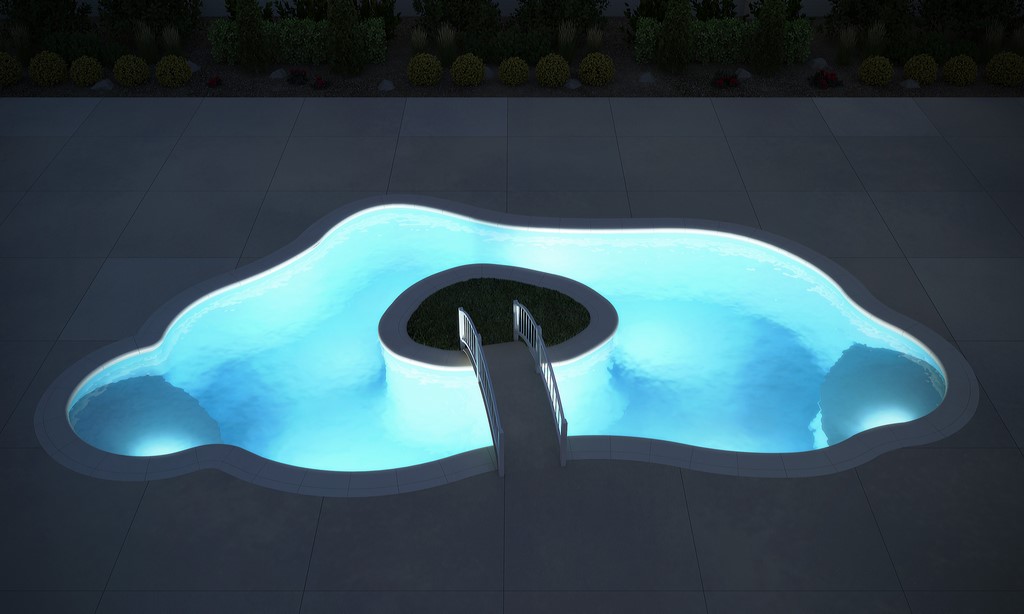
Shaping with Light
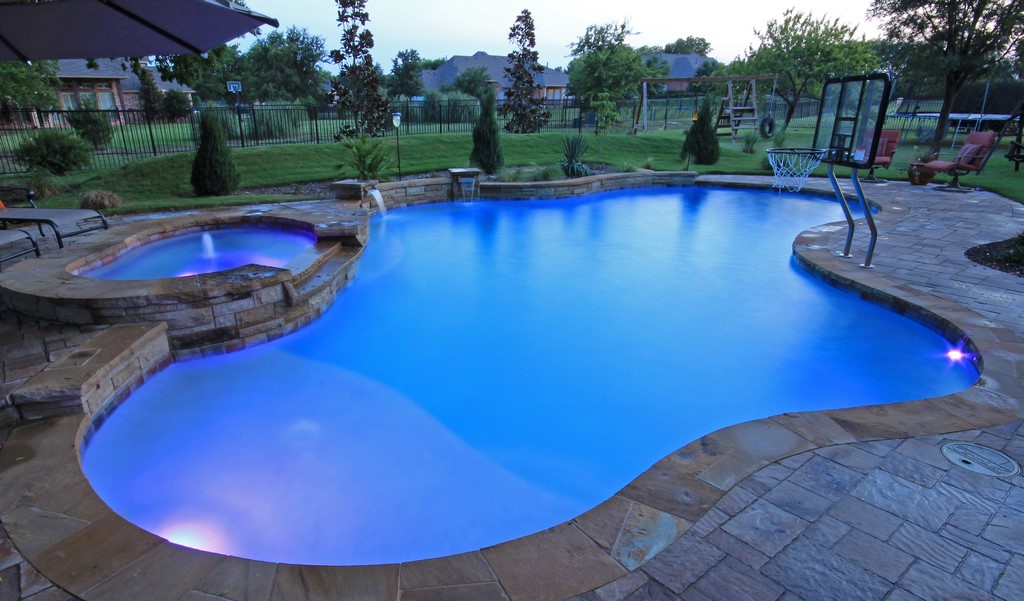

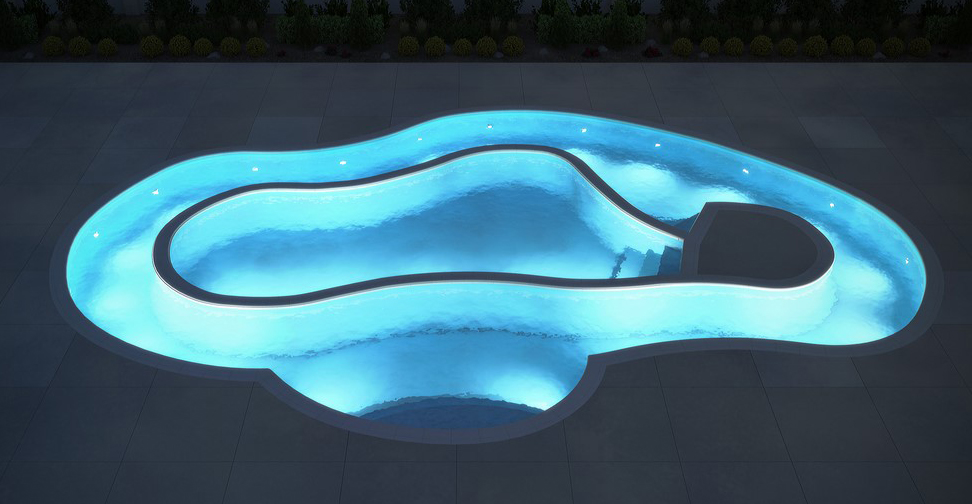
These days, using LED lights to illuminate rectangular or kidney-shaped pools is pretty simple: You just space the fixtures out at proper intervals on a wall facing away from prime viewing spots inside the house and on deck, specify the appropriate wattage, hook them up to a suitable control system and step back to bask in the warm nighttime glow.
But that sense of routine quickly disappears when designers work on more complex projects where planes, levels and contours multiply and the lighting challenge becomes an art form mixed with practicality. It’s all about achieving the same sort of welcoming glow, of course, but now it’s in spaces that are much less cooperative and forgiving.
In the most recent article in this series (click here), we looked at approaches to lighting the simplest pool shapes. This time, we’ll complicate matters in a big way by moving beyond rectangles and kidneys to consider lighting some of the more complex features found with today’s increasingly customized watershapes.
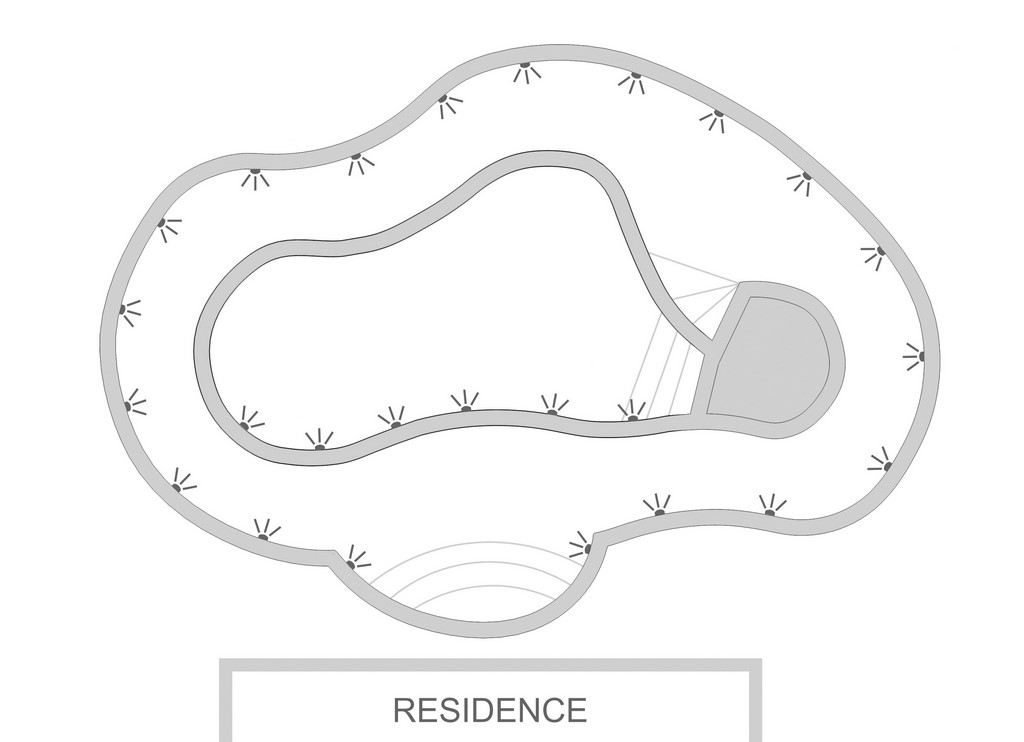
Shallow Lounging Areas
Also known as wet decks, sun shelves or Baja shelves, these features have increased in popularity in recent years – and it’s no wonder, because these shallow lounging areas are great for children at play as well as for thoroughly relaxed sunbathers.
Lighting these areas for safety or any other purpose was basically impossible before the advent of nicheless LED fixtures and accent lights. With these smaller LEDs, all it takes is placing them four inches below the surface to light a shelf beautifully by night.
The key here is making certain all parts of these lounging areas – all corners and coves – are adequately illuminated. It’s obviously a safety issue for people walking around the lounging area, but it’s also more attractive if the entire area serves up an even glow.
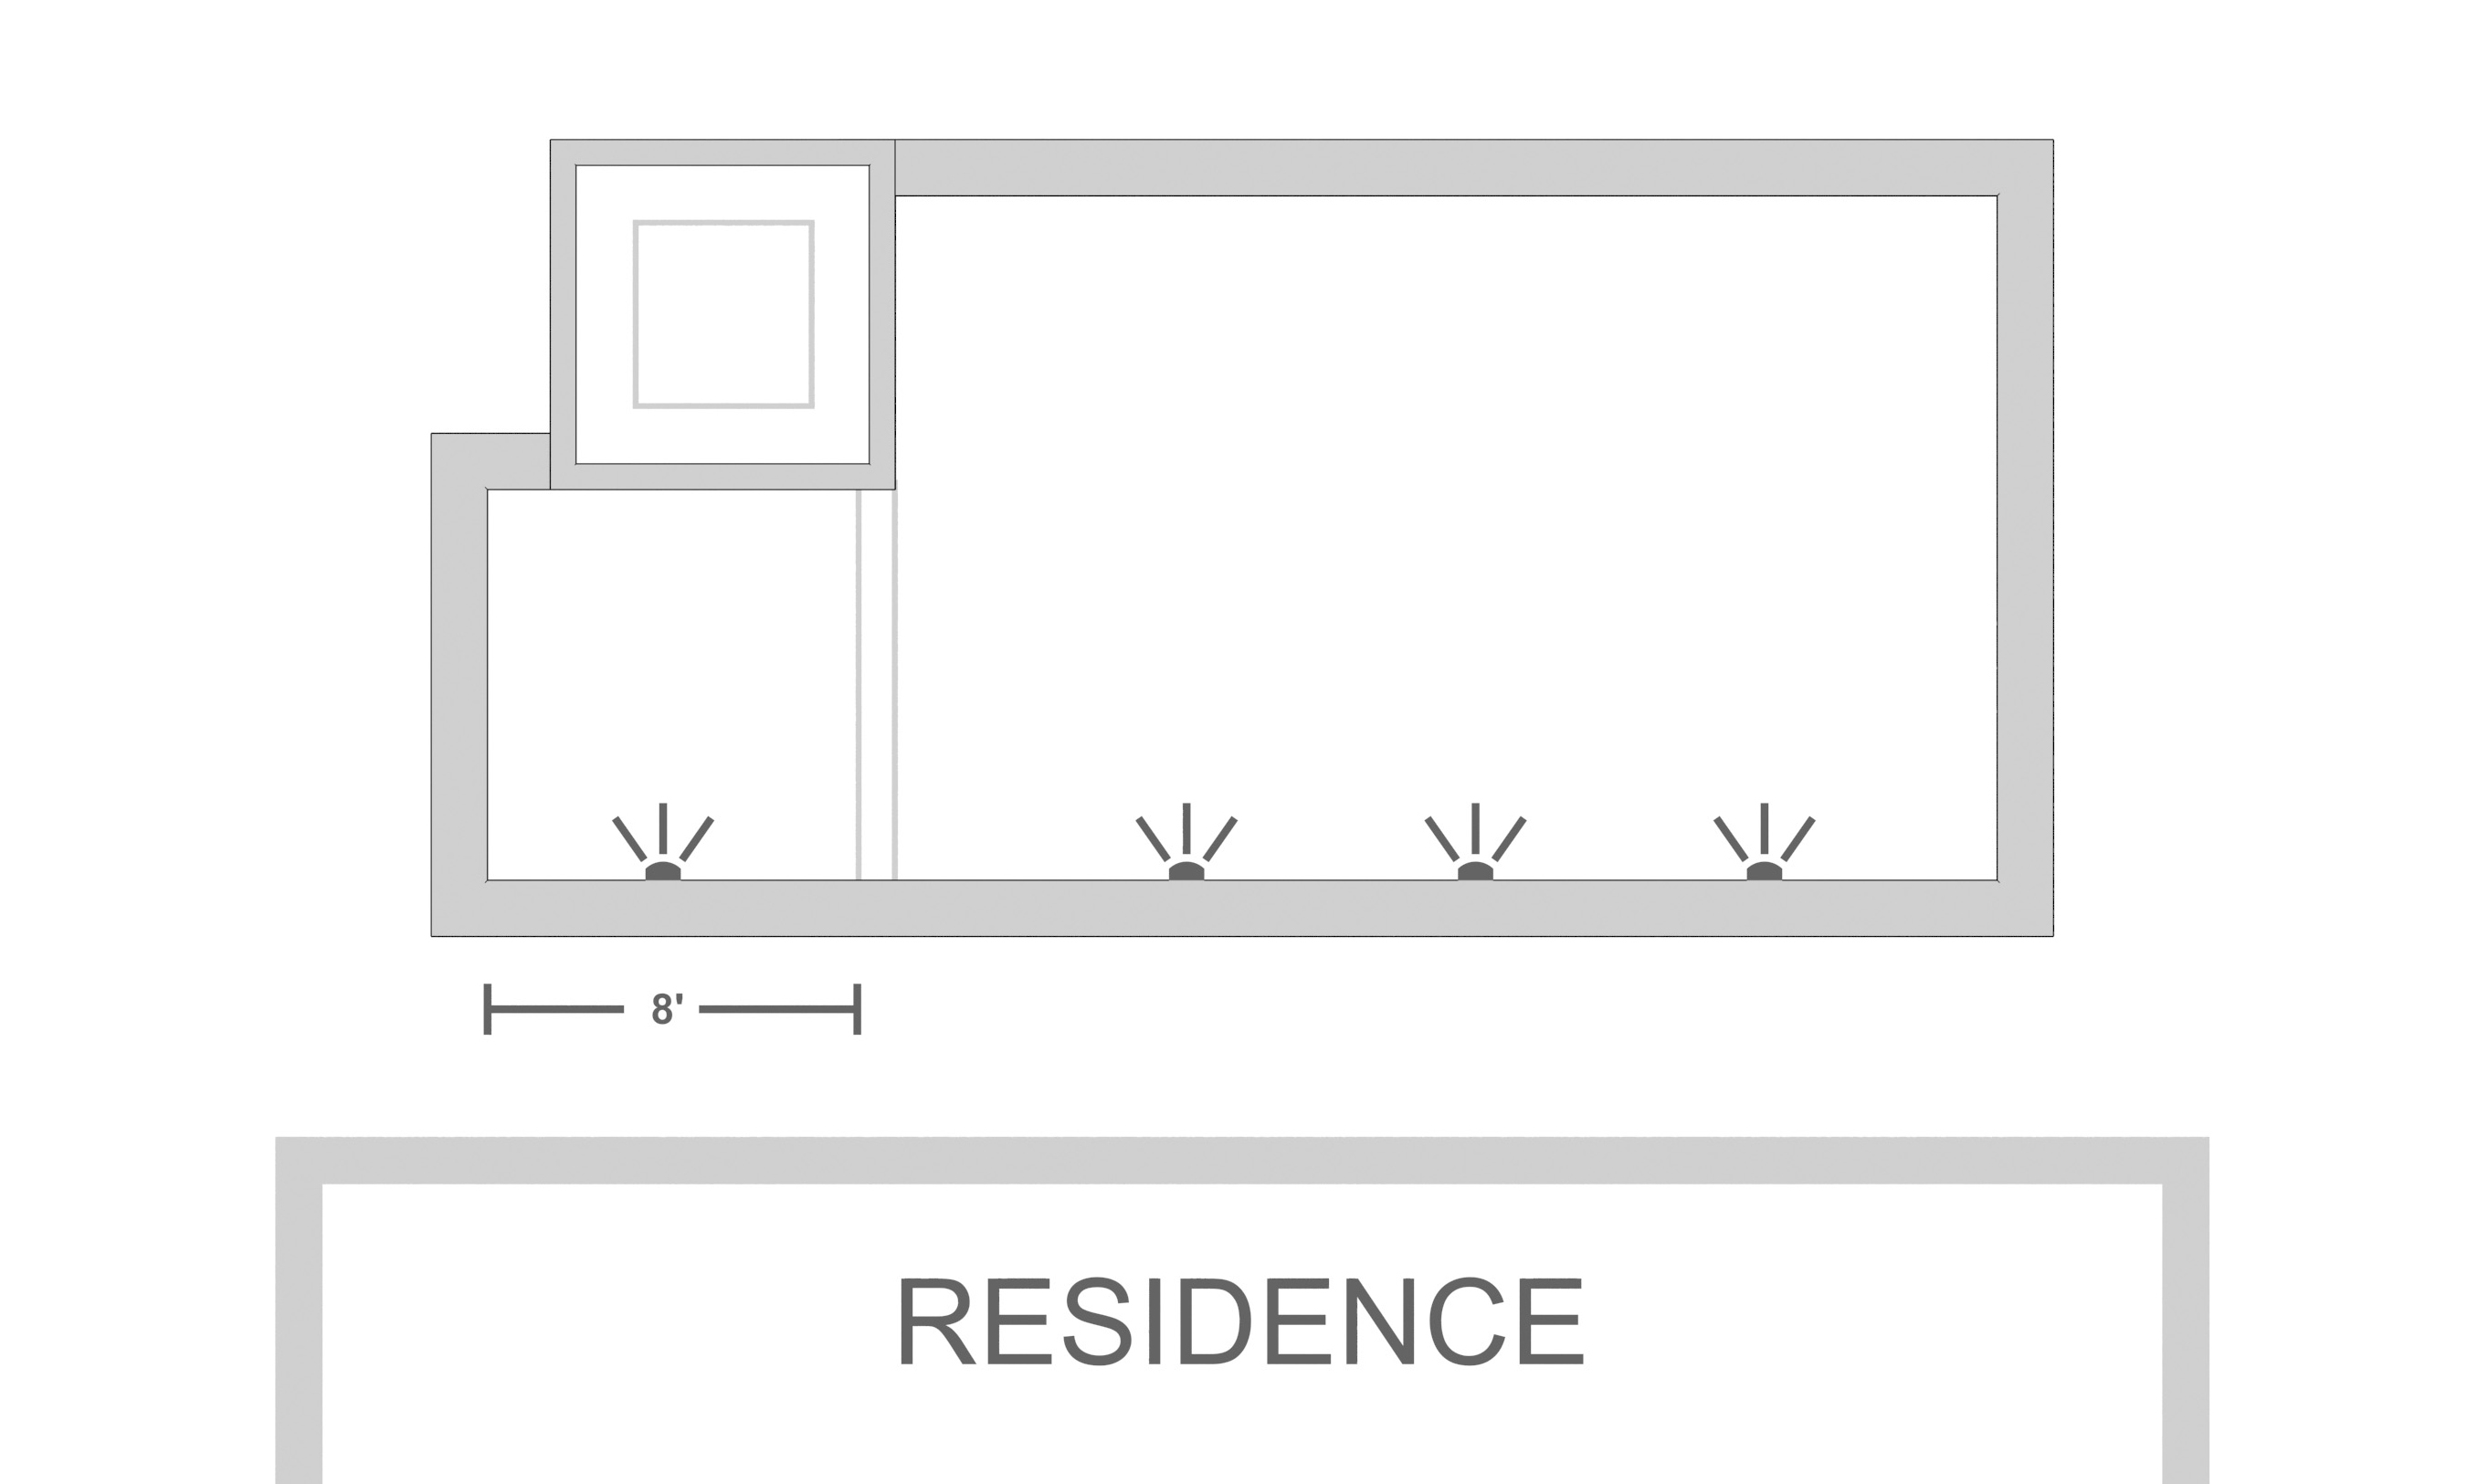

| Geometric lounging areas (large and small) |
To make lighting viable for a geometric or any other shallow lounging area, the water depth must be at least eight inches to allow for placement of LED fixtures the required four inches below the water’s surface. If that requirement is met, lighting a squared-off lounge area is a relatively simple matter.
Light travels well in these shallow areas because of the reflective qualities of the finished shelf surface. As a result, it’s usually advisable to step down the wattage to keep the illumination from becoming too bright. If the lounge area is large, however, it may be necessary to raise the wattage to provide full coverage – but even here, think medium wattages rather than the highest ones.

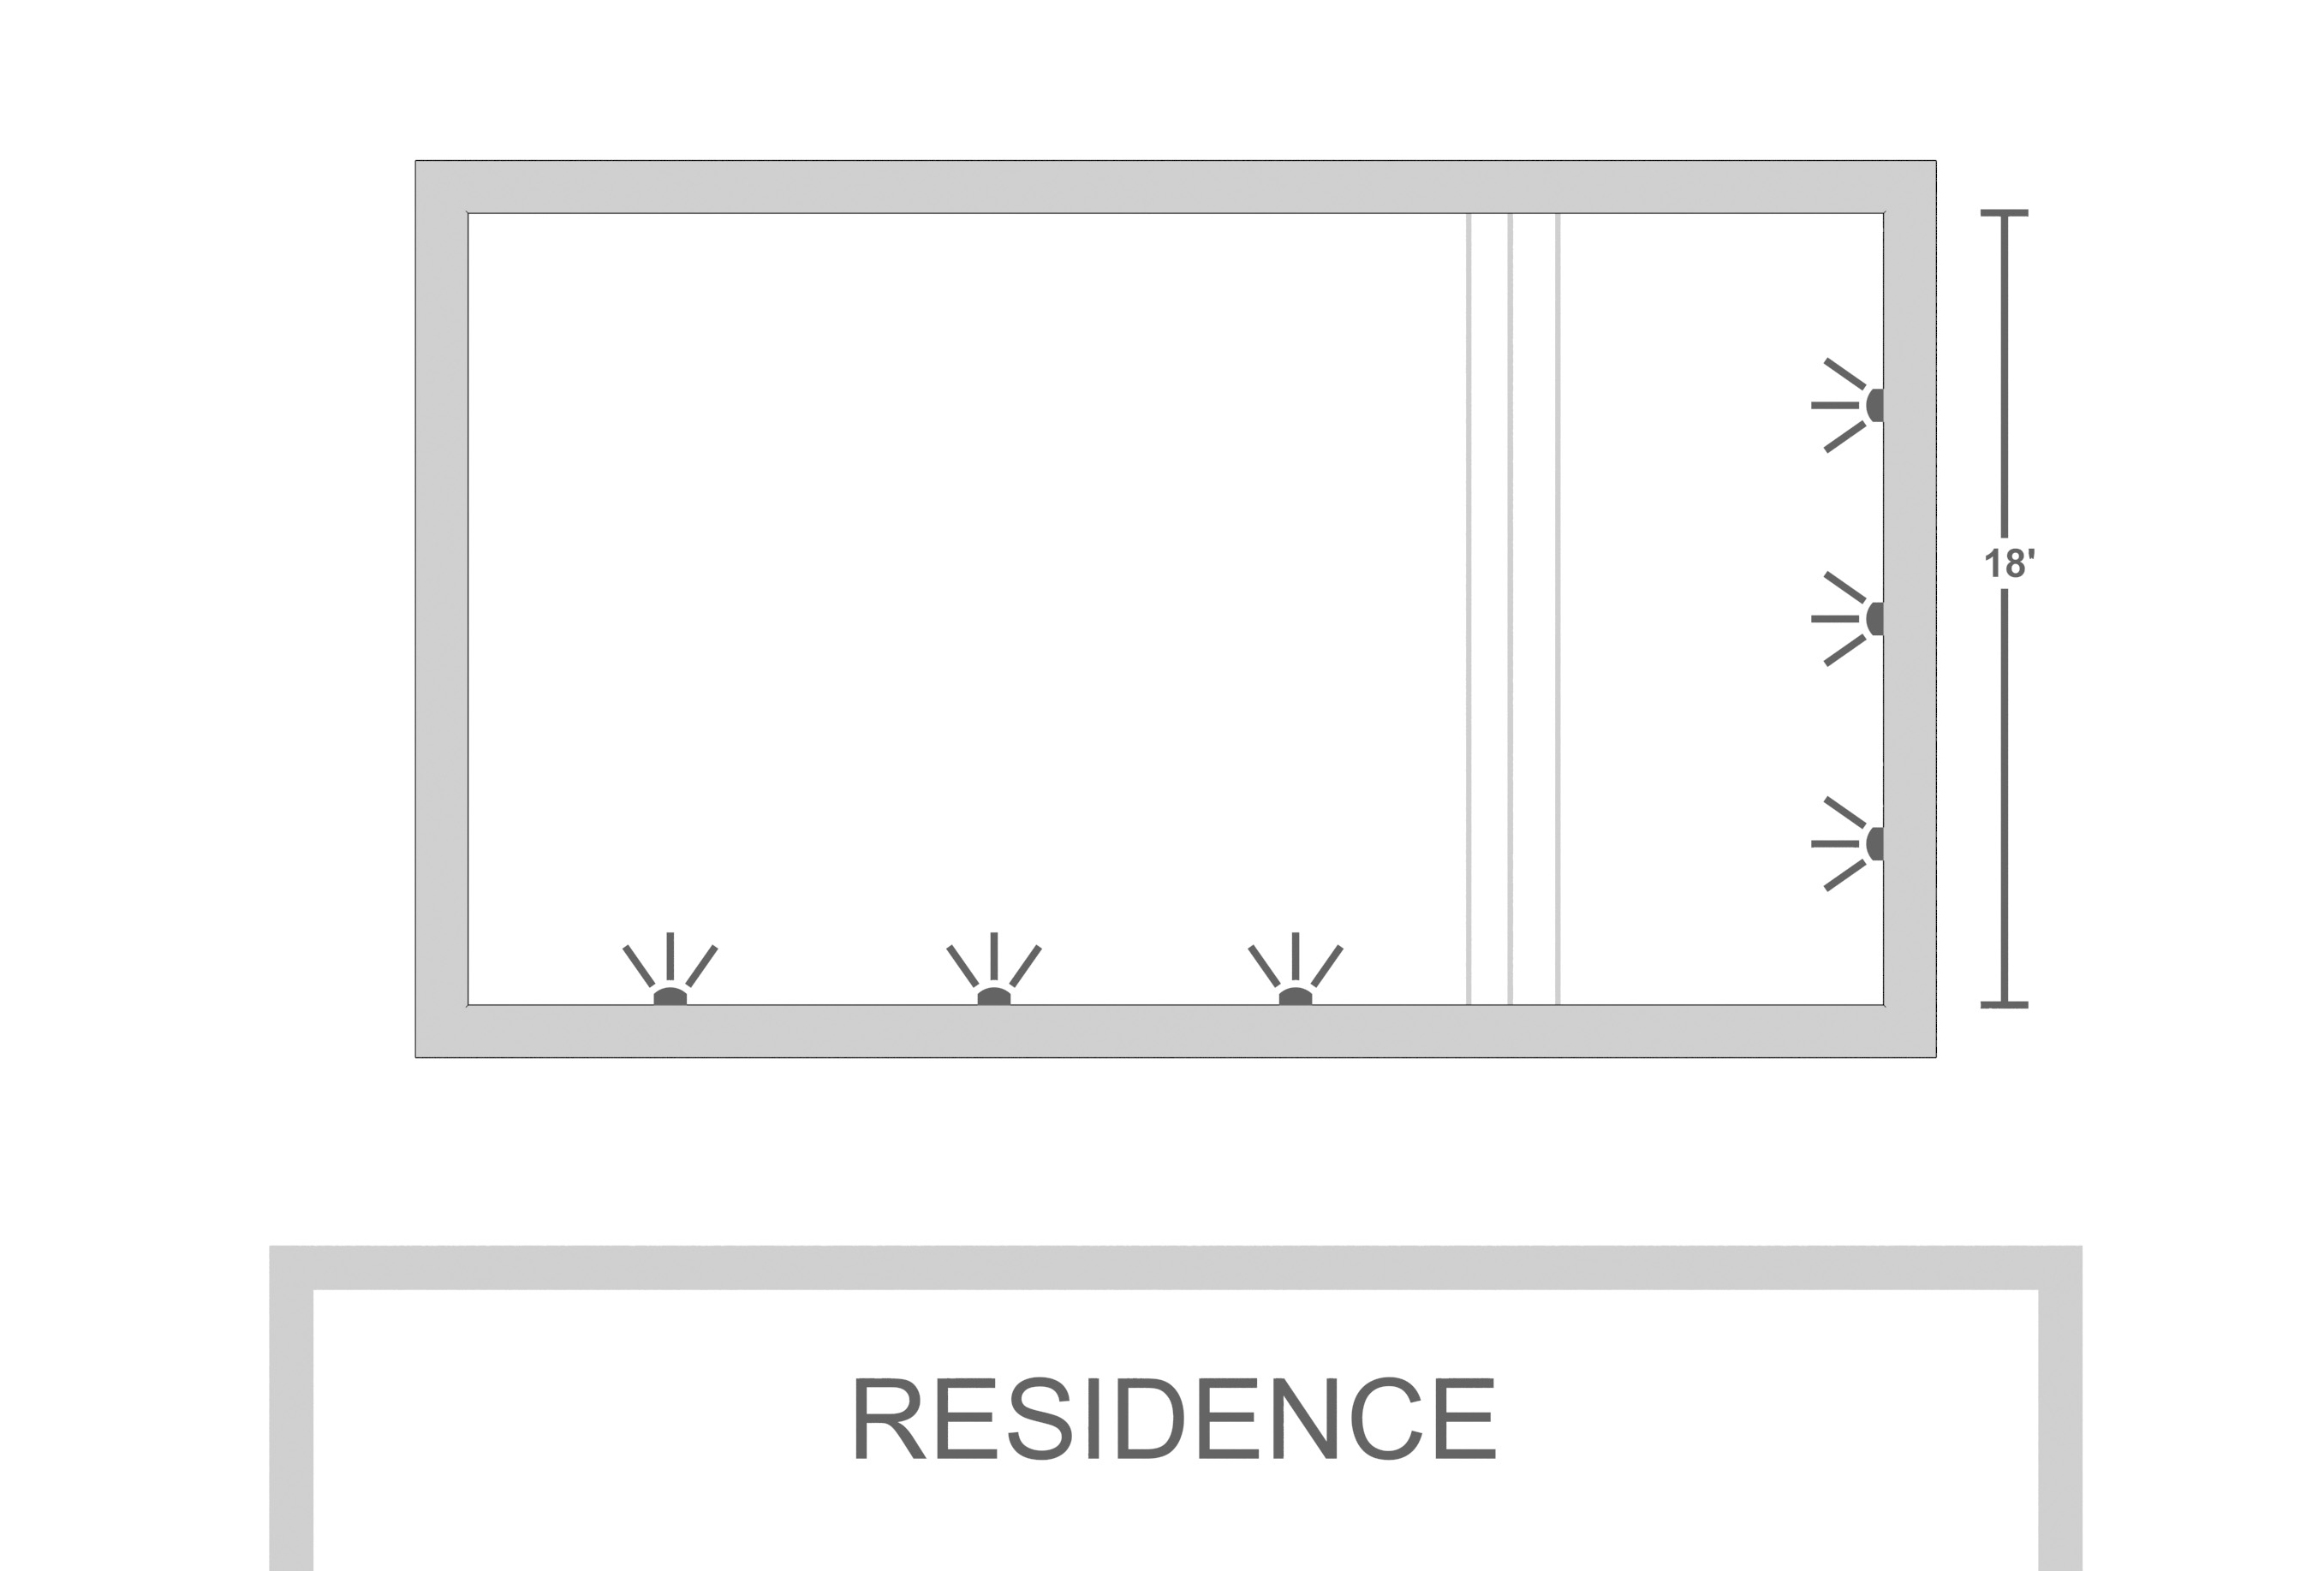
| Free-form lounging area |
In lighting a more shapely lounging area, it’s imperative to follow the principle of placing lights so they shine away from the residence: These shallow-set lights are closer to the surface of the water than are those in the main body of the pool and will seem much brighter (and even blinding, if too high a wattage is selected) if pointed towards the house or a main gathering space.
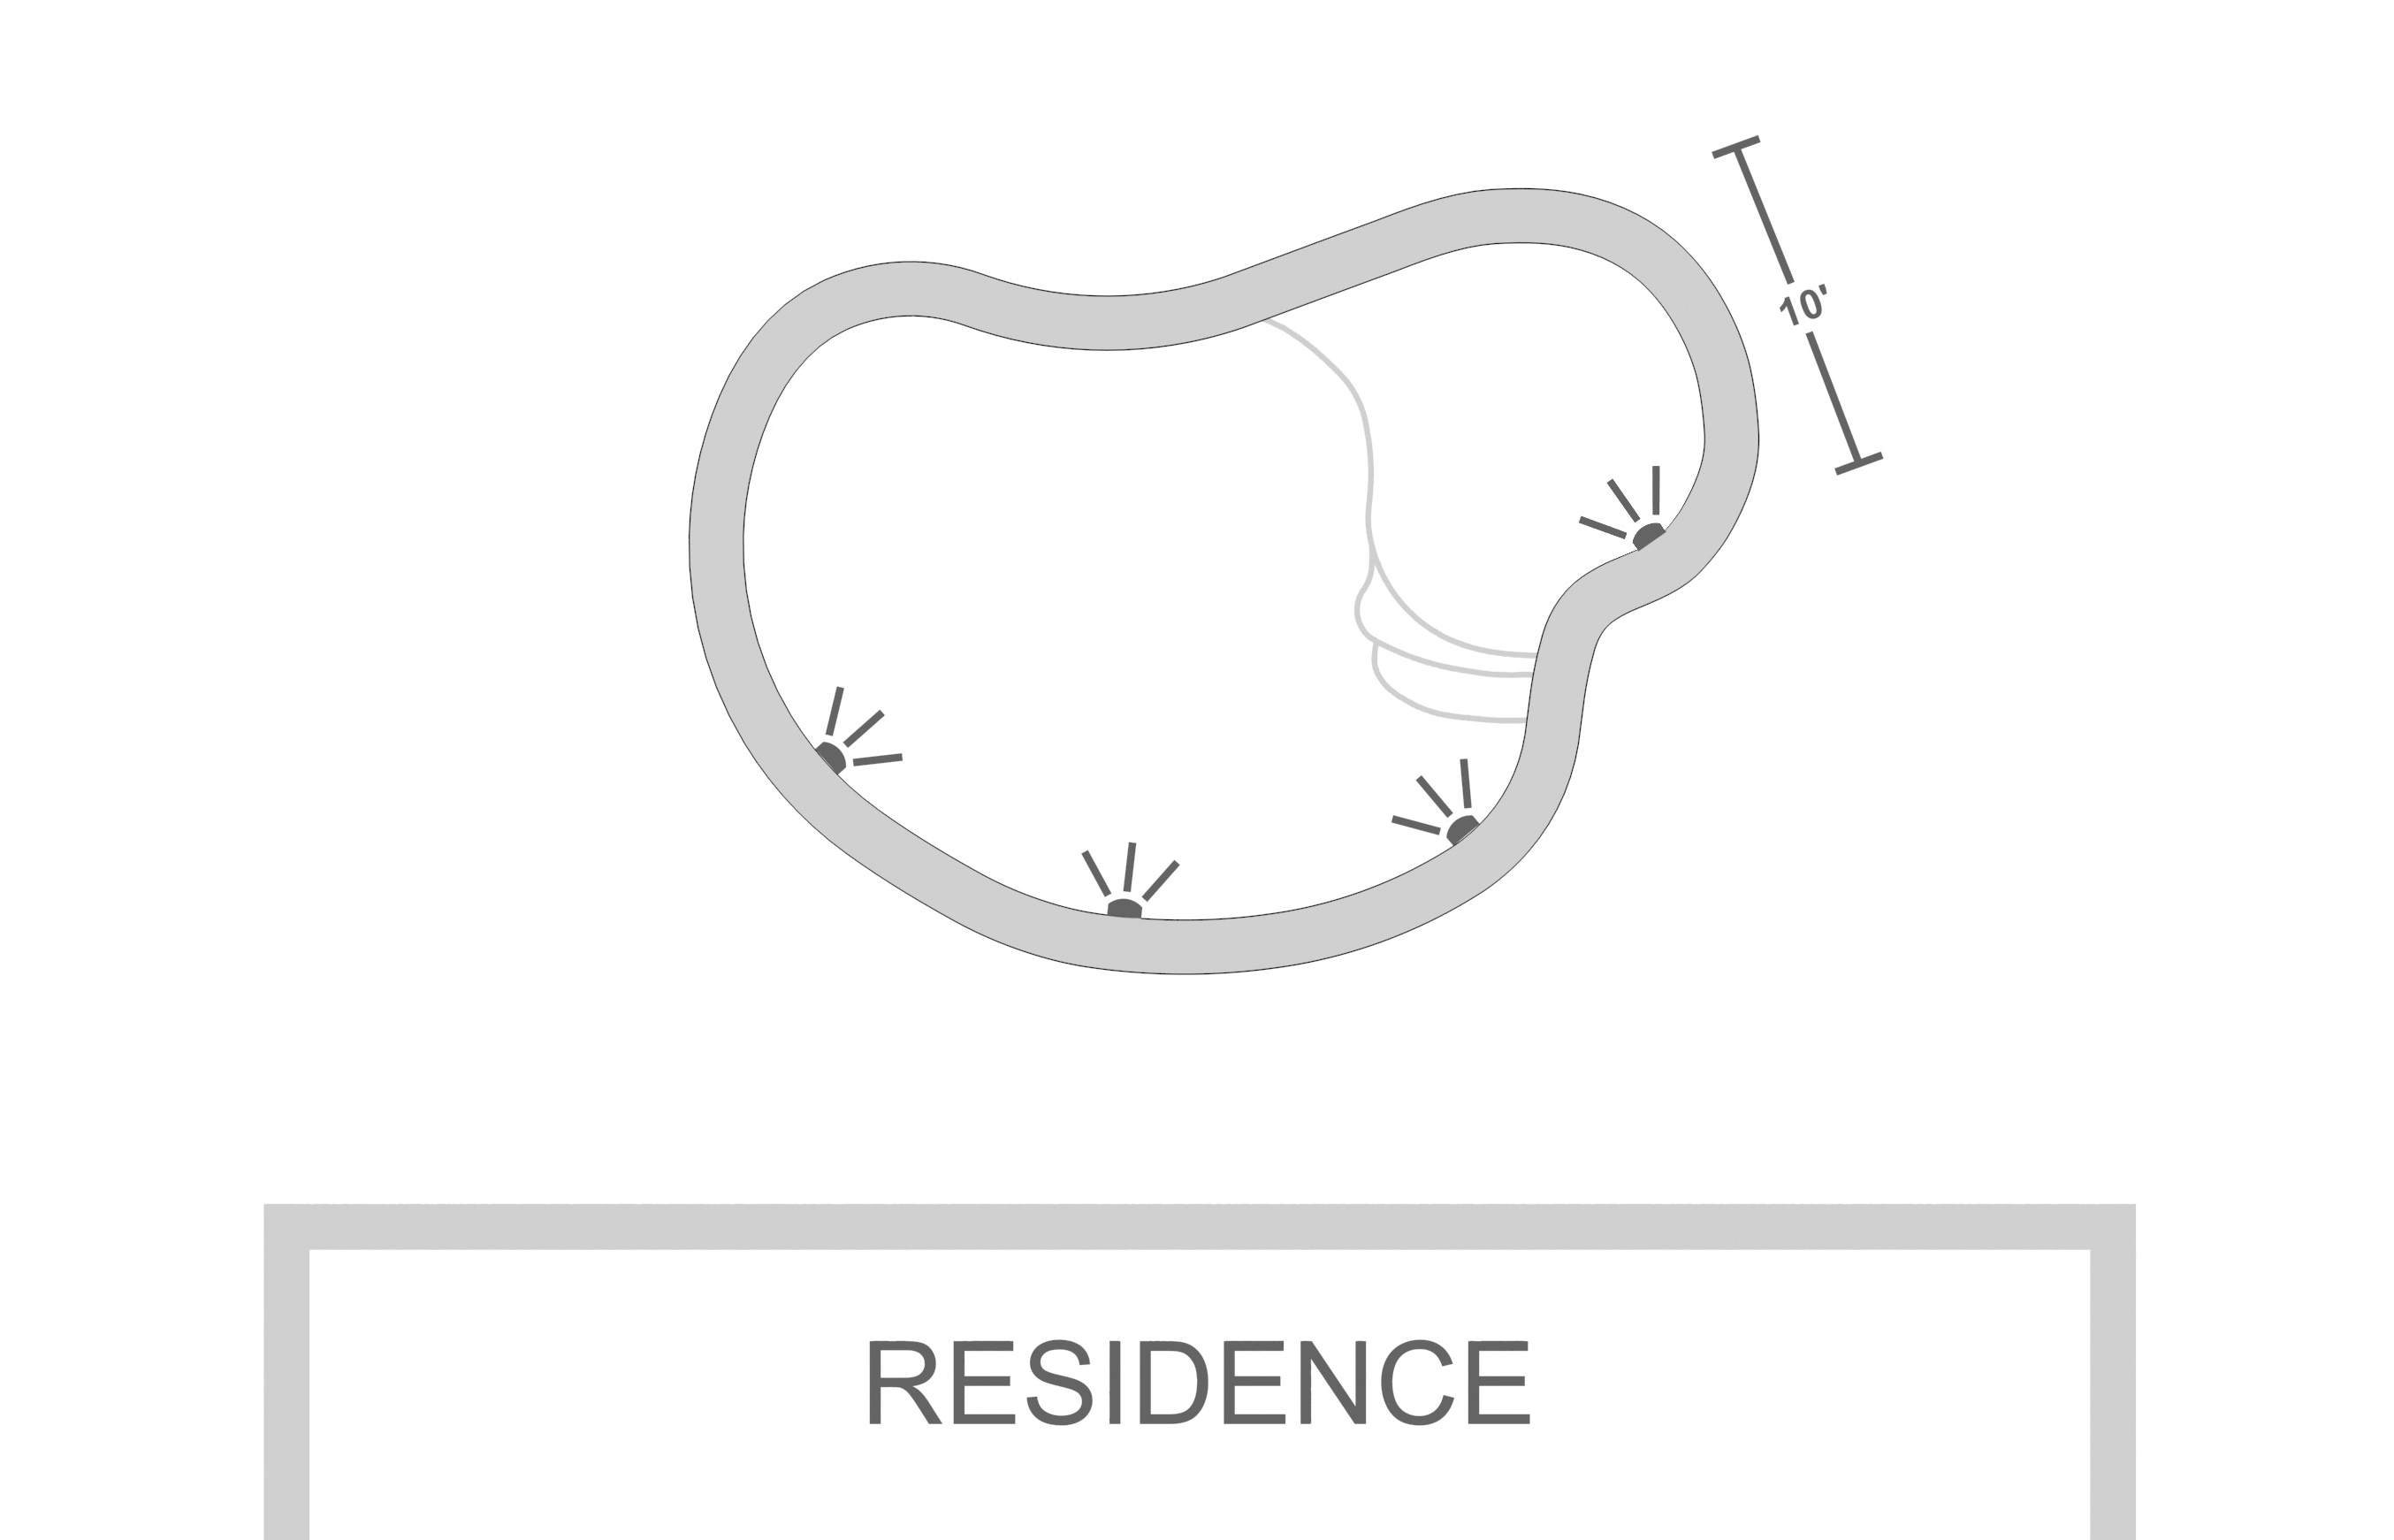
The extent of the lounge area is a factor, too: If the surface reaches more than ten feet out into the water, a second light will be needed and should be placed six to eight feet away from the first. Even-larger areas will require more lights.
Beach Entries
In basic terms, these features are similar to shallow lounging areas with respect to the lighting challenge, the main difference being that a beach entry follows a pronounced slope down toward the main well of water. As a result, fixture depth isn’t usually an issue because the water generally drops well below the critical eight-inch level that can be a challenge in shallow lounging areas.
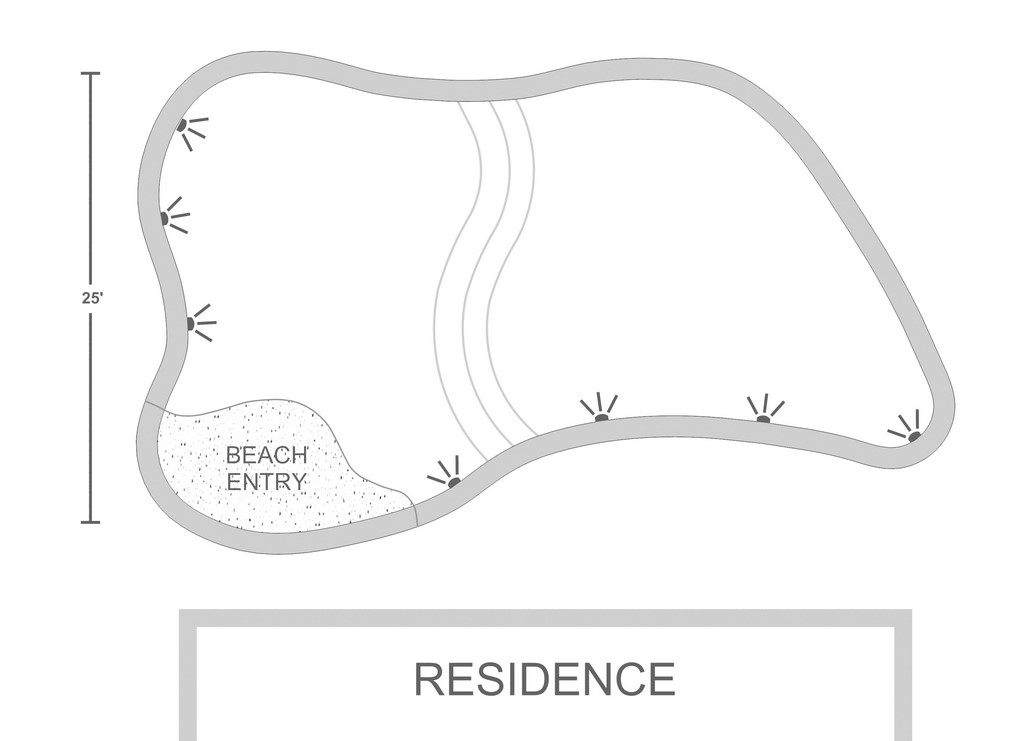
| Typical beach entry |
But here, because of the slope, getting an even lighting effect can be difficult, with the brightness of the light in the shallowest areas of a beach entry creating an annoying hot spot. The key here is to do what can be done to point any LED fixtures slightly away from the shallowest areas and rely on the water’s ability to transmit light to the edges. It’s also important to work with low-as-possible wattages to prevent hot spots while keeping the glow as even as possible.
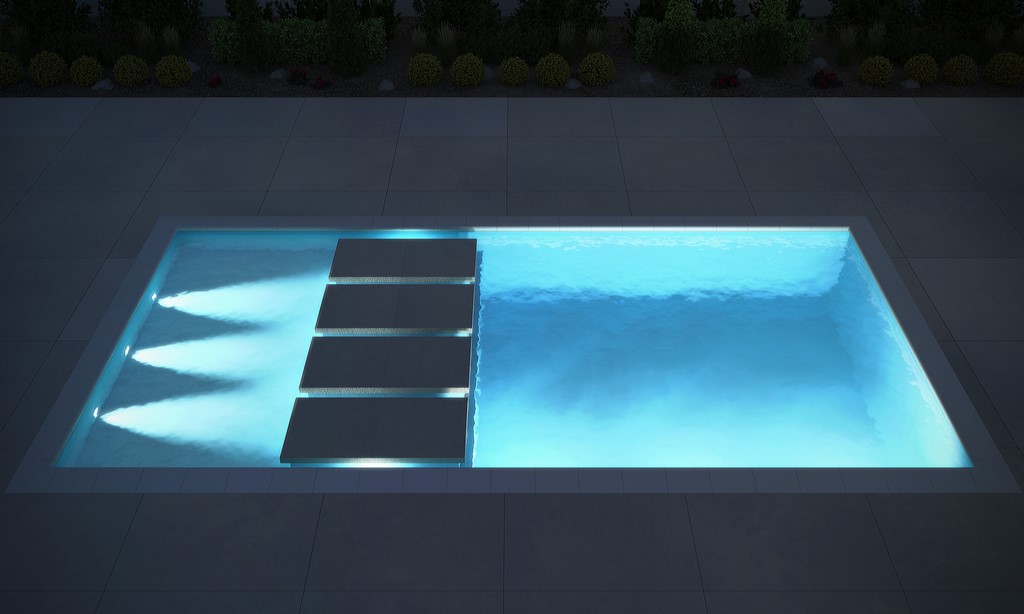
Stepping Stones
These increasingly popular features create the illusion of solid surfaces floating on a pool’s water – a magical effect, but one that also presents lighting challenges mainly because it requires the use of multiple lights to make it work effectively.
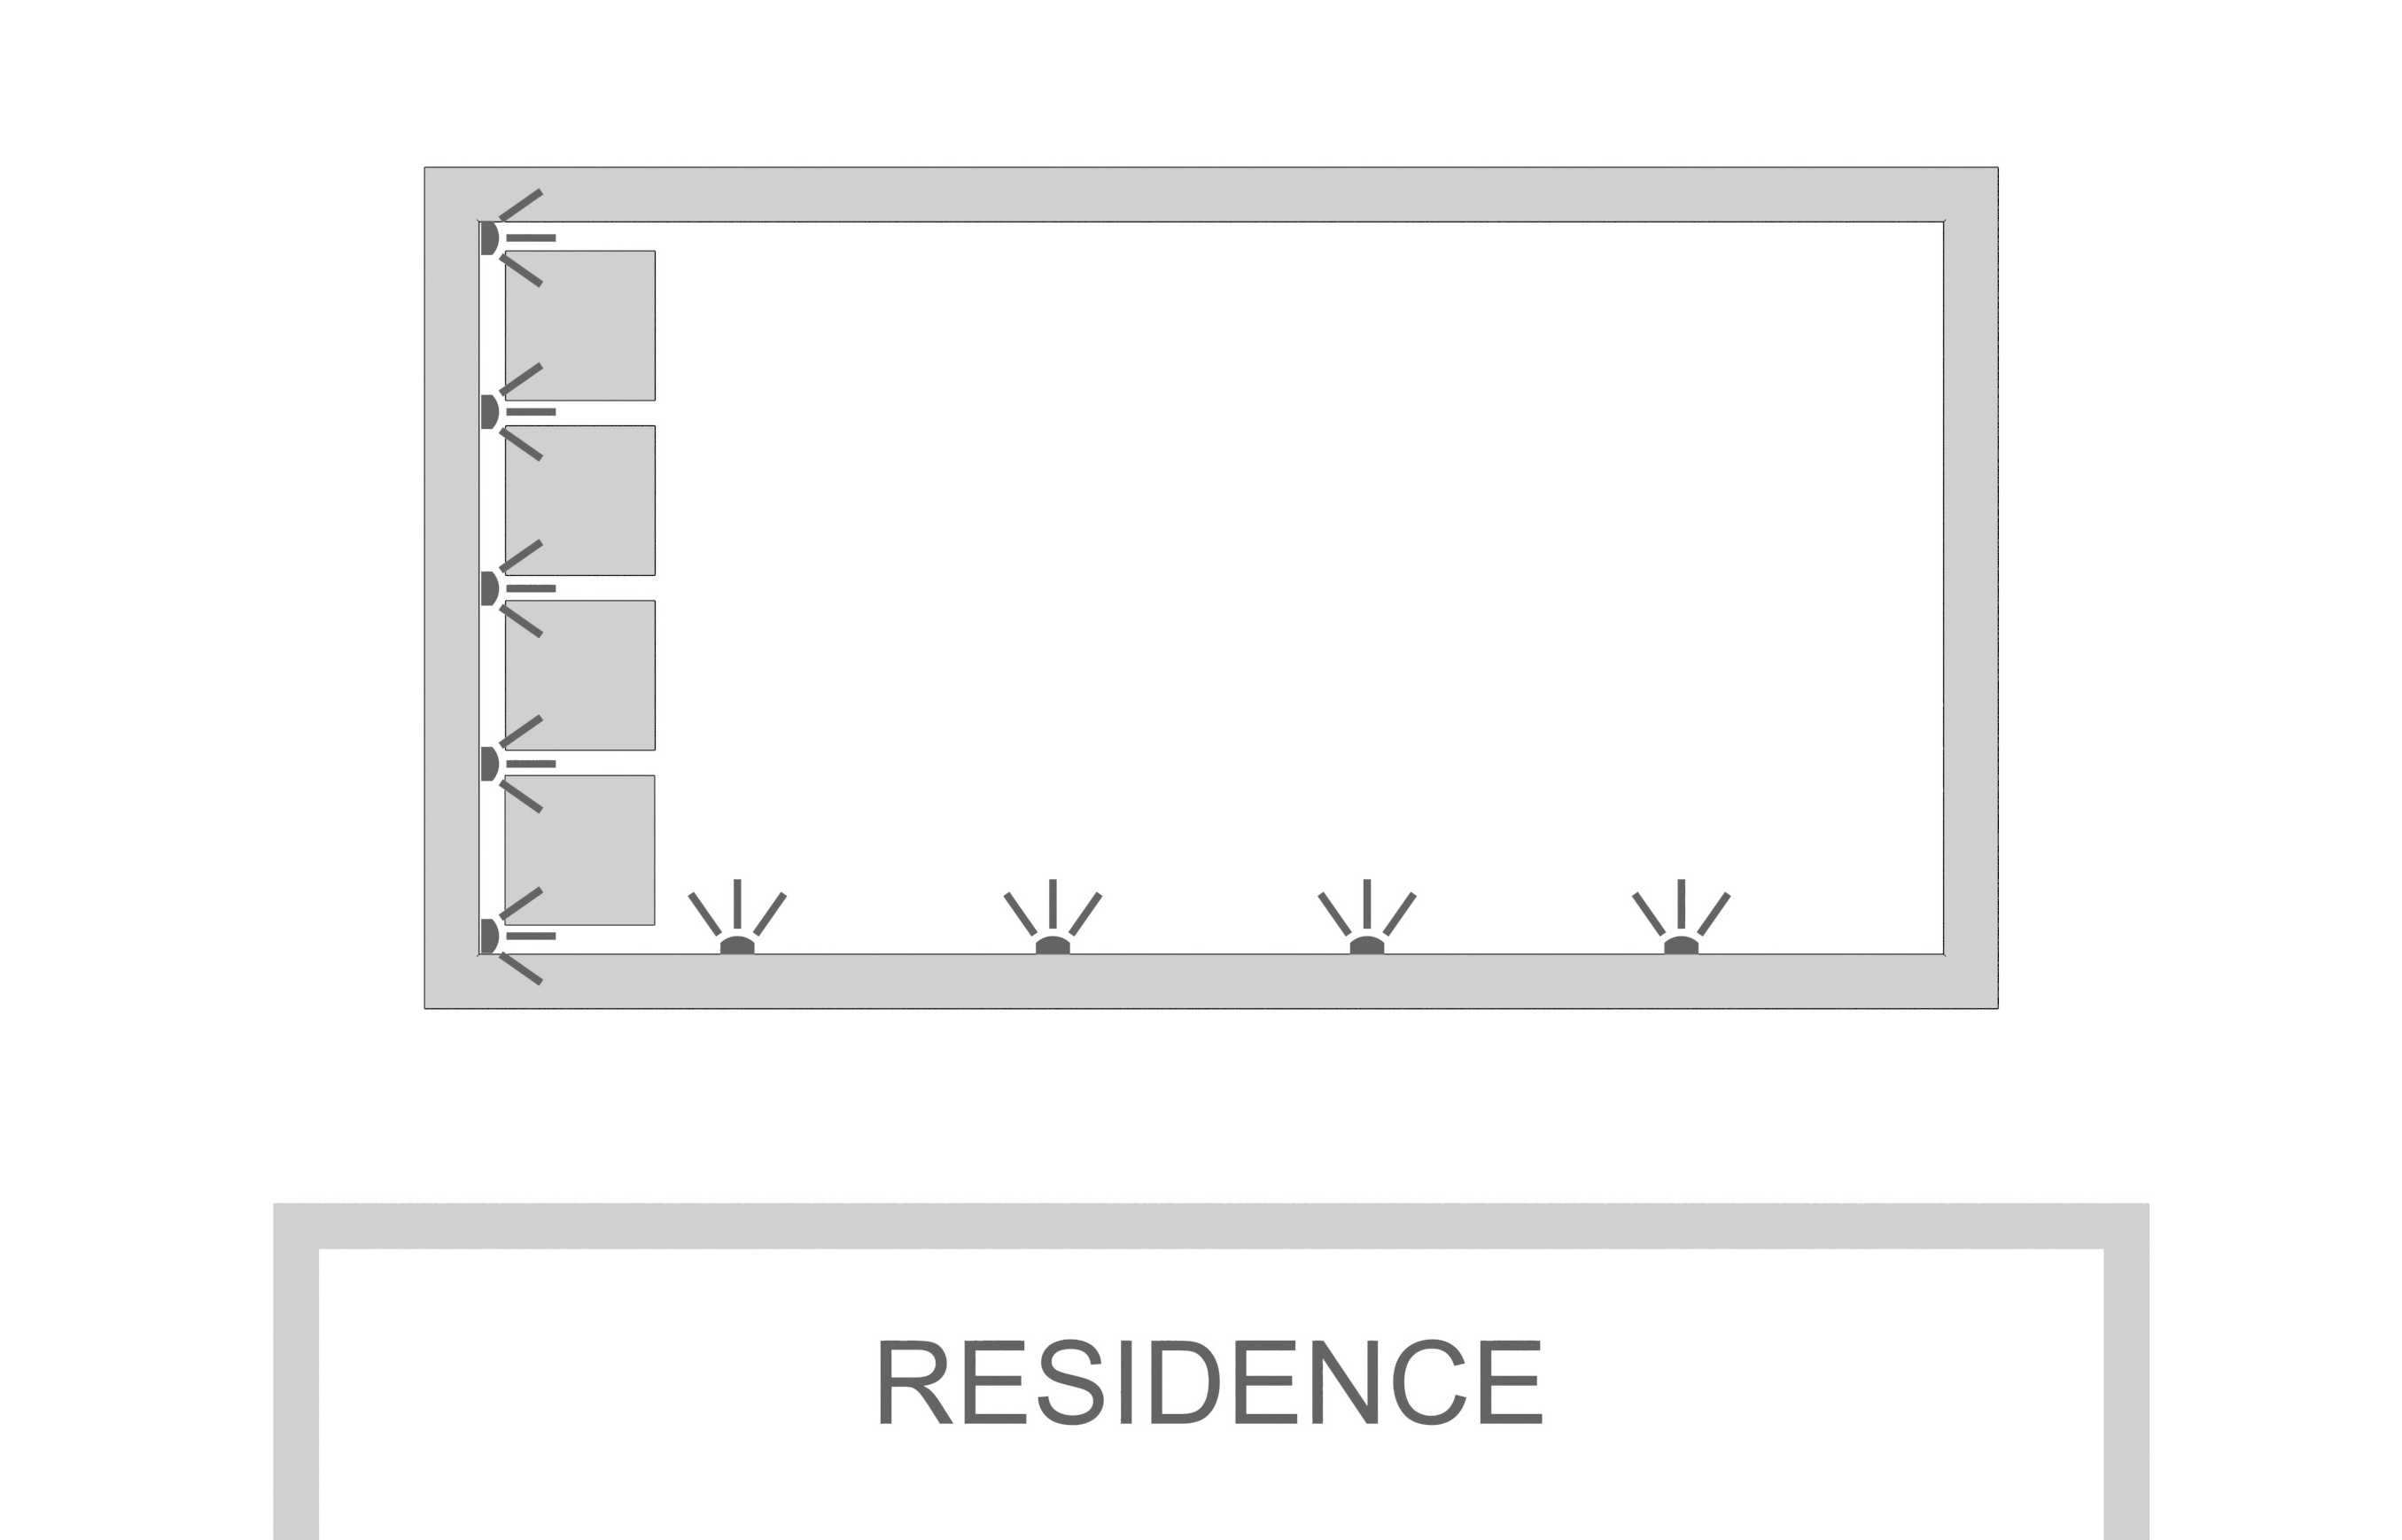

| Option 1: Close to a wall |
For best effect, there should be lights illuminating every gap, as that’s the best way to isolate each step and safely complete the illusion. If the pads are close to a wall, it’s easy to include low-wattage lights to achieve the right look. But if they’re away from the wall at, for example, the edge of a shallow lounging area, it’s important to pay attention to wattage if you want to carry off the illusion with a desirably clear, bright light.
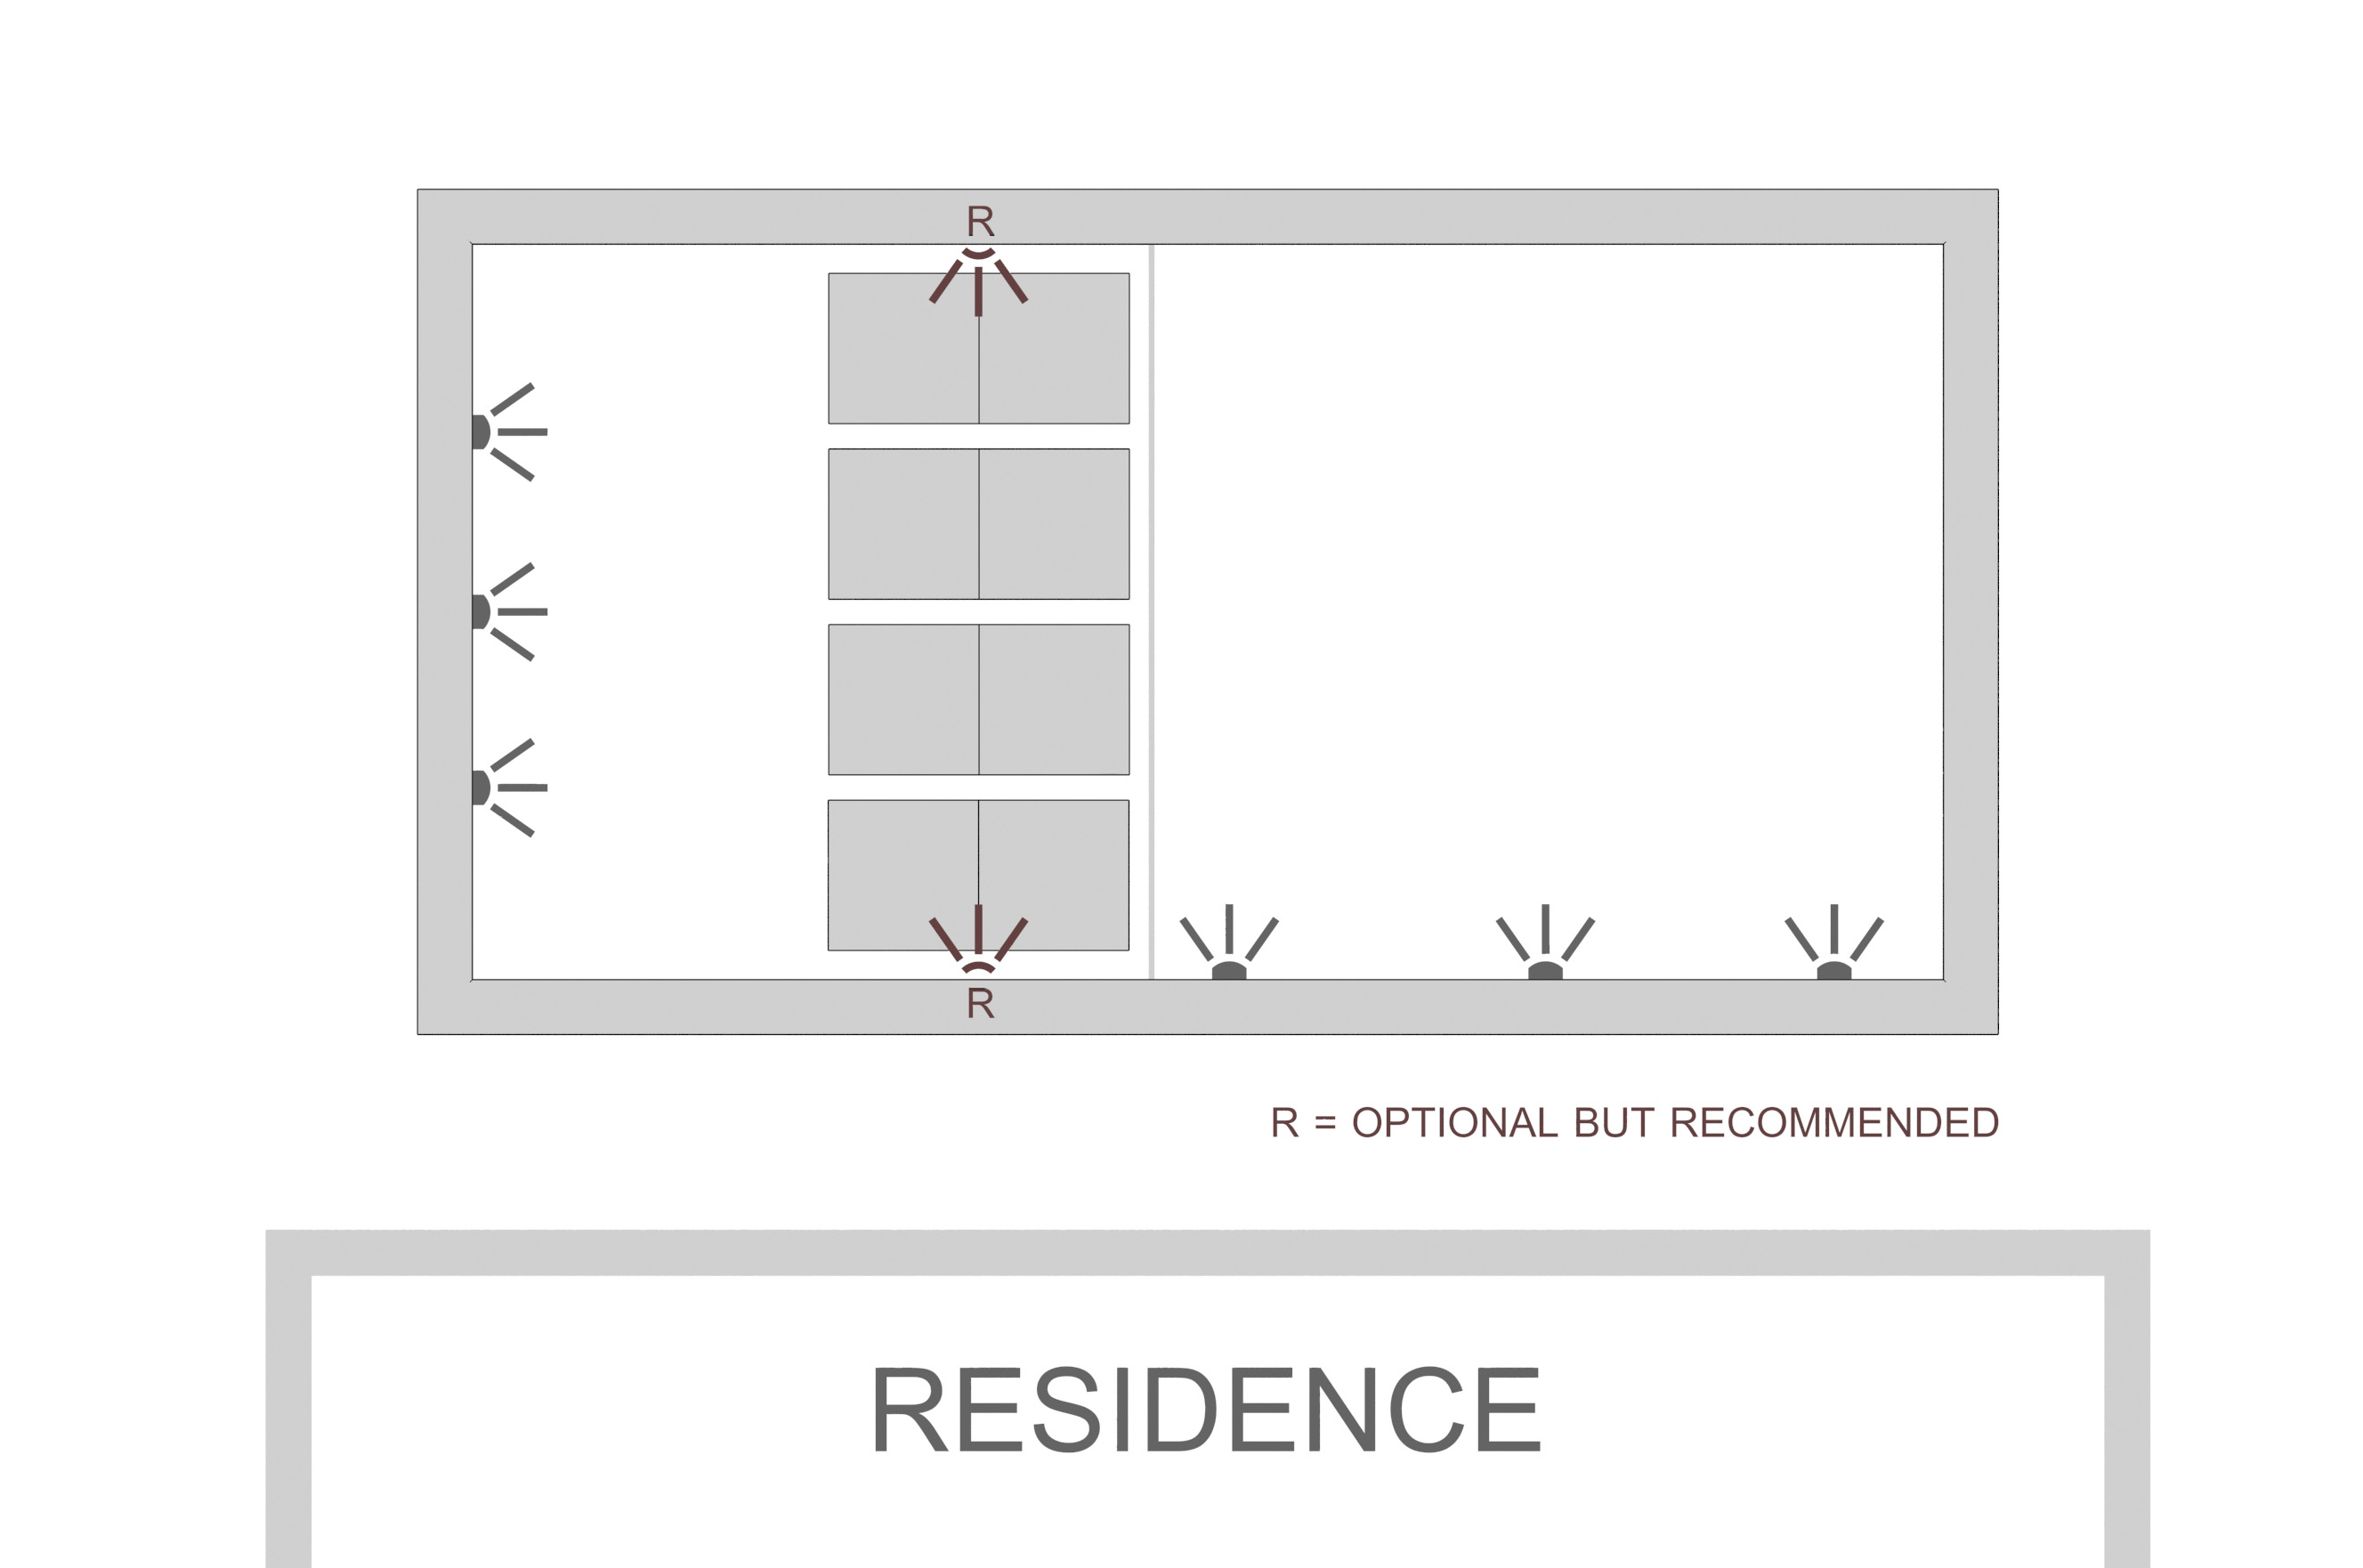
| Option 2: Away from a wall |
Stepping stones also appear in configurations that defy wall-mounted lighting approaches. In these cases, it becomes necessary to places lights on walls between steps – an approach that typically requires a low-wattage approach.
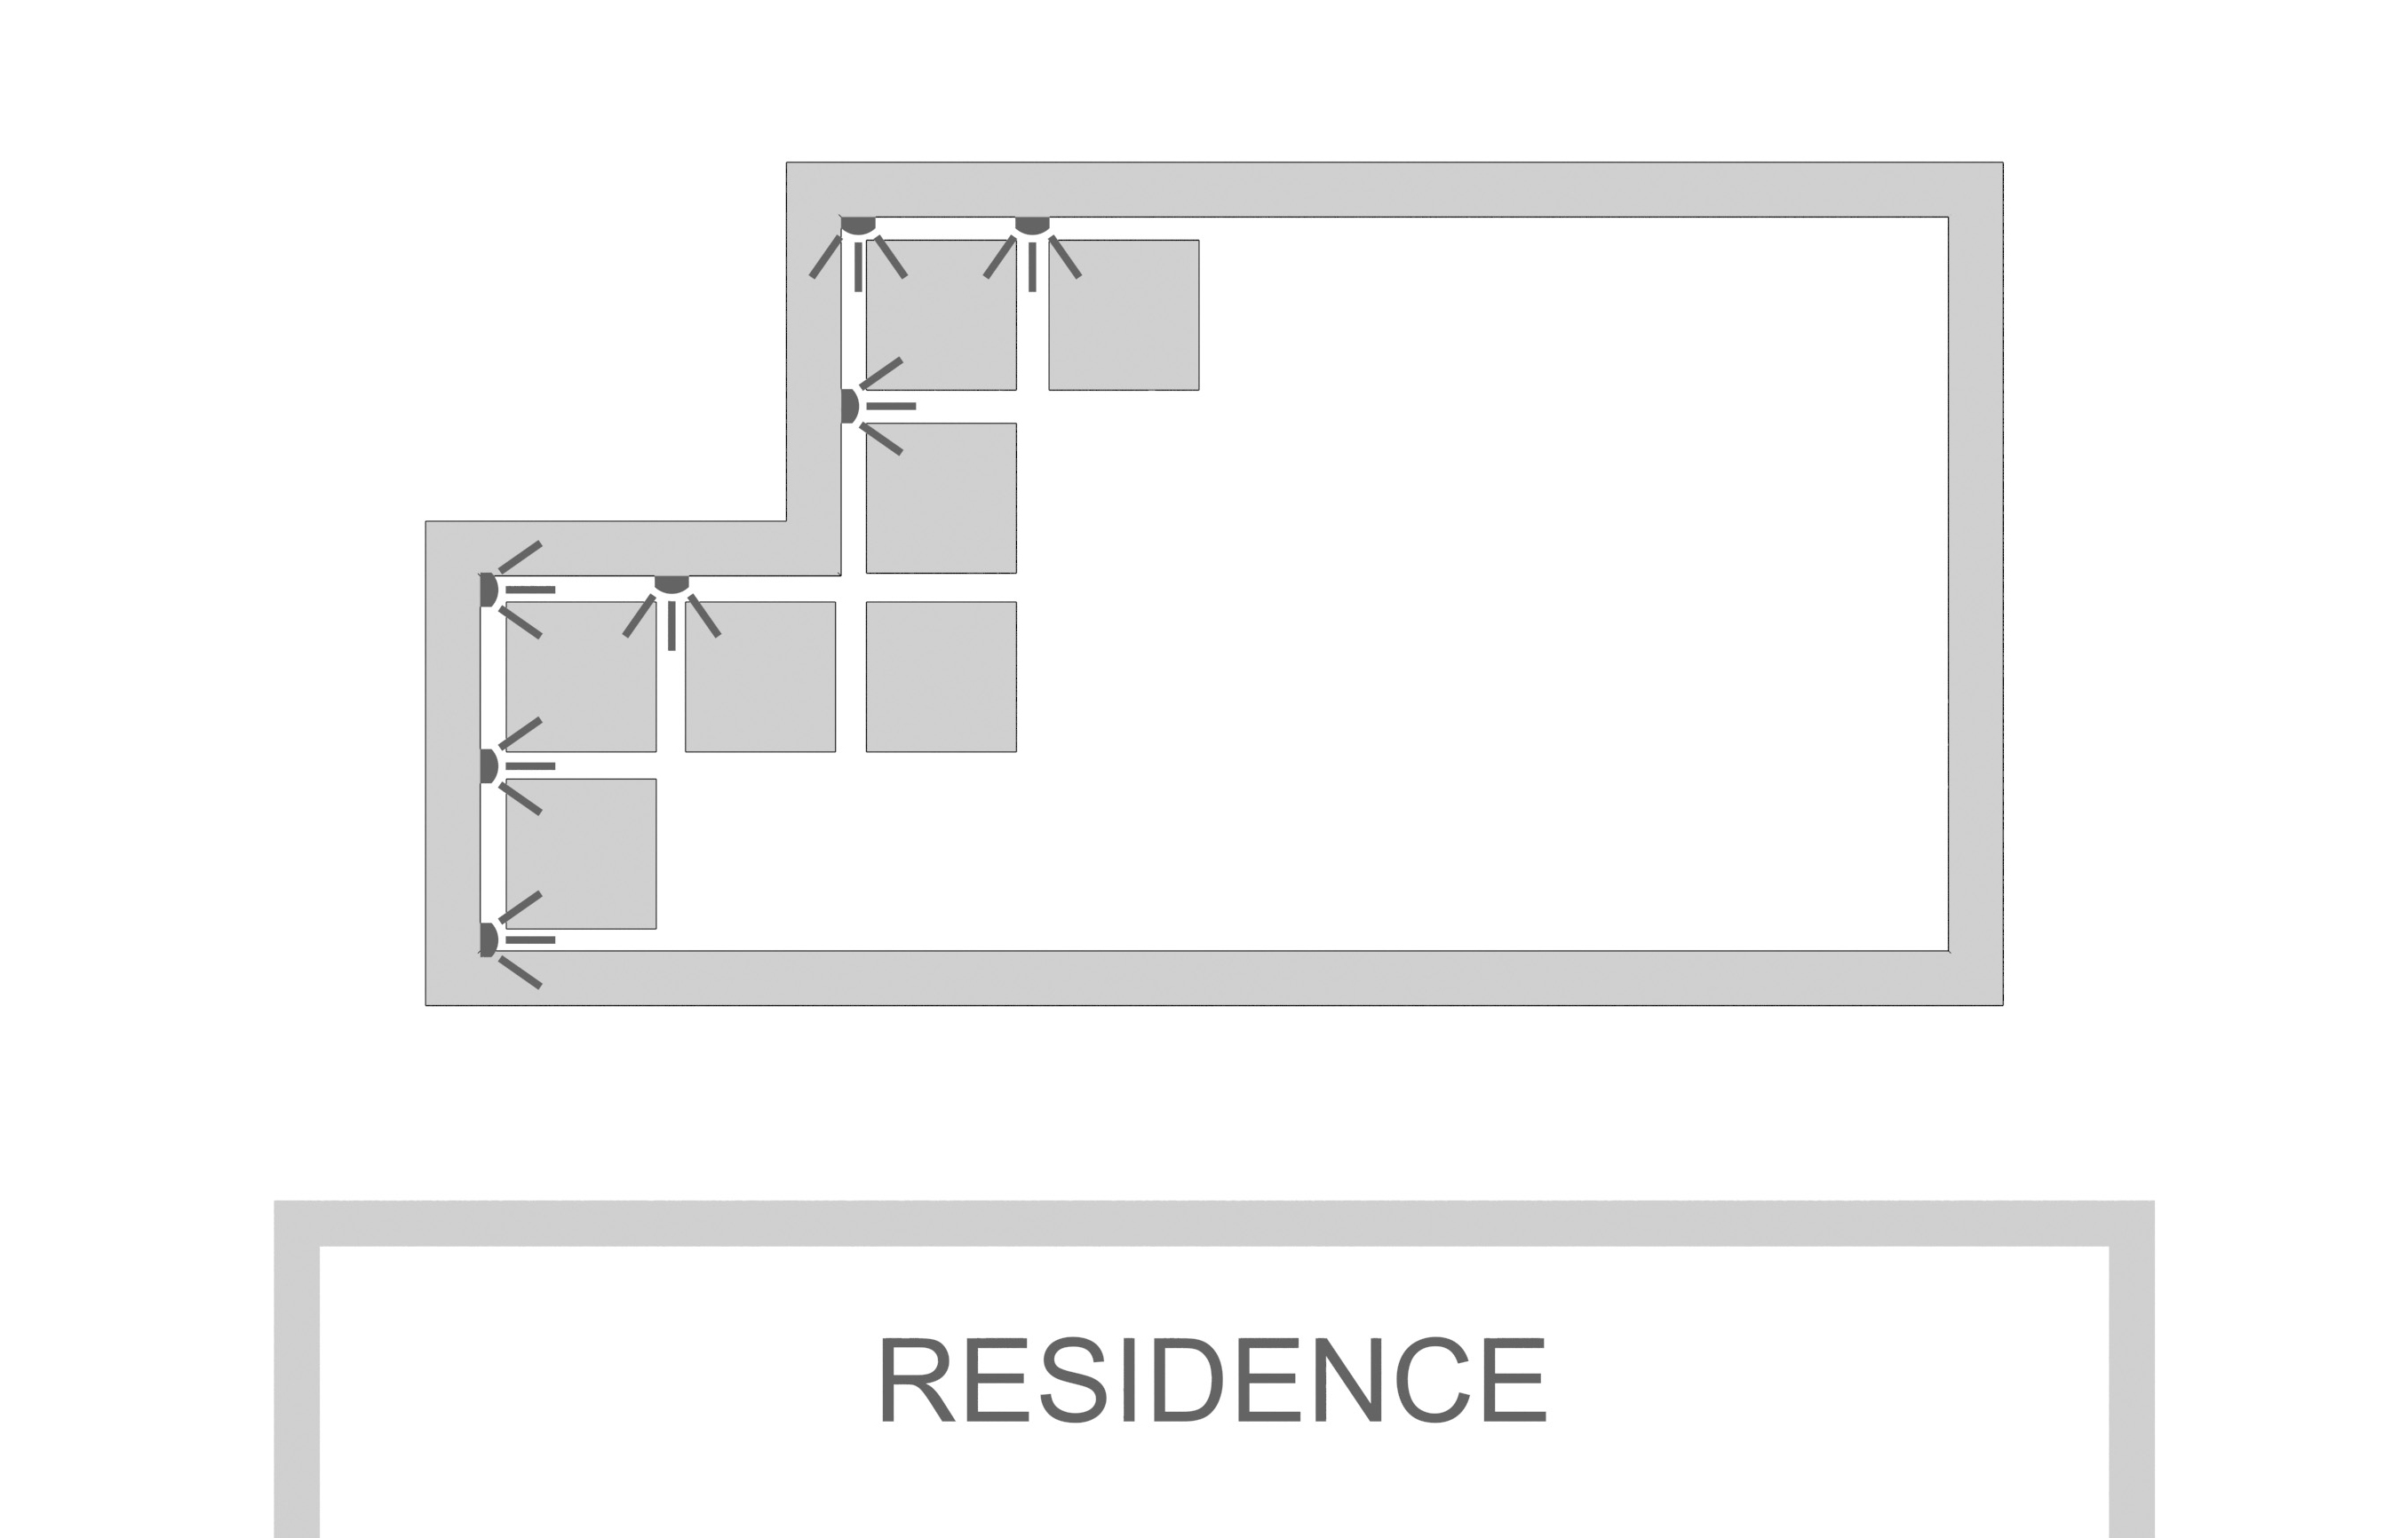
| Option 3: Complex step patterns |
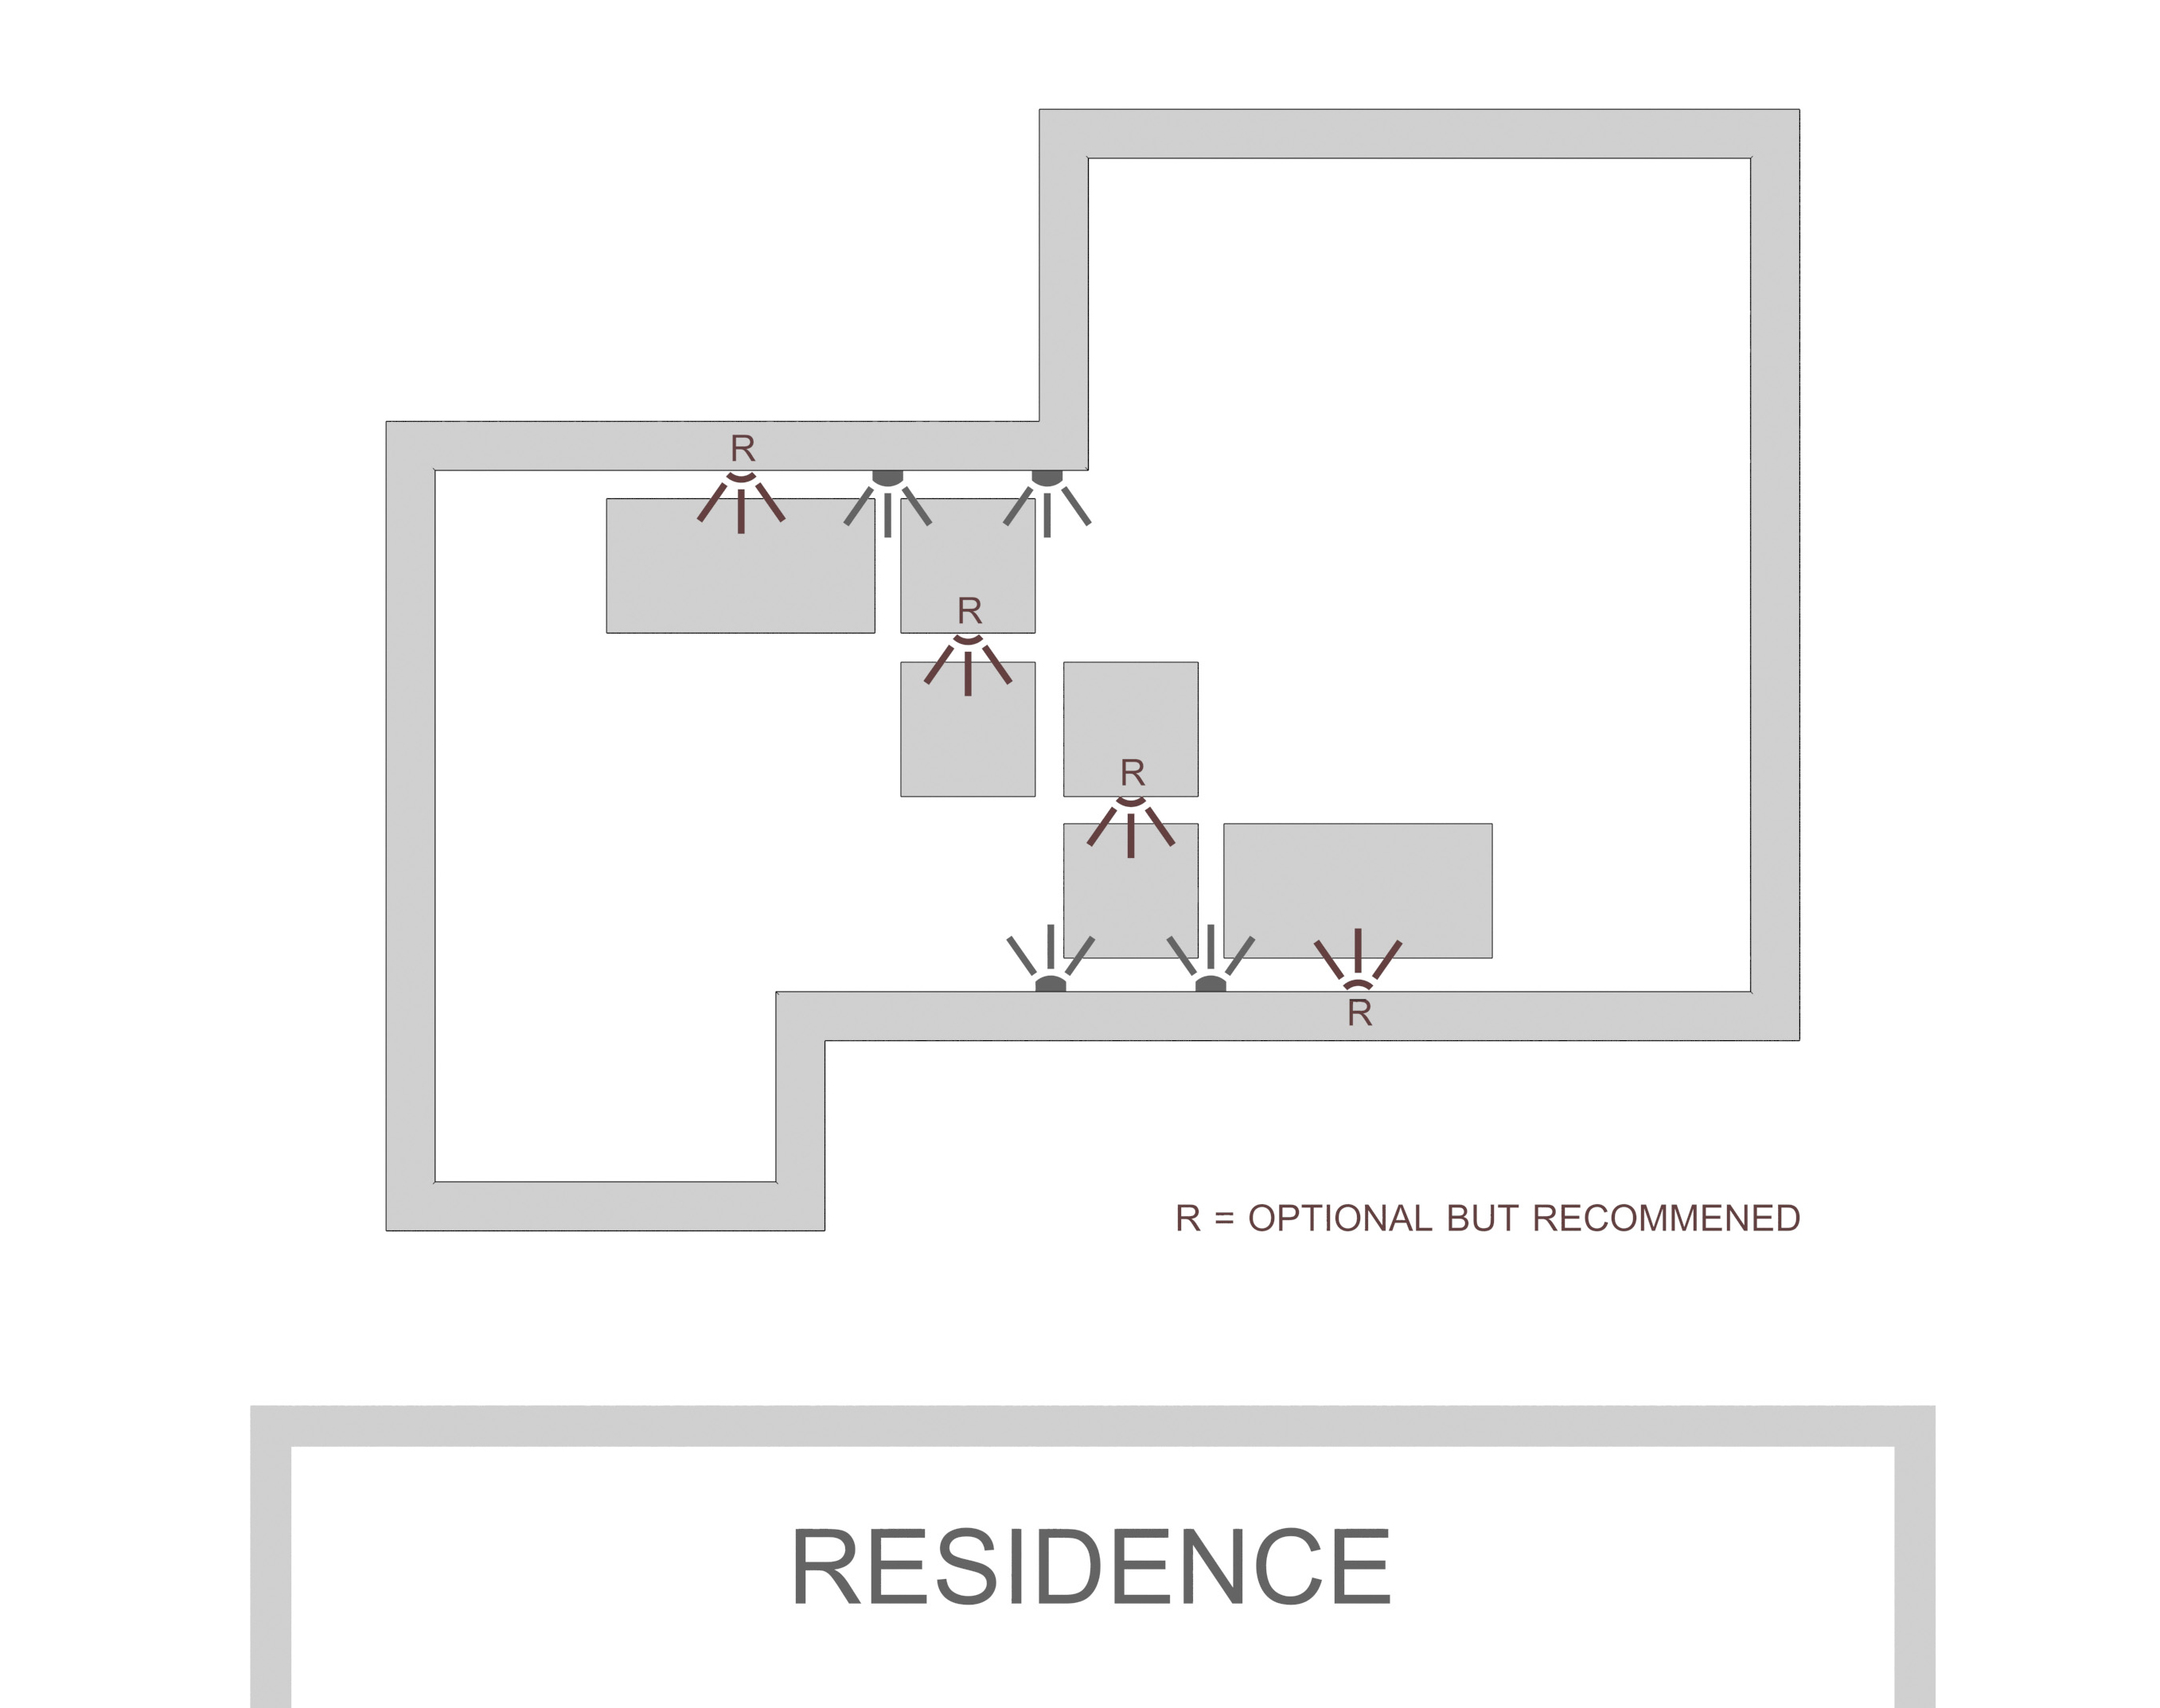
Islands
Set in the middle of a pool, these features are true crowd pleasers – but they can be difficult to light effectively. And it’s not just about lighting the island itself: Because these structures interrupt ordinary lighting pathways, they typically require the use of several additional lighting fixtures on the island itself to avoid darker, shadowed areas.
Paying attention to wattages is crucial here if the pool’s glow is to be anything close to even. It’s workable, but keep an eye on distances and place higher-wattage lights where they’re needed – then step back to medium- or low-wattage options where the spaces are tightened by the island’s presence.
| Option 1: Off-centered island |
As always, the goal is to hide the source of the light from the main vantage point of the home so that the pool appears to glow without hot spots or dead spaces!
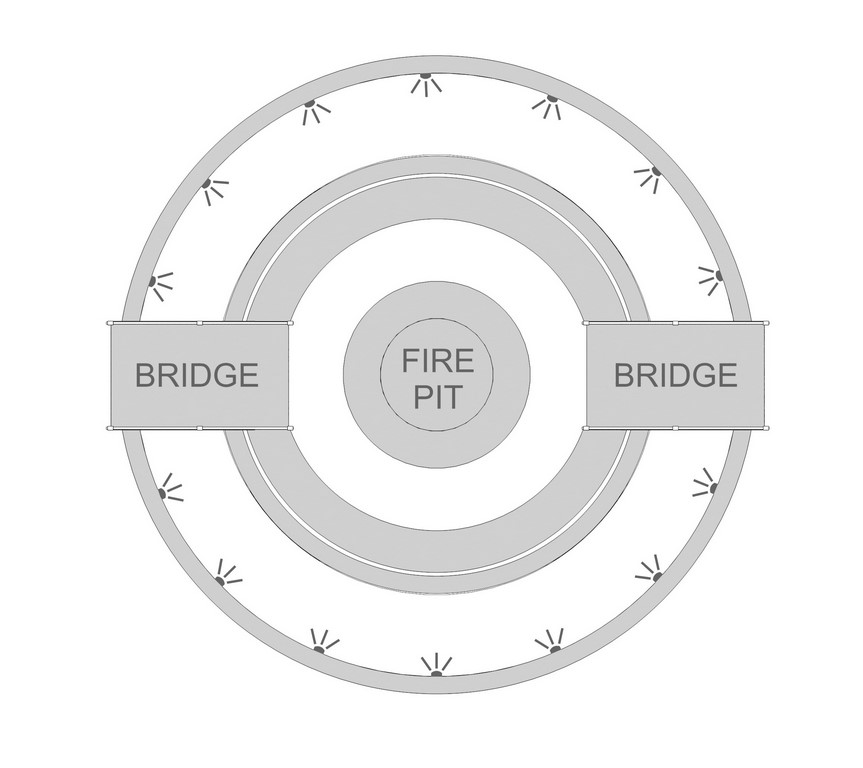
| Option 2: Centered island |
In a more formal island poolscape, the feature will be centered and will include a firepit or some other seating/gathering space in the center of a ring of water.
In these cases, lighting is simply a matter of evaluating the distance, selecting the appropriate wattage and installing fixtures around the perimeter at six- to eight-foot intervals – preferably low on the wall!
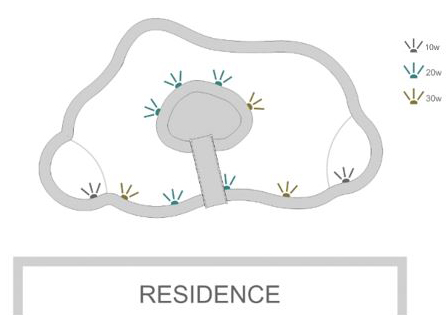
Lazy Rivers
These features, once strictly limited to waterparks and grand resorts, are now appearing in more and more residential projects and present some interesting lighting possibilities. The key is the width of the channel, which will guide wattage selection. Beyond that, it’s a matter of inserting fixtures at the right intervals to ensure even coverage.
| Typical lazy river system |
Lazy rivers present unique safety issues that make it important to achieve even coverage: Bathers are often in the water with other bathers floating on rafts or inner tubes, so it’s unusually important for everyone to be able to see each other – no dark spots allowed!
***
There are no mysteries in any of this: Lighting the feature-filled modern pool does take some time and consideration, but the LED fixtures available in today’s marketplace offer a range of wattages that get the job done, no matter a pool’s special contours and details.
The key is taking the time required to think things through early in the design phase – then setting up the documentation to make certain everyone stays on the same page as the project unfolds.
If it’s a warm glow you’re after, in other words, just about anything is possible with LED lighting systems. What can be better than making a project safer as well as more beautiful for use and viewing 24 hours a day?
Next time, we’ll wrap up this series with Part 4, where we’ll cover the illumination of water in motion, from spillways and waterfalls to jets and vanishing edges.
Graham Orme is product and custom design manager – lighting and water features for Zodiac Pool Systems in Vista, Calif. He may be reached at [email protected].