Looking at Lighting
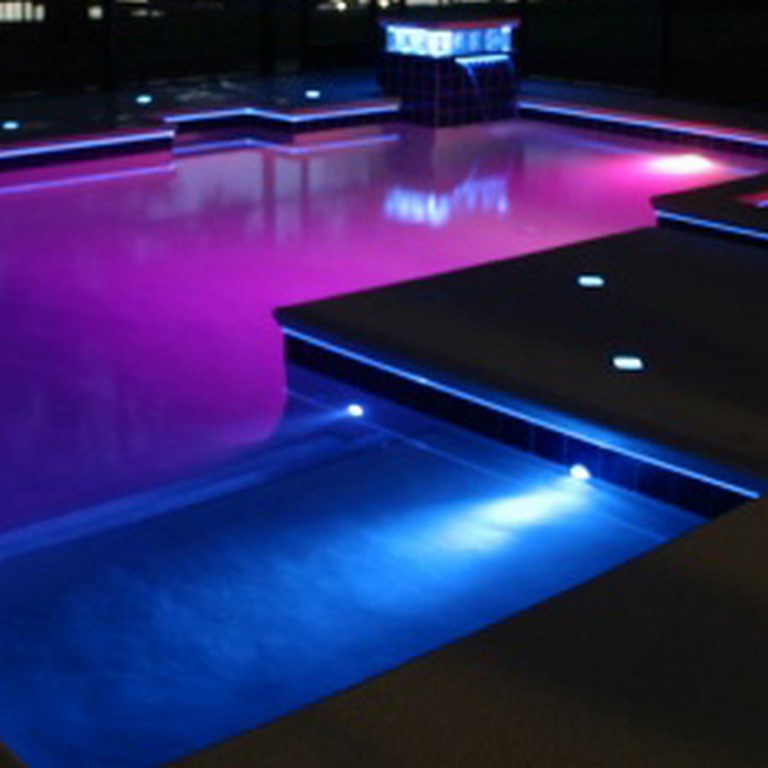
The advent of underwater LED lighting has changed the way we look at and perceive swimming pools and spas once the sun goes down. In contrast to past days, when a single incandescent light blasted the eyes of anyone nearby, lighting is now a far subtler design feature – an intricate, integral part of a pool’s aesthetic presence and the key facilitator in creating an ideal backyard ambiance once the sun goes down.
But LED technology brings a learning curve with it – one that is even more of a challenge in an era when pool designs are increasingly dynamic and complex. And no matter whether you’re a veteran or a raw novice in matters of pool illumination, LED lighting as a technology is moving along so quickly that anyone lighting a watershape needs to focus – really focus – on the technology’s capabilities and how best to achieve desired results.
This article is the second of four that are intended to define what’s happening with pool illumination and seeks to speed the process of understanding the way LED lighting works in bodies of water. The first installment (click here) offered a simple lighting philosophy and cracked open some of the issues involved in using the technology effectively. This feature and the two to follow will get very specific, with this one addressing the principles of lighting the pool in common shapes – starting with the most familiar of all.
Rectangular Pools
There are several options to consider in lighting a simple rectangular pool, basically rotating around a choice between using more lights at lower wattage to achieve an even glow – or using fewer lights at higher wattage, mainly to reduce costs.
Both approaches will light a pool sufficiently to ensure safety – the main reason for introducing lighting to a pool in the first place – but the illustrations below will highlight some significant aesthetic distinctions that come into play.
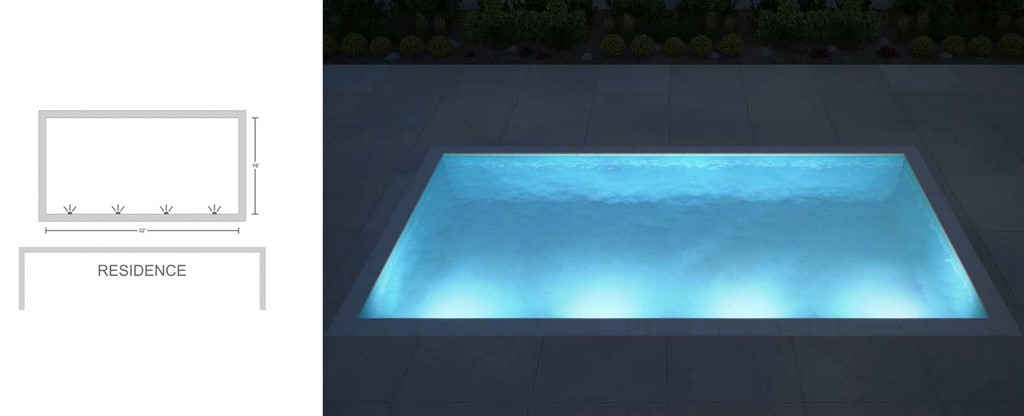
| Option 1: More lights at lower wattage |
As a rule, creating an even glow calls for spacing the lights out at approximately eight-foot intervals along a straight wall. (As discussed in the first article, it’s best to point these lights away from – or at least not directly toward – the house and its prime viewpoints.) This more lights/lower wattage approach results in a body of water that glows evenly without hot spots or dark spaces.
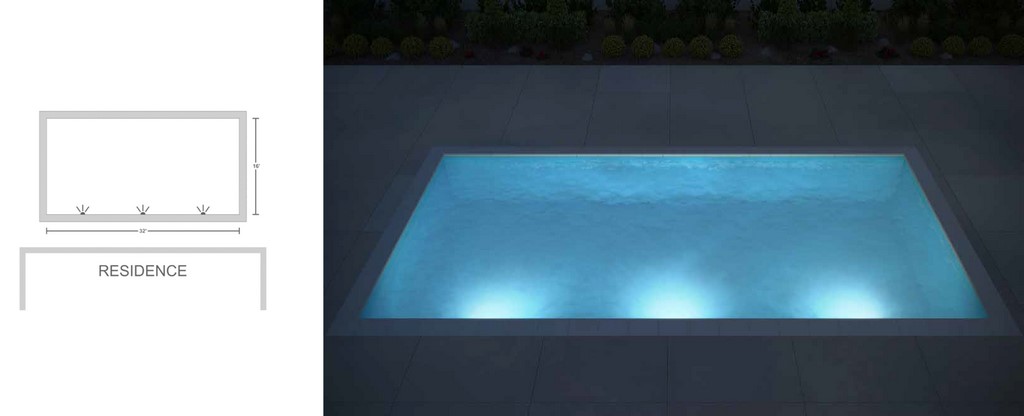
| Option 2: Fewer lights at higher wattage |
If there’s a budgetary or some other practical reason to limit the fixture count, the same pool could be effectively and safely lit with fewer LEDs at greater wattages. This approach lowers the cost to the client, but the lighting effect will not be as polished as it is when Option 1 is used.
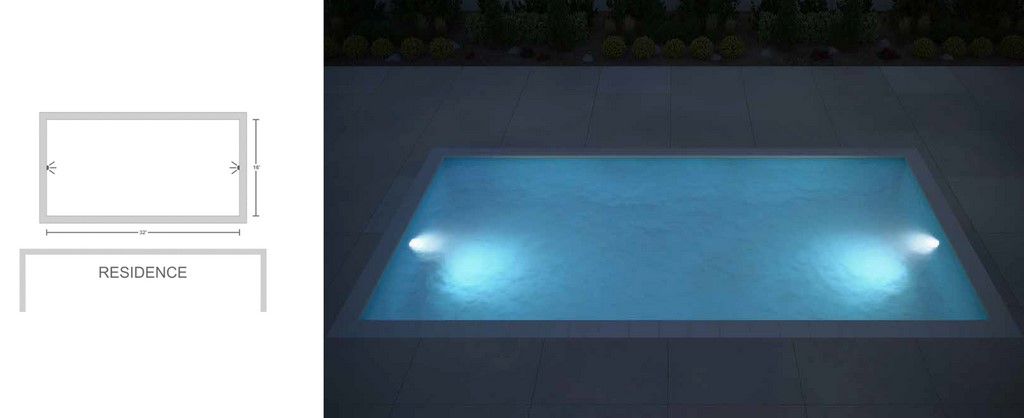
| Option 3: Fewer lights at longer angles |
In this option, the lights point parallel to the house instead of away from it – an approach that gets the job done, but with the result that the glow is less even than it probably should be, even compared to Option 2.
This is a decision in which educating the client and fully explaining the differences in appearance that result from each option is an important point of conversation. For many watershapers as well, this is a new wrinkle in the design process, but it’s one of increasing importance in facilitating the homeowner’s ability to control mood and ambiance after dark.
Kidney-Shaped Pools
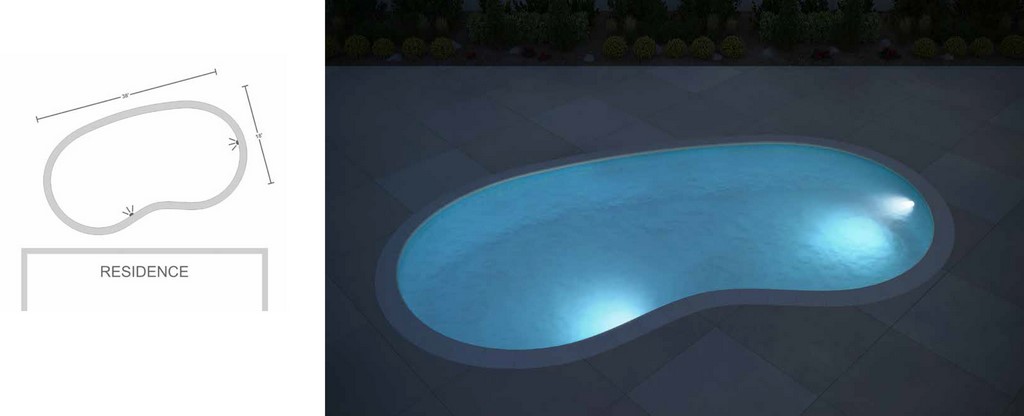
Two basic options can be applied to kidney-shaped pools.
| Option 1: More lights at lower wattage |
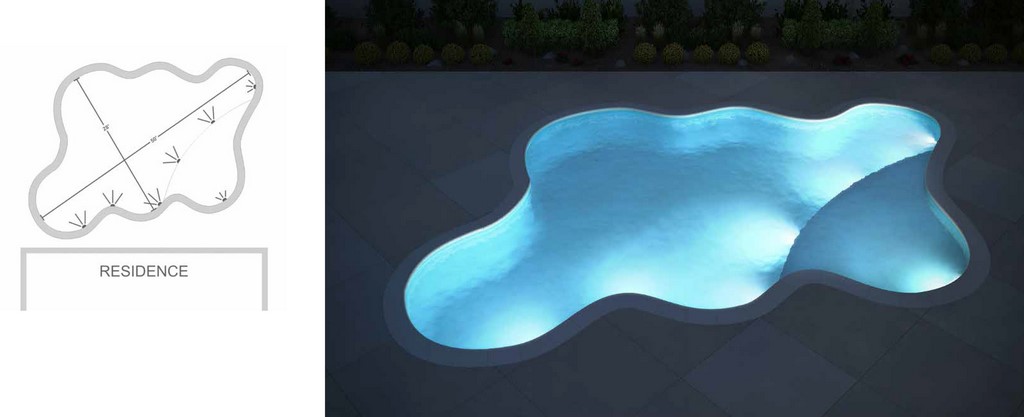
The rule of placing lights at eight-foot intervals is not as applicable with a kidney-shaped pool, but the same warm, even glow can be achieved by using lights of lower wattage if they are placed thoughtfully, keeping beam spread in mind.
Indeed, the key point to remember with kidney-shaped or freeform pools is that the most concentrated portion of the beam spans an angle of 60 degrees. If there’s no limit on the number of lights being installed, working out their placements is a matter of mapping out the angles to ensure the most even light coverage.
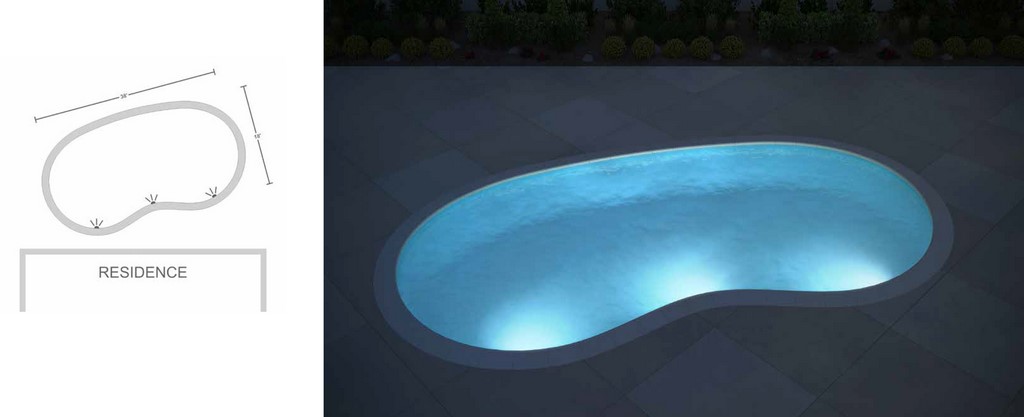
| Option 2: Fewer lights at different angles |
This approach, using fewer lights of greater wattage, can light up a kidney-shaped pool quite effectively – although again, the lighting will not be as warm and even as it would be with more lights.
Here and elsewhere (and as was discussed in detail the first article in this series), it’s important to keep in mind that the color of the pool’s interior has a major influence on how it should be lit: With white or light-colored interiors, the approaches described so far will generally work well. In dark-colored pools, however, a lot of the light will be absorbed before it has a chance to extend all the way across the pool – a fact that requires upward adjustment of both wattages and maybe even fixture counts.
Geometric Pools
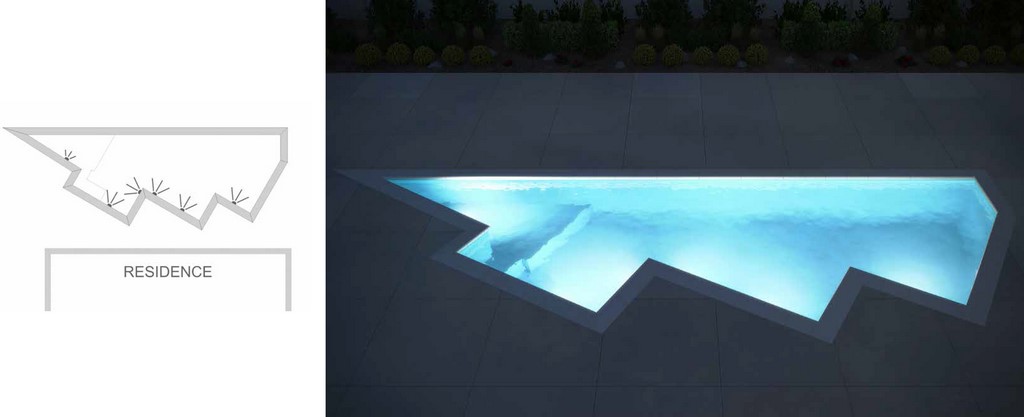
These strongly angular pools come with an infinite number of variations and generally more complex contours. In these cases, the lighting design is driven by beam spreads and making certain the all parts of the watershape are safely and adequately lit.
Safety is always important, of course, but in this case, adequate coverage is crucial: Why have an intricately contoured pool if it features can’t be fully appreciated at night?
| A ‘typical’ geometric pool |
The angled walls of a pool of this sort, coupled with the presence of a shallow lounging area, call for the use of multiple lights just to make certain the main features are safely visible after dark. We’ll cover the lighting of lounging areas in detail next time; the important point to note here is that the face of the shelf’s wall needs to be lit, which means two lights are required in close (and crossing) proximity.
This sort of crossing is fairly common in pools of this type. To avoid creating a hot spot, it will often be necessary to think things through and adjust wattages down accordingly.
Spas
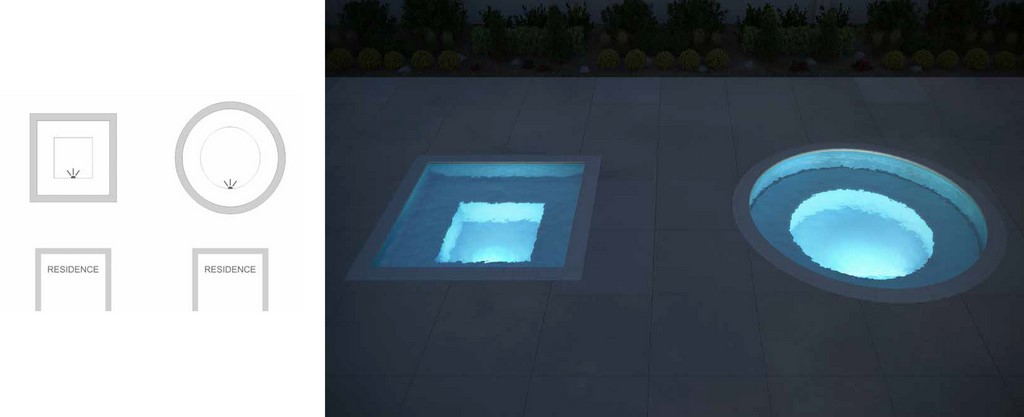
The most important rule for lighting a spa is to place the light below the bench. Doing so keeps people from resting their backs against a warm lighting fixture – and from blocking out the light as well. It’s also wise in design and practical terms to point the light in a spa away from the residence, but given the deeper positioning, this tends not to be as crucial a factor in a spa’s well as it is in a swimming pool.
| Typical spa configurations |
In the usual four-to-six-person spa, using lower-wattage lights is generally advisable because the light won’t have to travel great distances from their fixtures. This will change in large or dark-finished spas, of course, but as a rule it’s both safe and prudent to think in terms of lower wattages.
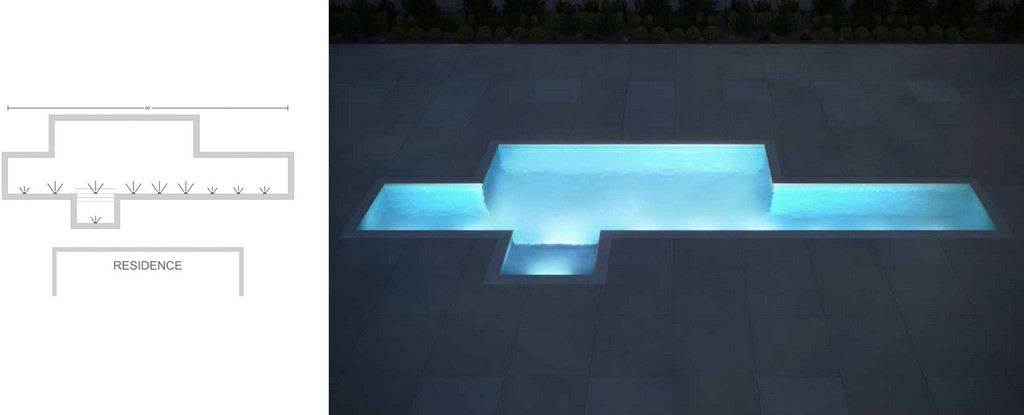
Lap Pools or Lanes
Lighting a true lap pool is a straightforward matter of spacing the lights out at eight-foot intervals along the length of the pool, adjusting wattage in consideration of the pool’s width and making certain all areas are safely lit. In pools with lap lanes, however, the lighting task is more complex and commonly will involve mixing wattages to make sure everything is as it should be within the entire pool.
Obviously, no swimmer wants to paddle directly toward a light, so it’s best to think in terms of perpendicular (or near perpendicular) angles to the greatest extent possible. It’s also important to avoid the temptation of cutting back on the fixture count to reduce costs: Doing so makes it very difficult to produce the warm, even light we’ve defined here as being most desirable.
Look at it this way: The pool will not always be in use, no matter how ardent the lap-swimmer. Having a watershape look its best as a backyard ornament when it’s simply there, after the sun goes down, is an important key to long-term client satisfaction.
| Option 1: A lap lane with straight walls |
This one is simple: Use smaller-wattage lights in the areas of the pool that are narrower than the main body of the pool to prevent hot spots from appearing on the opposite wall.
| Option 2: Lap lanes in a freeform pool |
This isn’t obviously a pool for lap swimming, but if, in designing the pool, you know that the client is likely to use it in that way, it’s important to ensure adequate lighting both for safety and appearance.
I’d also argue that, even if the client says there’s absolutely no intention to use the pool for nighttime lap swimming, it’s still advisable to go with a full, lap-swimming-friendly lighting program. Needs and users change, pressing designers to think in flexible terms – and you can never go wrong in applying a full-featured lighting approach.
***
Please note that this is a discussion of basic principles – one intended to start you thinking about lighting in safe, responsible ways, but also to excite you with how great an aesthetic contribution these systems can bring to a project. If, armed with these basic concepts, you focus your energies on creating environments, managing moods and making poolscapes more enjoyable after dark, your clients and their guests will thank you!
In this article, we glanced briefly at shallow lounging areas – and all know that there are plenty of other specialized details that make the lighting task more complex, including steps and benches on one end of the scale and grottos on the other. That’s where we’ll head next time.
Graham Orme is product and custom design manager — lighting and water features for Zodiac Pool Systems in Vista, Calif. He may be reached at [email protected].


