


Earthbound Endeavors

Last month, we began our discussion of a large pond, stream and waterfall system for a historic upper Midwest estate found on the forested shore of a scenic lake. As related there, the project was to include three major ponds and a series of complex waterfall structures connected by streams rising close to the top of thegently sloping property.
To sum up, the space we were working with measured approximately 300 feet wide and 800 feet long – a large section of a 35-acre estate marked by scores of mature trees that largely governed the watershapes’ configurations. Moreover, as there were no natural rock formations or outcroppings on site, we faced the need to create them while working without any cues from the local landscape.
Through the design stage, the clients made it clear that they were looking for a system that was scaled properly to the setting; that provided views and reflections complementing the home and verdant landscape; and, finally, that presented their children with ample places to play while also giving them access to areas where quiet contemplation of a glorious overall setting was possible.
We completed our early work under the eagle eyes of local historic-conservation agencies with which we were happy to co-exist. This proved, however, a time-consuming and occasionally difficult process that added months to the design phase and ended up severely compressing the time frame in which construction work could be done. With the assistance of my good friend Dave Duensing and his expert staff (David B. Duensing & Associates, Ponte Vedre Beach, Fla.), we finally were able to roll up our sleeves and dig into the many tasks at hand.
PHASE BY PHASE
In projects of this size and complexity, it’s not unusual for the work to unfold in stages as a consequence of the difficulties in crew scheduling, working around weather and the seasons and a host of other complicating factors. In this case, construction ultimately took place in three major phases, with the first covering installation of the majority of the system.
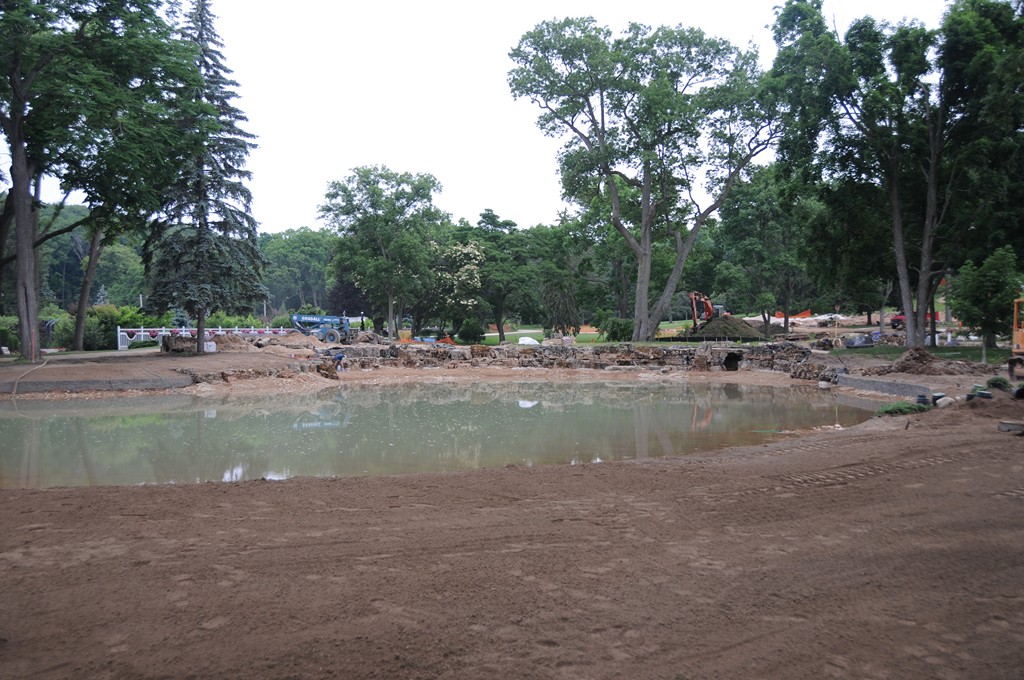
In this initial burst of activity, we installed the large pond at the base of the system. It’s situated close to the home and is framed by the huge pillars forming the entrance to the estate’s formal gardens. There’s fine lawn that runs to the water’s edge, and we placed a complex range of four-foot-high waterfalls that descend from a second, smaller pond located just above. On this level, we built a beautiful boardwalk through (proposed Lotus beds and constructed six-foot-high waterfalls that flow into the pond’s far side. Behind these waterfalls, we built two small caves designed with the children in mind and, finally, completed this part of the project by installing the third pond, which in this project contains the natural-filtration system.
All of this was done in a mad scramble of activity in slightly more than two months, with the water in, the pumps working, the turf laid and everything for the most part finished in time for a huge summer party.
The second phase, which had to be completed before winter set in, included construction of the high waterfall and the large, complicated grotto we built behind it.
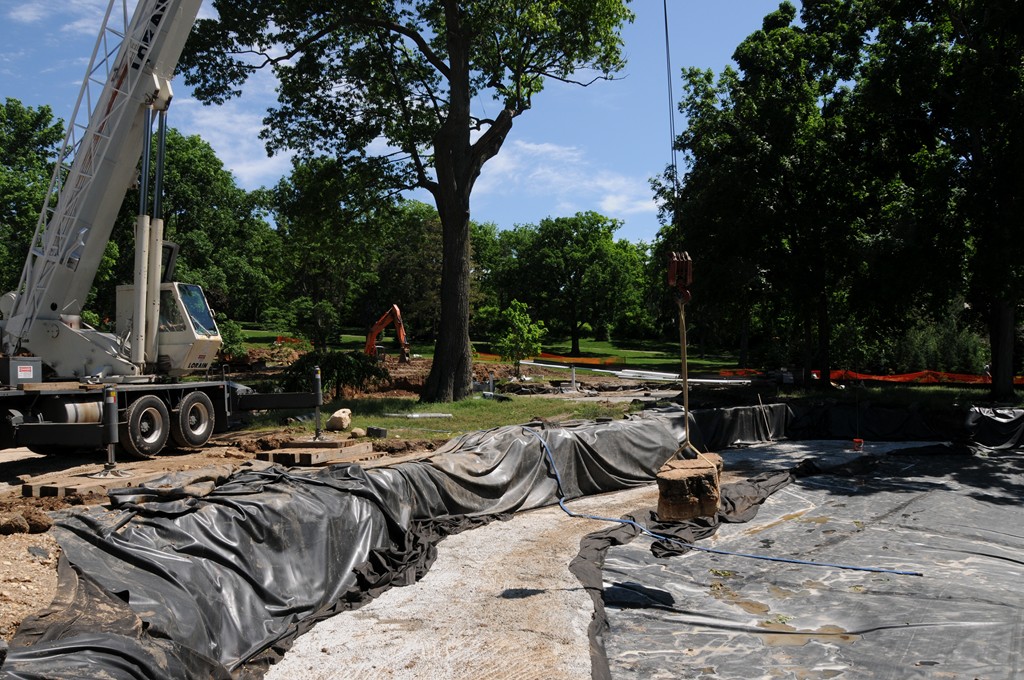

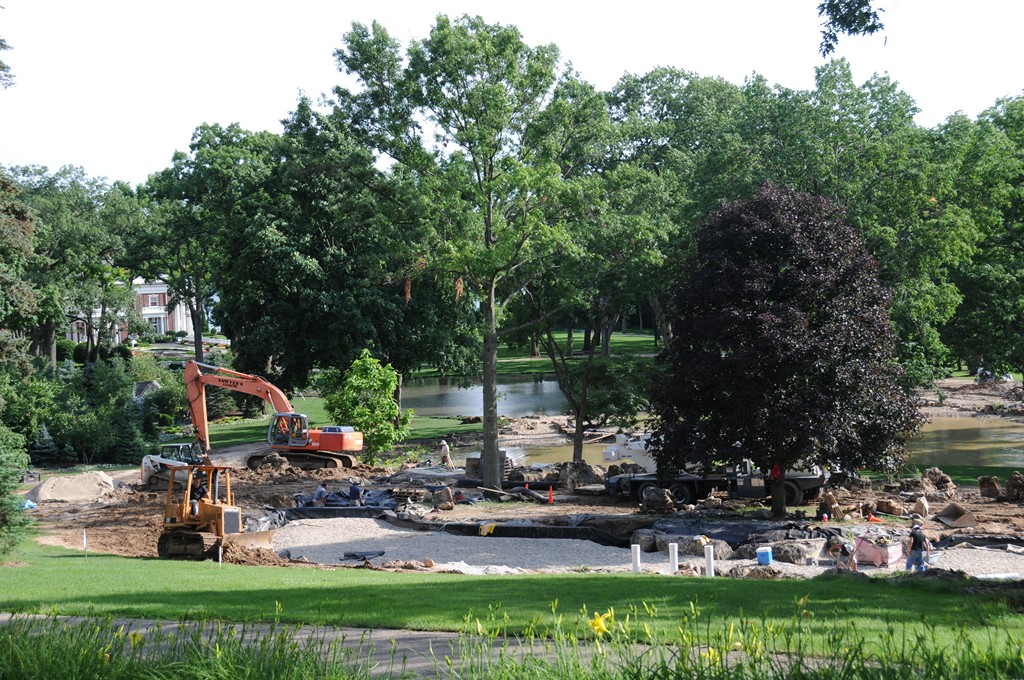
| Our Phase One work on the lowest of the project’s three large ponds began with excavation and compaction and then placement of an expansive, multilayered lining system. Where required, we also added concrete foundations for the rockwork and waterfalls before covering and protecting the liner with gravel and finally adding the water. By the time we’d filled the lowest pond, we were already well under way with the same sort of installation process with the middle pond. |
The following spring, we returned to complete our work on site, finishing the two streams at the top of the property that feed the high waterfall. We also dealt with installation of the rock formations in the landscape around the watershapes and applied a wide array of finishing touches throughout.
As completed, the system includes three pump vaults that move water up the system in relays – from the bottom pond to the middle pond, then from the middle pond to the filter pond and, finally, from the filter pond up to the headwaters hidden at the top of the system. The flow starts as a humble trickle, with injection points hidden along the streams gradually increasing the flow as they approach the high waterfall and water moves down the chain and eventually reaches the bottom pond.
Our objective throughout the construction process was to create structures that would last indefinitely. The key in this case had to do with the way we worked with the liners – a component of these systems that I prefer to make as functionally bulletproof as possible.
Preparing for the liner starts in the excavation process, which in this case was simplified by the fact that we were working in sandy, gravelly soil – consistent and very well drained with no issues at all related to groundwater and no subsurface rock formations to slow us down. In rapid order, we were able to install our below-liner, overflow and pump-vault drains and tie them all to the deep stormwater lines that already existed on the property.
The material we removed during excavation was very clean and by chance included some lovely colored pebbles and rounded stones that we used later on top of the liner.
PREPARING THE SPACES
From the start, we knew that a project of this scale could only be made using liners. Using concrete would certainly have been prohibitively expensive, and it was likely that two other options – the use of puddle clay or bentonite – would likewise be quite costly and would in any event be problematic given the nature of the substrate and complexity of the system.
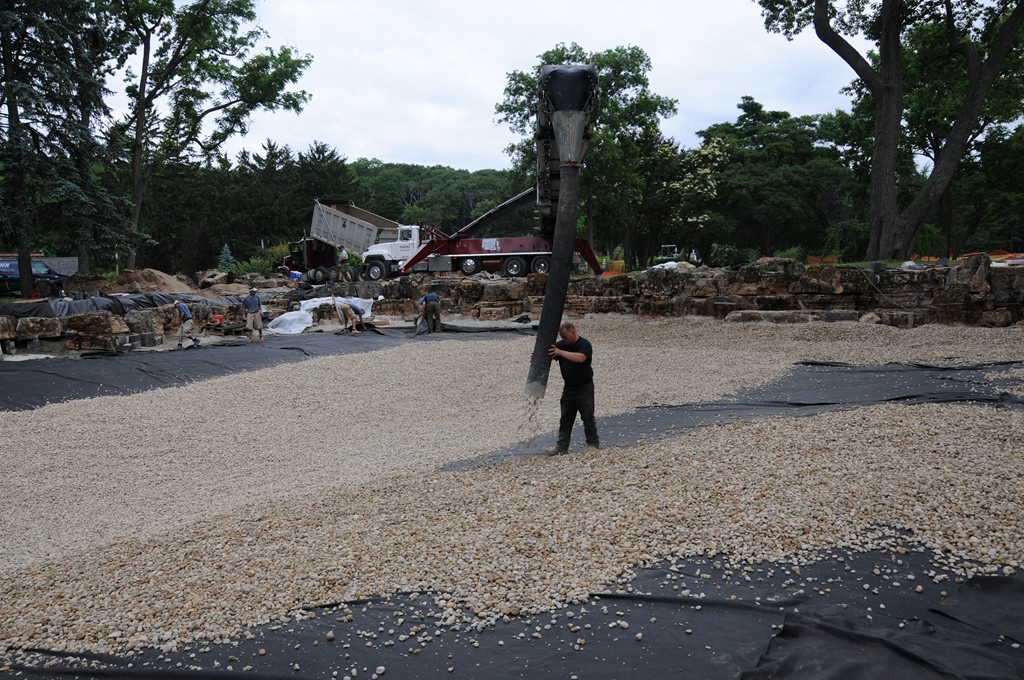
So liners it was to be: We started by compacting the excavated ground so everything would rest on smooth, firm surfaces. We then applied a dressing of clean sand topped by heavy geotextile matting. Above that, we placed a 60-mil EPDM liner (Firestone Specialty Products, Indianapolis, Ind.), covering it with yet another layer of the geotextle matting – basically to sandwich the liner and protect it from physical damage as well as degradation attributable to the sun’s ultraviolet radiation. WE further protected the shallow planting areas with stainless steel mesh.
Atop the liner, everything else would be built: all the foundations for the waterfalls, the soil beds for both the emergent and aquatic plantings, the foundations for the rocks and allowance for islands or the fountain we had been discussing. This was not a job that could be hurried: A great expanse of surface needed to be covered and protected while we also had to deal with the system’s intricacies – meaning Duensing’s crews had to do a great deal of cutting and seaming and flanging of numerous pipes through the liners (and do it all expertly, which they did).
As I’ve explained in previous WaterShapes articles (particularly “Sculpting Edges” in the August 2005 issue), the treatments applied at the water’s edge absolutely dictate how you work with the liner at these margins and how far beyond the water the material must extend.
If it’s to be a hard or block edge, little extra liner is required, really just enough to flip it over the back of the edge structure. If it’s a rock edge, by contrast, the liner will reach beyond the rocks and stop at a point about six inches above the planned water elevation. Alternatively, if you want a marshy edge, the liner might extend quite a long way beyond what is perceived as the body of water – upwards of ten to 20 feet beyond the edge to allow you to merge the aquatic and terrestrial plantings.
Suffice it to say that with a project this extensive, all of those approaches came into play in different sections of the composition.
Once the liner installation was complete, we began creating the foundations for the waterfalls and major rock formations. This process began with the pouring of steel- and glass-fiber-reinforced concrete pads as raft-like structures at the base of the major elevation transitions. The degree of reinforcement depended on the size, heights and weights of the rocks we intended to use. In all cases, we ordered concrete mixes to achieve the high psi strengths indicated by the engineer in the structural plans.
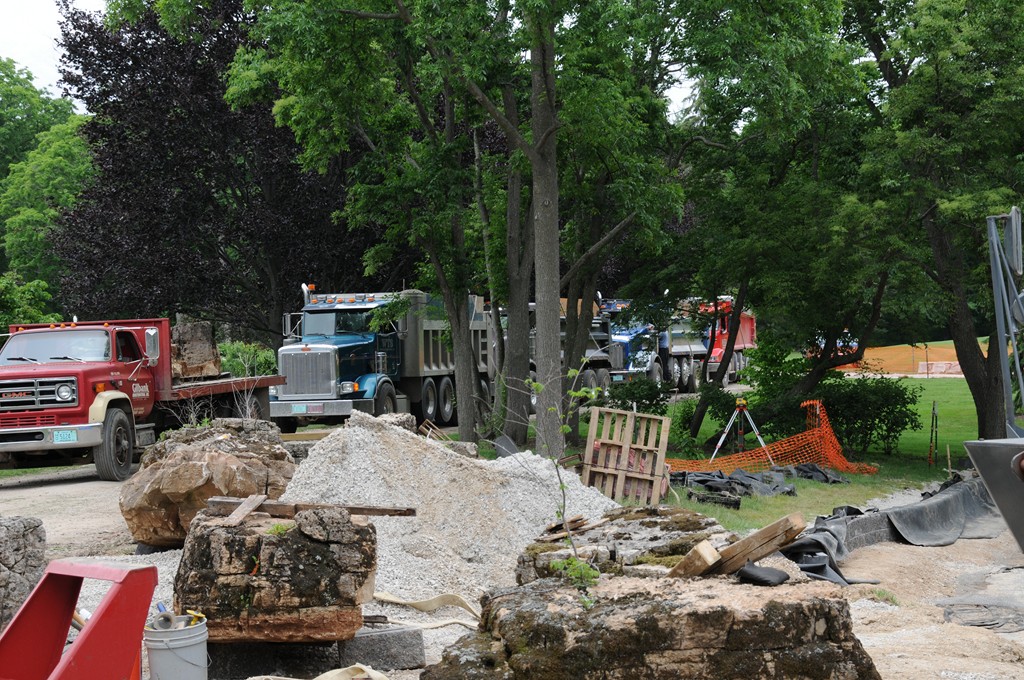
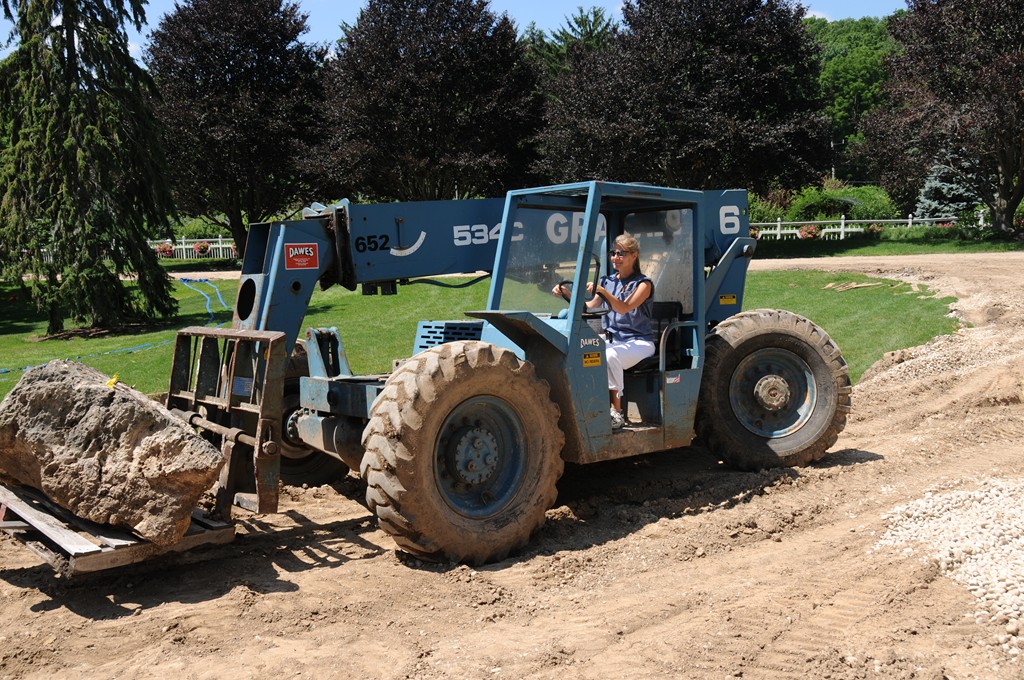
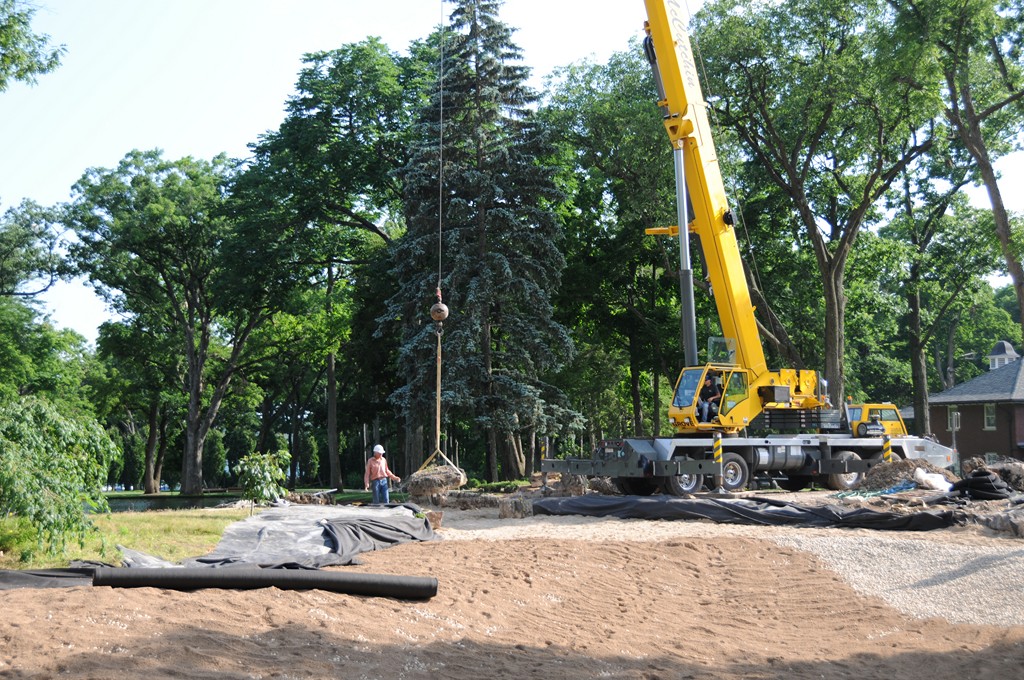
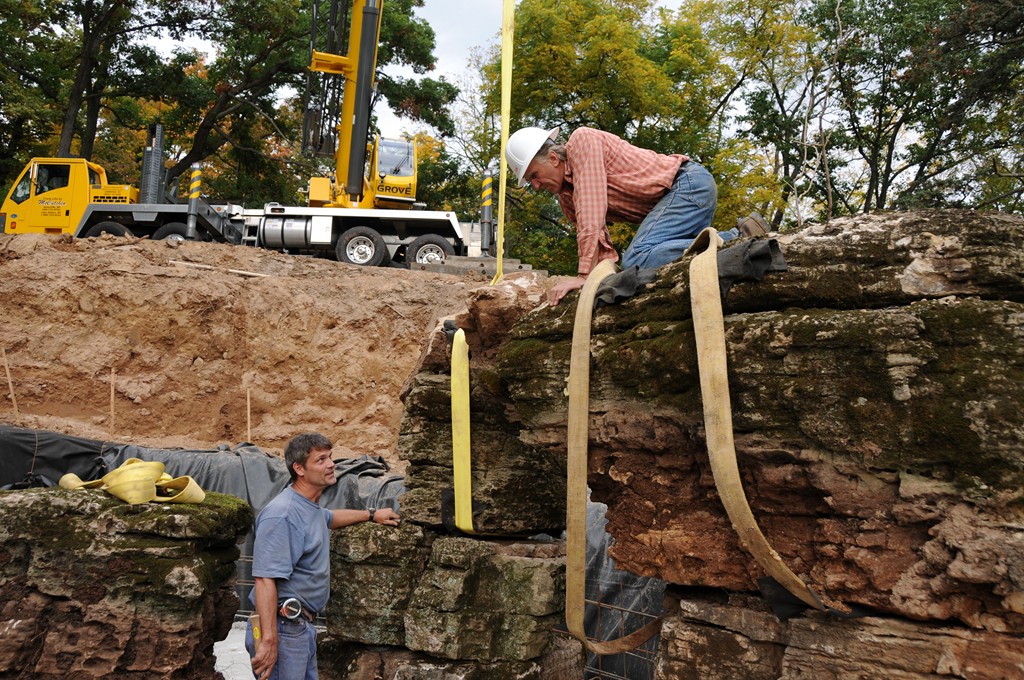
| The parade of trucks that showed up to deliver the 500 tons of rock we ordered created quite a traffic jam. (The trove we’d selected included outstanding pieces covered in moss and lichen – and even a few upon which small trees had sprouted!) Once the material was transferred to our holding area, we began the laborious process of moving rock around the site by whatever means was necessary, placing the heavier pieces with cranes and maneuvering smaller pieces into just the right spots by hand. |
These rafts serve three basic purposes: First, they established structural bases for the rocks in which they could be locked in place. Second, they enabled us to move rocks around with relative ease compared to moving and adjusting rocks on a liner or even in soil. (The differences here are extraordinary: You can easily move a two-ton rock with a pinch bar on a concrete surface, nudging it around easily to attain the perfect position. Doing the same thing on mud or a liner is a slow, ghastly job.)
Finally, the rafts of concrete protect the liner and spread the load and were perhaps most important to realizing our desire to make the liner failure-proof. In this, we take advantage of the fact that a 60-mil EPDM liner has 400-percent elasticity and that it is also sandwiched between two layers of almost unbreakable, non-stretch material. In other words, we do not have to worry about it tearing as it takes the weight of all that applied concrete as well as the rocks we’ll ultimately place atop it – truly a wonderful system.
ENGINEERED ENDURANCE
Once the rocks were placed, we drilled holes and pinned them in place with rebar. Having connected all the rebar, we encased it in a poured and vibrated mass of fiber-reinforced concrete backfill. At that point, the rocks become integral units on their rafts of concrete and were very stable indeed: If the ground were to move, the structure would move along with it as one piece.
I’m the first to concede that I tend to over-engineer these structures. In some cases, I have drawn up plans calling for two reinforcing layers and have subsequently been told by engineers that one would have been sufficient. As I see it, however, the cost of structural failure is so great compared to the cost of some extra material that this is an affordable form of insurance against future problems.
In making these adjustments, I don’t casually deviate from the engineer’s prescriptions. In doing so, I rely on years of experience in working with these materials in critical applications and have developed an intuitive feel for managing the masses and stresses involved in projects such as this. I know what works, in other words, and find myself pleased to see that the engineers generally agree with me and support my assessments.
By contrast, in flat areas where rocks are just sitting and not holding back the ground, stability is not nearly as important: If they move around a bit over time, there’s no damage done. By the same token, these free-floating rocks are very important in aesthetic terms, as they give the appearance of having fallen away from the larger geological formations. As a result, we do treat them seriously and make certain they are as stable and secure as they need to be.
As was discussed in last month’s article and at the outset of this one, there were no existing rock formations on this property or any to speak of in the local area. As a consequence, we had to create them from scratch. On the one hand, this made the job somewhat easier because we didn’t have to worry about matching something down the road or up the hill or on another part of the property. On the other, it meant we had to bring in lots of rocks and make them look natural.
All of the rock used on this project was sourced from a remote quarry in the Mississippi Valley. It’s a beautiful, water-worn limestone with extraordinary surface features. In addition, it’s essentially the peelings off the very top of the quarry. For the most part, these upper-level scrapings are discarded in favor of the unfissured subsurface stone that can more readily be machined to various shapes and sizes.
What we were after instead were the top pieces that had been exposed to moving water, oxidation, erosion and plant material – the raw stuff of natural outcroppings and watercourses in all their rugged glory.
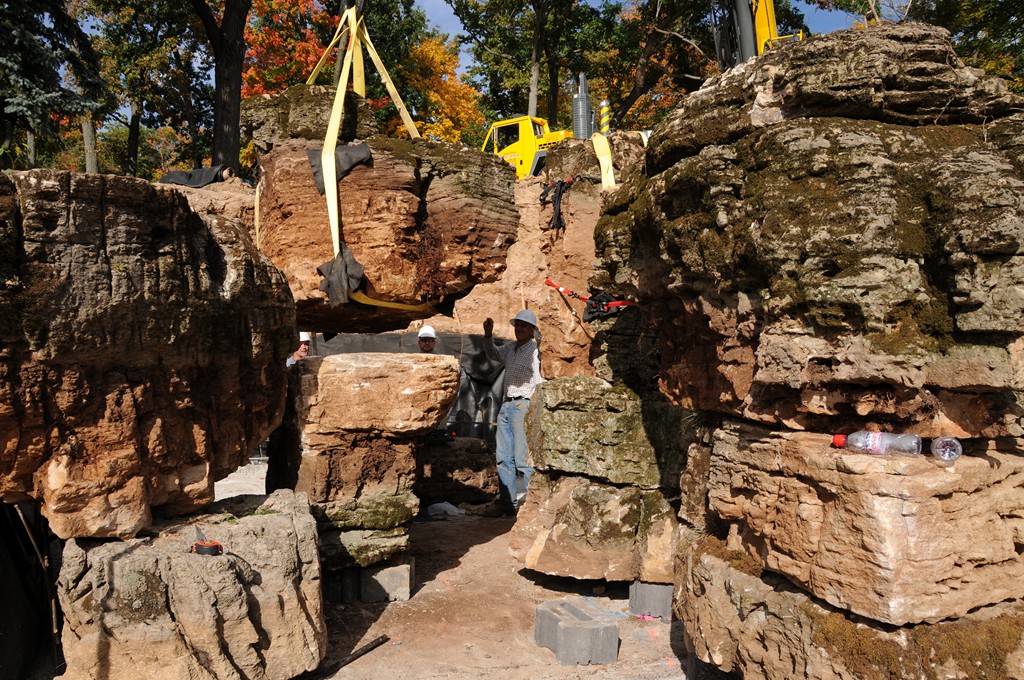
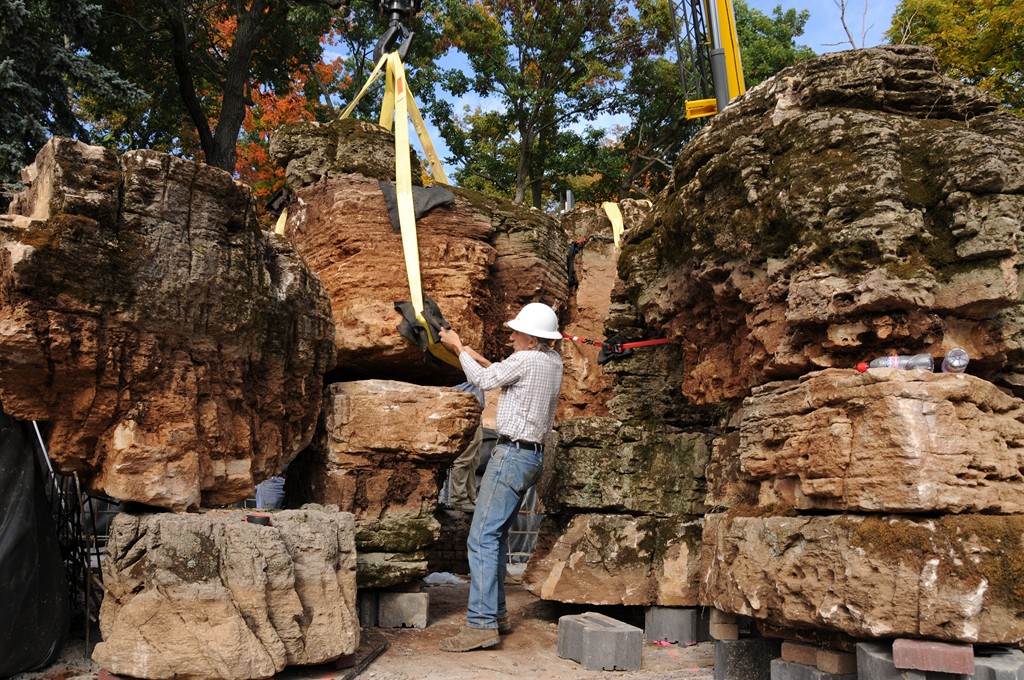
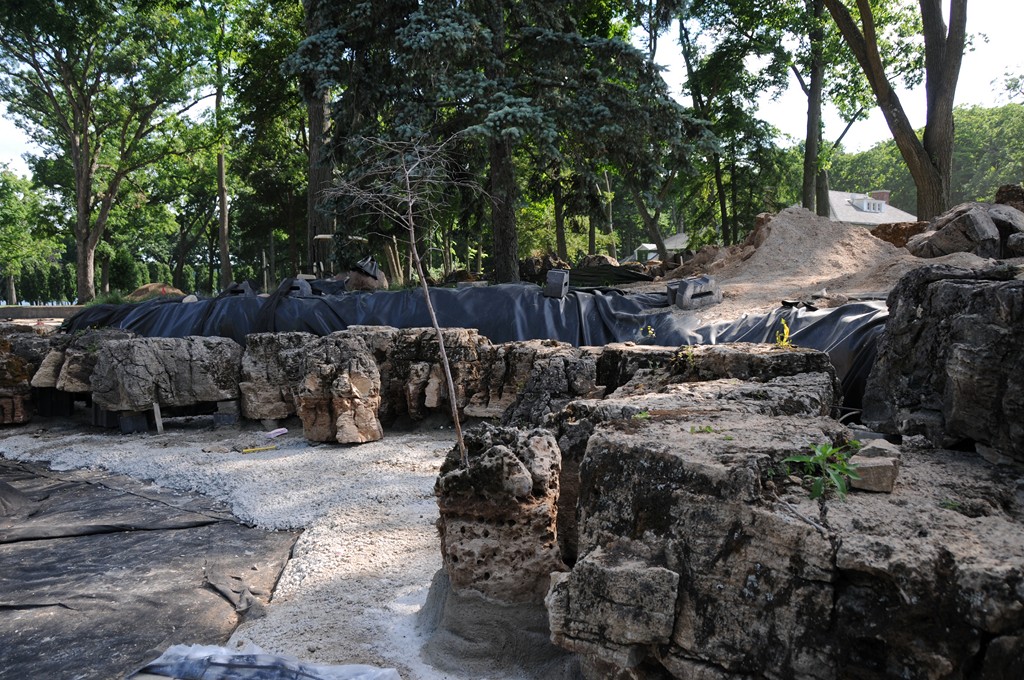
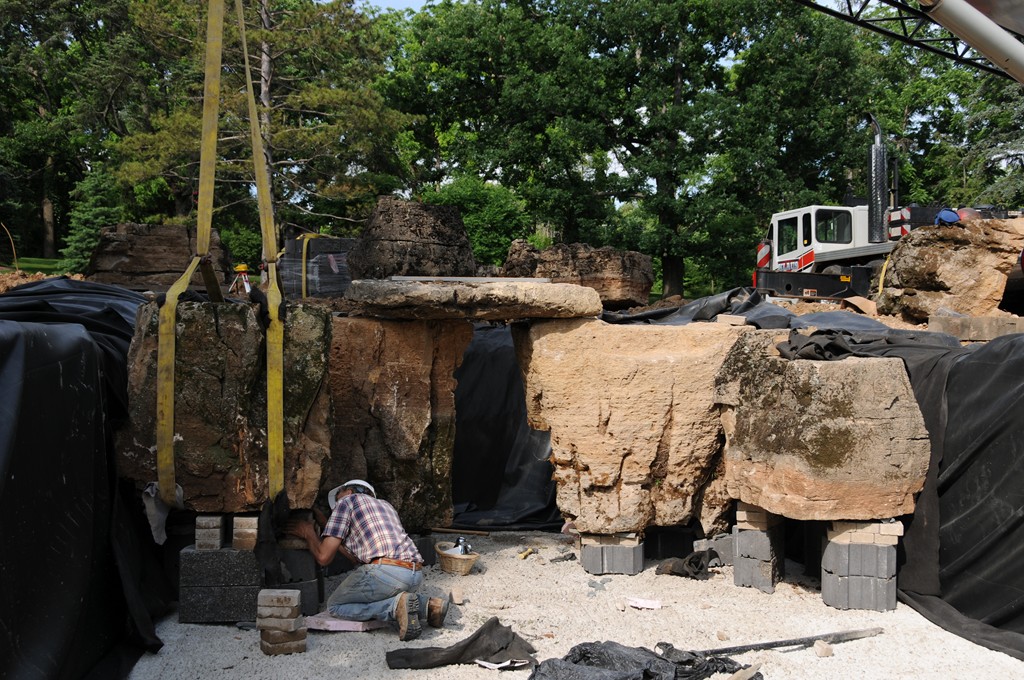
| In the second project phase, the work became more vertical with development of the tall waterfalls that would eventually flow into the top pond and behind which we were to place a large grotto. The stones were quite large – but even so had to be stacked to achieve the elevations we desired – and had so much character that the process was as much about the joy of discovery as it was about the hard labor of placing, shimming and securing the boulders. |
This particular stone was a bedded, sedimentary rock that had been laid down millions of years ago and formed from millions of tiny fossils. Erosion had exposed wonderful, layered patterns and imperfections that give toeholds to all sorts of wonderful mosses, ferns and lichen. At the quarry, we were simply amazed by the plants we saw growing among these rocks: There were Aqualegias and even small trees and sage brush that had sprouted and were thriving in the cracks.
In all respects, this stone had precisely the character and features we were after.
SHEPHERDING ROCK
I made three trips to this quarry to choose the rock.
I’ve always seen stone selection as a hugely important process and spend a great deal of time finding those pieces that are suitable and will work well within the composition. I start with a rough shopping list of what I must have – say, 100 pieces of four-foot-high rock, 10 pieces of six-foot-high rock and so on. I’m also looking for pieces that might serve as spillways or for other specific purposes in the watercourse. In this case, for instance, I found a number that had saddles in the middle where the stone’s surface had been worn down by flowing water.
In walking around, I will sometimes happen upon “must have” pieces that enchant me and that I know I will incorporate. Such a piece might be really wacky, with an unusual shape or possessed of odd surface features. In this particular quarry, I found a massive piece of rock shaped something like a humpback whale. I also found a number of wonderful pieces that looked good from every angle – just the sort of thing to use as “islands” rising from the water.
In all, we acquired some 500 tons of this stone. When it was delivered, the temporary traffic jam with many of the trucks showing up at once to disgorge their loads was really comical – a slice of chaos that lasted several hours. That’s a lot of stone, of course, and the volume was increased a bit by virtue of the fact that I always order about 15 percent more than I know I’ll need.
This way, when I’m selecting and placing pieces later on, I won’t run out of options and end up compromising the design somehow because there are no available pieces left to fill given spots. And the extra material never goes to waste: I’ll use it later to dot the surrounding grounds with small outcroppings that tie the landscape more intimately to the water – all of which gives the entire scene a more natural appearance.
I typically stage the stone in a way that lets me conveniently walk around it as I make selections. I place this area as close to the job site as possible, but only seldom can it be described as “nearby.” That’s not exactly ideal, but I wouldn’t ever want the staging area to be so close by that I’d end up tripping over it as I tried to move around the job site.
However it works out, I take all of this preparation very seriously, as I’ve always seen stone selection and placement as the most critical of all construction processes: This is where careful planning and design work meet up with intuition, visualization and creative improvisation.
Last month, I shared several rough sketches that express the basic design. These are extremely useful in setting everything up for the moments when the system takes form in natural stone, but because it’s impossible to anticipate exactly what the stones will look like, sketches are only a gross approximation of what will eventually take shape.
In making my choices, I always walk around the staging area carrying a stick I make on site, notched so I can conveniently size up the rocks. On this project, the contractor’s children were so intrigued that they made me a six-foot-long stick that they’d carefully notched and color-coded. They were delighted that I used it as we walked around making selections and saying things like, “Now we need a blue-and-a-half-sized piece!”
(I can’t abide tape measures, by the way: They require two hands, get choked with mud, tend to break or jam at the least opportune times and require bending down to read the numbers. Great for carpentry nut no good for rocks!
As I move through the staging area sizing up the possibilities, I’ll usually identify a handful of pieces of suitable size and then choose the one that best conforms to the immediate need with respect to shape, grain patterns, contours, fissures and other surface features.
SPELUNKER’S DELIGHT
In the end, of course, the success of a naturalistic project of this or any other magnitude all comes down to intuition, experience and the quality of the available materials. You can plan all you like, but ultimately it’s the rocks themselves that dictate how things will come together.
The situation is rather more complicated when you work on a grand scale, however, because you’re creating as you go along and each placement depends on a whole string of placements that have gone before. It’s even more difficult when you have to face something like a large waterfall. To make these things work, I refer steadily to my drawings and interpret the situation as I go along, knowing I can never precisely predict how things ultimately will look.
|
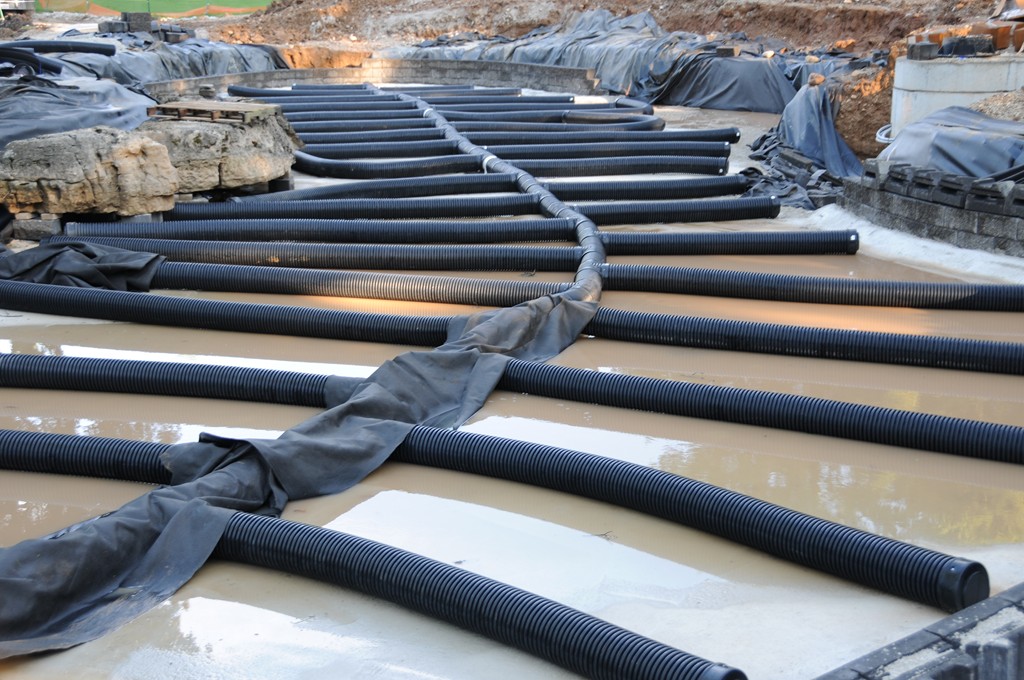
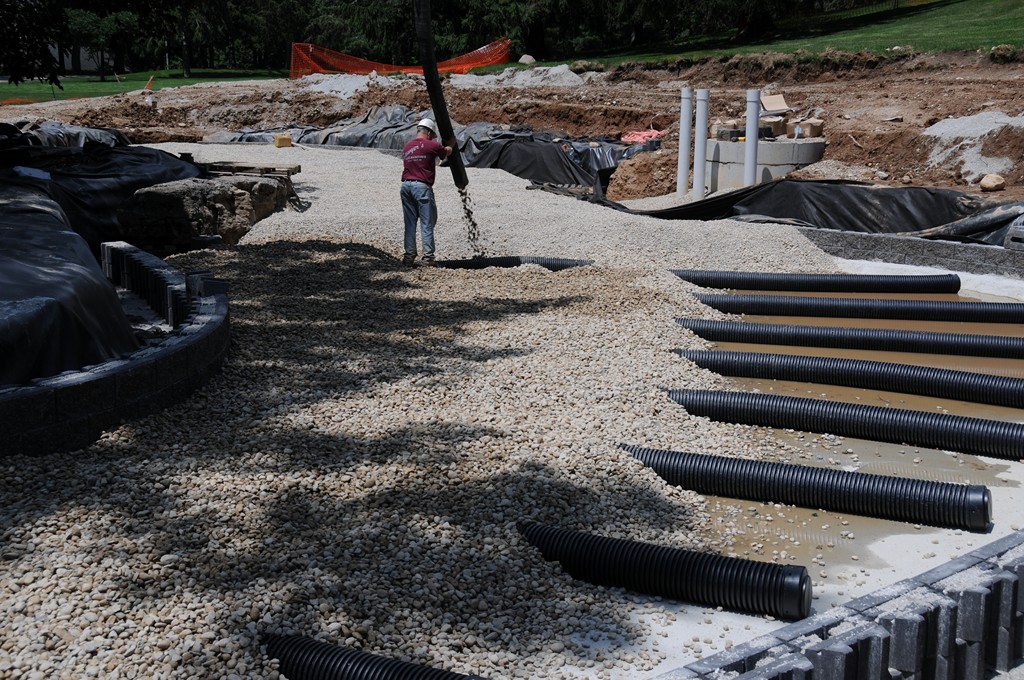
Mass Filtration The filter pond mentioned in the accompanying text was designed to provide impeccable water quality throughout an extremely large system. This vessel, which sits near the top of the system, measures about 50 by 120 feet – and the entirety of its floor is dedicated to biological filtration.
It’s very simple approach that I’ve relied upon since I started building filter ponds in the 1970s: We place perforated-pipe manifolds beneath 18 inches of gravel. Pumps pull water down through the gravel, where it’s cleansed by aerobic and anaerobic bacteria. The pond also contains plant material of types that send out extensive fine roots that are greedy for food and further help to starve algae and purify the water. It’s a simple system, but it works beautifully – the proof being evident in the quality of the water it produces. — A.A.W. |
This is another reason I bring in 15 percent more stone than I know I’ll need: The bigger the available selection, the quicker and better the job. Indeed, having enough to choose from is too important to leave to chance, and I always try to avoid situations where I’m forced to rethink the design or a detail based on a shortfall in available material.
I could go on about rock selection and placement for countless pages, but it’s time to move along and shift from the big picture to some of the smaller details and how decisions were made. As I was building the system, for example, I decided to create a cave that would let the children duck behind the waterfall: To that end, I fashioned a little passageway into the space that let them peek out across the water.
This improvisation worked so well that I decided to add another small cave nearby, giving the kids two places to hide. I’ve always known that children love hiding places, and these kids were no different: They were absolutely thrilled with the caves, and their howls of pleasure in turn made the clients very happy indeed.
They were so delighted, in fact, that the owners asked if I could make a cave meant for adult use. I immediately thought of the high waterfalls at the top of the system and recognized that there would be a space for a much larger cave up there for adults. After a bit of discussion, the clients gave us the go ahead and we went forward with the processes that made up the second phase of the project.
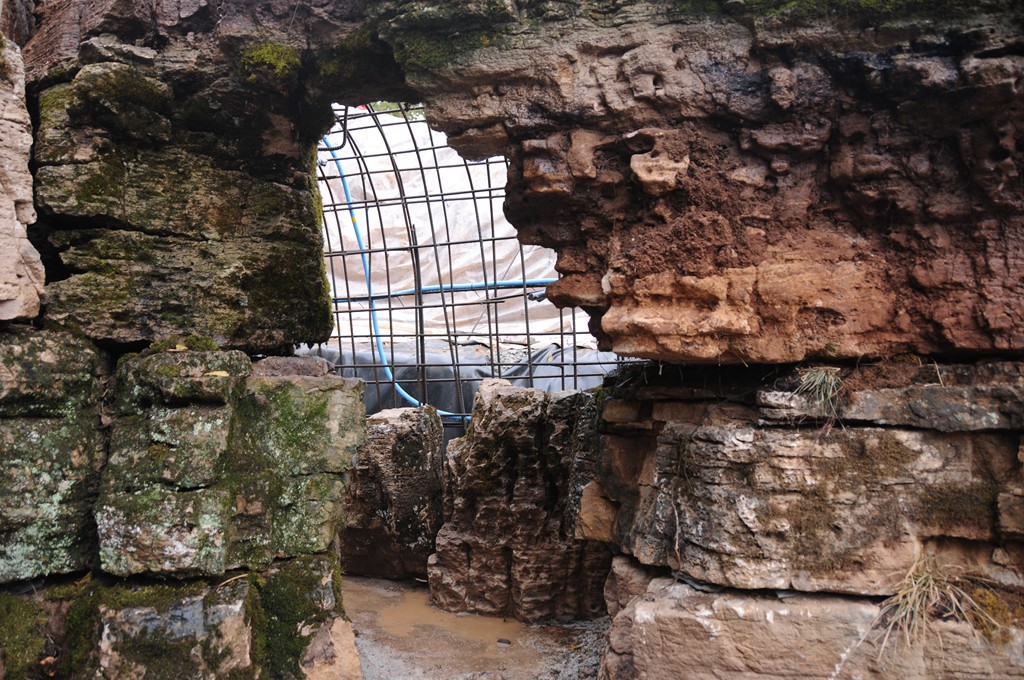
Arranged so that adults could walk in comfortably without needing to get wet, the grotto is reached via a path that follows the water but then allows you to duck into an entrance that is almost invisible until you come upon it, inset into the stones in a deep chasm between rising rocks.
At about seven feet high and covering approximately 150 square feet, the interior space is organized so that it leads you around to a spot directly behind the waterfall. It’s actually quite complicated inside: The cave includes stalactites and stalagmites, and there’s a small “ante-cave” that has a dripping stalactite with little stone benches. The whole space is wired with discreet LED lighting and, interestingly, works as a sort of micro-climate, staying cool in the summer and warm in the winter.
CONCEALED STRENGTH
The grotto/waterfall structure is absolutely sturdy, built more or less like a bomb shelter. Behind the waterfall, for example, the large rocks are pinned into a massive floor structure consisting of two mats of rebar encased in 7,000 psi glass-fiber-reinforced concrete two feet thick. We left scores of pieces of rebar sticking up, all around the perimeter and in middle spots where we were setting up the stalagmites as well as the interior columns.
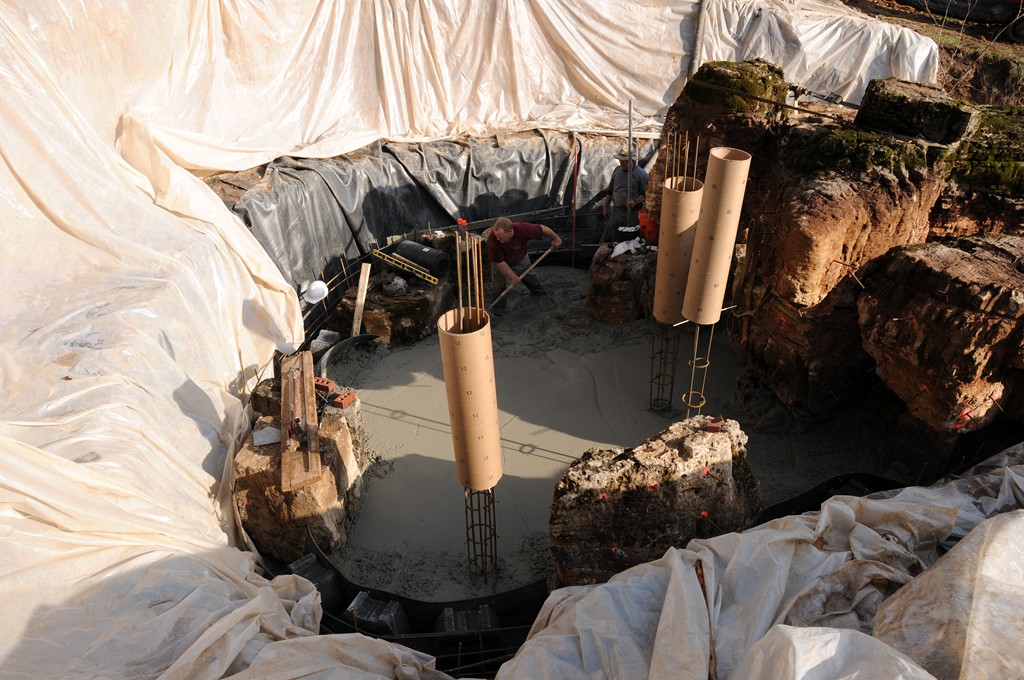
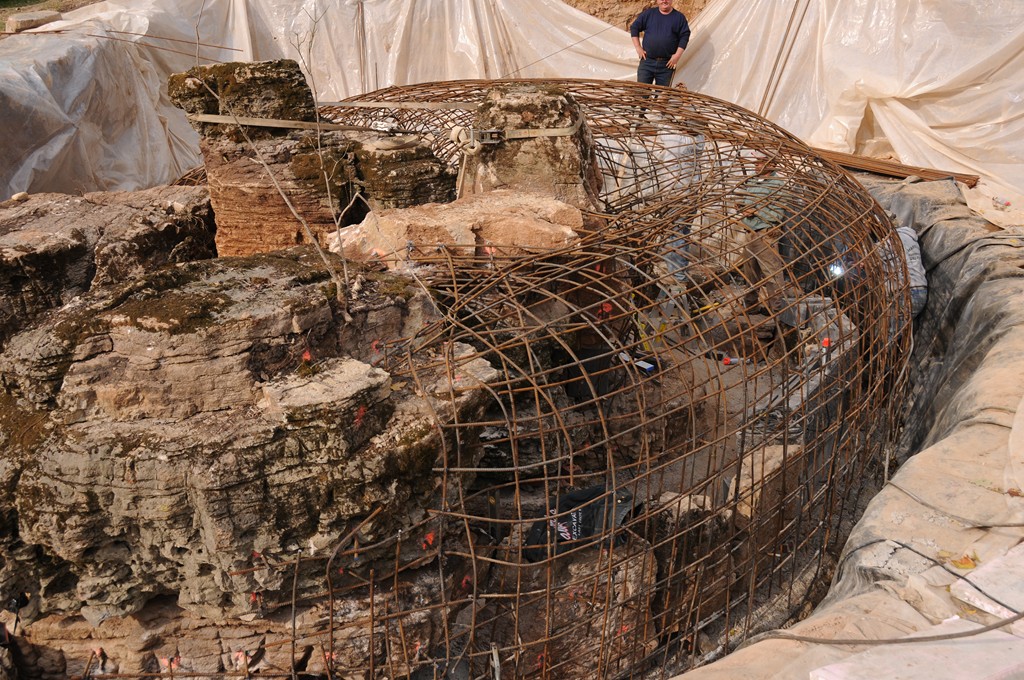
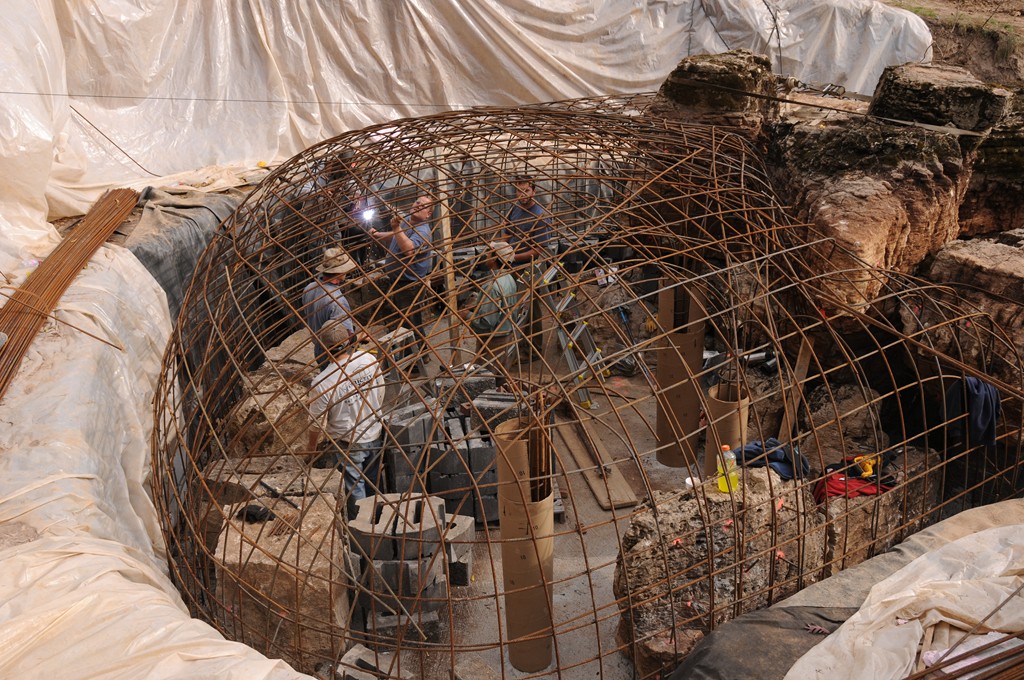
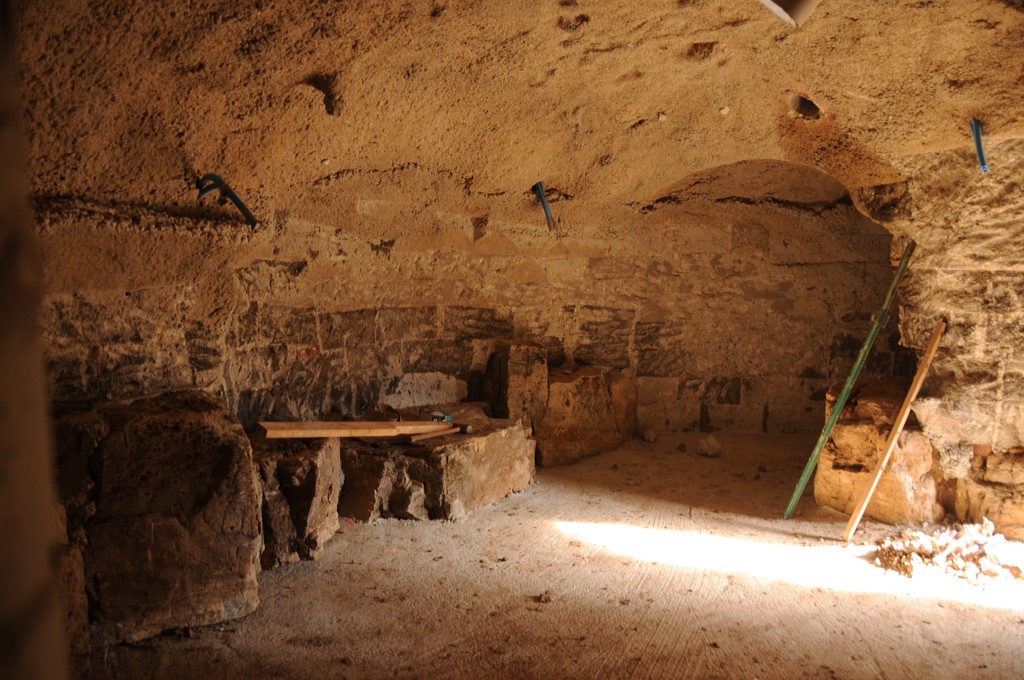
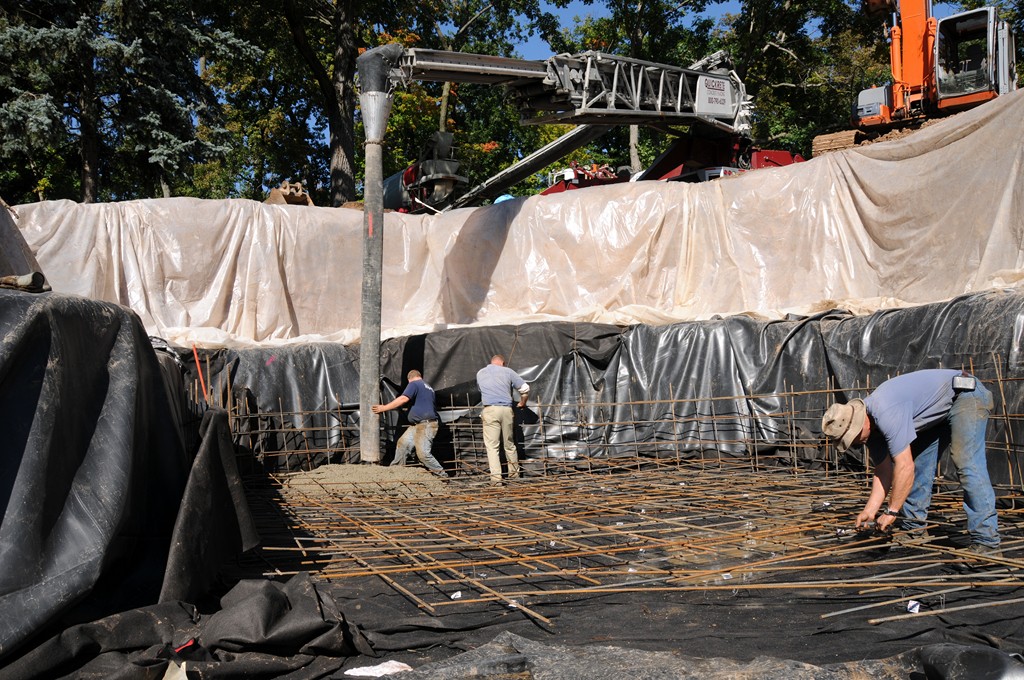
| With its foundation set and boulders placed, we moved in to create what would be the grotto’s open space. We started by building a steel cage complete with interior columns and, when all was ready, backed off and filled the cage with sand to establish a working form for the concrete. Once the concrete was applied, we cleared away the sand and began the unusual and interesting work of putting the finishing touches on a ‘primeval’ cave. |
Once this cage was ready, the whole thing was filled with sand that would act as a mold against which we would eventually pour concrete to form much of the wall and roof structures. At that point, I crawled up onto the sand and, by hand, sculpted the interior contours of the grotto. We also inserted tubes for lighting as well as the plumbing for several small dripping-water effects.
It was all great fun: At this point, after all, we could do pretty much whatever we wanted to do.
Once those details had been attended to, we set rocks into the sand and built a rebar armature over the sculpted sand, drilling into the rocks and connecting them to the armature. We then poured fiber-reinforced concrete over the whole affair to a minimum thickness of 18 inches. After it cured, we removed the sand and walked in to inspect the space we’d crafted.
We finished up by plastering the grotto’s interior with a lime/mortar mix that looked similar to the rock in appearance, then combed and sculpted it while dyeing it with natural earth colors. Now it was the adults’ turn, and they loved their grotto as much as the kids loved their caves.
Once this was complete, we prepared the surface above the grotto for the project’s third stage, placing a liner and installing rocks on top of the concrete to form the sides of the stream. (We pinned these in place following the same drilling procedure we’d used in shaping the grotto.) During this process, we drove directly over the structure with a loader – after all, it had to be tested! – then followed up by placing liners and rocks to complete the headwaters streams.
This was the final stage, and we completed the two streams at the top of the system before working through a list of finishing touches all around the property. As is always the case with such a wonderful project, we will anxiously follow the system as it ages and the plants grow and we might find some fine-tuning to do. As I mentioned last month, for example, I’d love to return someday to install some sort of visual connection between the bottom pond and the lakefront.
As it stands – and as you will see in an upcoming issue – the completed project involved both hard work and great fun in a beautiful setting. Best of all, the owners are delighted with what we’ve all accomplished in keeping with their vision of appropriately enhancing a beautiful, historic property.
Anthony Archer Wills is a landscape artist, master watergardener and author based in Copake Falls, N.Y. Growing up close to a lake on his parents’ farm in southern England, he was raised with a deep appreciation for water and nature – a respect he developed further at Summerfield’s School, a campus abundant in springs, streams and ponds. He began his own aquatic nursery and pond-construction business in the early 1960s, work that resulted in the development of new approaches to the construction of ponds and streams using concrete and flexible liners. The Agricultural Training Board and British Association of Landscape Industries subsequently invited him to train landscape companies in techniques that are now included in textbooks and used throughout the world. Archer Wills tackles projects worldwide and has taught regularly at Chelsea Physic Garden, Inchbald School of Design, Plumpton College and Kew Gardens. He has also lectured at the New York Botanical Garden and at the universities of Miami, Cambridge, York and Durham as well as for the Association of Professional Landscape Designers and the Philosophical Society. He is a 2008 recipient of The Joseph McCloskey Prize for Outstanding Achievement in the Art & Craft of Watershaping.