Dream & Build


Great ideas aren’t worth much if they can’t be made into reality, says watershape builder, and fountain aficionado, Tony Giordano. That’s why taking a design idea and making it work with creative and commonsense solutions is where he finds the greatest satisfaction. Here’s a look at three seemingly simple projects where he applied surprisingly nuanced problem-solving to ensure the systems function as intended.
By Tony Giordano
It’s a statement I sometimes boldly share with the landscape designers and architects I work with, “If you can dream it, I can build it.” I’m proud of the fact that problem-solving is what I do best and enjoy the most. I take creative watershape ideas, and do my best to make them real.
It’s not always easy. There have been a few projects that when I first looked at the design, I thought, I’m in trouble. But I always work the problem and eventually arrive at a solution. I’ve mostly succeeded; and, as a result, have been in a position to work on a variety of creative designs over the years.
In this article, we’ll look at three waterfeature projects, with an eye toward the challenges each design presents, and the solutions I used to bring the designs to operational fruition.
RULE OF THREE
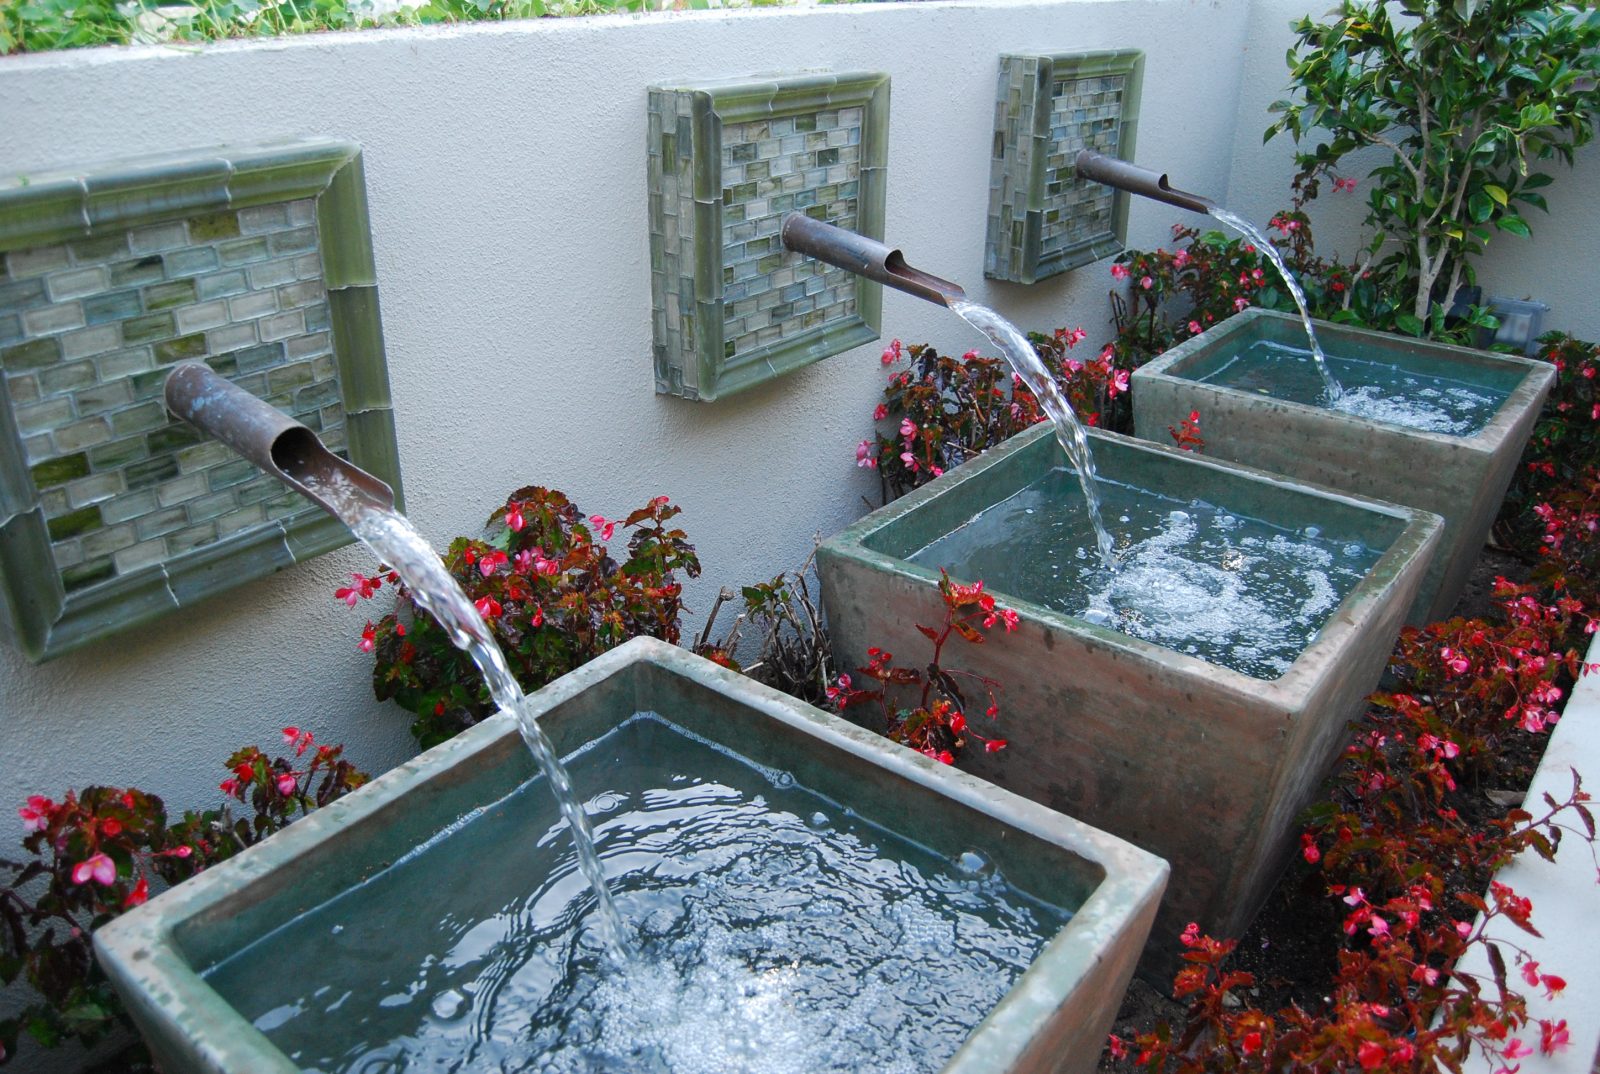
This project (pictured above) is a courtyard wall fountain featuring three repeating harmonious copper waterspouts falling into square terracotta bowls. It’s a relatively simple looking feature, but one that’s trickier than it seems, because we need to see even flow and water levels in each of the three identical features.
Our options here would be to use three separate pumps with suction and returns lines to and from each bowl to achieve even amounts of suction and return flow. As a result, the suction out of each bowl, and return through the spout, would be independent of the other but could be adjusted to be very close to exactly the same.
Or, we could use just one pump, reducing maintenance cost, overall job cost and equipment-area size. That would mean using one suction line split to connect to all three bowls and one return line split three ways for returns to each spout.
The challenge: No matter what you do to equalize the suction or return plumbing to and from each independent body of water, you’ll never get the suction and return to and from each bowl to be exactly equal. Eventually leading to one of the bowls emptying out, which in turn results in one of the bowls overflowing.
To mitigate this problem, I installed gravity feed plumbing from the bottom of each bowl, connecting all three bowls to equalize the level of water between the bowls. The plumbing for this simple application, should be a minimum of 1 ½ inches. I used 2-inch.
After the equalizer lines are installed, the one-pump system described above will work just fine. I prefer having one ball valve for each return line to control the flow to each return feature as opposed to a return plumbing loop. Based on my experience, utlizing ball valves for each return is a safer option and more effective option.
In terms of waterproofing the bowls: There are a number of waterproofing systems on the market, unfortunately many will not work when continuously submerged in water. When trying a new product, I recommend calling the tech department of the manufacturer to ensure in what conditions the product will work. Reading the label is also helpful.
In this situation, we used a cementitious waterproofing agent, which should work reliably. Keep in mind that most cementitious waterproofing agents recommend adding a liquid polymer, one of those devils in the details.
MULTIPLE LEVELS
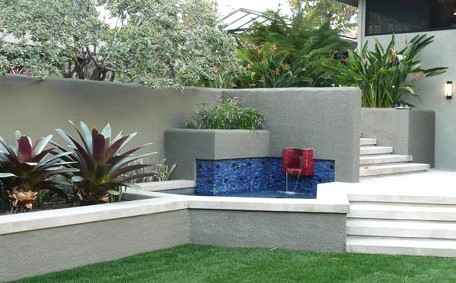
The second water feature consists of three separate but interconnected bodies of water — two of which are on the upper level and one on the bottom level. The vessels are tied together by a water channel, which cascades down a flight of stairs before dropping into the lower-level body of water.
The first feature has a pyramid shape with a waterwall effect on all four sides. (Waterwall flow rates can vary tremendously; most residential waterwalls require approximately 5 gpm per foot or less.)
The second feature includes three bubblers. All manufactured bubblers will come with a flow rate, which is important in designing your hydraulics, pump size and filtration properly.
The third feature incorporates a spillway effect dropping into it. Our challenge here was to achieve an adequate flow rate for the desired effect for each of the three features, as well as the desired flow rate for the almost-level portion of the water channel, along with the desired flow rate of the water channel as it cascades down the staired portion of it.
The 5-gpm from the first feature is not enough to give us the necessary flow rate for the first segment of the water channel. Therefore, we added a separate return to supply more water to the first feature. (Note: all returns have a ball valve on them to control the desired flow rate).
At the spillway into the water channel from the second feature, the flow rate surpasses the flow rate needed for the desired effect through the staired section of the water channel. To reduce the amount of water delivered to the cascading staired effect, a 2-inch drain line was placed in the floor directly before the staired effect began, with a small curb to dam the water before it continues its journey. The drain line was routed into the lower-level body of water with an inline ball valve to control the amount of removal for the desired effect.
The flow rate through the staired effect was close enough to create the effect needed for the final cascade into the lower pool. Once the additions and subtractions of water flow are made by adjusting the ball valves, your flow rates should stay consistent for long periods of time.
One other very important item involves dealing with waterfalls and water features with a skimmer in the bottom pool, and a long distance up to the return at the top and or end of the feature. If this water feature or waterfall is to be turned on and off, in the off position it’s assumed that the water level of the pool will not exceed the height of the skimmer.
Depending on the length of the feature, the elapsed time between when the pump is turned on and until the water starts to fall back into the bottom pool could be considerable. Therefore, the bottom pool must be sized to adequately compensate for this displacement, so the water level does not fall below the skimmer.
TIER DROPS
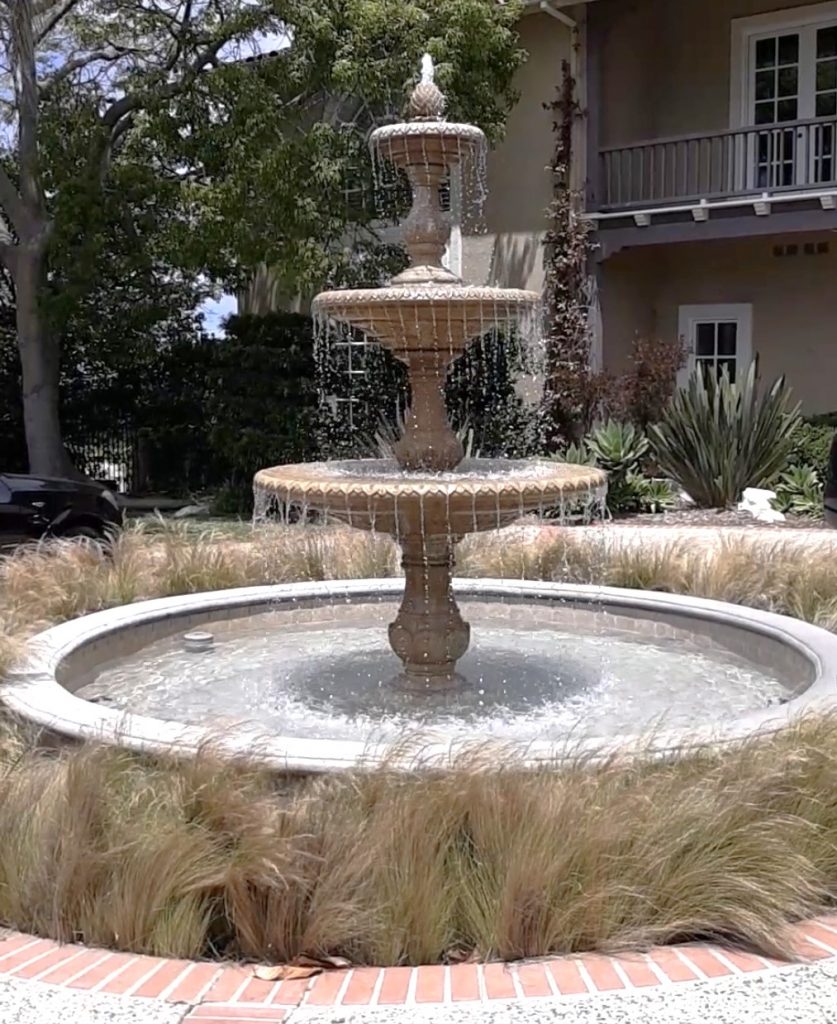
The last project was a 12-foot-tall pre-manufactured three-tiered fountain. The bottom bowl is 5-feet in diameter, the middle bowl is 3-feet and the top bowl is 18 inches. The challenge here is a continuing theme, how do we achieve the desired flow rate at each specific effect.
The flow rate needed to create the bubbling effect at the very top is usually 8 gpm, which is essentially the starting point for calculating the flow at each tier.
To calculate the flow rate needed for each individual bowl, you have to first know the linear feet of edge over which the water is flowing, aka, the length of the weir. In this design, there are tiny 3/8ths inch channels or scuppers around the edge of each bowl, which we’ll call “droplets.” You need 10 gpm per foot.
The top bowl has 24 droplets, so that’s 8 inches total, meaning 8 gpm. The middle bowl has 48 droplets, which total 18 inches, which means you need 15 gpm flow into the bowl. We know that the upper bowl is providing 8 gpm, so that means we need to add 7 gpm. Using the same calculation method, the bottom bowl requires a 20 gpm flow rate, meaning we need to add 5 gpm to go with the 15 gpm that’s flowing into it from above.
We installed a bypass at each level with a ball valve to control amount of water delivered to each bowl.
Every fountain I’ve ever seen whether concrete-based or natural stone has only one hole through the middle of each piece. If the diameter of the hole is not big enough to accept the size of plumbing you need, you’ll have to drill the hole to a larger size.
Most designs for fountains I come across have a small vault in the bottom of the fountain pool where a submersible pump is to be installed.
This method ensures two things: First, the pump will need to be replaced regularly. My experience tells me the average submersible pump lasts about two years unless they run 24/7, which will extend the life of the pump. Second, it will also ensure that the fountain pool will be a bug, leaf and trash collector and labor intensive to maintain.
The preferred method, I set up a front-access-only spa skimmer, that will fit in an 8-inch wall, with a spilt main drain and a remote variable speed pump with filter. This set up will make it easy to maintain, will keep the surface water clean, and will save a considerable amount of labor and money over the long term.
Antonio Giordano is owner and operator of Element Outdoor Design Build, located in Brentwood, TN. He is an experienced arborist, disease and pest-control applicator, general and electrical contractor and pool and fountain builder.


