Averting Disaster
Every once in a while, being right is not such a great thing!
Last month in this column, I described the initial phases of a spectacular project in Malibu, Calif., and one of the things I mentioned was the fact that from the moment I stepped onto the site, I suspected that there might be some serious problems afoot. This impression was based largely on what I saw to be substandard construction of the existing swimming pool and on concerns about the elevation of the deck relative to the structure of the house.
Unfortunately, those initial impressions turned out to be far more accurate than anyone could have imagined.
BELOW PAR BELOW GRADE
To reset the scene: The three-story home is a stunning modernist structure designed by prominent Los Angeles architect Ed Niles. It’s located in the Malibu Colony, an exclusive enclave known for the wealth and celebrity of its residents, and commands a position on a point overlooking a reef – hardly the least impressive property in the neighborhood.
The swimming pool, which was to be remodeled, was located in a narrow courtyard surrounded by the house on three sides and by a tall wall on the fourth. Access to the space was limited to a six-foot-wide breezeway at the front of the house.
As is true with most beach communities in Southern California, the houses in the Colony are set on narrow lots and are often only a few feet apart. In those close quarters, street space is at a premium and there’s not much by way of parking or areas to store or maneuver materials and equipment. All of this increased the level of difficulty of the project, but it wasn’t anything my crews haven’t dealt with before.
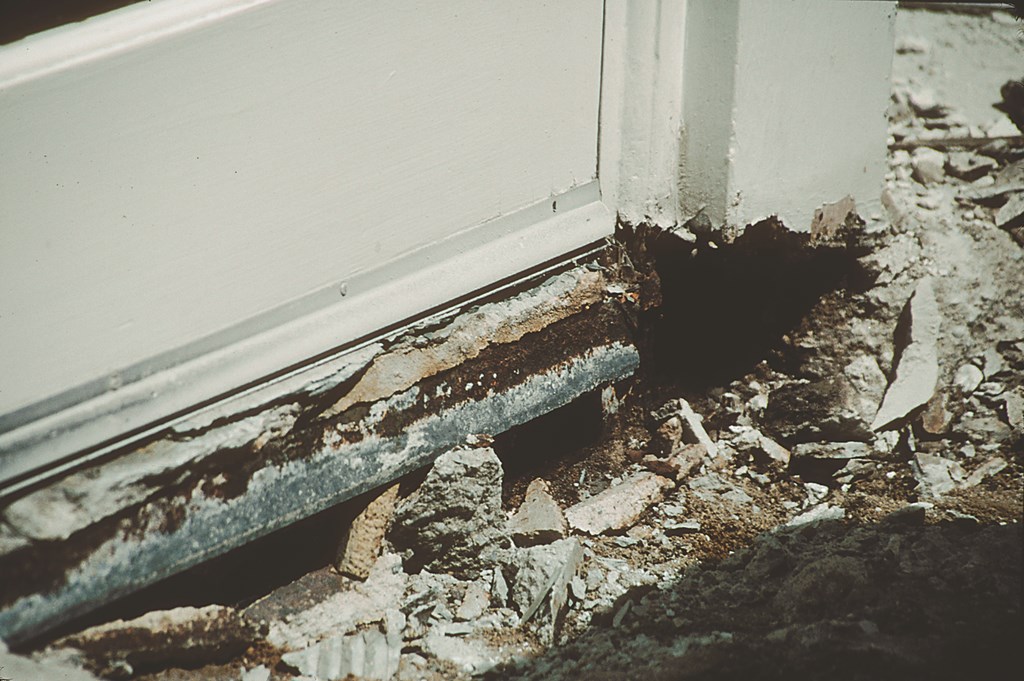
| Once our excavation of the courtyard was complete, we were able to see that the way the original deck had been set up had done an amazing amount of damage to the wood in the home’s foundation. |
But this oceanfront project was distinctive in its own way. For one thing, we didn’t expect that a Bobcat would drop three feet as the slate walkway that comprised the floor of the breezeway suddenly collapsed.
When we pulled the Bobcat out and examined the hole, we saw that the breezeway floor, which appeared to be slate-veneered concrete, was actually a flimsy structure of floor joists surmounted by plywood onto which slate had been applied with a thin coat of mortar. The wood was entirely rotten, and we found exposed electrical wiring running through the bays between the joists – a scary situation, to say the least.
At this point, I was starting to get a very bad feeling about what was going on underneath the rest of the house. When we finished pulling out the pool and the rest of the deck, we all began to see just how awful such things could get.
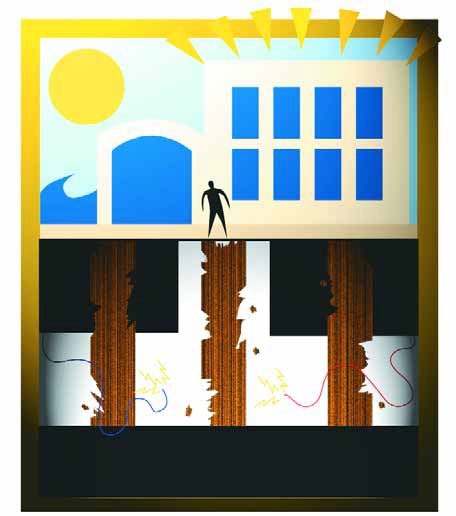
The house itself had been built on a system of piles and grade beams, a typical type of foundation for structures set in sandy, oceanfront soil. The problem in this case was that the builder had used large wooden joists atop the grade beams – all of them set below grade.
Any contractor worth his salt knows in applications such as this one that the foundation of the house should be concrete, not wood – or that the grade beams should be raised to elevate the wooden foundation above grade. Neither was the case here, and the results carried a potential for disaster.
EVALUATING THE SITUATION
In California, there’s a code requirement for a minimum of 24 inches of airspace around any wood located below grade. The reason is obvious: It’s to prevent dry rot.
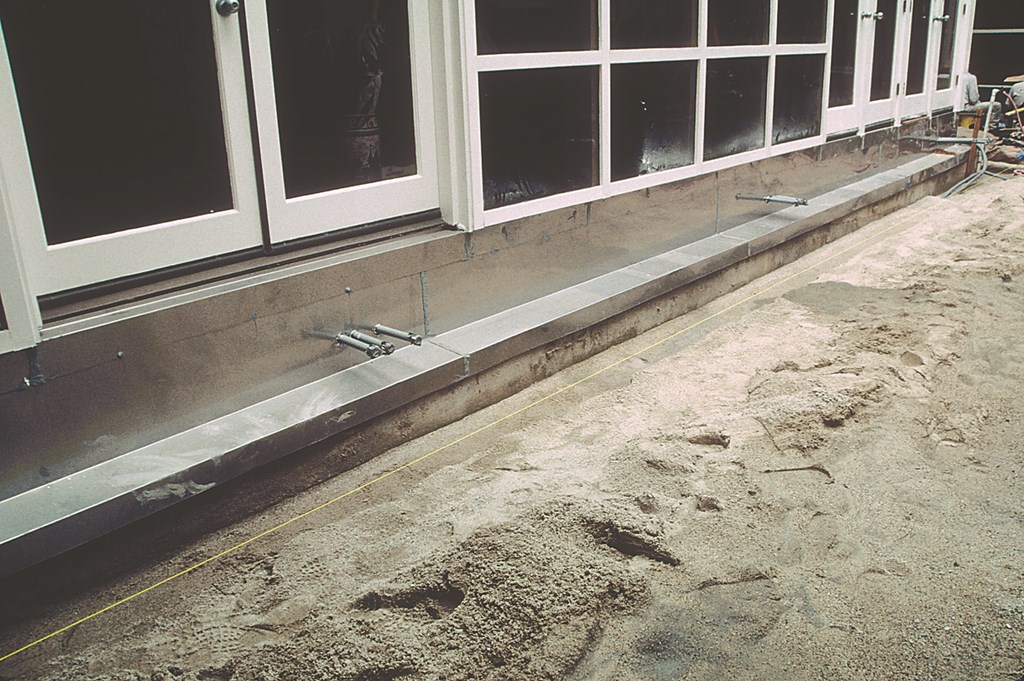
In this case, the builder had actually back-filled up against the wood with the sandy soil. The foundation’s only protection against moisture was a thin skin of aluminum flashing – totally inadequate to the purpose. In fact, it was really only a matter of time until the foundation failed completely.
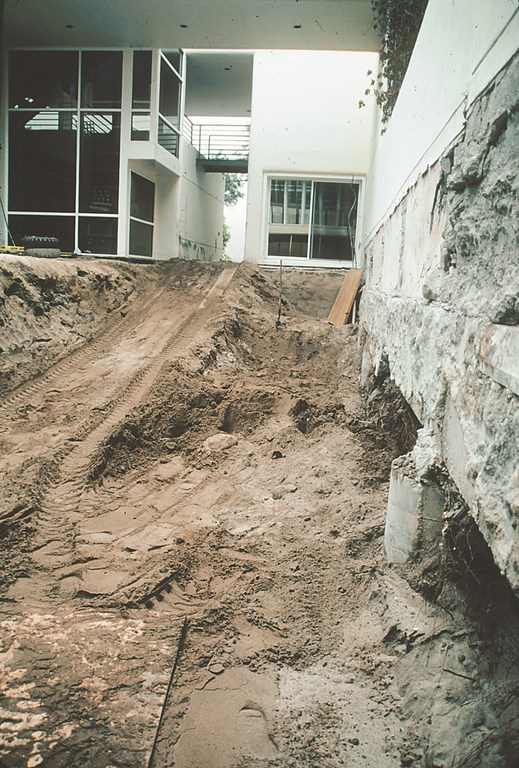
| Our digging revealed that the old pool had been set up against the wall with no slip joint – hence the easily visible damage – and that the piles supporting the wall had been set to the inside of the wall, including about a foot into the pool area. |
When we exposed the joists – large, structural framing members – they were indeed rotting away. Although the house had stood for years and had endured a number of earthquakes, it was not beyond reason to think that at some point a sizeable temblor could’ve brought down a significant portion of the structure.
Furthermore, once we removed the pool, which had been butted up against the large wall that enclosed one side of the courtyard, we could see that the previous pool builder had not been up to the task. For starters, there was no slip joint between the pool and the wall, so when we pulled the concrete of the pool structure away, big chunks of the wall came with it. The wall itself looked like masonry, but actually it was stick construction and was suffering from many of the same problems as the foundation of the house.
Furthermore, the piles supporting the wall had been set up to 11 inches into the pool area, where they actually should have been set toward the outboard side of the wall and back toward the property line. This led me to design a beam detail that let us work around the inset piles and that accommodated the need of wall and pool to move and settle independent of one another.
But as excavation continued and we kept running into problem after problem, these issues of the structural detailing of the swimming pool’s bond beam seemed trivial. By the time the Bobcat finished its work, we were far more concerned about the structural integrity of the house than we were about installing a pool.
Fortunately, further examination of the foundation showed that large portions of the home had been properly built with adequate concrete foundations. Most important of all, the concrete seawall was intact, and all the other walls running parallel to the ocean were concrete as well. Unfortunately, however, the walls running perpendicular to the ocean (and parallel to the pool) were on wood – and supported large portions of the house.
Ultimately, we exposed dry rot on about two-thirds of the structure immediately surrounding the courtyard.
THE BIG DIG
These problems obviously had to be remedied, and I knew I wasn’t the one to take on the task. My expertise may be building pools cantilevered off of the side of mountains, but I’ve never claimed to be a structural engineer.
After we’d dealt with the initial shock of the condition of the home and had survived a very difficult conversation with the client, I contacted two people I knew could be of real assistance in this tough situation. One was general contractor Rick Shevit, a guy I trust, respect and admire. (His firm does all of my forming to a standard that is virtually unmatched.) I also contacted Mark Smith, one of the smartest structural engineers I’ve ever met.
| The repairs to the foundation left us the challenge of isolating the foundation against future damage. By itself, the flashing would offer no protection if we simply backfilled and repeated the errors of our predecessors. |
At that point, I stepped back and let the experts take over until the problem was resolved. It took some time, but before long Shevit and Smith had devised a detail that would save the house from ruin. We met with the owners to describe the fix – and I said goodbye to the site for about five months.
Again, I’m not an expert in these matters, but what they came up with was a “sistered” joist system that buttressed the rotting timbers. Suffice it here to say that the method they created for reinforcing the foundation almost certainly saved one of the most spectacular houses I’ve ever seen.
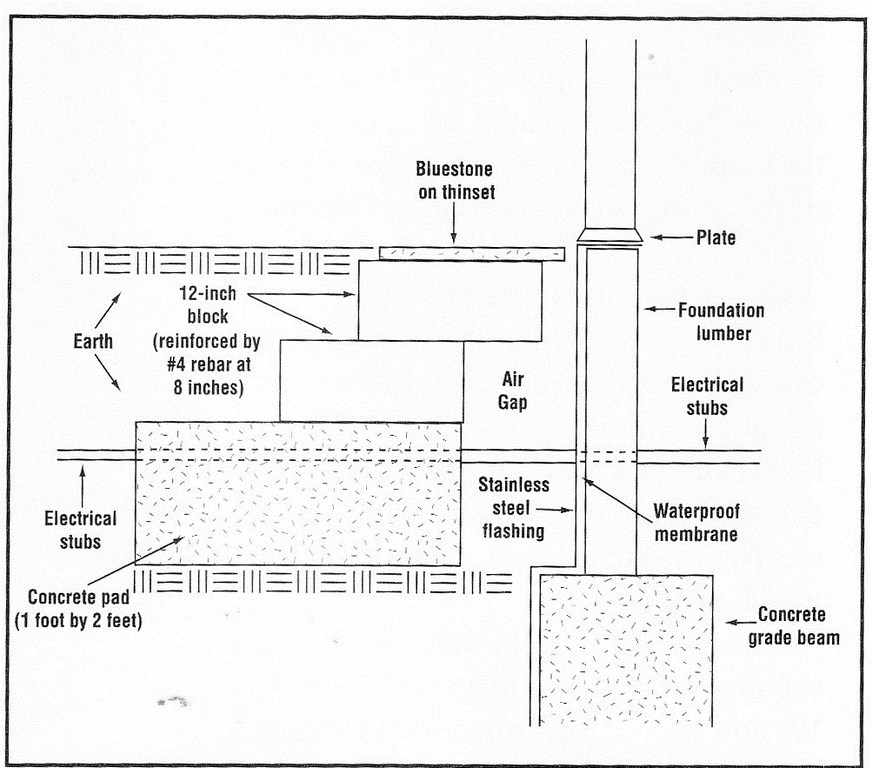
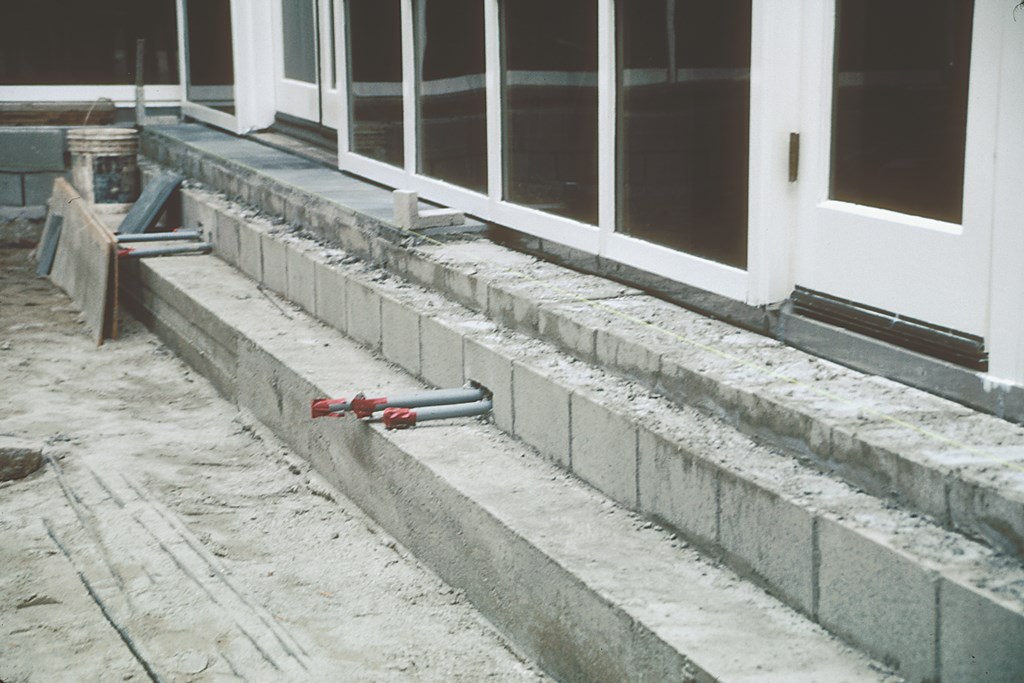
| We set up a small retaining wall in front of the flashed structure and then stair-stepped masonry blocks toward the house like a ziggurat. This set up a crucial air gap that will protect the foundation for years to come. |
One of the consequence of Shevit’s and Smith’s labors was that the seven feet of excavating we’d already done to create an adequate foundation for the pool had been extended down another three feet to give Shevit’s crews the access they needed. This left a massive pit where the courtyard had once been.
Once the structural work was done, it was time for my crews to get back to work. We now moved forward rapidly, forming the pool, installing the steel and setting up lines to take care of every conceivable need (and then some).
All of this work left one issue completely unresolved – so let me conclude this chapter of the story by jumping ahead several months to describe the design and construction of the new deck.
A PYRAMID SCHEME
Of course, we had no intention of repeating the mistakes of our predecessors or of leaving the new joist system below grade without a generous gap between structure and soil.
The simplest thing probably would have been to lower the level of the deck, but we didn’t have the option because the clients absolutely did not want to have to step down into the courtyard. (That was actually a good thing, because the four six-inch risers that would have been required to create such steps would have extended about four feet into the courtyard and run far too close to the pool structure.)
Mark Smith weighed in once more, proposing a plan that would cantilever a structural deck from the house to the pool. This would leave a huge void below the deck, which led us all to think of a new storage area, or perhaps a wine cellar – and for a brief time it looked as though that was the direction we’d take.
| With the ziggurat complete, we set up the home course of the bluestone decking – careful to maintain a small gap that will keep air flowing between the wall and the foundation. |
But the bad luck wasn’t at an end just yet: While removing the soil from the courtyard, we found a large septic tank that had outlived its purpose. It had been leaking in a minor way for some time and needed replacement, which was something the homeowners were reluctant to do, to put it mildly. But stuff happens – literally in this case – and a new septic system was installed.
After footing the bill for fixing the foundation, replacing the septic tank and deciding to move ahead with the pool project, let’s just say that my clients had lost interest in taking on the added expense of the underground storage area. What this meant was that we’d eventually be refilling the courtyard and would now have to come up with some way to create a below-grade air gap around the foundation.
It took some time, but eventually I came up with a detail based on the ziggurat, a structure first used by Babylonian architects to build their great towers and something I’d seen up close in the Valley of the Kings in Egypt. As Figure 1 shows, it’s a step structure that rises to a pinnacle. My idea was to cantilever a similar structure out over the area adjacent to the foundation of the house. This would create the essential air gap while providing adequate support for the deck structure above.
In addition to providing the all-important air gap, the ziggurat creates a channel to divert runoff from rain water, provides a gap between the stone deck and the house to allow for differential settlement and, finally, sets up an area where we could bore weep holes to channel excess water into the sandy soil.
It worked like a charm, and I’m happy to report that the former problems with the foundation of the house are now little more than ancient history.
Next time: material selections for tile, coping and decking and how they influenced construction details of the pool itself.
David Tisherman is the principal in two design/construction firms: David Tisherman’s Visuals of Manhattan Beach, Calif., and Liquid Design of Cherry Hill, N.J. He can be reached at tisherman@verizon.net. He is also an instructor for Artistic Resources & Training (ART); for information on ART’s classes, visit www.theartofwater.com.


