


All About the View


When outsiders think of Texas, they very often assume that it’s flat as a pancake with no topographical distinctions to consider. That may be true in some parts of our big state, but where I live and work in the vicinity of Austin, there are areas that offer great views and have attracted developers who are intent on using those prospects to full advantage.
The spec home featured in this article is an example of this trend: It’s in Westlake Hills, a small neighborhood within Austin’s city limits that affords some amazing views of both the downtown district and the Hill Country of central Texas.
Many homes in the area were built in the span from 1960 to 1980. But the lofty perches and the properties’ proximity to downtown have drawn high-end buyers who’ve tended to knock down the old places and start fresh along much more modern, luxurious and well-appointed lines.
The site that’s the subject of this article, for example, offers 180-degree views of downtown, the University of Texas campus and a range of Austin landmarks. The architecture firm of Dick Clark + Associates worked with Jon Luce Builder to improve the cleared lot; both companies are based in Austin and have worked together many times on this sort of high-end project.
JOINING THE TEAM
The architect defined the pool’s basic shape and location. We at Design Ecology (also based in Austin) designed the mechanical, electrical and plumbing systems and managed the construction process. It’s our third project with this architect/builder team within the past three years, so we’re familiar with their preferred approaches and participated with them from groundbreaking forward.
Those other two projects were just down the street from this one, so we knew what we getting into with respect to soils, access and the general process of construction. Work on site started during the summer of 2014, but execution of the foundations and main structure was so complex that we didn’t actually start working on the pool and spa until July 2015.
From the start, we worked with the architect and builder on a level at which our ideas were considered and our skills in watershape design and construction were fully exercised. One key point: We advocated giving the pool and spa all-tile finishes befitting the scale and scope of the project. This was not something the builder had been involved with before, however, and he just didn’t see the value.
The advantage of our long idle time was that we plenty of opportunity to steer the project’s course. All through that period, we kept showing the builder photographs and shared dozens of tile samples. He wasn’t easily swayed, but eventually the all-tile finish won the day – at which point the conversation turned to the even-more-difficult subject of making a choice among all the available options.
Both the architect and builder were involved in the selection process and were generally receptive to our design and material suggestions – but they had the final say. The interior and exterior approaches with the home were crisply monochromatic, so they wanted to fit the pool within that scheme. I lobbied for a red glass tile to bring an exclamation point to the home’s exterior, but they were thinking more along the lines of all white.

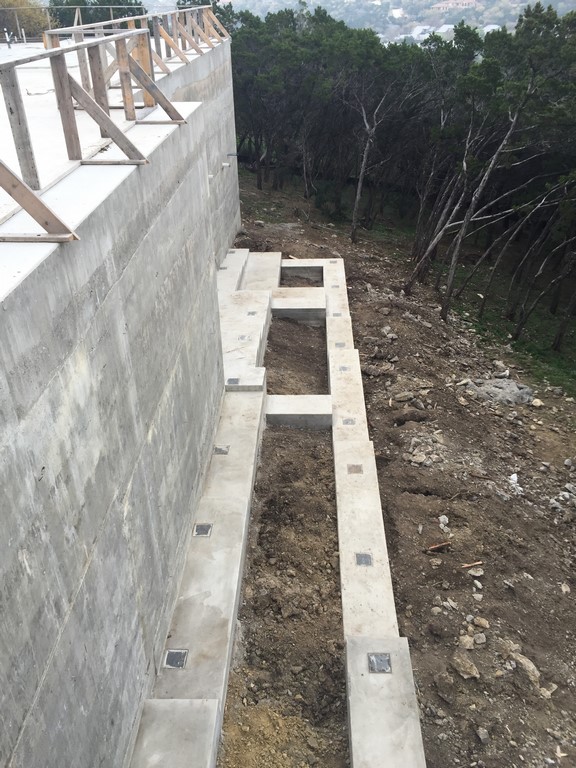

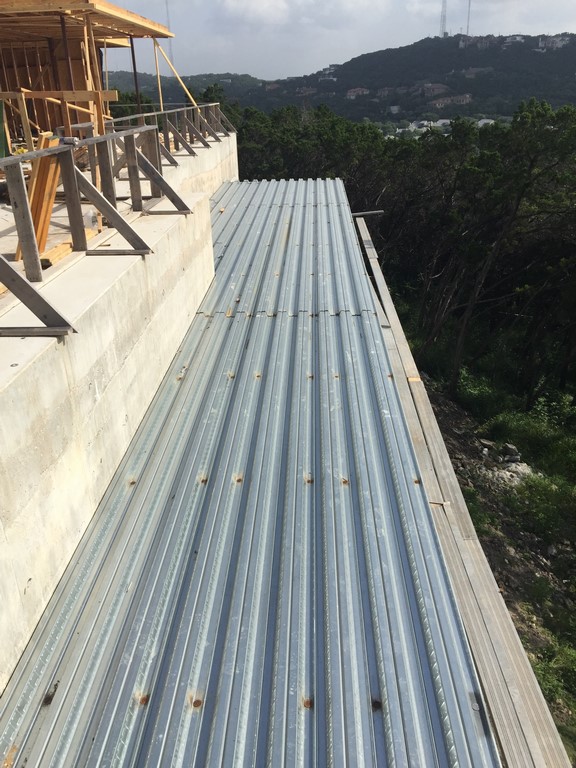
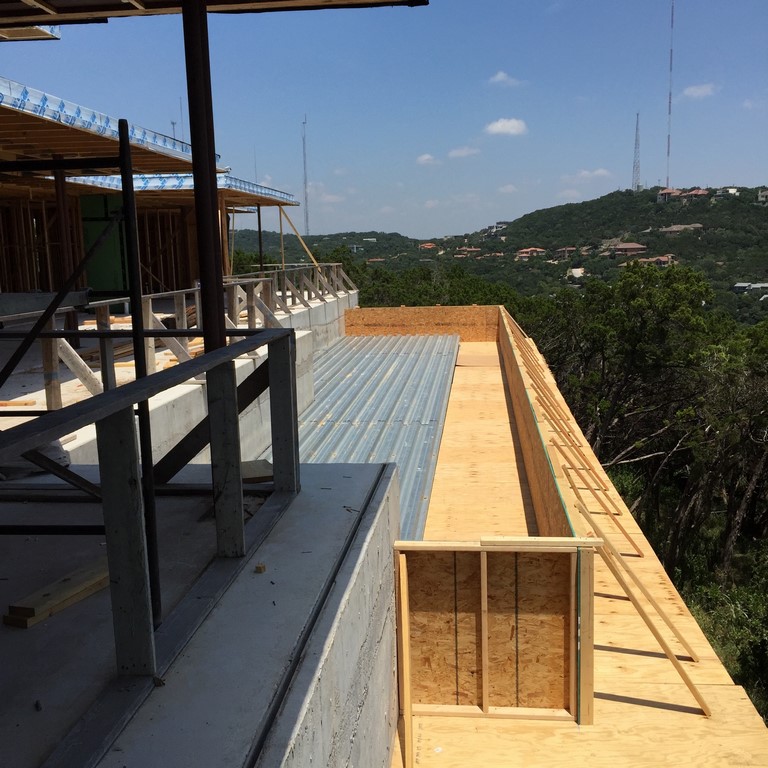
| We waited almost a year before the site was ready for us to start our work. Once the foundations for the home and deck were in place (top left), the crew that had installed the walls hand-cut and poured the pool’s footings (middle left), then yet another crew installed the galvanized steel support system and pan (middle right and right). Next came the forms for the cantilevered catch basin, which spans 90 feet along two sides of the pool and spa (bottom left). |
As strong as my opinion was, I came around to their point of view – and I have to say I’m happy with the way things turned out.
Through the developmental phases, I was also a strong advocate for using a toe-kick detail to conceal the suction and return fittings in the pool and spa and completely relieve the pool’s tile field of penetrations that would break its clean, simple lines. This way, only the spa’s small jet fittings would intrude on the gleaming white surfaces.
Again, the builder was unfamiliar with this particular detail and hesitated for a time. But I kept at him on this point as well, and eventually he told me we could run with it – so long as it was perfect. As I visualized the look standing at the pool’s edge, I knew just how much I wanted to see the pool and the view alone, with no extraneous visual clutter. Keeping that ambition in mind, perfection wouldn’t be a problem.
SHARED SKILLS
The way the project unfolded, the home’s engineer developed the plans for the pool’s substructure. The builder followed those plans, taking full advantage of the highly skilled subcontractors who’d done the work on the home itself.
The perimeter footer supporting the lofty steel framework is 36 inches wide and more than 48 inches deep, sitting atop hard limestone. As a result of access constraints, all of this foundation work had to be done by hand with pneumatic tools.
Once the footer was poured, the ironworkers who were assembling the home’s steel frame also erected the galvanized-steel support and the pan form for the pool. Finally, crews from Design Ecology came on site, helping the ironworkers set elevations for the floor pan and specifying cutouts for conduits and plumbing.
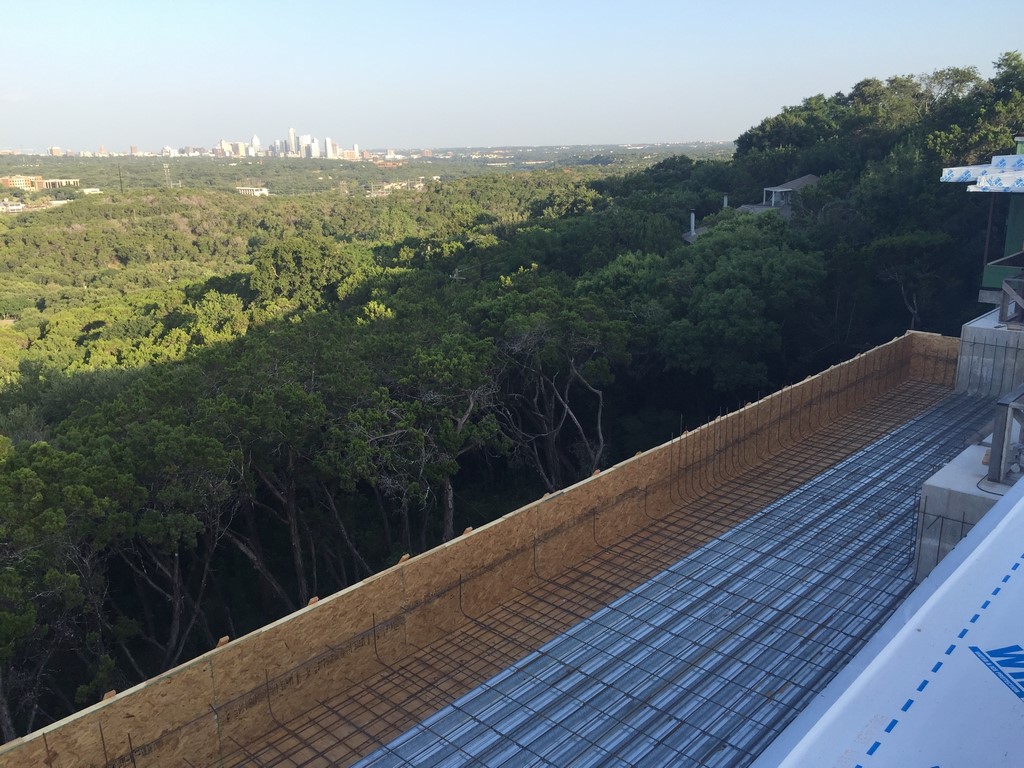
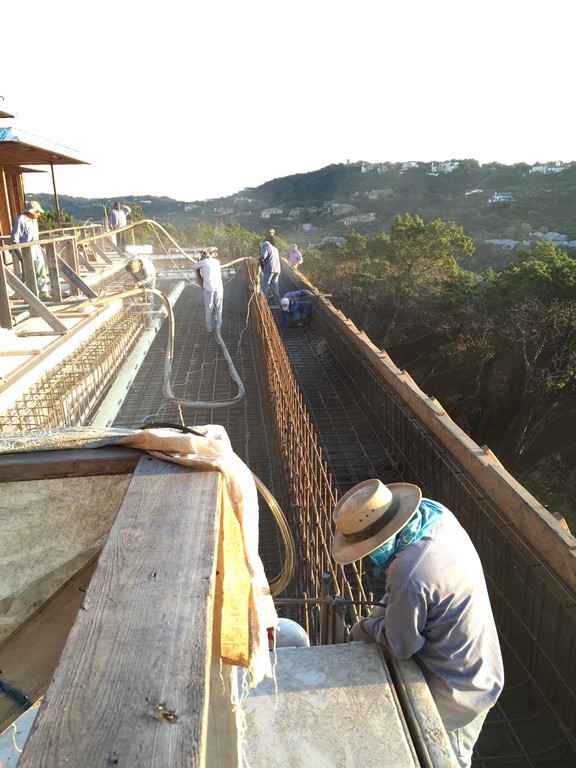

| Our first task in placing and tying the steel was to make certain the cantilevered basin was fully and tightly woven into the structure of the supported pool and spa (left). We also needed to tie the basin together with the vanishing-edge wall to give the whole system as much integrity as possible (middle). Then came the addition of the plumbing and the Styrofoam blocks that prepared the way for the project’s toe-kick detail along one long wall of the pool and all the way around the spa (right). |
The overall structure was to be 68 feet long with a four-foot catch basin hanging off its side, with drops from 21 to 27 feet down to the sloping grade below.
We used the ironworkers and their scaffolding skills to build a wooden platform that would support the cantilevered basin through the construction process; they also helped us set up a much-needed safety railing to keep us up where we belonged. This platform ran for 90 feet along the two exposed sides of the pool. Design Ecology’s foreman, Mateo Fajardo, was fully involved in designing and building these temporary structures.
Preparing for the shell was now our focus – and the source of a good bit of stress. The cantilevered basin hangs 54 inches beyond the floor pan of the support structure for a total of 90 feet, and all of its reinforcing steel had to be tied continuously into the vanishing edge wall as well as the floor of the pool.
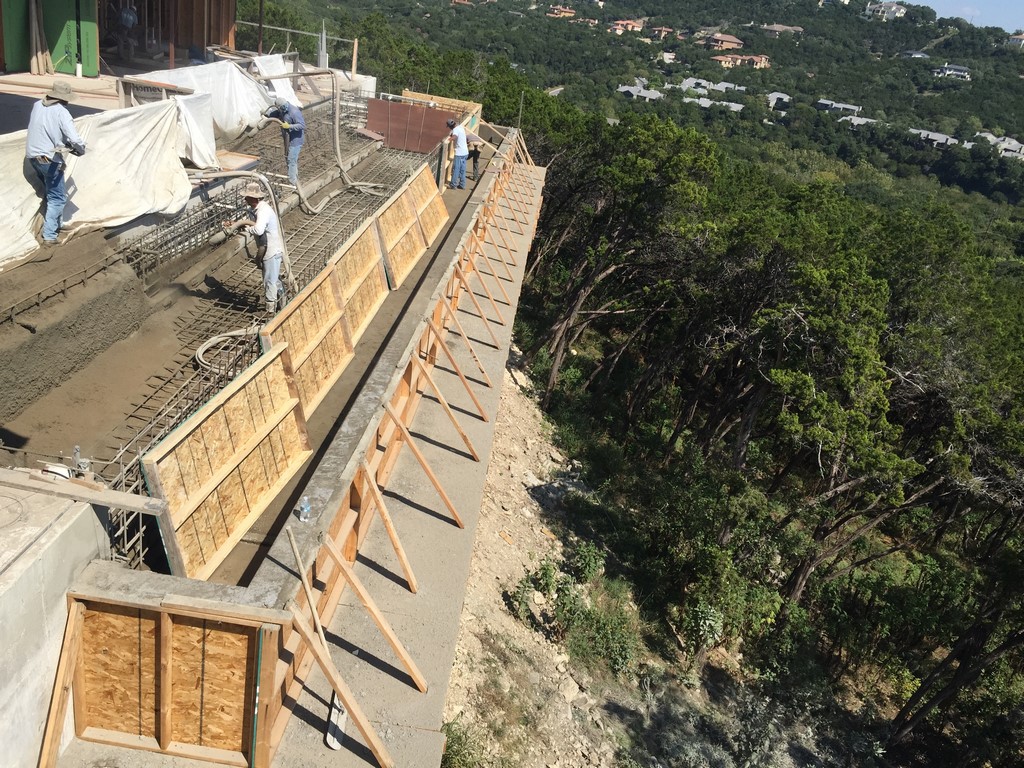
| The shoot was intense, with two guns in operation much of the time and our crews climbing all over the place to perform such tasks as inserting forms for the dam wall once the basin’s outside wall was complete. The watchword the whole time was precision, because we knew that all surfaces were to be finished with glass tile. (In the photo at middle right, you can see the Styrofoam forms locked in place at the base of the spa’s benches. In the photo at right, they have been removed.) |
We had a structural engineer on site during the shoot, basically to tell us where and when to place the gunite. He had us shoot the outside wall of the basin and its thick floor first, which made sense, but then he had us shoot the house-side wall and floor of the pool before getting to the vanishing edge wall. This doubtless made sense from a structural perspective, but it was logistically difficult – basically working inside-out from our usual way of thinking.
What this approach meant was that, by the time we were getting around to shooting the vanishing-edge wall, we’d be dragging hoses over the freshly placed concrete of the house-side wall – not the simplest or the ideal proposition. We made it work by bringing it lots of extra hands, but the engineer’s insistence took what was already a high-wire act and elevated it a couple notches.
SEAMLESS DETAILING
Given the corrosive nature of water and chlorine, we knew we needed to protect the galvanized steel structure beneath the pool from moisture as best we could. Although there was to be nothing of architectural interest below the pool, we did not want it to end up looking like a cavern with stalactites hanging from the bottom of the pan.
More compelling, aesthetics were prioritized all over the site, and we were concerned that any evidence of water showing up beneath the pool might be a point of concern for a potential buyer of this spec house. Only the pool equipment was to be housed in this area, but we saw that the space was big enough that it would likely be used for storage in one way or other.
All this became an issue when we set up a soaker system to help the concrete shell cure. This process introduced a lot of water into the vessel, and because we had yet to do any waterproofing, a fair portion of that water made its way through the concrete shell and showed up below as stains and efflorescence. The builder was worried, but I have used the waterproofing system from Basecrete Technologies (Sarasota, Fla.) on several occasions and knew it would relieve his concerns.
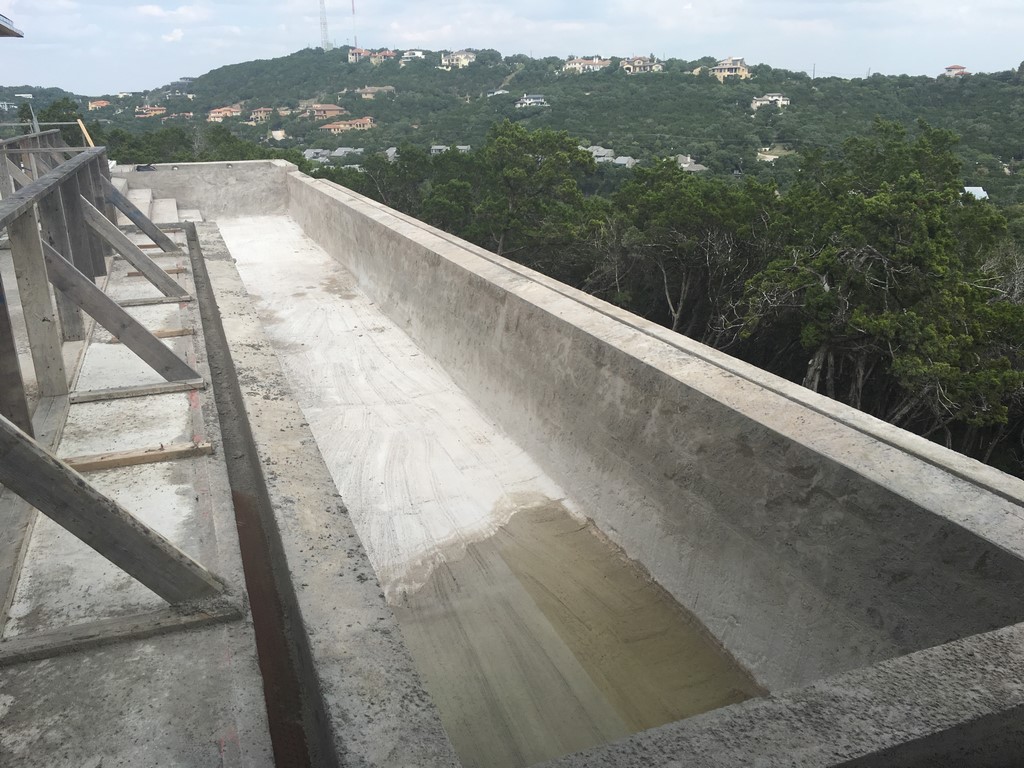
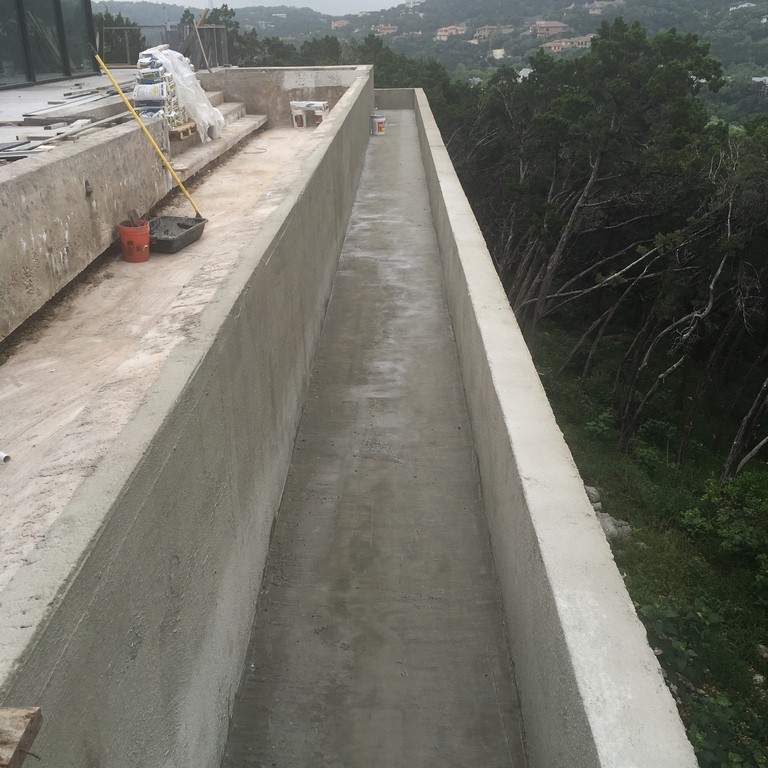
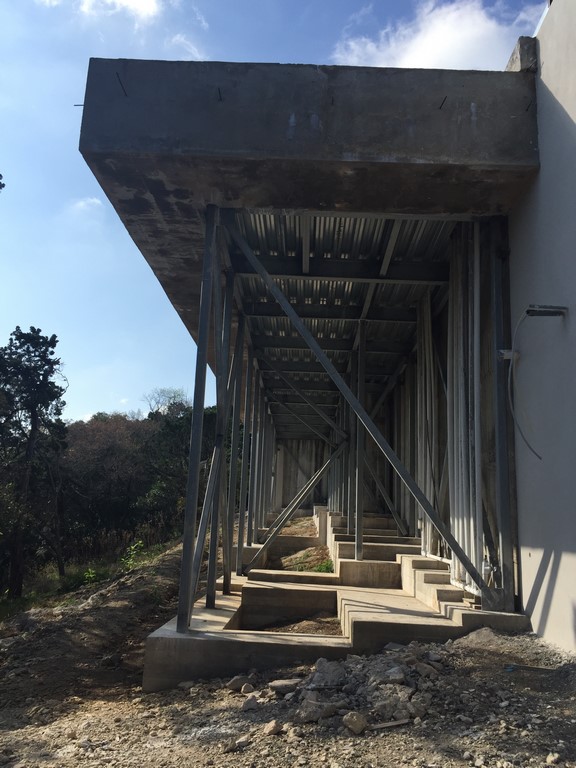
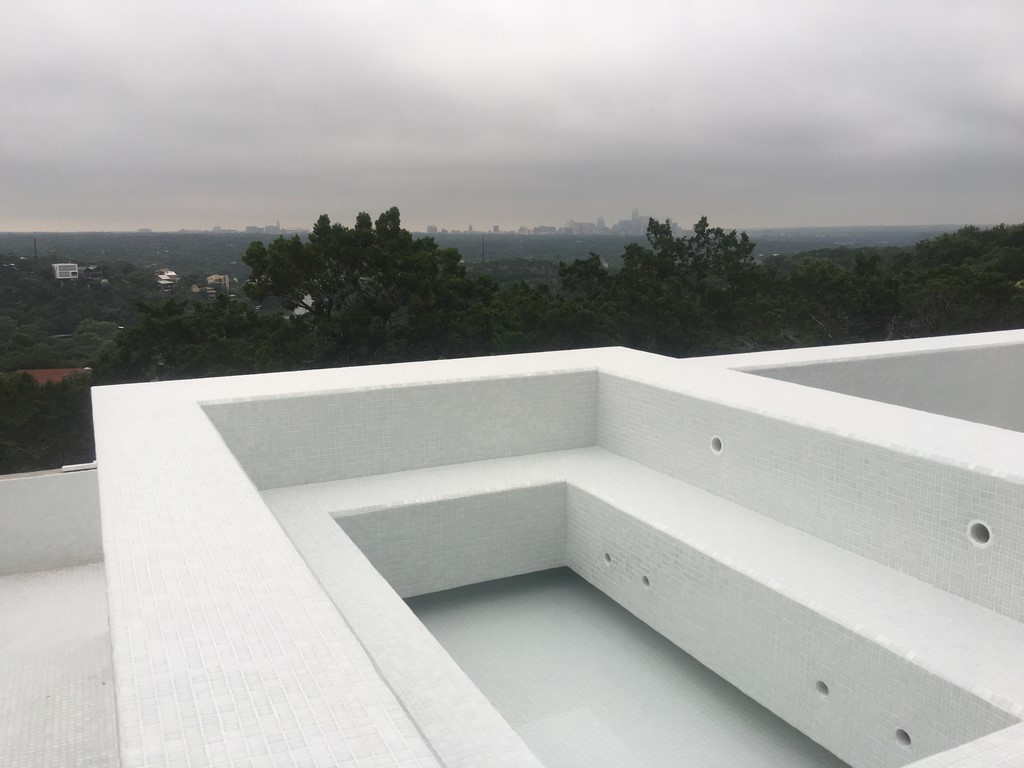
| Once all the forms were stripped, we cleared the site of debris and used soaker hoses to complete the process of curing the concrete (left and middle) – all in preparation for waterproofing the shell and making way for the tile crew. The view up from the slope below is pretty impressive: Where there was nothing before is now a massive concrete structure with a drapery of plumbing and conduits along the home’s foundation wall (right). |
After the usual curing period for the shell was complete, we cleaned and prepared its interior surface for application of two coats of Basecrete with a heavy-nap roller. A subsequent flood test indicated that all penetration of water to the space below the pool had ceased.
This sort of waterproofing is routine with all-glass-tile pools. In this case, we used a three-quarter-inch iridescent white tile from Kolorines (Cuernavaca, Morelos, Mexico). The contrasting decking is a matte black two-by-four-foot porcelain tile that is also used as flooring throughout the entire house. The main living area adjacent to the pool has a 60-foot-long, nine-panel sliding-door system that pockets into the framing of the house, creating a large indoor/outdoor space with one continuous floor.
The pool features 185 linear feet of perimeter overflow, and the masons were constantly checking their levels to make certain everything was on track. In setting the edges with brown coat and then in applying tile, we used a water level and a transit to verify overflow points and keep the edge within a tolerance of a thirty-second of an inch.
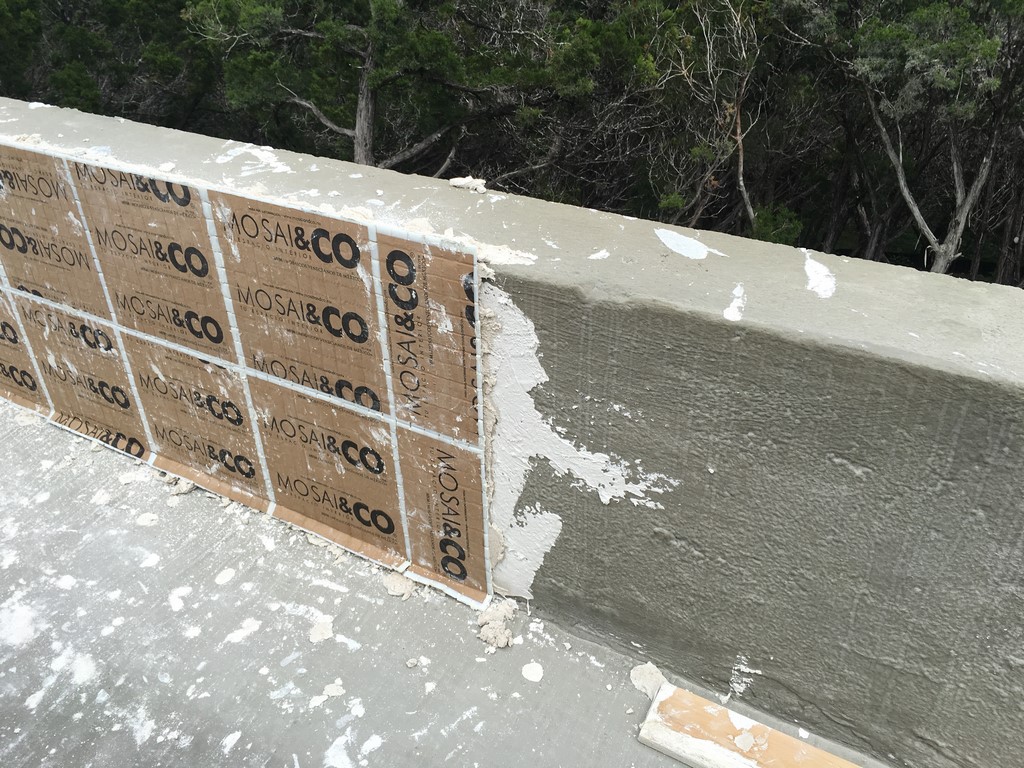


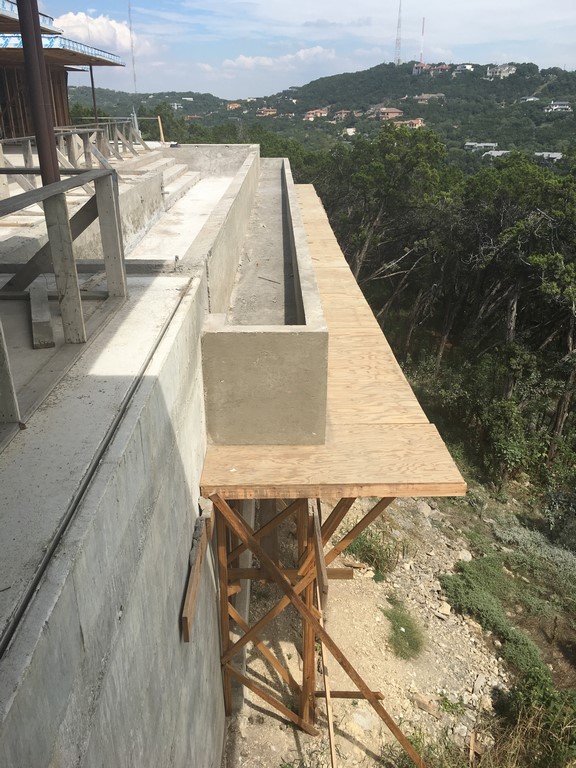
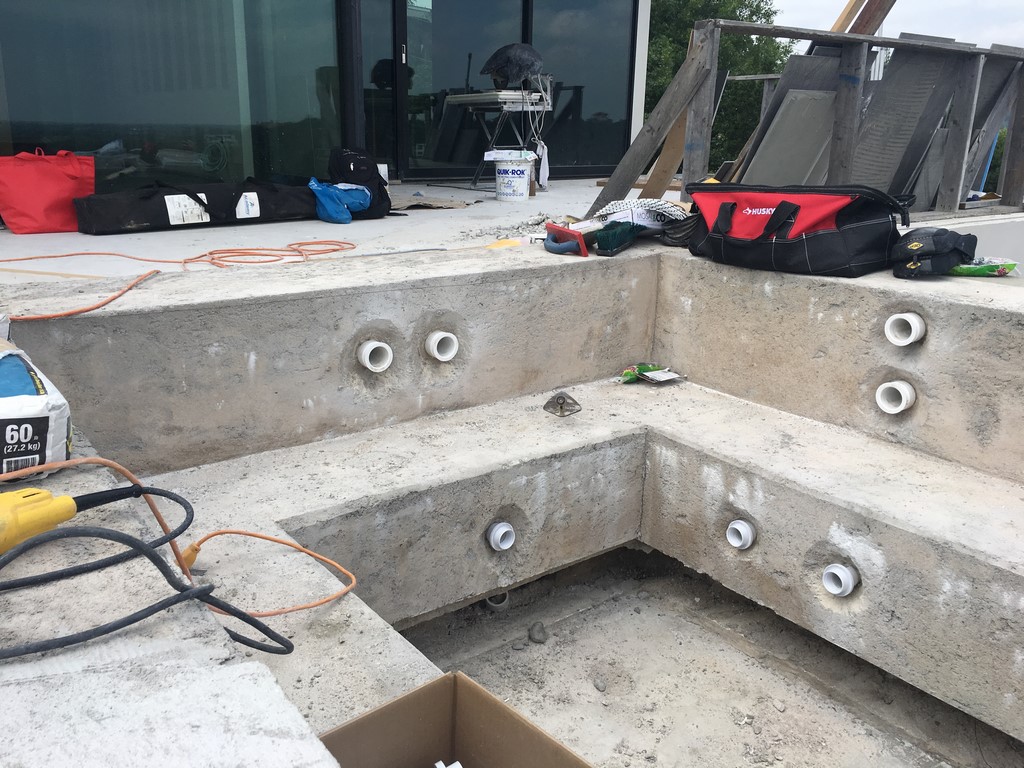
| We’d taken a great deal of care in placing and trimming the concrete to make the surface as ready, straight and plumb as possible for waterproofing and tile application. This is where the toe-kick detail pays off aesthetically: Although there are still small penetrations for lights in the pool and jets in the spa, the far larger visual intrusion of drain grates is no problem here because they’re tucked into the recess. |
The hydraulic system had been designed to run the edge with a two-horsepower ePump from Jandy (Vista, Calif.), along with a one-horsepower Stealth booster pump (also from Jandy) as a backup to increase flows as necessary on the region’s frequent breezy days. Our proudest moment came when we filled the pool and began to circulate water using only the one-horsepower booster pump: With that minimal flow, we were able to wet the entire 185-foot weir!
In all of this, we took advantage of the long timeline for work on the entire home project – much more generous than we are accustomed to enjoying in most of our other pool/spa installations. In fact, we had 12 months at our disposal, so no process was ever rushed, and all of us on the team (architect, builder and watershape contractor alike) were able to work through options, discuss hurdles and develop solutions that worked for everyone concerned.
ENJOYING THE VIEW
As hinted above, the toe-kick detail we included to hide suction and return fittings in the pool and spa was a novelty and was therefore frequently part of team deliberations. Beginning to end, a good chunk of our energy was spent on easing the mind of the builder in particular that the concept was sound.
He needed the reassurance, and we were happy to oblige. He had also demanded perfection – and that kept us focused, no doubt about it. In placing the required plumbing, for example, we used a transit to set the elevation of each and every relevant pipe, using the existing deck level as our point of reference.
To preserve the toe-kick spacing during the gunite shoot, we ordered custom Styrofoam blocks, cut out holes for the fittings, then secured them firmly into position with rebar tie wires. As we shot the floors, we kept double- and triple-checking the elevations with the transit to make sure nothing moved during the process. This was crucial: Because of the shoot’s inside-out logistics, there were 25 people climbing through the work area, and we knew all it would take was one misstep to ruin the alignments.
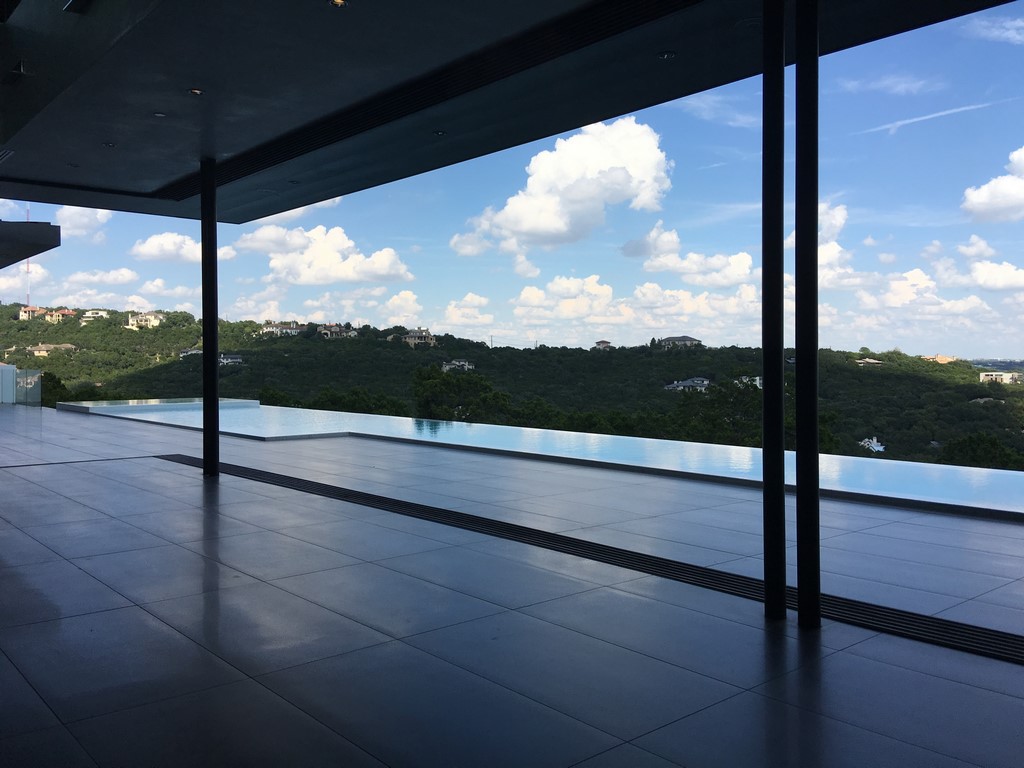

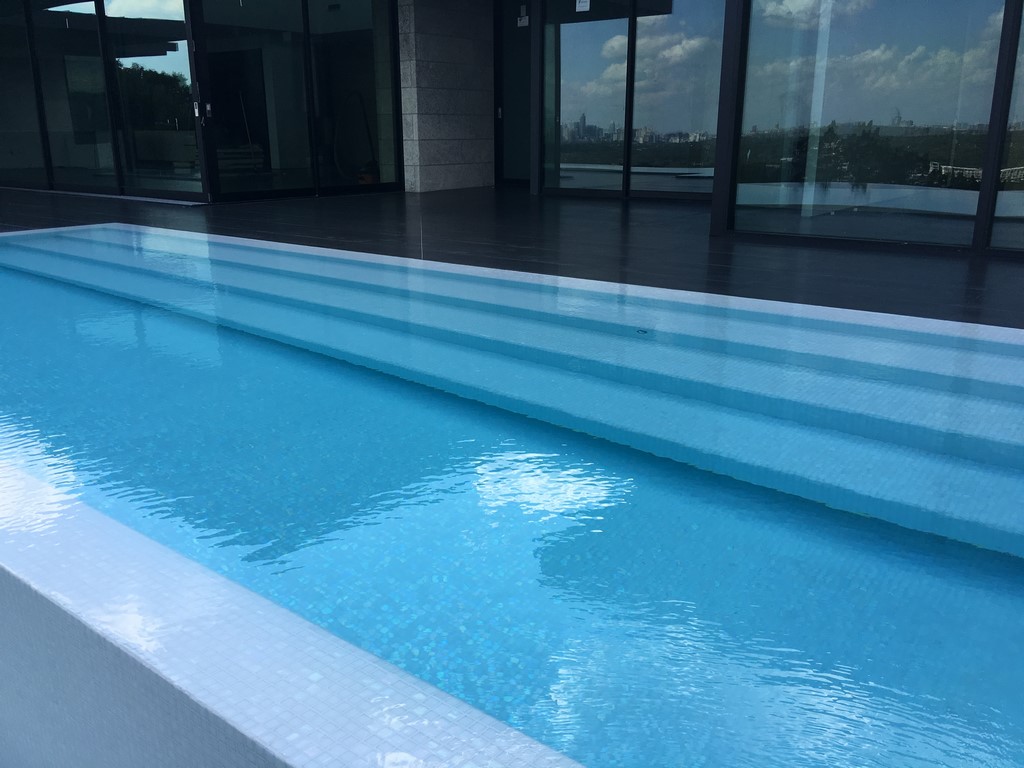
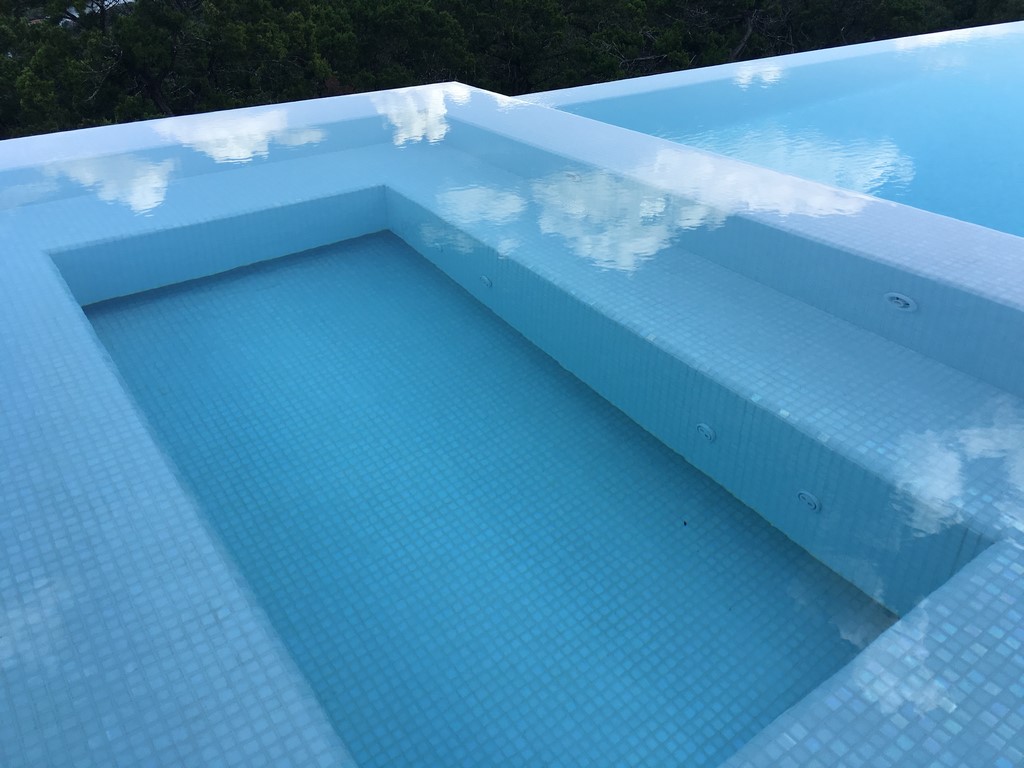

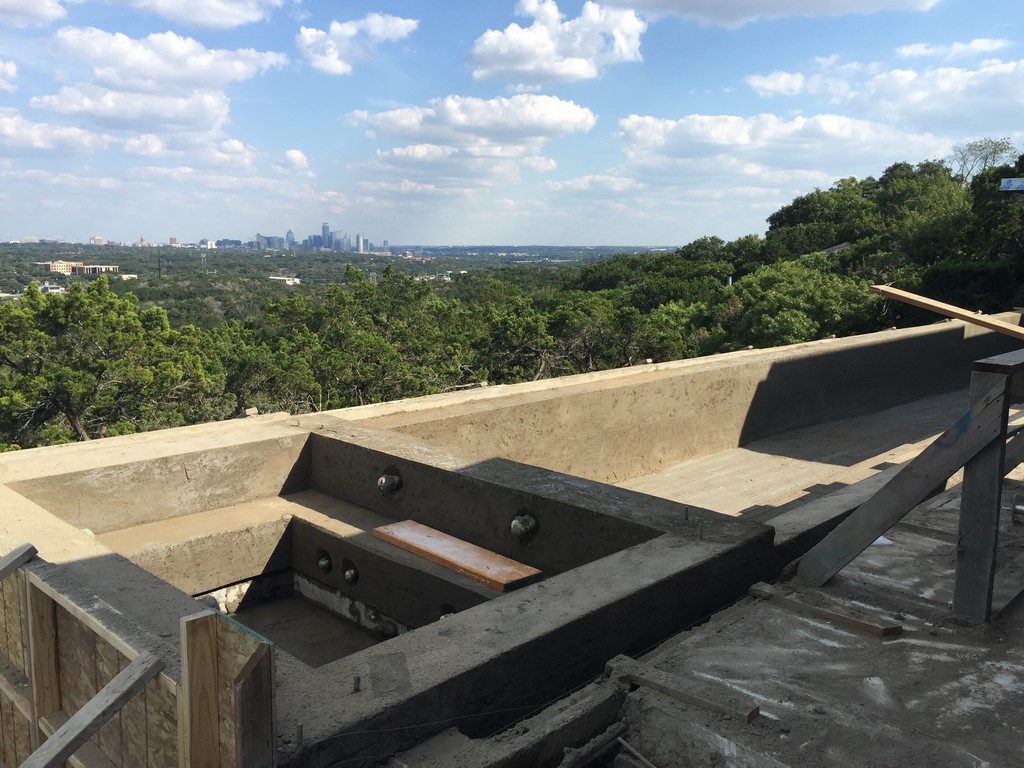
| The home’s interior flooring and the pool’s decking are the same material (top left), so there’s a seamless flow out to the slightly raised watershapes that reaches to the view beyond. The white glass tile interior is iridescent (middle left), so there’s more texture to the visual field than would be expected at first glance – and the visuals get even more interesting with the toe-kick detail that runs the length of the pool and the full perimeter of the spa (middle right and right), hiding all of the suction and return penetrations. Best of all, even with the light-colored interior finish, the water is still wonderfully reflective (bottom left) – nearly as dynamic as the distant views! |
When all was complete, we started removing the Styrofoam forms – and it took a whole day to do so! We hadn’t anticipated it being so much work, but we soon figured out why it was so laborious: With the entire weight of the wall resting atop them, the forms were wedged in so tightly that they had to be chipped out. Add in the fact that the detail ran the full length of a nearly 70-foot-long structure and the rigor of the task all made sense.
It was a lot of work, but when we checked our levels again, just a single 32-inch channel drain was the exception to absolute perfection – and it was only out of level by a negligible quarter-inch! Next time, we’ll figure out a way to speed removal of the Styrofoam forms. This time, however, the results were so clean and beautiful that nobody complained about the extra work. (Not much, anyway.)
Through every project phase, we kept our eyes on the view as our guide and inspiration. The collective, team-wide desire to avoid anything that would offer a distraction – together with the project’s deliberate pace – led us to weigh every mechanical detail as we moved along and resolve every issue we could anticipate (right down to junction-box and Hartford loop placements) as clearly and cleanly as possible.
It really was all about the view, right from the start. And the results? They speak for themselves.
Ben Lasseter is president of construction at Design Ecology, an Austin, Texas-based design/build firm specializing in swimming pools and landscapes. He founded the company with partner Scott Cummings, RLA, ASLA, in February 2009 after four years in pool and landscape construction management with another firm. Lasseter received a BS in horticulture from Texas A&M University in 2003 and is a Genesis gold-level member. He may be reached at info@designecologyaustin.com.