Cresting Perfection
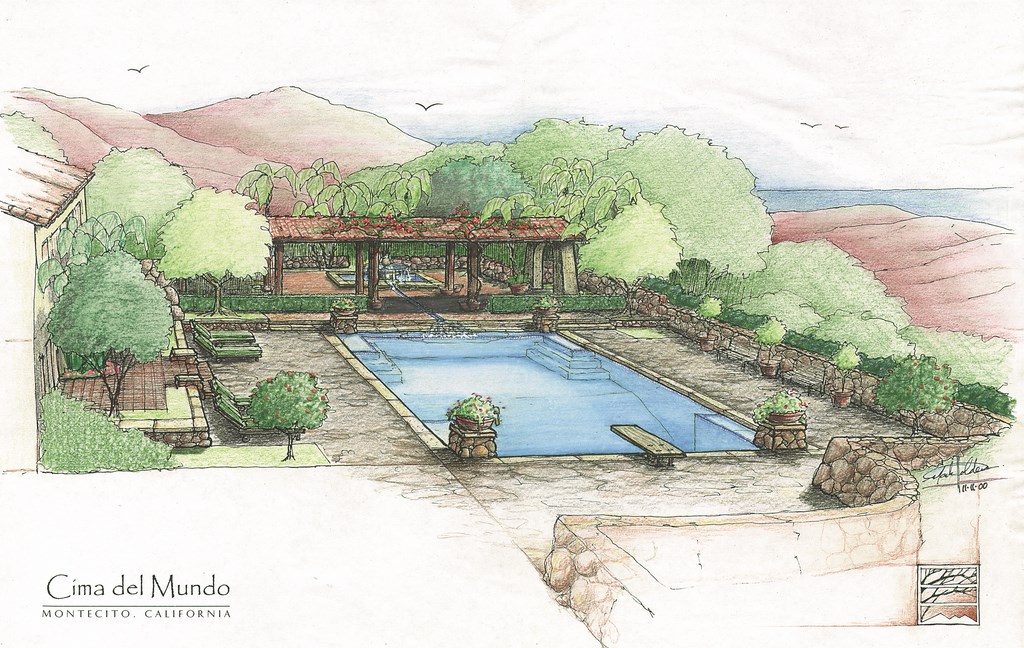

A grand California estate deserves a grand pool, and Cima del Mundo is certainly no exception.
The new pool is part of a project that involves the complete renovation of a classic estate in the hills of Montecito, a prosperous enclave just south of Santa Barbara, Calif. In keeping with the overall theme of the project, which was described in detail in “The Crest of the World” (WaterShapes, January/February 2001, page 32), the pool has been outfitted with thoroughly modern technology and amenities but is meant to appear old, as though it had been installed when the house was built in the 1920s.
Keeping this period look and feel has been a considerable part of every aspect of this project from the outset, but in the case of the pool, that driving need also came with a truckload of engineering issues, planning difficulties and substantial construction challenges. Indeed, the pool is the culmination of almost three years of effort.
As you’ll see here, a lot happened to complicate the pool project, but the resulting watershape is one truly and uniquely suited to its remarkable setting.
PERFECT ALIGNMENT
Everything we’ve done on this jobsite has been aimed at maximizing both the spectacular physical setting and the historic nature of the property.
To that end, the pool is aligned on a westerly axis to emphasize the setting sun and provide a prime view of downtown Santa Barbara in the distance. The spa as well was set to maximize this view, using the length of the pool as a reflective surface. In every detail, we worked toward a simple elegance that is perfect for the time period, the space and the client’s own sense of history.
Positioning the pool on the south side of the manor house was originally the client’s idea – and it was an ambitious choice, because the property sloped off dramatically on that side. We knew immediately that we’d need to call in the experts to see what had to be done.
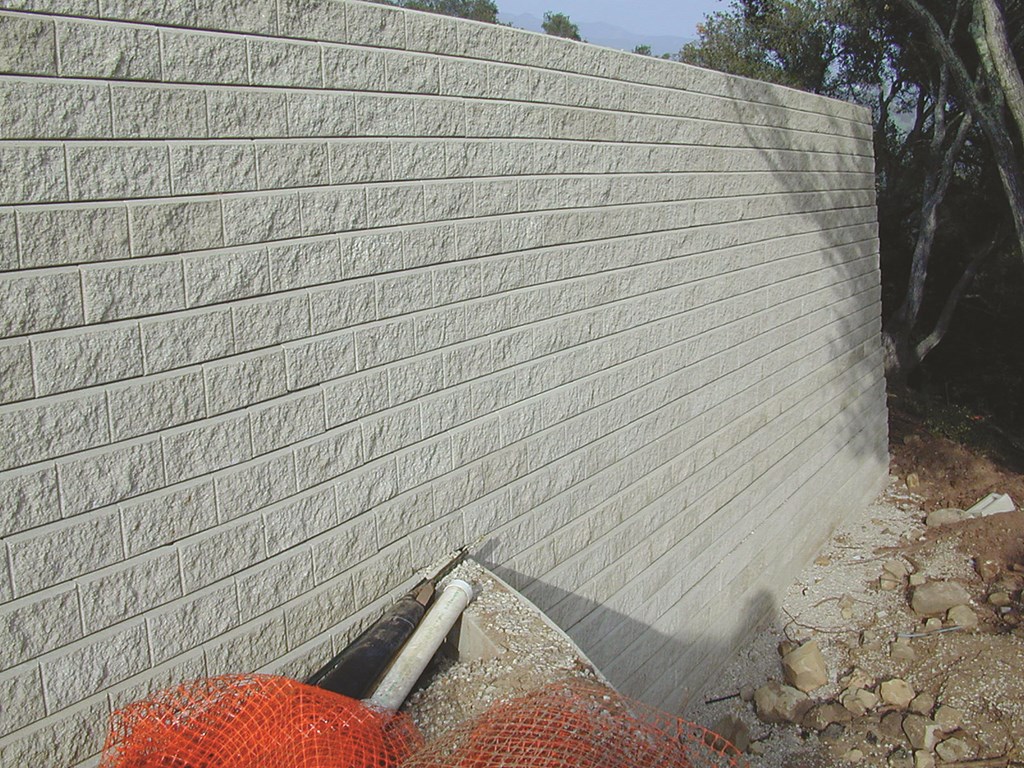
| STEEP STUFF: The home sits on a hilltop, and the client wanted a pool set on one of its steepest slopes (left). This meant setting up massive retaining walls (middle) to create a new backyard by which the pool and spa would be surrounded. Working with the advice of a team of soils and structural engineers, we came up with a system that’s both functional and visually interesting (right). |
As with most hillside projects in California, our course was dictated by the results of geological surveying, soils reports and structural engineering. In this case, the survey was performed with the aid of a satellite-based GPS system because of the immense size (almost 50 acres) of the overall site and the physical improbability of closing a surveying loop on such a parcel. The geologists and soils engineers were on site for weeks, and our structural engineers processed all that information and worked on the plans for months.
One of the greatest factors in the success of the project, I believe, was this synthesis of all available site information and the high level of value engineering that characterized this part of the project. Every alternative was investigated for cost, time involved in implementation and ease of construction – and considered alongside some obvious access issues.
During the soils investigation, it was revealed that significant bedding material was sometimes 15 or 20 feet below the native grade and another 10 to 15 feet to the proposed finished grade, meaning we would have to build some very long friction piles to varying depths to set the pool and spa up on the same level as the house.
By design, the pool is set up not to rely on the support of any retaining walls we would be setting up to raise the grade. As a result, the 30-by-60-by-12-foot vessel sits on ten friction piles and a network of grade beams that create a stable platform that isn’t dependent on the stability of the slope upon which it sits.
As mentioned above, the exact pile depths varied because of the inconsistent subsurface bedding plane, which meant that the grade beams also had unique dimensions to align with the changing profile. These two factors left us with almost every pile and beam having different specifications and dimensions – a steel fabricator’s nightmare, but something that had to be done to ensure even dispersal of loads across the entire matrix of steel and concrete.
MAKING SPACES
It was at about this point that we hit a snag with the County of Santa Barbara, which had a long list of projects on the books to be approved for construction permits.
Given the complicated nature of the project, the sensitivity of the site and, quite frankly, the way things get done in coastal areas of California, the plan-review process was a long one that meant many trips to the county seat. From the time we completed conceptual design and preliminary structural engineering, we waited nearly nine months while the county considered the retaining walls – and more than a year as they pored over the swimming pool and spa.
During this stretch, we attended countless Architectural Review Board meetings and planner consults and spent hours in line at the Building & Safety Department. Finally, inspection card in hand, we broke ground in the backyard.
More accurately, we started building up the backyard, setting up a series of modular-unit retaining walls to secure 7,000 cubic yards of imported soil to flatten the existing 1.5:1 slope and create a backyard that would surround the new pool. This new grading included geo-textile matting at particular intervals to lend stability to the newly compacted soil. These mats connected to the modular concrete units of the wall itself.
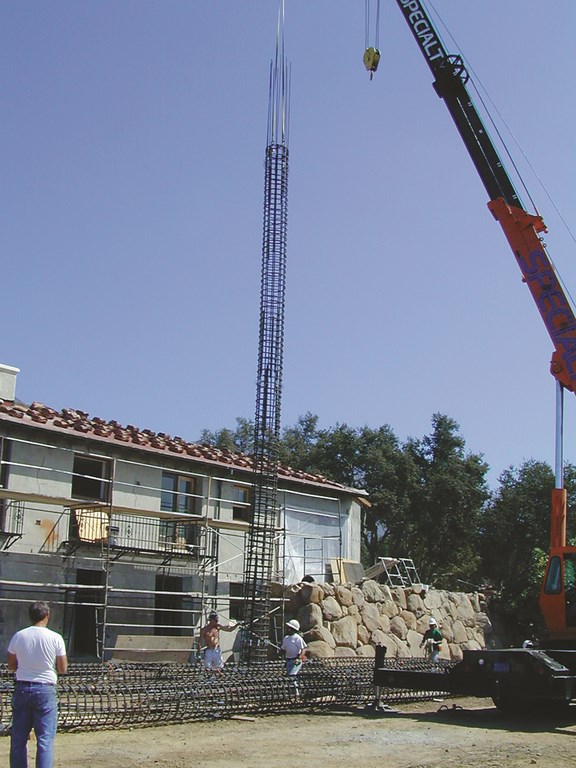
| HEAVY DUTY: The pool has been set up independent of the surrounding soil and retaining walls on a set of friction piles and grade beams. The cages, some of them more than 60 feet tall (left), feature vertical steel members of more than one-inch diameter. (Note the gray-plastic spacer wheels on the steel: These will keep the cages from coming into contact with the soil for the full length of the pile.) Once the piles were in, we carefully excavated around them using every sort of earthmoving equipment we could get on site (middle). Next, and after flashing the walls with gunite for stability, we dug out spaces in which to set the network of grade beams that serve as the pool’s platform (right). |
In no way is this type of engineered retention intended to hold a swimming pool in place – and these walls should never be used that way, no matter what a salesperson might tell you. In fact, the wall’s design allows minor movement to occur – movement that would have disabled the static matrix of a poured-in-place or concrete-masonry-unit (CMU) wall and been disastrous for a vessel holding any significant amount of water. We also set up an elaborate system of subterranean drains to relieve any hydrostatic pressure that might infiltrate the new soil.
After more than nine months of excavating, bulldozing, offloading dump trucks and testing for compaction, the backyard was finally ready for construction of the pool.
The first step didn’t involve digging up soil we’d just placed and compacted. Before we could get there, we needed to augur the 30-inch-diameter piles because we wouldn’t be able to drive a drill rig into the area once the pool had been dug. As a consequence, we had to calculate the exact pile levels and create the steel and concrete structures to exact specifications without actually being able to see their tops.
With the deepest augured hole finished at 75 feet below the surface, that left each top at between ten and 15 feet below finished grade, with the vertical steel sticking out of the pile holes by only a foot or so. (This vertical steel would later be bent into the network of grade beams.)
TALL ORDERS
Each steel cage had a dozen vertical bars that were well over an inch in diameter – not the standard #3s and #4s you see in pool projects. We used a crane to lower the cages – some of them more than 60 feet long – down in to the holes, then pumped in a high psi concrete mix to the calculated depths. Because the tops of the piles were not visible from the surface, we had to rely on tape measures and moisture-sensor tape reels to help us decide when to stop the pumps.
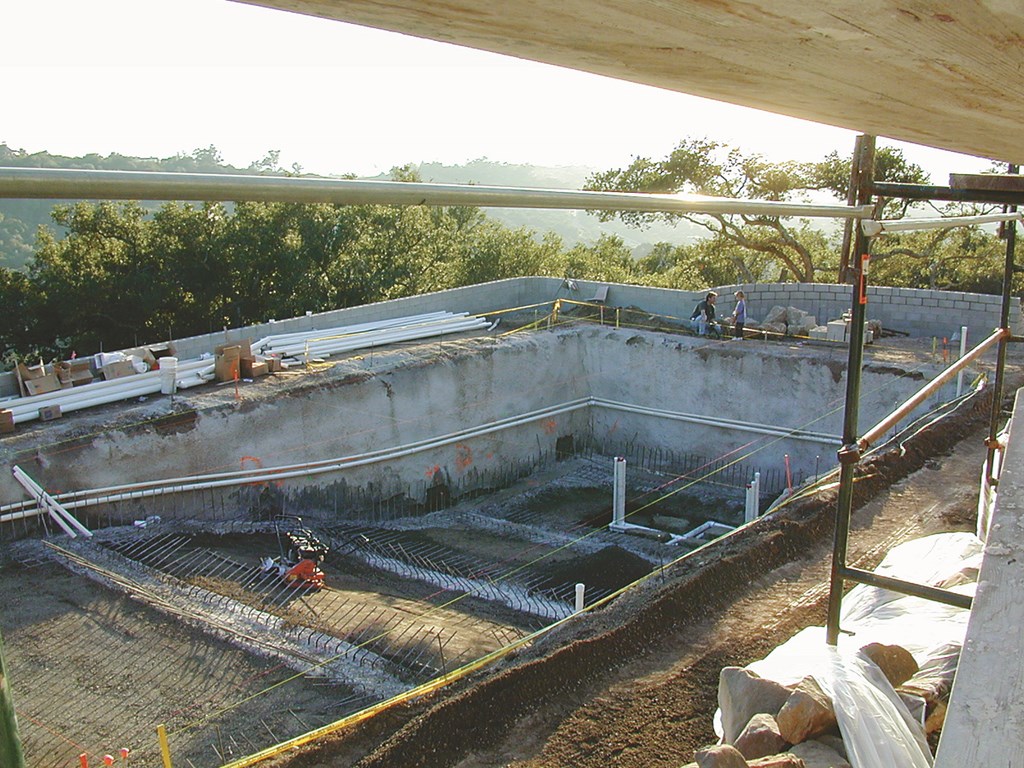
Once the piles were set and cured, we started excavating. Needless to say, great care was taken not to damage the friction piles, so even with a full-sized excavator, a loader, two Bobcats and numerous ten-yard trucks, it took more than two days to dig the shell in rough – and another week to excavate for the grade beams.
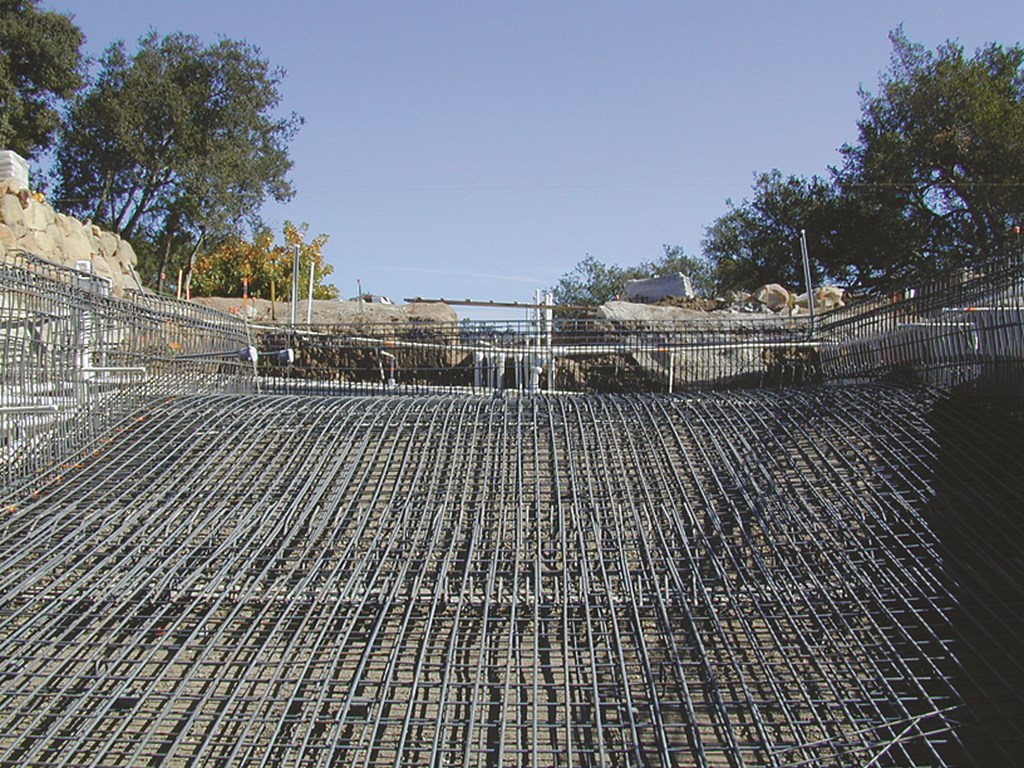
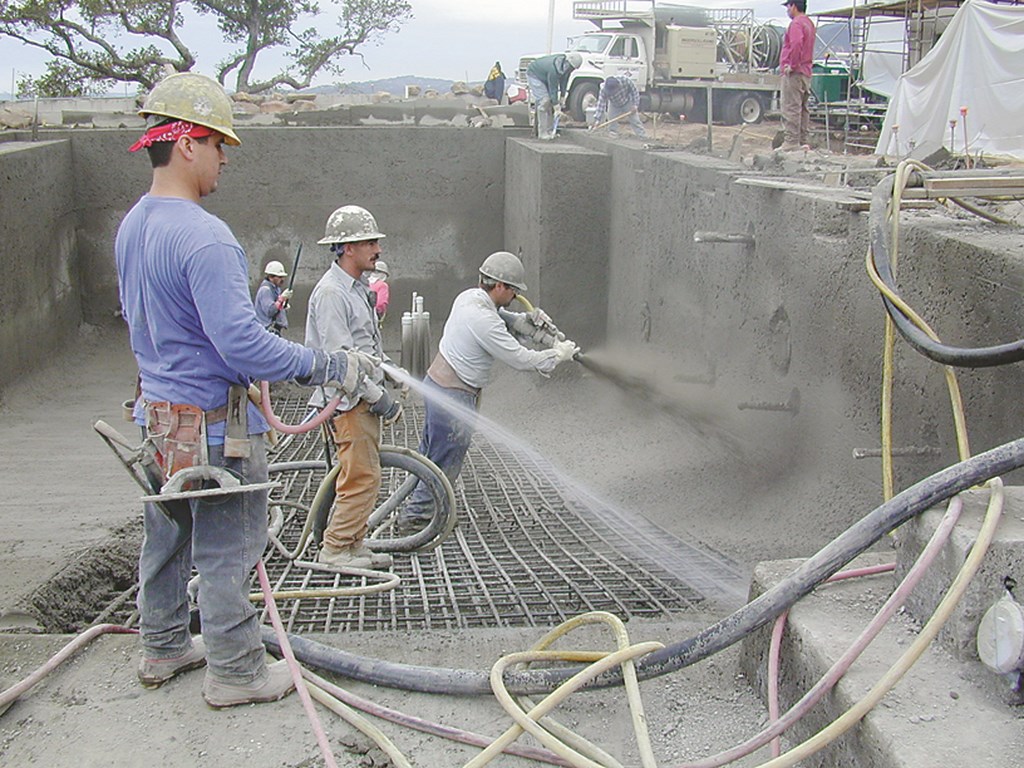
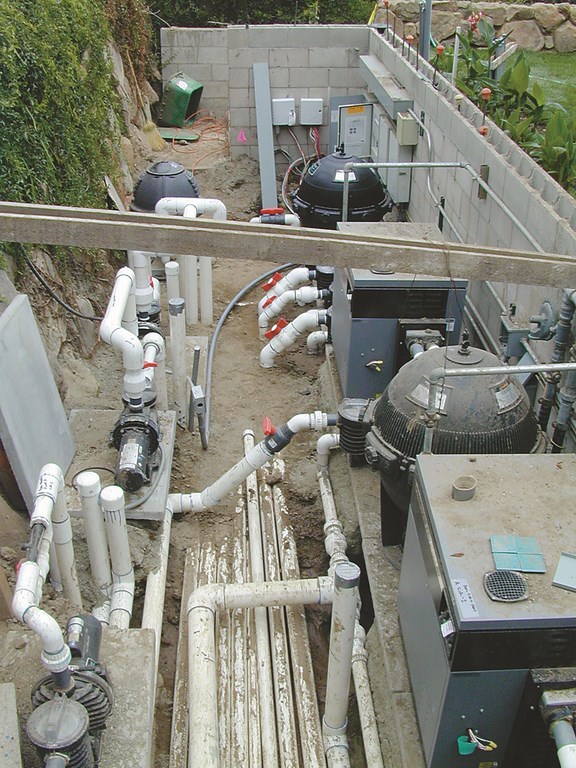
| WORKING SPACES: With the over-excavation and flashed walls, setting up the plumbing and steel cage for the pool was simplified – somewhat. The plumbing is large – 3- and 4-inch circulation lines throughout (left) – and there’s an awesome amount of steel here (midle). With all the details in the structure, it took a full shotcrete crew more than 20 hours to complete their work (right). |
In all, we dug out 650 yards of soil, using the dirt to raise the entire backyard area to its finished grade. Digging the beams was tricky in such tight confines, but with the use of inch-thick steel road plates we were able to lower a backhoe into the shell. Once the backhoe was in place, we performed something of a ballet on the plates (and over the open beams) and eventually hand-cleaned each one.
Next, we brought in a gunite rig to flash the walls, and our reasoning was simple: If any settlement occurred or we had a run of bad weather, the cost of this flashing was far less than any damage that might occur with the plumbing and steel networks. Given the complexity of the project, we knew the hole might be open for months – and we weren’t taking any chances.
With the pool excavated and flashed, we moved on to the grade beams – the crux of the support structure for the swimming pool. These units tie the piles together and provide the stable platform on which the pool rests independent of the surrounding soil.
We started by bending all of the one-inch diameter steel bars rising out of the piles at the correct angles and elevations to intersect with the steel of the beams and support them. Most of the beams were 24 to 30 inches wide and 36 to 60 inches deep, depending on the loads exerted upon them by the weight of the pool. (This huge weight had to be considered in computing the surface area of the friction piles.)
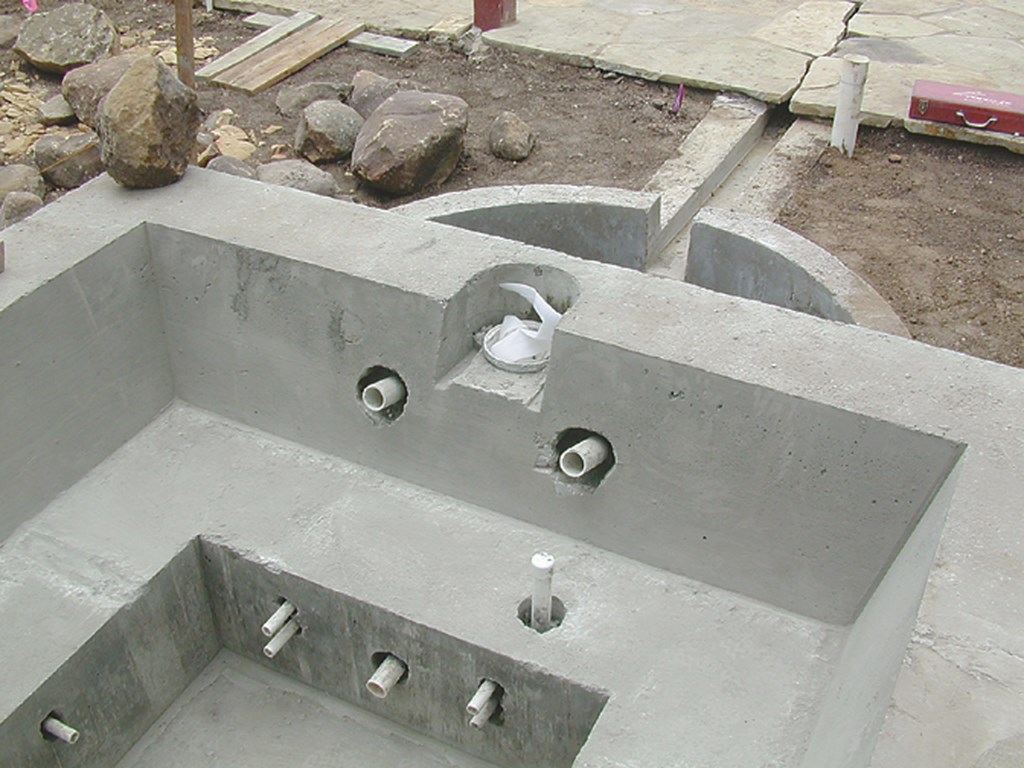
Following installation of the grade beams, we began plumbing the shell. The hydraulic design had been a full year in the making and featured a plumbing trench more than 12 feet wide, which gives you an idea of the scale of what we were doing. It took five plumbers working consistently for more than three weeks to install the 3- and 4-inch suction lines, four skimmers, 24-square-inch main drains, 4-inch return manifolds and future stubs for the spa and runnel. (For more information on hydraulic design, see the sidebar above.)
The gunite flashing was ideal for pinning the plumbing lines to the straight walls of the pool using small steel dowels, leaving the final steel cage more than 24 inches away. This made working behind the cage easy up until the day of shotcrete installation.
The floor and walls themselves consisted of double curtains of rebar spliced into the transition bars from the grade beams. Along the way, we used lots of big bars for the shell – and the only thing that stopped us from going bigger is the governing factor for structural steel; that is, at a certain point, the weight of the steel outweighs its strength. We were also constrained by then fact that shotcrete applicators need room to work, and bars spaced too closely just won’t do.
COMING TOGETHER
All in all, the shell consisted of 230 cubic yards of shotcrete, with a finished bond beam 20 inches thick and the bases of the straight walls at just above 30 inches in depth.
Added to this tonnage of concrete was the 18-inch thick floor topped off by a couple of deep-end benches at 12 cubic yards apiece and 20 yards in the shallow steps and thermal ledge. After more than 20 hours of shooting, the client finally had some idea of how significant this structure was to become.
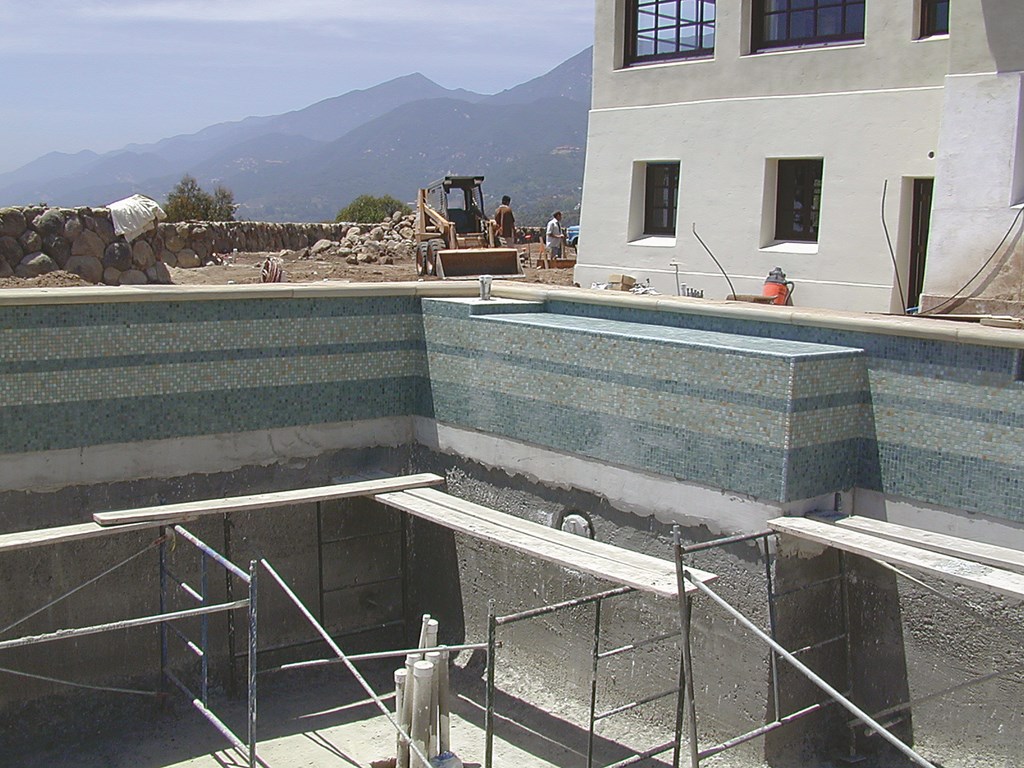
| FINISHING TOUCHES: The glass tessera tile – more than 1,000 square feet of it – was used to accent the steps and the waterline. We played with the idea of finishing the interior completely in this tile, but backed away in favor of white plaster and a more authentic 1920s look. |
This had been something of a concern up to this point: After the over-excavation and the steel/plumbing phase, the client still wondered if the 30-by-60-foot rectangle was the right size for such a large space. Now, with the shell there in all its massive glory, one and all could see that the proportions and scale would be just right.
We moved quickly to the finishes. Glass Tessera tile had been selected for the walls and benches of the pool – more than 1,000 square feet of tile in all. First, of course, we had to waterproof the walls, then tile and lap the final plaster over the waterproofing to ensure a tight membrane.
The selected finish colors were all subtle, picked up from other parts of the project and the surrounding environment, including the hues of California Live Oaks, the home’s antiqued plaster and Montecito’s low-slung skyline. Washed greens, various shades of tan and gold and the reflected blue of the water brought the project’s color scheme full circle in the pool/spa area.
Where the fully enclosed central courtyard had a more dramatic design and color makeup, this area has an incredible view of Santa Barbara and the Pacific Ocean as its true focal point – not the pool. And we achieved our visual goal: This pool fits into the setting and is in no way dominant or overbearing or competitive with the grander vistas.
In keeping with the vintage 1920s theme, white plaster was chosen for the pool’s interior. We’d thought for a while about using the hand-drawn glass tile throughout the entire pool, but ultimately we went with the more traditional look. So instead of a tile monolith, we used the tile as a means of visually connecting the deep- and shallow-end benches and ran the tile all the way to the bottom of the shallow end’s wall.
At this writing, the pool is nearly complete, but finishing work with the landscape surrounding the pool and with many other areas of the estate will continue for some time. In the third and final article on this project – and you won’t have to wait a year this time, believe me – we’ll focus on some of the finer points of the finished project, with an eye toward demonstrating how it all comes together to create a complete tapestry of water, plantings and hardscape.
Mark Holden is a landscape architect, pool contractor and teacher who owns and operates Holdenwater, a design/build/consulting firm based in Fullerton, Calif., and is founder of Artistic Resources & Training, a school for watershape designers and builders. He may be reached via e-mail at mark@waterarchitecture.com.


