Making the Grade on Slabs

If you’re a watershaper of any kind, odds are that you build concrete slabs.
You build them to create decks, set up equipment pads, establish sub-bases for finish materials – and for a variety of other essential construction purposes. No matter the application, it’s important to build these slabs to last, which invariably means building them correctly.
This isn’t something that’s important just for mega-buck projects: No matter whether you’re working on $20,000 cookie-cutter pools or on custom projects at the very highest level, knowing how to construct a slab or a concrete deck properly is a baseline skill we all should have.
CONCRETE BASICS
Reinforced concrete is a wonderful thing – one of the greatest-ever construction materials because you can do anything with it.
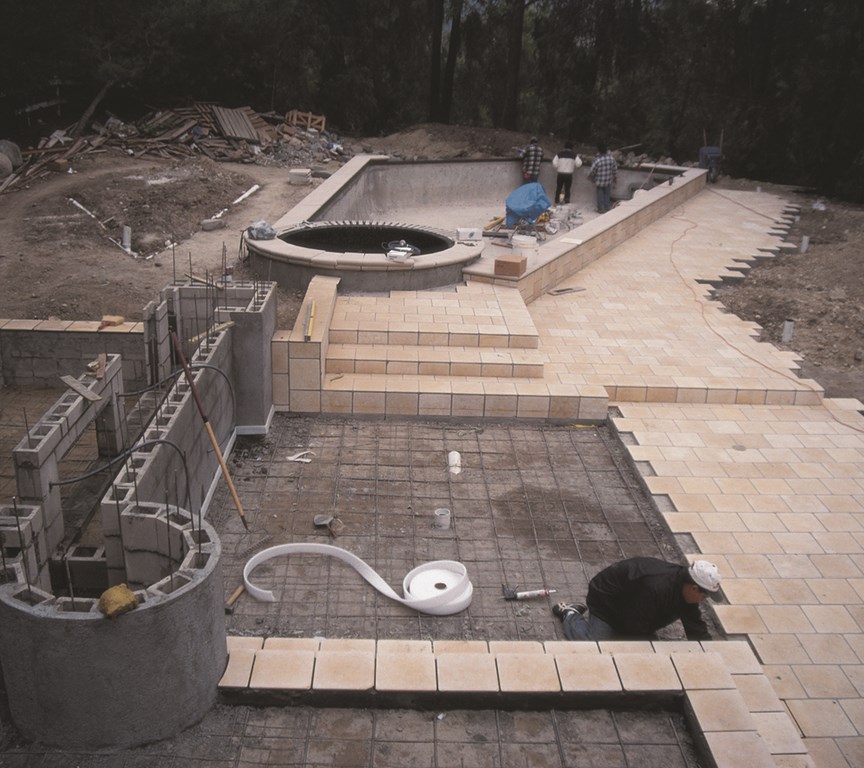
Just in terms of the finished appearance of decks, for example, your options are virtually endless: You can give it a broom finish or a salt finish or a sponge finish. You can give it a washed- or exposed-aggregate look. You can cover it in tile, brick, natural stone or granite. Or you can acid-wash it, give it a monolithic color or use dust-on colors for incredibly artistic visuals.
|
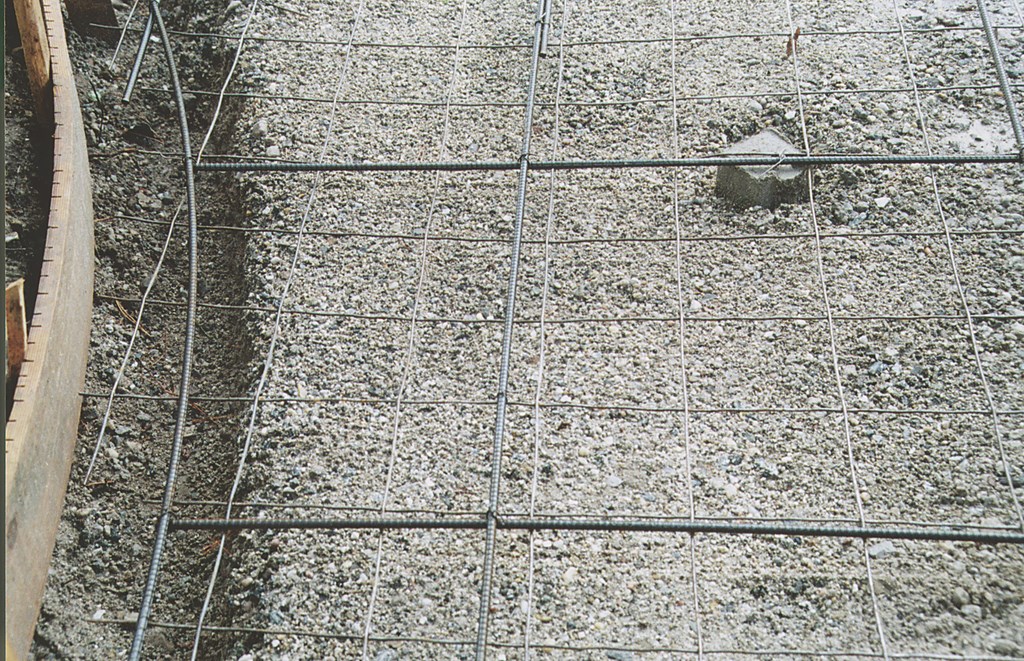
I can’t emphasize enough how important it is to raise the steel and mesh above the surface so that it ends up in the middle of the slab, where it belongs. All the steel in the world won’t help a deck if it ends up on the ground beneath the concrete! |
Concrete is indeed great, but anyone who has worked with it knows one big thing: No matter what we do, concrete will crack. In the case of slabs, it’s a natural material placed next to the earth, which is guaranteed to move in some way over time that will cause cracks to develop. In fact, I’d go so far to say that all concrete cracks, so whether you’re building a bomb shelter, a freeway, a sea wall or a 10-by-20-foot deck, you can presume with great certainty that it will crack.
Knowing this, it’s up to us to try to control that cracking. We can, for instance, beef it up with steel and wire mesh to resist cracking. We can prepare the ground to minimize expansion and absorb movement, and we can build footings that enable the slab to remain stable in the face of prevailing soil conditions. We can also try to determine where it will crack.
Fortunately, these measures are neither difficult nor expensive. Even in lower-priced projects – the cookie-cutter projects mentioned above – the cost of improving the strength and reliability of slab construction is in fact minimal. Given a choice, I can’t imagine there’s a client out there wouldn’t be willing to spend an extra buck or so per square foot to ensure that the work will look good for years to come.
If a pool project costs $30,000-$40,000 and calls for 1,000 square feet of decking, the cost of doing it right will add up to an extra $1,000-$1,500 tops. Let me put it plainly: At that rate, proper deck construction is cheap insurance that should be standard on every project – no exceptions!
To do the job correctly, you have to know the ground upon which you’re building. In California, for example, we have a tremendous amount of expansive soil, while in the Northeast, you have to deal with freeze/thaw conditions. These basic environmental factors have an influence on how you build your decks.
As I’ve stated repeatedly in this column and elsewhere, if you don’t know the geology and the soil, you can’t do the work – at least not properly.
DOWN TO DETAILS
Here’s how I approach a typical project:
[ ] We excavate the grade for the decks during the rough excavation for the overall project, allowing for a sub-base of one to three inches of sand and/or gravel. Later, during the “fine grading” in preparation for the building of forms, we set the drains. By this time, the plumbing and conduits should already have been trenched, installed, backfilled, compacted – and signed off by an inspector. [ ] We build forms for footings based on the soils conditions. The footings I build range anywhere from six inches deep in a typical deck in the Western United States or Mexico, for example, to 30 inches deep to accommodate freeze/thaw conditions in places like the Northeast or Europe, where I also design and build pools. These footings provide strength and stability for the slab and prevent the soil from eroding from beneath the deck. [ ] Now we add the gravel/sand sub-base and wet everything down to expand the soil to the greatest extent possible. [ ] For reinforcement, we use both steel (rebar) and welded wire fabric (wire mesh). The combination of steel and concrete is a great thing, and it works so well because concrete is good at withstanding compression (or weight) while steel provides tensile strength (or resistance to flexing). Depending on the specific soil conditions, I use #3 or #4 rebar on 12- to 18-inch centers in both directions.|
There’s a lot of thought and effort that goes into building a concrete slab or deck – and that’s particularly true when it comes to setting up expansion joints and score lines so that minor relative motion won’t ruin good work. |
It’s at this point that many people I know make a crucial mistake: Rather than making sure the steel is raised off the ground before the slab is poured, they leave it sitting on the soil and simply pull it up with a claw hammer as the material is being poured.
This has always amazed me: Given the fact that the concrete is in a semi-viscous state, and given the fact that gravity does what gravity does, it seems certain that the steel that’s been abruptly yanked upward during the pour will, whether gradually or abruptly, settle right back down into contact with the soil. This technique doesn’t work, and there are countless cracked decks out there that prove it!
To be effective as a structural element, the steel must be in the center (or even slightly above the center) in the slab. It doesn’t do much if any good at all lying against the ground. So:
[ ] Before we pour the deck, we block up the steel on small concrete blocks (or “dobies”). These hold the steel away from the soil so that it will end up in the middle of the slab – right where it should be. Given a standard slab thickness of four inches (which is really 3-5/8 inches, given the dimensions of the two-by-fours used for forming), we typically block the steel up two inches above the sub-base. [ ] Next, we tie wire mesh to the steel, which further works to hold the concrete together by holding cracks together when they do occur. As a rule, I use 6×6-10×10 welded wire fabric. [ ] Finally, we pour, pump or tailgate the concrete on site, with the method determined by the location of the project with respect to truck access and distance. (Our ability to pump is also determined by distance and aggregate size.)SO MUCH MORE
One key consideration in setting up a slab or deck that will last is smart use of expansion joints and score lines.
In planning decks and slabs, I place expansion joints strategically to create monolithic slabs that are no larger than eight by eight feet. I make these using flexible joint materials that allow for a certain amount of movement – particularly important in expansive soils.
I also use score lines to control cracking – and I make certain they’re deep enough to do the job. I can’t count the number of decks I’ve seen where a crack runs parallel to or diagonally across a score line that simply wasn’t deep enough to serve its purpose.
In setting both expansion joints and score lines, I also pay very close attention to aesthetics – but that’s an issues that will be better served with more detailed treatment in a future column or two. For now, the last point I want to make is this: Concrete is an extremely versatile material, but it’s also unforgiving – and you can’t take it for granted!
Managing concrete’s inevitable tendency to crack is the job of everyone claiming to be a watershaper, and the thing of it is that it doesn’t take much extra effort to design and build slabs and decks that will stand the test of time.
David Tisherman is the principal in two design/construction firms: David Tisherman’s Visuals of Manhattan Beach, Calif., and Liquid Design of Cherry Hill, N.J. He can be reached at [email protected]. He is also an instructor for Artistic Resources & Training (ART); for information on ART’s classes, visit www.theartofwater.com.


