Beads on Glass

It’s right up there for longevity in the history of building materials with marble and concrete: The use of glass tile, in fact, dates to the Roman Empire and traces its path through widespread use in Byzantine art in the eastern Mediterranean before finding its way back to a primary role in the art and architecture of Renaissance Italy.
From ancient times forward, glass tile has always been associated with beautiful and enduring works of art. Now enhanced by some modern-day manufacturing practices that serve to bring out its incredible gem-like features, the material still holds faith with all those centuries of tradition while reaching into many more markets, for example, residential and commercial indoor and outdoor applications, than ever before.
What was once the labor of specialists has now reached well beyond those artisanal limits as user-friendly materials and systems have been developed and proved successful in the field. But where proper installation methods have been an essential catalyst in the growth and acceptance of glass-tile applications in a broader market, this can be a mixed blessing if those who are specifying the material in their projects don’t fully understand it and aren’t finding installers who know what they’re doing.
To bring more designers, specifiers and installers up to speed, let’s examine the way glass tile is produced and how it is used – and, in a step-by-step pictorial below – take a close look at specific recommendations of tile-industry trade groups that have weighed in on how best to apply this beautiful material.
MOLTEN MAGIC
The key to quality glass tile is working with quality raw materials.
It may seem odd, but our starting place at Oceanside Glasstile is with recycled glass bottles. The fact of the matter is that American bottle glass is of amazingly high quality as a raw material.
That glass is broken down and is then fully melted so that it is bubble-free and all contaminants have been eliminated. That base material is mixed with other ingredients, including silica sand and colorants (mostly metal oxides such as copper, chrome and cobalt, among many others). Up to85% of the molten mix is recycled bottle glass, but the exact proportions will vary a bit depending on a variety of factors.
The materials are melted in a furnace under closely controlled conditions and cast in a variety of forms, from basic one-inch tiles up to modules that can range from two-by-two inches up to eight-by-eight inches. The molds can also be set up with a variety of relief designs, and irregular-shape pieces are made for use in decorative applications.
After it’s formed, properly cooling the glass is tremendously important. There’s considerable debate about whether glass is actually a solid or is instead a super-cooled liquid, but whatever the case may be, the transition from the molten state to the “frozen” state – a process known as annealing – must be conducted slowly and evenly. When that doesn’t happen, the glass is left with internal stress points and inconsistencies that weaken the material.
A resurgence in the popularity of art glass has resulted in highly innovative products emerging from studio manufacturers, particularly in the United States. Following that trend, glass tile is now being made in places all around the world with varying degrees of quality and consistency. It’s been made in Italy for centuries, of course, and Venetian glass tile has long been the standard.
In recent years, a number of U.S. producers, including Oceanside Glasstile, have developed a range of hand-made and often iridescent products that stand apart from machine-processed tiles made overseas to meet the needs of the global glass-tile market. This increase in sources – both hand- and machine-made – has fueled tremendous growth in both the availability and popularity of the material, especially in the past ten years.
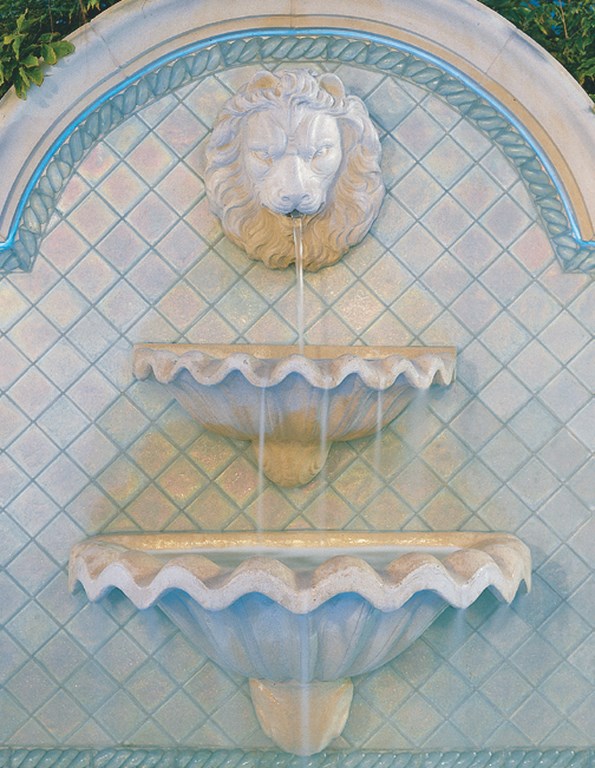
Applications in watershapes – particularly high-end pools and spas, but also in some fountains – have become far more common in recent years, and it has a lot to do with the fact that the material is beautiful as well as being perfectly suited to use in water applications. With the advent of paper-faced tile sheets in particular, glass tile is now much easier to install than it once was, and working with it is no longer such a rarified skill.
MAKING SENSE
When the upswing of interest in glass tile hit the design community in the early 1990s, the material was not particularly well understood, nor was it widely recognized by consumers.
At that time, installation was seen as being quite difficult, and relatively few contractors felt comfortable in specifying or applying it. Year by year, however, glass tile has gathered momentum and is now familiar to a large population of designers and consumers who know how it can be used to great effect in a variety of interior and exterior settings.
We now see it used extensively in kitchens and bathrooms as well as outside cook areas, and it’s also used to decorate surfaces or to trim out major structures. It has proved as well to be a fantastic surface in pools, spas and other watershapes. You only need to consider the proliferation of glass tile suppliers in recent years to see evidence of how demand for the material has grown in a very short time.
What all suppliers to the worldwide market for our products particularly enjoy is the fact that designers, be they architects, watershapers, landscape architects or interior designers, have been pushing the envelope and coming up with more and more creative applications of our products.
This level of acceptance among designers has fueled another level of interest among consumers, who are seeing glass tile in more and more places including the resorts where they take their vacations, on the design-oriented cable-television shows they watch and in the upscale home-design magazines they read. Indeed, we have a generation of homeowners and commercial clients who are far more educated and interested in considering a far broader range of materials than ever before.
The glass tile industry has responded to this interest by working to make the material as accessible as possible. A combination of advancements in setting material and installation techniques has helped: Now the materials are easily set over a cured-mortar bed in a simple direct-bond method, where in the past installers had to use a “wet set” method that required a far higher level of skill.
For all that, we still have problems these days when non-recommended setting materials are used or recommendations for cure times for the tile’s substrates are not followed.
KEYS TO QUALITY
Everyone in the glass tile business – and let’s include suppliers as well as distributors, specifiers, installers and consumers under that umbrella of common interest – wants to meet with success in applying this beautiful and relatively expensive material.
To ensure that success, glass tile and setting-material manufacturers have worked together to develop very specific recommendations for the proper application of these materials and have seen them accepted and published by the Tile Council of America (TCA) and the Ceramic Tile Institute of America (CTIOA). It might have been easier if building authorities had set and maintained standards, but we in the trades saw the need and stepped in.
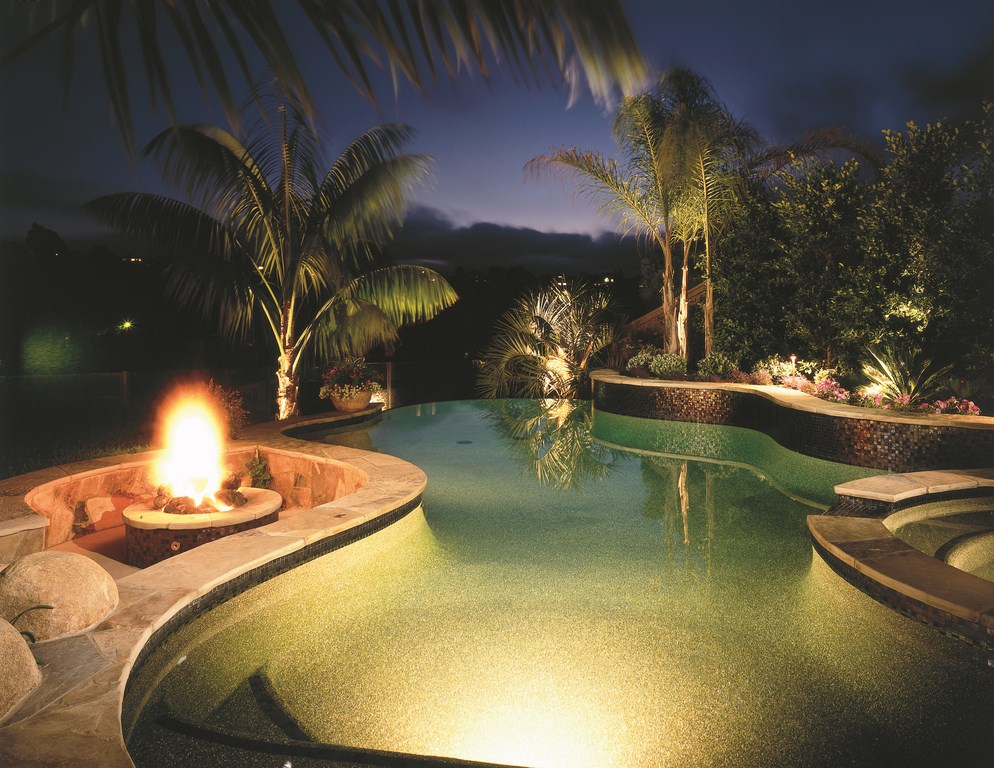 The recommendations are very specific – minimum cure times for substrates in swimming pools of seven days for the mortar bed, for example, and 21 days after grouting before the tiled surface should be submerged. This is all in accordance with TCA and CTIOA recommendations we at Oceanside Glasstile helped to develop and fully endorse.
CTIOA has published this information in the form of field reports (available on their website, www.CTIOA.org). These documents offer product-specific guidance by manufacturer, product name and number for thin-set mortar systems, membrane products, grout materials, expansion joints and sealer materials across a variety of interior and exterior applications.
Glass tile suppliers urge compliance with these recommendations because they go a long way toward ensuring a maximum life span for our products. When you talk about a reinforced-concrete structure, you usually talk in terms of a 100-year service life, and that’s the kind of longevity we target for our products. With most watershapes, in other words, our aim is to have the surface last as long as the vessel itself.
These recommendations are also intended to ensure that the product is set up to have the best possible appearance. Many glass tiles are translucent, for example, so suppliers strongly suggest using white bonding mortar to enhance that quality. It is this brilliant appearance, after all, that has led designers and consumers to consider glass in such a wide range of potential applications.
A brilliant appearance is, ultimately, what capably installed glass tile is all about. When you look at the depth of color and reflective nature of surface, if you are captivated by its often-iridescent look, it’s not much of a stretch to see that these materials work particularly well with water. The interplay of sunlight in water with these surfaces can be truly spectacular, literally gem-like: Light refracts and creates an intriguing optical quality.
It’s a design medium like no other.
***
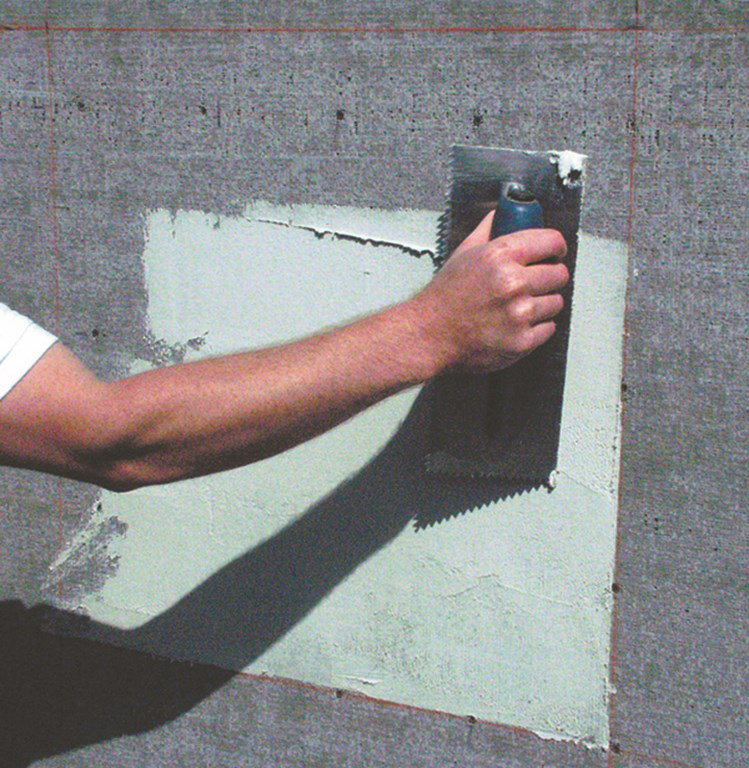
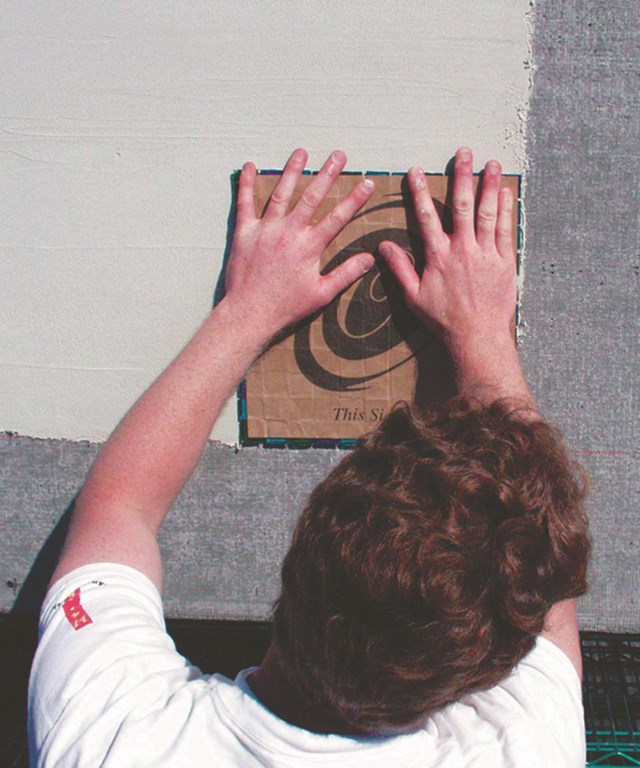
Installing glass tile is not difficult, but the applicator needs to take care in following a few key steps and recommendations – as seen here in the use of paper-faced tile sheets.
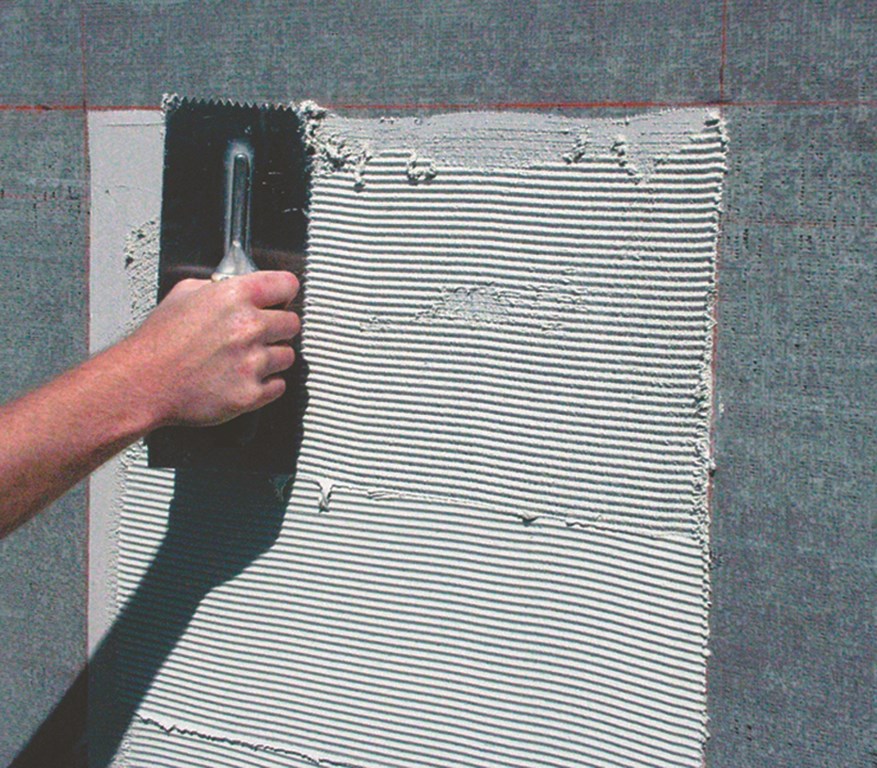
Step One: Applying the Setting Material
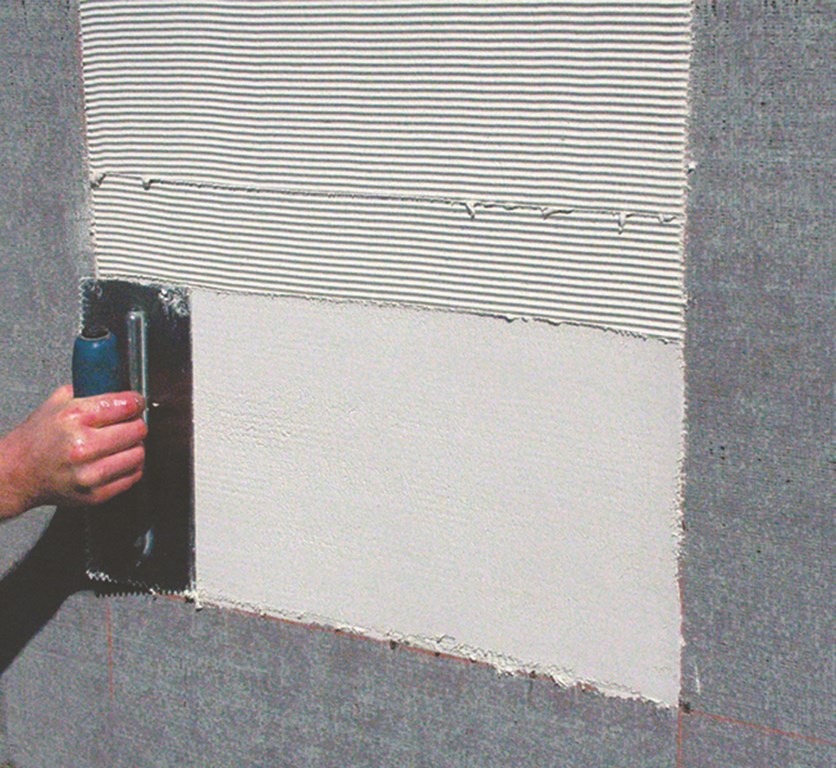
The setting material is applied to the substrate using the flat side of a 3/16-by-1/4 inch V-notched trowel (left). Next, using extra setting material as needed and the notched side of the trowel, the material is “combed” to establish the proper depth for the setting bed (middle).
Again using the flat side of the trowel, the notches are flattened to achieve a smooth, consistent setting bed approximately 1/8 of an inch thick (right).
Step Two: Applying the Tile Sheet
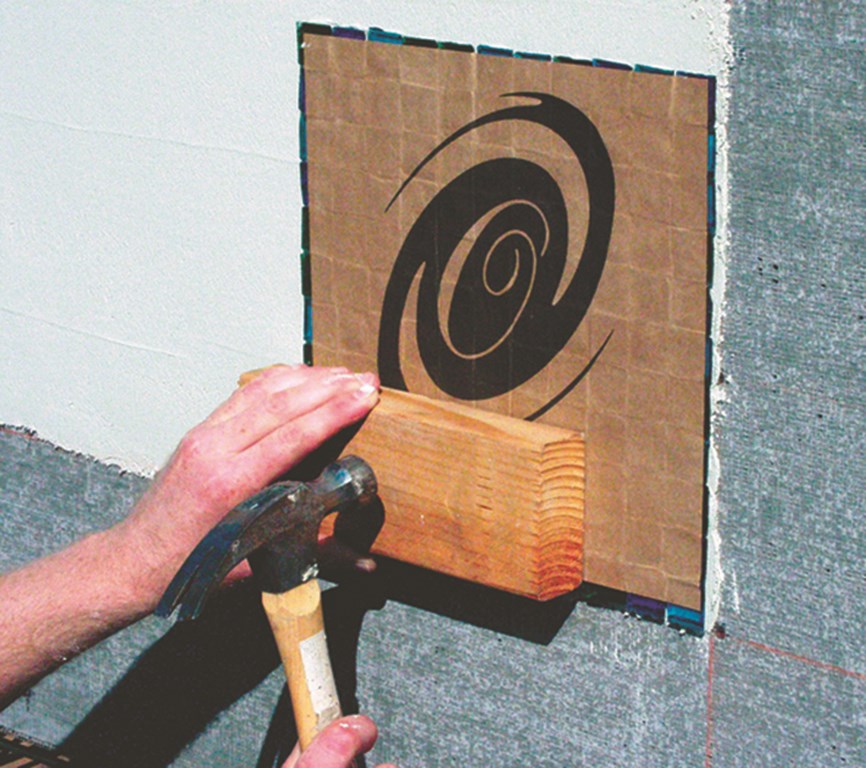
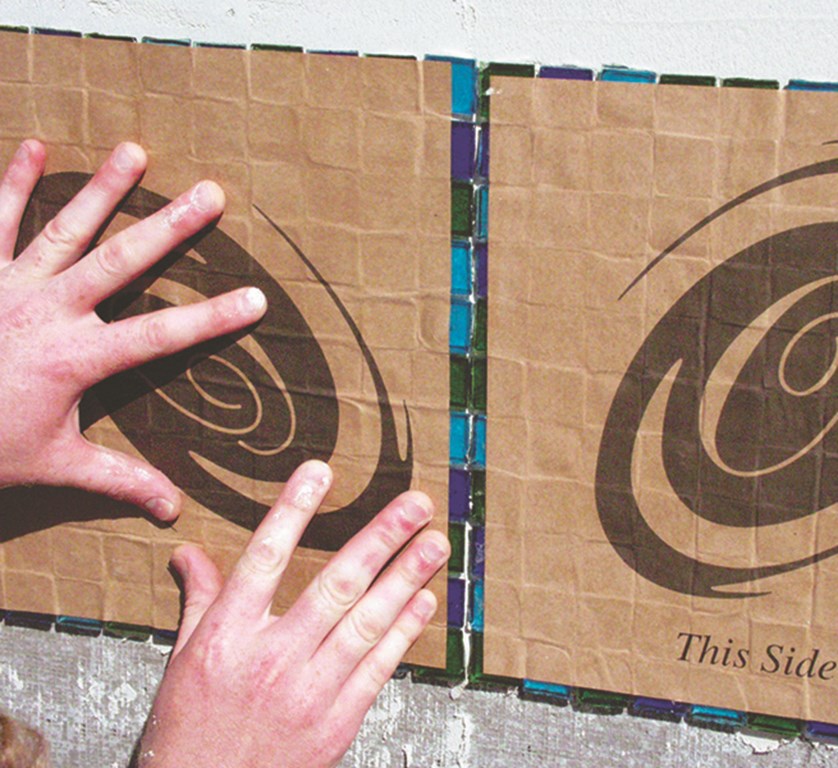
The mosaic is applied to the setting bed, paper side toward you, using a light even pressure to establish contact and eliminate voids (left). (Before setting each section, check for “skinning” – that is, the slight drying of the thinset surface. If you detect skinning, repeat Step One.) To achieve a uniform, flat surface, lightly tap the surface with a wooden beating block and hammer (middle left). Apply subsequent sheets so the grout lines match (middle right). To unify the tile surface from one sheet to the next, use a wooden beating block to tap the newly applied sheet snugly against the previous sheet (right).
Step 3: Removing the Paper Backing
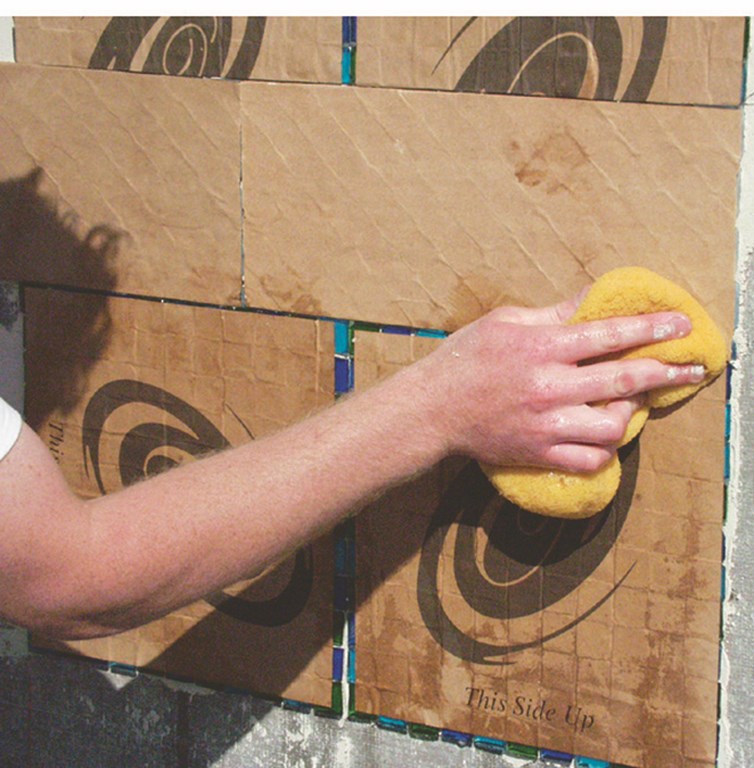
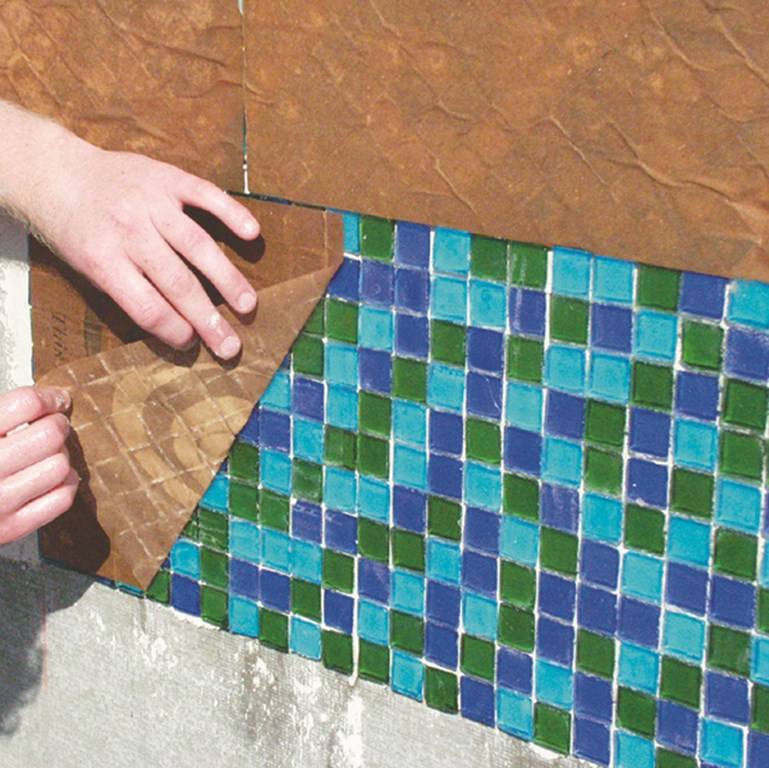
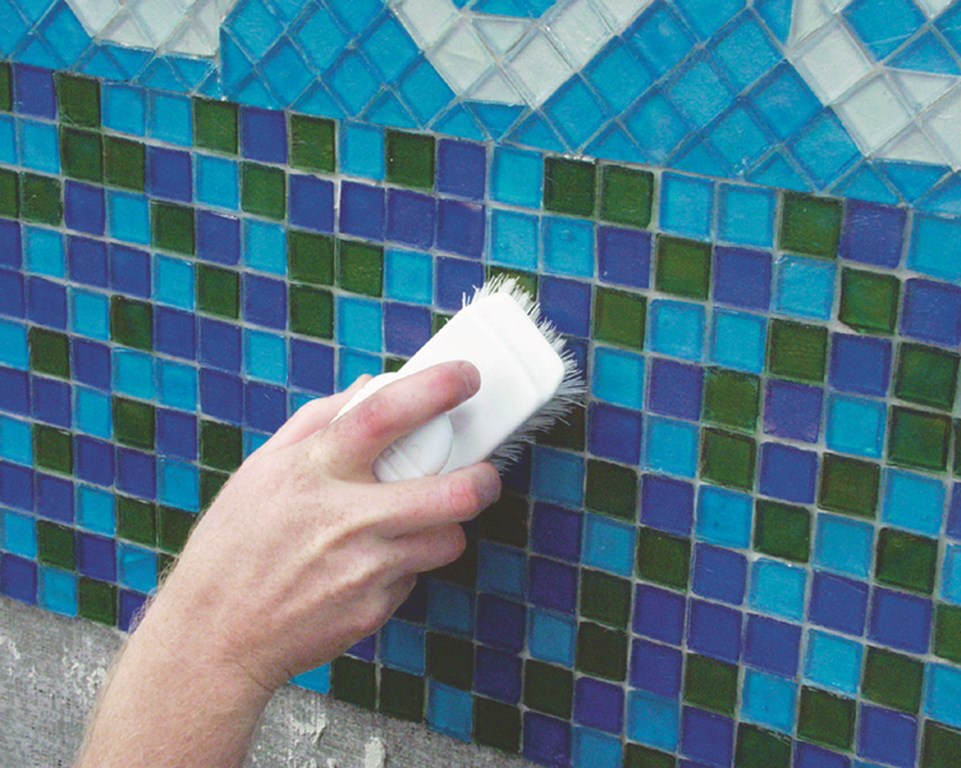
After 15 to 30 minutes pass, lightly wet the paper several times over a five to ten minute period (left). When the paper turns dark – meaning it’s saturated with water and has released the glue that holds it to the tile – it’s ready to remove. Peel the paper starting at the corner of the sheets (middle left). Removing the paper at this time – that is, while the setting material is still wet – allows for necessary adjustments of alignment and allows you to check for color consistency. Straighten individual tiles (middle right) to create a consistent field of tile and pay particular attention to the joints between sheets to eliminate obvious “sheet patterns.” Let the surface cure a minimum of 48 hours before cleaning with a nylon brush and water to scrub away residual paper and glue from the tile (right). Follow this by cleaning with a damp sponge, then allow the tile to dry.
Step 4: Applying the Grout
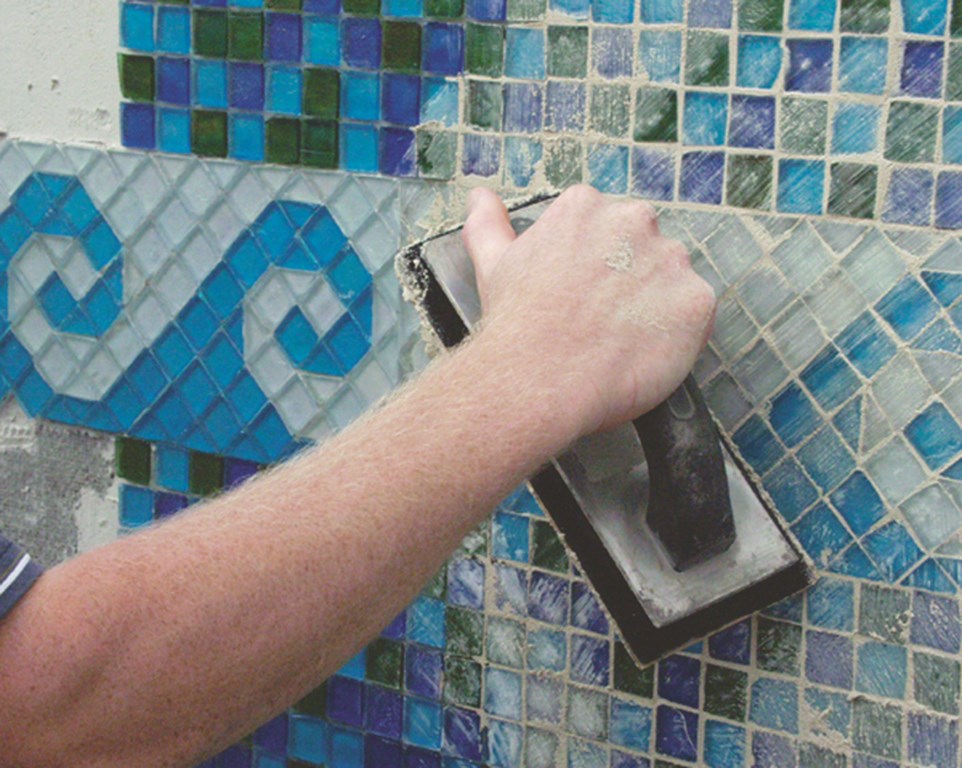
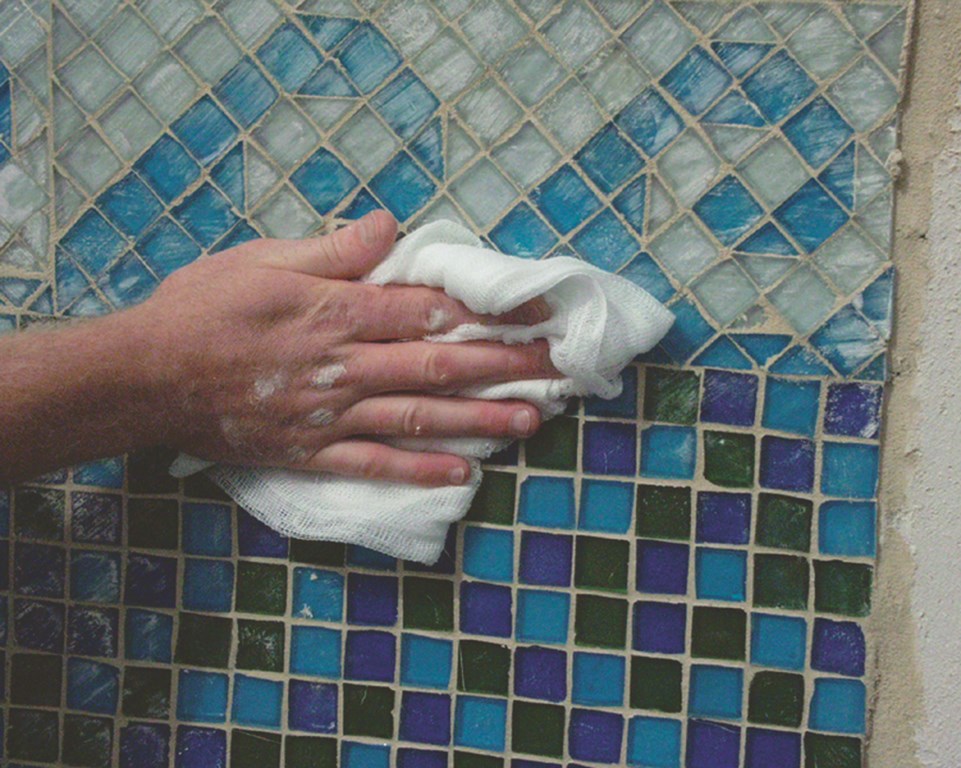
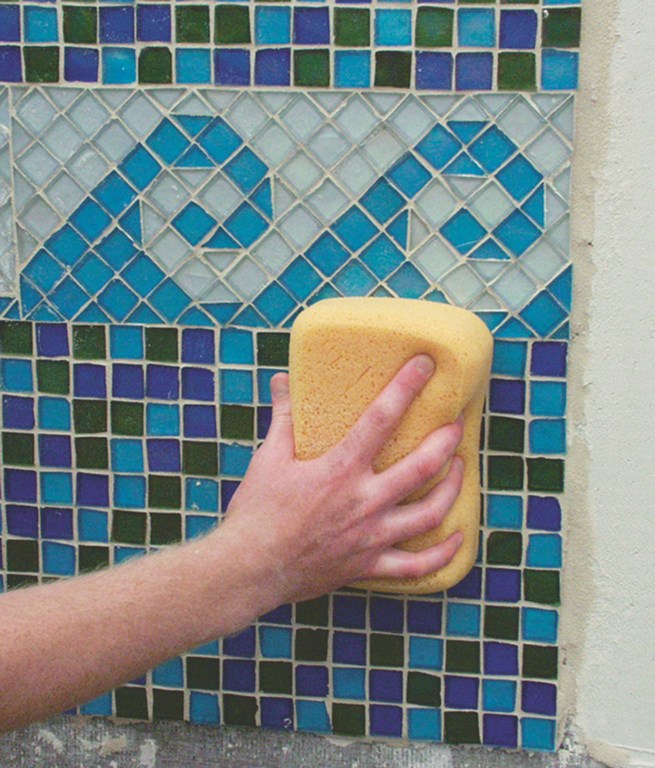
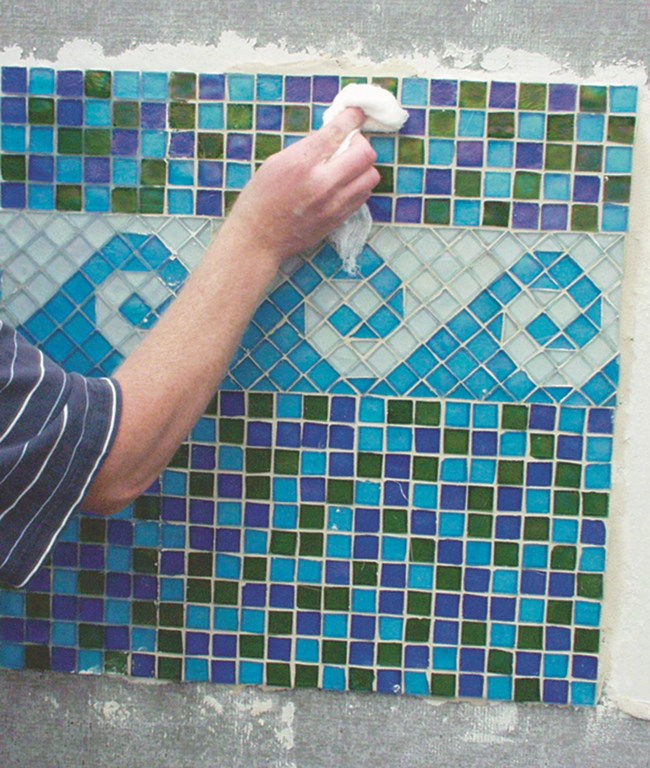
Once the tile is completely dry, use a standard-grade, sanded grout mix and apply the grout with a rubber float, forcing the material into the joints until they are full (left). Because glass is impervious to air and moisture, the grout will take longer to set than is the case when porous materials are applied. Once it sets, use dry cheesecloth for an initial cleaning (middle left). This will wick excess moisture from the grout and help in washing out the grout joints. Allow the grout to set for the time recommended by the manufacturer, then smooth the finish with a damp sponge (middle right). Use a clean, soft cloth to clear away any remaining grout haze and complete the final polishing (right).
John Marckx is executive vice president of Oceanside Glasstile, a manufacturer based in Oceanside, Calif. A catalyst for growth since joining the firm in 1996, Marckx has responsibility for the company’s manufacturing operations and sales/marketing programs as well as product development and new business ventures. Recipient of a bachelor’s degree in literature and creative writing from the University of California at Santa Barbara, he also oversees the development of advanced glass-tile installation, testing and methods. Scott Fleming is director of technical services for Oceanside Glasstile. A licensed tile contractor in California and New Mexico for more than 20 years, he oversees the company’s installation-training programs. A certified tile consultant, he has published numerous technical papers on tile installation issues, methods and field testing and is a frequent speaker at trade shows and other industry events.


