Expansion Solutions

Put yourself in your customer’s swim suit for a moment:
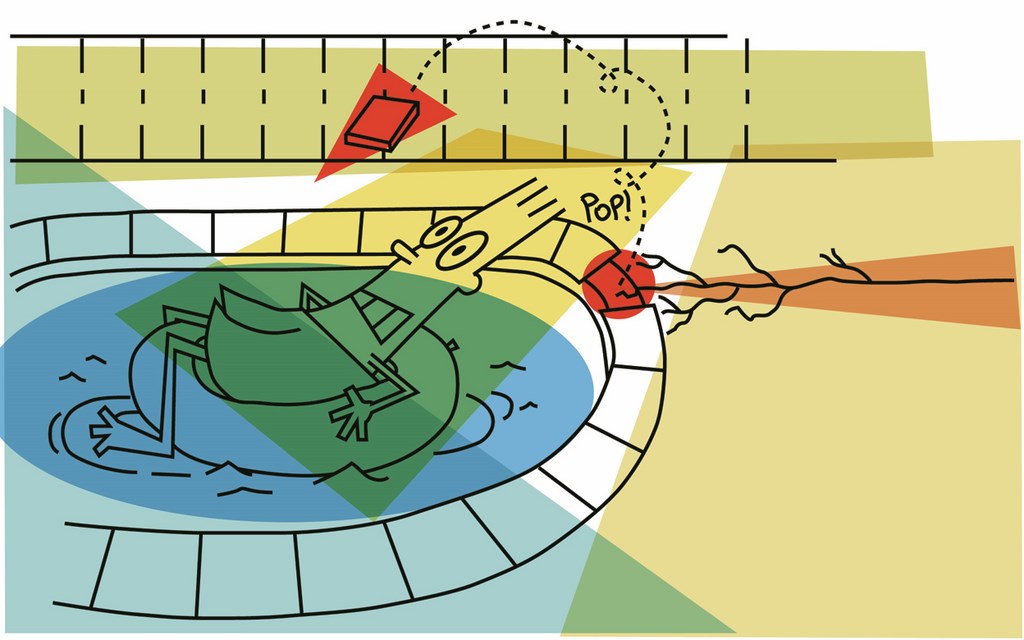
You’re floating in a lounge chair in your pool, taking in the surroundings and proud ofwhat you and your family now enjoy. As you scan the perimeter of the pool, you spot something you’re certain wasn’t there the last time you looked. Yes, you’re sure of it: A portion of the deck seems to be rising above the backside of the coping.
Instead of continuing to enjoy a lazy afternoon’s float, you now start to wonder how long it will be before the coping cracks and the tile will pop off the water line. You paid untold thousands for this slice of backyard beauty, and now the deck is falling apart.
You are not happy.
This sort of experience reflects a fact of nature: When expansive soil absorbs moisture, it expands and ultimately will lift a deck. And despite the fact we’re talking about a compromised appearance rather than structural failure, this phenomenon of soil expansion is responsible for more deck repairs and replacements than any other type of problem commonly occurring with slabs set on grade around swimming pools and other waterfeatures.
Happily, there are some simple ways of avoiding (or at least minimizing) this unsightly problem, basic preventive measures that might someday mean the difference between a customer lounging quietly in the sun – or calling you on the phone with an unpleasant edge in his or her voice.
THE SATURATION SOLUTION
The first step in the process involves knowing what you’re getting yourself into as you start a project. Certain regions are notorious for expansive soils and you can almost take adverse conditions for granted, but there are pockets of expansive soil in just about any setting, coast to coast (see the sidebar below for some quick identification tips).
|
The Lowdown on Dirt The first thing you need to know about expansive soils is that they are exceedingly common. They predominate in places like California, Texas and the upper Midwest, but pockets of the stuff can be found just about anywhere. Expansive soils come in a broad range of types and compositions; in fact, a truly detailed discussion would fill a whole series of books. To narrow our discussion here to manageable length, let’s talk about “clay” – soils that are so sticky that when you walk through the mud, you come out about three inches taller for your trouble. This stickiness is one obvious signal to the decking crew that expansiveness is an issue. Another indicator is the telltale cracks you see when expansive soil is dry: The clay has absorbed water, expanded, and then lost the moisture – retaining its overall volume but forming voids as the water leaves. (The cracks themselves don’t really pose a structural problem for a deck, but you wouldn’t want to set a footing of any kind on soil this unstable.) The difference between clay soil and regular soil boils down to particle size. The particles in clay soils are extremely small, where non-expansive soils tend to have much coarser particles. When thoroughly wetted, clays “blow up” because water actually gets sucked between the soil particles by a capillary action. The water molecules are drawn in and actually push the minute soil particles apart, thereby causing what is often a dramatic expansion. When this happens under a deck, the expanding soil will lift the slab, usually very slowly, and ultimately cause the sort of eyesore that catches a homeowner’s eye. So whenever you spot sticky mud or evaporative cracking, it’s time to call for a soils report and to think about taking some basic problem-preventive measures! – R.L. |
Once you’ve determined that you’re standing on a liftable surface, the most important remedial step you can take is to pre-saturate the ground.
This step is too often overlooked, basically because it can mean adding days to the schedule, but the principle is very simple: Before you build the deck, you introduce water to the soil and cause it to swell to its full volume. Then you build the deck knowing with a reasonable degree of certainty that the ground won’t rise any further, even if more water is introduced to it later on down the line.
Decking contractors often make a mistake here: Pre-saturation is not just a matter of wetting the ground, not by a long shot. Clay may blow up like a sponge once it absorbs water, but it tends to do so rather slowly. What this means is that you really have to flood the soil to get the water to penetrate and do its job.
Of course, flooding a construction site is a bother for a variety of reasons. This is why many decking contractors lay down a layer of crushed rock before flooding: This allows them to flood the yard and still walk around without getting mud all over everything. Better yet, once the deck is down and life goes on, the soil may continue to expand a little bit; the crushed rock, with its large voids between individual rocks, will give the soil a place to go. (Sand doesn’t offer this advantage!)
In general, a four- to six-inch layer of 3/4-inch crushed rock will get the job done. If this isn’t a step you take as a matter of routine, you probably should think about it. The one thing to bear in mind is that you need to drop the grade to accommodate the depth of the rock. After the pool or waterfeature has been gunited, you can put in your crushed rock, form it and flood it.
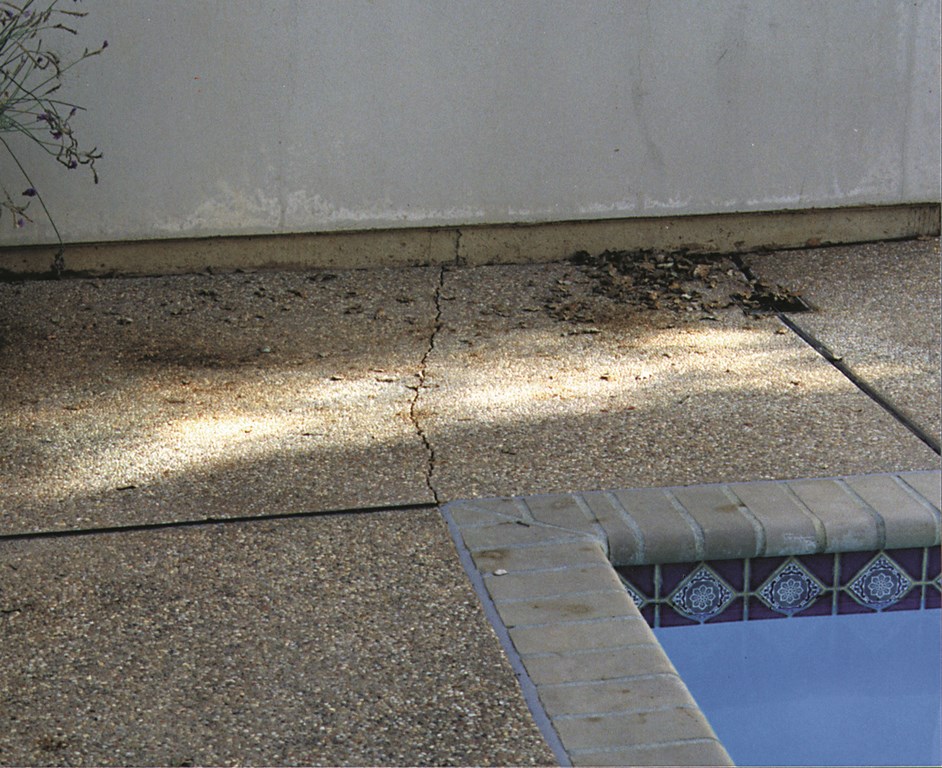
| The lifting caused by expansive soil manifests itself as a range of problems, from noticeable elevation differences between coping and deck (left) to rapid deterioration of mastic joints (middle) or cracking away from control joints (right). In most cases, these problems are preventable with proper site preparation, engineering and installation practices. |
How long the ground needs to soak before you lay the deck depends on factors such as temperature and humidity. As a rule, you’re looking at a week to ten days, but if that’s simply too much time, you can speed things up a bit by spreading some inexpensive powdered detergent on top of the rock before you hit it with the water. The detergent will act as a wetting agent and help the water penetrate the soil.
The saturated soil will probably blow up a half to three quarters of an inch, so you may need to do some final grade work before you lay the slab.
DECKING JOINERY
No matter whether you’re dealing with expansive soils or not, some degree of cracking in concrete flat work is unavoidable as a result of natural shrinkage that occurs as the slab dries over time. Expansion and contraction that come with temperature changes are also factors here.
To limit this sort of cracking and, as important, to control the locations of cracks, decking contractors install joints of two basic types. Although this is standard procedure for all deck installations, the use of proper joints is especially critical when building on expansive soil.
[ ] Control Joints. Also known as contraction or expansion joints, control joints are placed within the slab itself to enable you, as the name implies, to control crack locations. As a slab shrinks, it tends to curl. Control joints open slightly, allowing cracks to appear at predetermined locations instead of randomly over the slab.
The key here is proper layout of the joints. The simplest rule of thumb calls for segmenting the deck in panels of approximately ten feet square, always dividing the deck into as many even squares as possible. Another way to calculate the frequency of control joints is to arrange them at intervals determined by slab thickness. For this method and other guidance on joint placement in specific applications, see the American Concrete Institute’s manual, Slabs on Grade.
That manual is helpful in pointing out certain deck configurations that are bound to give you trouble. L-shaped panels, for instance, tend to have exaggerated cracking problems, and extended rectangles can be so crack-prone that it’s generally advised that you should never make the long side more than 1.5 times the length of the short side.
As for the joints themselves, there are three common methods for making them:
|
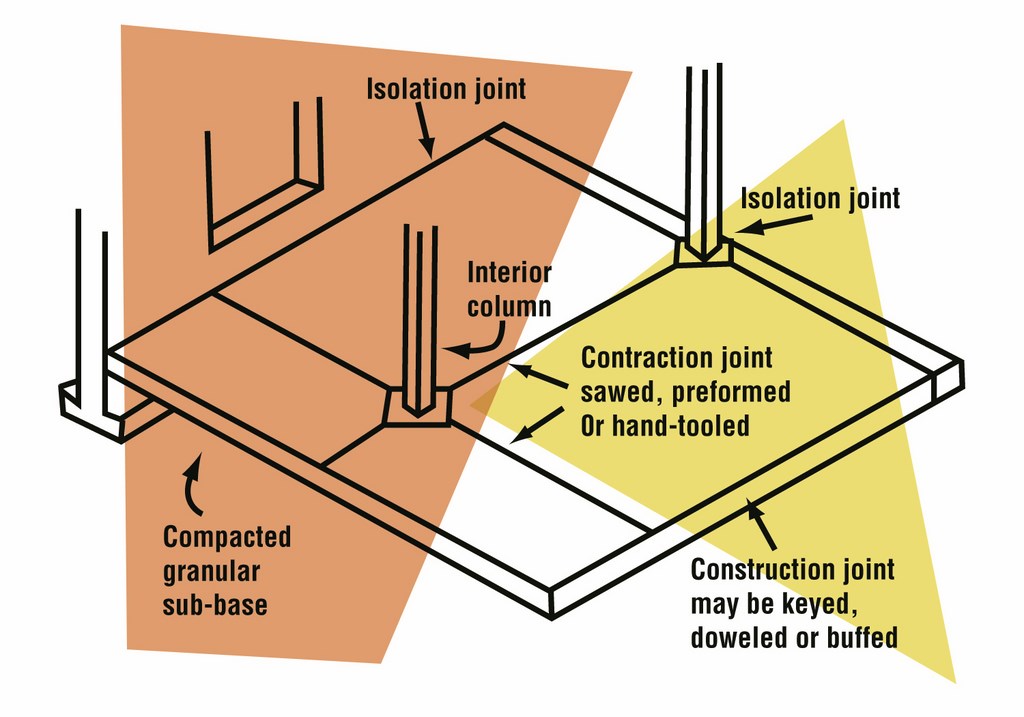
Cantilevered Decks Cantilevered pool decking can be used to beautiful visual effect — but expansive soils below (not to mention simple temperature-related expansion and contraction) can ruin the impression in rapid order. The key here, beyond the preventive measures described in the accompanying article, is proper leveling of the top of the bond beam and installation of a “bond breaker” or slip joint on the top of the leveled beam before the deck is poured. Without this joint, the waterline tile may become partially attached to the deck and will crack and/or fall off when the deck moves. Deck movement may also shear off the leveling mortar you place atop the bond beam. As you install cantilevered decks, also beware a fatal error made all too often: Do not extend any reinforcing steel from the bond beam into the deck. There should be no contact whatsoever between these two structures! R.L. |
• Before the pour, by placing a thin wooden or plastic form between sections of slab
• While the slab sets, by slicing grooves into the slab while it’s still wet and soft
• After drying, by cutting the slab with a saw blade.
[ ] Isolation Joints. These joints are used where a slab runs up to walls, columns, equipment pads, drain pipes, sumps and other obstacles and are intended to prevent any load stress from being transferred between the slab and the adjoining structure. (See the sidebar on this page for details on control jointing around columns.)
Around pools, the most common isolation-type joints are the mastic joints found between a deck and the vessel’s coping. This is simply a sealed space that allows the bond beam and deck to move independently.
Again, use of isolation joints is common to virtually all deck installations, but it’s especially important when building on expansive soil to be certain that you’ve got a good one, from 1/2- to 3/4-inch wide, extending the full depth of the deck. And you should double check to make certain the void is completely sealed: If you hurry and don’t do a good job of sealing – a common misstep – a portion of the joint will allow water to penetrate and your chances of experiencing lift in that area will greatly increase.
RULES OF THUMB?
Slab thickness is a complicated issue, but it’s another factor that comes into sharp focus when you’re working with expansive soil.
There’s a natural tendency to think that building thick decks loaded with steel is the way to prevent lift, but this is a misconception: The thickness of the slab actually relates to how much differential expansive force the deck can take without cracking; it won’t stop it from lifting.
|
Movement in the Trenches Pool-plumbing and drain-line trenches frequently run under concrete pool decking, and there’s an unfortunate tendency not to compact the soil adequately beyond the deck after those lines are installed. The resulting voids give surface water a perfect place to accumulate. Once that soil is saturated, the water will follow the piping and move under the deck where it can penetrate expansive soil and, ultimately, lift the deck. A “cut-off wall” consisting of properly compacted expansive soil should be placed at the point where these trenches extend under decking. This barrier will stop surface water and give another measure of protection to the slab. Finally, pay careful attention to sealing drain lines extending under a deck: Leaks here can undermine all your best efforts elsewhere! – R.L. |
The only way you can hold a slab down over lifting soil is to set the deck up to have so much weight that it overmatches the expansive force pushing up beneath it. That’s not impossible, but it is difficult – and, frankly, economic realities usually get in the way of this kind of heavy-duty construction. In other words, it’s generally best to use pre-saturation and proper joints rather than sheer mass to hold the soil down.
So what’s the thickness standard? That’s a common question to engineers, and the best answer is that there is no set rule. Think about it this way: If you have a 100-foot slab of concrete and the far end lifts. The deck will crack no matter how thick it is. By the same token, if you have a three-foot width and one side lifts, you would only need minimal thickness to prevent cracking (away from the control joints, that is).
Steel won’t eliminate cracks, either. Yes, the more steel you have the less likely the slab is to crack, and when the concrete does crack, the steel will hold it together better. But again, saying how much steel you’d need to prevent the cracking depends on lots of factors, including the size of the slab and the amount of lift – and once more, there’s no set answer.
That said, it’s also perfectly true that the decking contractor needs to think about crack prevention and providing a slab with a measure of crack resistance. This typically means laying down a deck three and a half to four inches thick with #3 rebar on l2-inch centers (or #4s at 18 inches) in both directions. Wire fabric (6-by-6 inches or 3-by-9 inches) also does the job.
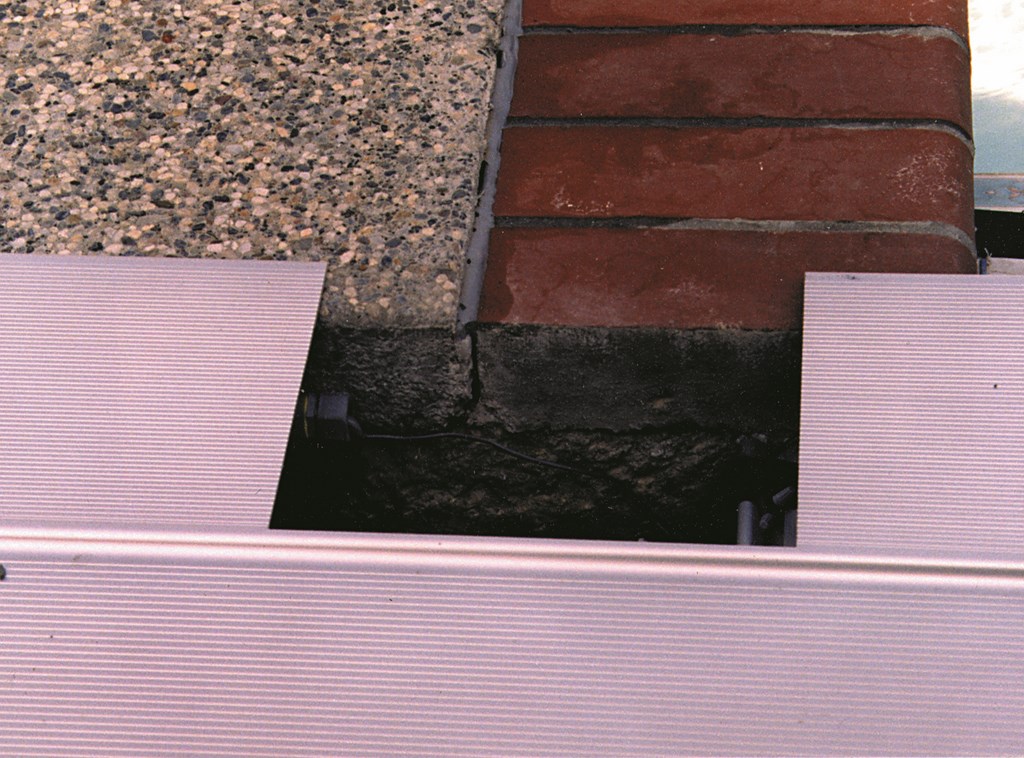
| Here’s a caution: In some situations, tamping can force decking concrete beneath a mastic joint, thereby negating that joint’s benefits. In this case, the lifting of the deck yanked the coping out of its bed. Shortly after this photo was taken, some of the coping stones broke free. |
Keep in mind that the list of preventive measures includes more than thickness and steel, particularly on expansive soils.
[ ] Proper drainage is extremely important. Poor drainage results in standing water, which can penetrate into the ground and cause various problems to decking and structures alike. This is a huge topic unto itself and will be covered in future articles; for this discussion, suffice it to say that you have to make certain that rain and irrigation water have a place to go! [ ] Concrete deck footings should be used at slab edges near a descending slope. [ ] Weep screeds should be separated from the top of the deck where it abuts a stucco wall. The weep screed is installed at the base of these walls to give moisture that condenses on the inside of the walls somewhere to go. All too often, when a slab is poured against a house or other structure adjoining a deck, the contractor inadvertently blocks the weep screed – and that can have grim consequences. (Building codes now specify that any exterior concrete work be two inches under the weep screed.) [ ] Concrete strength of the decking should be about 2,000 psi. Keep in mind that the strength of the concrete depends on the amount of water in the mix: The greater the water content, the weaker the concrete. The general rule is that you want as little water as possible and still properly hydrate the cement. If there’s too much water in the deck and it comes to the surface as curing progresses, you’ll get surface checking, spalling and a whole array of finish problems.PRUDENCE AND RESPONSBILITY
Beyond the aesthetic issues involved in lifting decks, there are obvious issues of liability that enter into this discussion of laying decks that will stand up to expansive soil. Although most code-writing bodies acknowledge that a contractor is not a soils engineer, you are expected to recognize expansive soil conditions and proceed accordingly. In California, for example, the rules require “prudent action” on the part of the contractor.
If you take the necessary preventive steps (pre-saturation, control joints, adequate thickness, sufficient reinforcement) and the deck lifts despite your best efforts, then you will not be held legally responsible. If you don’t take these prudent actions, you’re likely to find yourself on the losing end of a courtroom battle.
Happily, none of the steps outlined here is either expensive or unusual. The key to minimizing future problems with expansive soil is to be aware and take the necessary preventive steps. There are no guarantees, but these basic measures definitely will stack the deck in your favor!
Ron Lacher is president of Pool Engineering Inc., in Anaheim, Calif. A licensed civil engineer, he spent the first ten years of his career managing large-scale construction projects for a variety of governmental agencies before becoming a pool builder in Southern California. In 1992, Lacher founded Pool Engineering, which specializes in developing structural and engineering plans. Since then, the firm has provided structural documents and details for thousands of residential and commercial swimming pools — more than 5,000 in 1997 alone. He regularly serves as a field expert for California’s Contractor State License Board, insurance companies, homeowners and pool-construction companies.


