


The Gap Attack

Sometimes, it’s the simple things that trip you up.
As a case in point, I was recently called by a homeowner who was wondering why the tile was falling off the outside wall of a raised pool that had just been installed by another builder. Unfortunately, that builder apparently hadn’t known how to pull off this standard detail.
The pool had been raised eight inches out of the ground in keeping with the design intent. This is a detail I use frequently to create a seating area around pools, but I was a bit mystified by this particular choice of elevation: It was too high to be a step (most building codes call for maximum 7-1/2-inch outdoor risers) and too low to serve very well as a bench. (Actually, it was just about right for creating a natural trip hazard, but that wasn’t really the problem.
I was further puzzled that the builder used three-inch-square tiles to veneer the raised wall, which meant that a whole row of tiles had to be cut to make the pieces fit. It was fairly nice tile, too, and I have to say the overall look wasn’t bad, either. Still, I had the feeling that it was one of those situations where a contractor was trying something new without really thinking things through with enough care.
NORMAL FORCES
It took me about three seconds to diagnose the cause of the falling tile: It was plain that the builder had no idea how to set up the transition between the wall of the pool and the surrounding deck. Making matters worse was the fact that the builder told the homeowner that the problem was the result of earth movement and therefore that he was not liable.
He was right that earth movement had caused the damage, but the builder was dead wrong about liability, as he had done nothing to accommodate the slightest expansion of the soil. In fact, the way he executed the detail virtually ensured that whenever the inevitable ground movement came, some tile would pop.
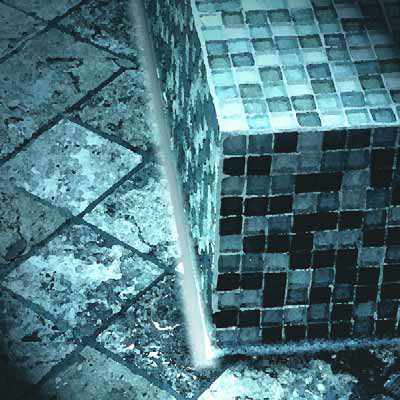
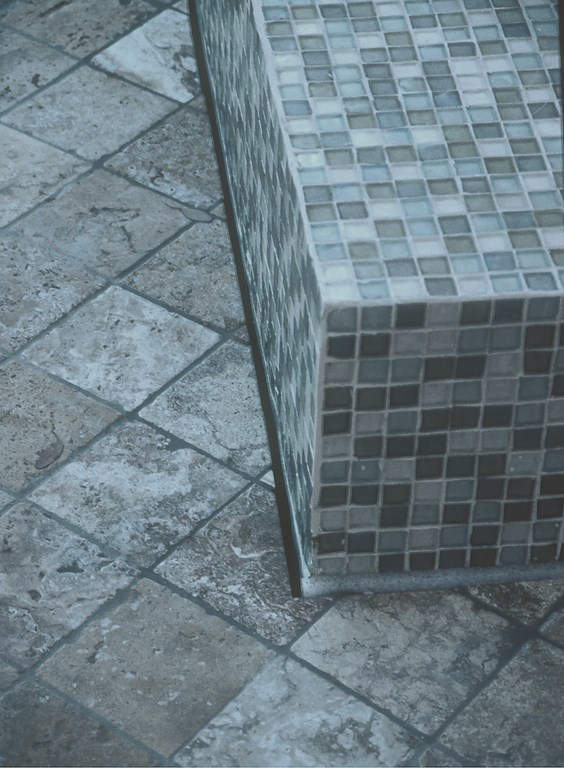
| There must be a gap at the intersection of vertical pool walls and non-structural decks to isolate each one from any possible movement of the other. As work proceeds, the gap is protected by a foam insert (left). (I pulled one end up a little to make it obvious.) When the decking has all been applied, the foam is removed (below). |
What the uninformed builder didn’t know is that there are two basic ways to handle veneering the outside of a raised pool and intersecting that wall with the surrounding deck: You can cantilever a structural deck off the side of the pool so that the pool and deck move as a unit; or you can leave a gap between the wall of the pool and the deck to allow the two structures to move independently.
Cantilevering a structural deck is the expensive option and requires heavy-duty, fully reinforced construction, sound engineering and knowledgeable execution. In this case, the builder should have picked the more affordable and less challenging second option and simply created a gap between the deck and the pool.
Instead, he chose a third and entirely wrong option and ran the deck right up to the wall of the pool before installing the tile so that the bottom edge of the bottom row was basically resting right on top of the deck’s edge. In some places, the float was more than an inch thick, so the tile was basically cantilevered right onto the top of the concrete deck.
Given that set up, even the slightest upward movement of the ground could (and did) destroy the tile job. And it came as no shock to me that the homeowner started experiencing these problems immediately following the run of heavy rainstorms that recently pounded Southern California.
SPACING OUT
I’ve seen this fundamental mistake many times, and if you’ve ever messed up a nice tile job in this way, you’re not alone. The good news is that doing things the right way the next time around doesn’t add significant cost to the project and is not at all difficult to pull off. Here’s what you do:
After the pool is shot and the forms are stripped, you set forms for the deck so that there’s a gap of an inch to an inch-and-a-half between the sub-base for the concrete deck and the wall of the pool. After the deck has been poured and the forms stripped, you place foam in the gap to act as a spacer during the rest of the construction process until it’s time to install a final mastic joint.

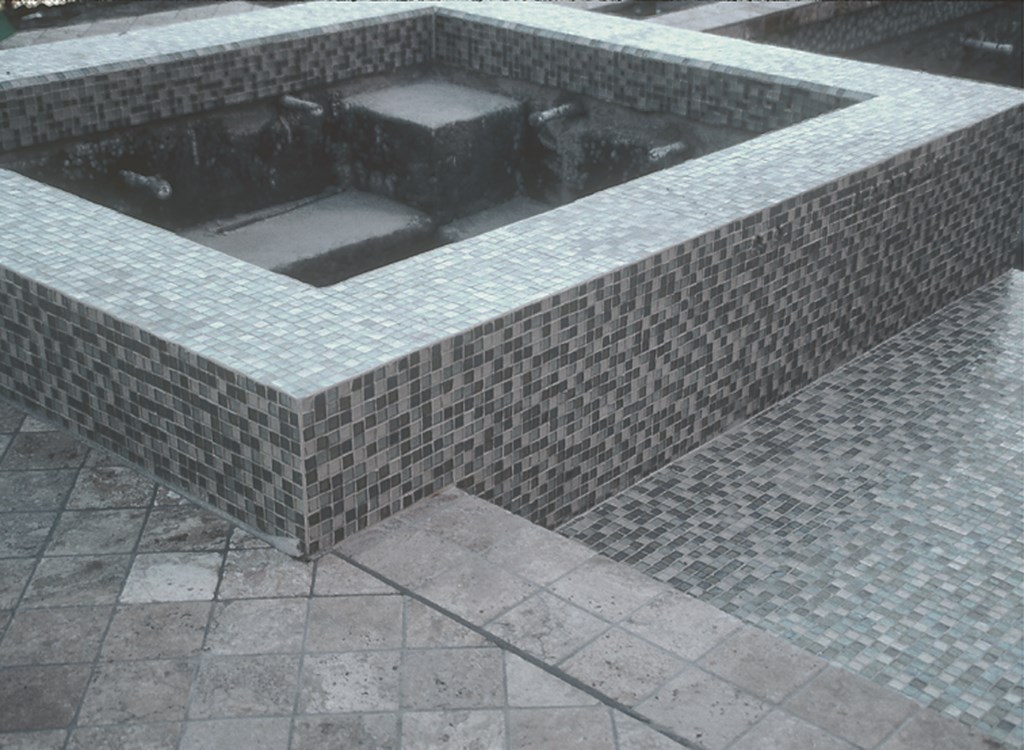
| The gap at the intersection of the pool wall and decking is filled with a mastic compound that will protect both the wall and the decking against each other’s movement. The joint materials color can be chosen to blend well with grout, and its texture can be made to do the same by sprinkling it with a little sand. |
If you’re surfacing the deck with a stone, tile or modular pavers, do not finish the edge of the deck next to the pool. The size of the remaining gap will vary depending on the materials. With tile or a modular system, for example, the gap can be small because you know exactly how and where the pieces will lay out. With irregular flat stone, by contrast, the gap you leave might be as wide as 15 inches.
(Another way to approach stone veneers is to notch the wall to receive the stone – see “Details,” March 2001, page 18. This is a great method, but it doesn’t relieve you of the need to create a gap between the vertical pool wall and any deck that might flow up to it.)
Now the tile installer should come in to float and veneer the vertical wall of the pool. As the tile or stone goes in, the masons can work on the rest of the decks throughout the project. (In my case, I send my masons home because I only want one trade on a job at a time.)
 My tile installers start with a coating of Xypex (Xypex Chemical Corp., Richmond, British Columbia, Canada), a polymer material that holds the calcium in the concrete and prevents it from leeching through the tile. Then we apply any type of waterproofing material we need, install the float, then set the tile and grout it. Now the tile is standing out from the bottom of pool approximately one inch and is resting on the foam spacer we’d previously put in the gap.
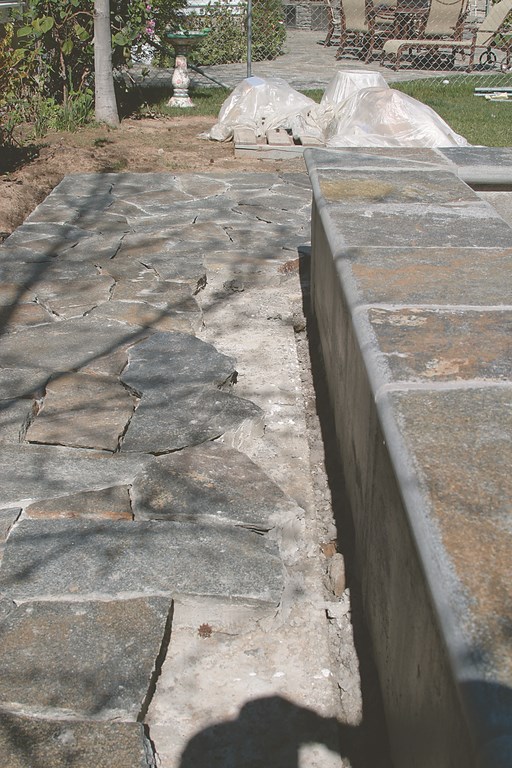
| With stone, we always leave a substantial gap as we work the decking toward the pool wall to allow for maximum flexibility in applying the finishing touches to our work. The approach may look different, but the goal is the same: We’re establishing a gap that will protect the wall against movement of the deck – and vice versa. |
Now the remainder of the deck-surfacing material is installed, the foam is removed and the mastic joint is installed. It’s that simple – and you can enhance the aesthetics of the mastic by covering it with a thin layer of sand to make it look more like grout, or by having your supplier match the material to the color of the grout you’ve used.
If it happens that the deck moves upward because the soil beneath it expands, it will now move independent of the wall of the pool and the tile on the wall will be protected by the mastic, which is flexible and will press against the tile or other veneering material without making it fall off.
The mastic joint also provides a measure of protection in the case of lateral movement in the ground or any slight expansion of the concrete pool structure itself. Again, this adds virtually no cost at all to the project, and all it takes to make it work is doing things in the right sequence.
MUCH TOUGHER
Getting everything right with the structural-deck option is, however, quite a different matter.
You don’t need to worry about preserving a gap, of course, because the pool wall and deck are tied together so there will be no differential movement where the deck surface meets the wall veneer. You do have the choice of installing the wall veneer or the deck material first, however, which is largely a matter of how you want the transition to look. (Personally, I prefer to install the surface material on the deck first and then put the tile on top of it. This hides the joint most effectively and gives the work a cleaner, more-finished look.)
|
The Earth-Movement Dodge Too many times, I’ve heard contractors try to wriggle away from responsibility for tile popping of the sort described in the accompanying text by blaming earth movement for the problem. That’s not valid in California and probably elsewhere: The contractor is the assumed expert on the condition of the soil into which the pool is being installed and is responsible for making certain earth movement will not be a factor before construction commences. If there’s any doubt, geologist’s and soils reports must be obtained and, if there’s any indication of potential movement, the structure must be engineered to withstand the shifting that might occur. That includes assuring that the pool structure is physically isolated from any nearby decking through use of a proper mastic joint. Simply put (and in California at least), there is no earth-movement excuse to shield the contractor from liability. — D.T. |
In this case, your client is paying for a cantilevered structural slab, which, depending on the size of the cantilever, can make costs skyrocket. This is why these decks generally appear in projects where the pool structure is sitting on piles – on a hillside, for example, but in other settings as well – and there’s to be a minimal amount of decking around the pool.
Every structural deck we do is different and must be properly engineered with a variety of factors in mind, so it’s difficult to offer generalizations much beyond the fact that you need to obtain an engineered structural detail and follow it to the letter.
For a majority of pools raised out of the ground, separate deck structures are fine so long as you’re mindful that the deck and the pool are going to move in different directions. If you miss the mark on that one, saying it isn’t your fault and blaming the error on ground movement just isn’t going to cut it.
David Tisherman is the principal in two design/construction firms: David Tisherman’s Visuals of Manhattan Beach, Calif., and Liquid Design of Cherry Hill, N.J. He can be reached at tisherman@verizon.net. He is also an instructor for Artistic Resources & Training (ART); for information on ART’s classes, visit www.theartofwater.com.