


Set in Concrete

In the parlance of those who know best, it’s time to discuss “mud” – the concrete material out of which most watershape shells are made.
Mud enters the scene after the steel, plumbing, electrical conduits and forms have been placed and, in some jurisdictions, all work to that point has passed careful inspection. The concrete itself can take any of four forms: concrete block or poured-in-place concrete (neither of which is used very often), or gunite or shotcrete (far more commonly used).
In my three decades of building watershapes, I’ve worked with all of these materials. If a very specific set of circumstances calls for the use of
either concrete blocks or poured-in-place concrete, I will do so, but whenever there’s a choice I will always choose to work with shotcrete. Before I get to the reasoning behind this preference, however, let’s roll through all of the possibilities and how they are most effectively used in watershape construction.
MATERIAL OPTIONS
I suspect you could probably pass through an entire career in watershaping without reaching beyond gunite or shotcrete, which are certainly the most common materials used in watershape shells. But in certain situations on certain sites, there’s a possibility you’ll be required to use of one of the two other material possibilities.
[ ] Concrete blocks (also widely known as concrete masonry units or CMUs) can be used to great effect in creating shells to exacting dimensions. When installed properly using a properly engineered structural plan, they are indeed every bit as reliable as any of the other options.The drawback with CMUs is that installation is extremely labor intensive – especially when tolerance must be held to a hair’s breadth – and is therefore quite expensive – several times the cost of either shotcrete or gunite. This basic economic consideration makes these blocks a rare choice, but if you’re working in a remote or inaccessible area in which other avenues aren’t open to you, this method can be your salvation.
[ ] Construction using poured-in-place concrete is a second option and, up until more than 50 years ago, was the most common material used in building pool shells. Again, if done properly these shells can be built to precise tolerances and with phenomenal levels of concrete strength, but the approach is both extremely expensive and time-consuming.Builders who work with poured-in-place concrete basically have to possess the same skill sets as the specialists who build structures such as highway bridges, dams and other precisely designed, engineered and formed structures – and they must find clients willing to pay for that sophisticated level of construction.
In both of these cases, we’re talking about extreme rarity: I’ve built pools using these materials, but among hundreds of projects completed, I could probably count them on the fingers of one hand.
For the vast majority of watershapes, gunite and shotcrete are the materials of choice and are so familiar that the distinctions between them might be taken for granted. As with so many topics related to watershaping, however, I’ve found that learning as much as I can about the options has given me an understanding that leads me inevitably in one direction.
WET AND DRY
Basically, both gunite and shotcrete are forms of what is known as pneumatically-applied concrete – that is, both materials pass through nozzles under pressure.
[ ] Gunite, which is sometimes called “dry mix” or “dry shotcrete,” is the product of mixing dry concrete and sand and conveying that mixture using a compressor to a nozzle. Water is introduced to the mix at the nozzle’s orifice, hydrating the material in the process of application. [ ] Shotcrete, which some people call “wet gunite” for reasons I can’t quite fathom, is the product of batch mixing at a concrete plant. The wet material is delivered to the site using mixer trucks and then is shot into place under pressure.The differences here are fairly obvious: Because shotcrete is mixed at a batch plant, its formulation of cement, sand and water is tightly controlled by weight, which means that the strength of any given batch can be reliably predicted: If you order a 4,000-psi mix (which usually will come up to 4,750 to 5,000 psi if cured properly), that’s what you get. Yes, you do need to confirm that the plant has sent the right truck to the site and that it contains the mix designed by the structural engineer and approved by the building department, but that’s about it so far as the possibility for human error is concerned.
|
Power Packed With pneumatically applied concrete, the velocity at which the material is shot at the substrate is of great importance – the faster the better. Too many crews are equipped with compressors rated at pressures of less than 250 cfm, but the best I know work at 375 cfm because the higher application velocities they allow have the effect of ensuring greater encapsulation around bars – especially when there are double curtains of steel. By contrast, working at lower pressures can result in poor concrete density with greater shadowing and porosity inside the wall that will allow mix water to evaporate or bleed away.
That water factor is critical: Even with high-velocity application, some I know in the business virtually fill their pools with water while it’s still in the concrete-only stage, saying it encourages greater density, minimizes porosity, eliminates bleed-out and retains mix water where it belongs. By contrast, others try to get around these issues by following up lower-velocity application with concrete sealers or waterproofing agents. But what’s really happening here is that, no matter what’s applied later, the shotcrete or gunite is simply not being applied properly and, as a result, the vessel is less likely to be watertight. As I see it, this is all about people not understanding the full complexity of concrete and how it cures. — D.T. |

Also, with shotcrete you can order any number of admixtures for various special situations – such as for sites with highly acidic soil. You can order color additives as well if the concrete is to be left unfinished for a special application. In both cases, the levels of these additives need to be exact and consistent from batch to batch – points that can easily be handled in the controlled conditions of a mixing plant.
By contrast, gunite is mixed on site – most often by laborers who may or may not know exactly what they’re doing. Consistency is therefore hard to come by: With cement and sand added as the process moves forward, it’s a shovel of this and a shovel of that, and the possibility for human error is relatively great. Yes, there are many skilled crews out there, but for critical applications, my inclination is to avoid the risks that come with gunite.
There are also differences in application. With gunite, for example, floors are shot first, then walls: This allows for easier removal of rebound and overspray, which should always be disposed of without question or exception. As I’ve reported many times in these pages, however, a disturbing percentage of builders use this trash to build steps and benches – and then wonder why those steps and benches fail.
With shotcrete, by contrast, the issue is much simplified. The walls are shot first, then the floor. Rebound of the sort experienced with gunite isn’t much of an issue, basically because all of the material is adequately hydrated.
BIASED TOWARD PERFECTION
Based on these factors and my own observations and experience, when it comes to pneumatically-applied concrete, I use shotcrete and shotcrete only.
I am fortunate in my California projects to work with the amazing crews run by Carlos Ramirez out of Valley Shotcrete. What makes them so good? For starters, Ramirez worked as a deputy inspector for several years: The man knows the ropes and his crews pay incredible, precise attention to the finest details.

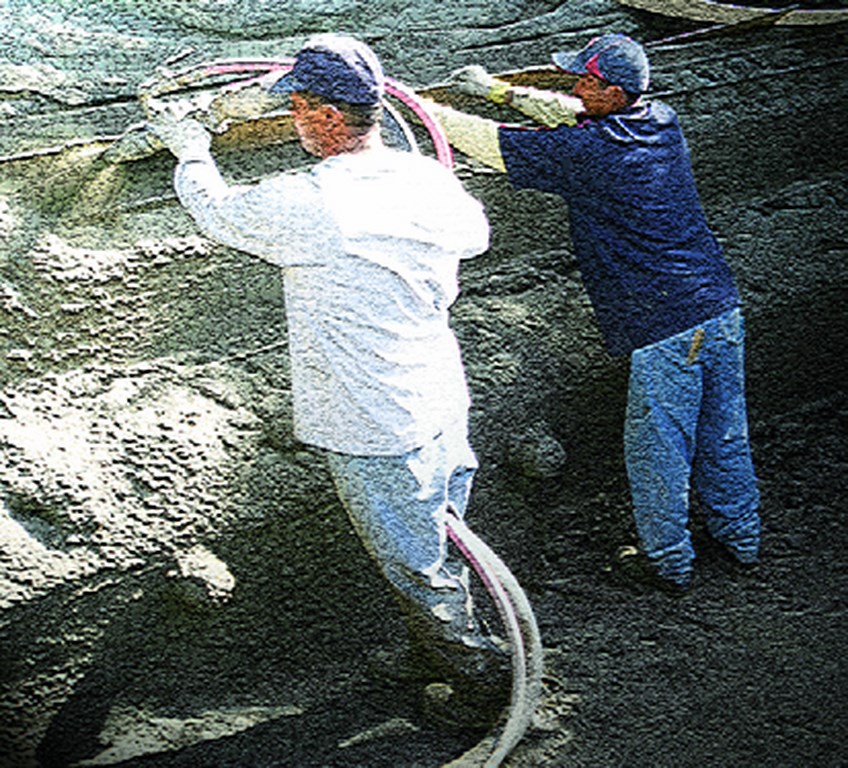
| In their final run-through before the shoot begins, the crew from Valley Shotcrete set up guidelines (Leo at left and Carlos in the middle) and clear away any debris or loose material (Jose at right). We do all we can to simplify their work on site with pre-shoot inspections of our own. |
Their level of craftsmanship is unmatched in my experience, right down to the wonderfully uniform texture of the concrete throughout – all based on the bonding requirements for the finish materials I’ll be using and all done within tight tolerances for all critical dimensions. These people are as professional as they come.
As good as they are, however, a huge part of the success on any shotcrete-application day is what they find when they come on site. I’ve discussed a number of these issues before (as did deputy inspector Richard Fehring in last month’s column), but it all bears repeating here because this stage of the overall construction process is so critically important.
With every project, I make certain before the shotcrete crew shows up that the steel is installed exactly per plan; that it is supported with dobies to provide adequate clearance; and that everything is wedged tight so the steel won’t move when stepped on or when the shotcrete hits it. If there’s a double curtain of steel, everything has to be staggered to ensure there’s enough room for the nozzle operator to cover each piece of steel adequately.
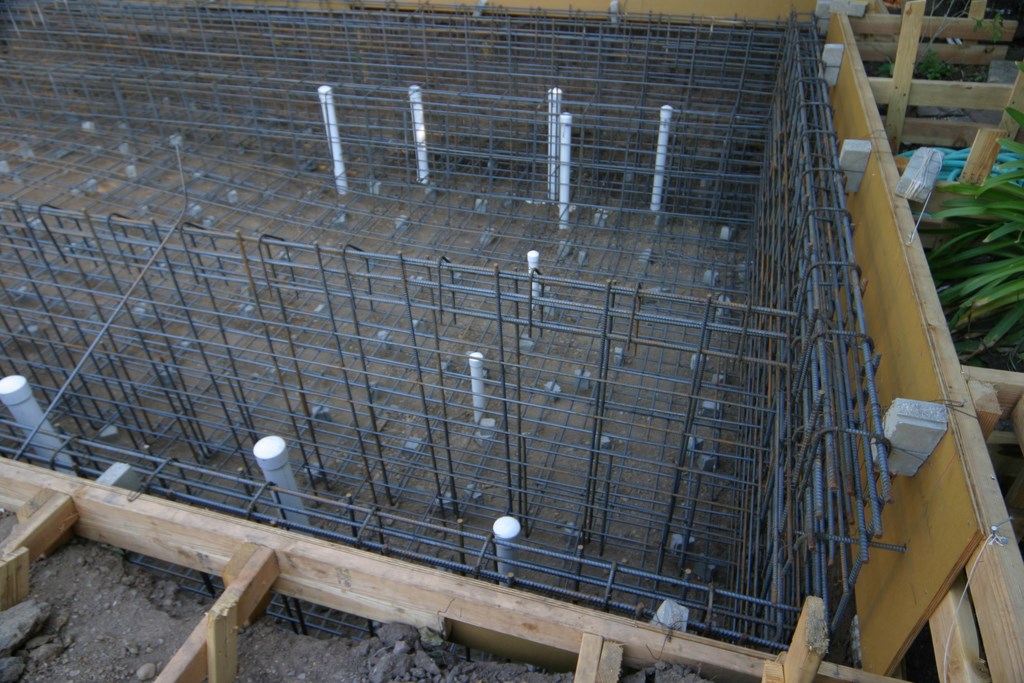
| At this point, everything is ready to go: spacers and dobies are all in place, the steel has been tied to the forms, the plumbing has been secured and we’ve done all we can to make certain that the concrete-application process will move forward with negligible vibration and we can be assured the steel will be completely encapsulated. |
I n those rare instances where, in reviewing plans before work has started, I see steel that has been specified in a way that won’t allow for proper coverage, I go back to the structural engineer and we work out a new detail that takes another approach while continuing to maintain structural integrity. Frankly, this never happens when I work with my usual engineer, Mark Smith (Tarzana, Calif.), but as I see it, there’s no more important quality-assurance step than making certain all steel will receive adequate coverage – and the best time to see to it is before work begins!
I also carefully inspect the plumbing, making certain it has been installed properly and is supported with trim bars to the left and right of every penetration so it won’t move as the shotcrete is applied. If we’ve needed to penetrate a grade beam or bond beam with plumbing, I will only have done so in collaboration with the structural engineer and in such a way that structural integrity is never compromised. (I studiously avoid the common mistake I see of penetrating a beam at the bottom, where it experiences the greatest degree of compression: That move weakens the structure and can become a nightmare down the line.)
Finally, we never run plumbing or steel side-by-side: This can create shadows or voids in the concrete. We also build forms with low tolerances and adjust them just before the shoot, setting up large numbers of guidelines to make sure every elevation is precise.
CURATIVE POWERS
This final site survey makes everything easier for the shotcrete crew when it shows up on the morning of the shoot. In the case of Valley Shotcrete, for instance, Ramirez and his staff don’t have to spend any time running around and correcting problems that the subs before them have left behind. Instead, they all spend their time focused on getting their part of the project done to perfection.
Once they’ve completed their work and left the job site, we shift our attention to the curing process – the other key to success with concrete shells.
|
Edge Walls Creating walls for vanishing edges can be surprisingly tricky because of the various angles involved and the challenges concrete applicators face in ensuring adequate coverage of the steel in all the various nooks and crannies. Many builders will shoot everything in one pass, but this means they end up using the steel cage to support their forms – usually button board or some other flimsy material – because there’s no room in the trough for proper wooden forms and stabilizing kickers. The instant the shooting starts, the forms start moving and the steel starts vibrating, resulting in the creation of voids that can lead to wall deterioration, whether immediately or down the road a bit. In my business, by contrast, we almost always shoot these walls separately from the rest of the structure. That is, we form and shoot the perimeter walls and the floor of the vessel, including the outer edge of the trough, in the first pass. The only part of the edge wall in place at this point is some steel that eventually will be used to anchor a full and proper mats for the wall in preparation for a second shoot. This two-stroke process gives us the opportunity to set up proper forms for the wall and ensure that the level of quality we’ve achieved elsewhere with the shell will be observed in this phase of the operation. Once the wall is ready, we go back in, make certain the steel is clean, blow out any debris with an air compressor and wet the concrete surface to which the new material will be added. This is a more costly process because of the extra labor involved in setting up additional forms and, more significant, in bringing in concrete trucks and shotcrete crew for return visits, but it’s something that needs to be done to ensure the integrity of the edge wall. If this part of the job is done in only one pass, well, about six months after the pool’s been finished, I’ve often seen it happen that these strange-looking fissures will start to form on the wall, calcium will bleed out, and cracks will appear that just happen to follow the same pattern as the steel. Later, when the call comes from the client, the first move is to blame the finish material when the real problem is inadequate installation of the shell. This starts a blame game, and months of rancor and litigation often ensue. That’s a mess – and I want no part of it. — D.T. |
As an aside, the dumbest thing I’ve ever heard while in the pool industry has to be the time when, during a builders’ meeting in Phoenix, I asked everyone seated around the table if they’d had a chance to visit Taliesin West while they were there. Getting no response, I started talking about Frank Lloyd Wright and his importance to modern architecture and design – at which point a prominent builder interrupted me to ask, “Why would you want to study about Frank Lloyd Wright? He’s dead.”
More relevant here is the second dumbest thing, which came up a couple years ago when the owner of a (now-defunct) New Jersey gunite company told me: “Concrete doesn’t expand or contract, so you don’t need to add water after it’s shot.”
The guy almost left me speechless. According to every standard or text on concrete I’ve ever read, you must add water to concrete after it’s shot so it cures slowly and thereby attains its maximum strength. This is so important that, unlike many builders, I never take the lazy way out and leave this chore to homeowners. There’s no excuse for such negligence.
In my projects, we set up soaker hoses around the highest elevations of the shell and on all the steps and benches, letting gravity do some of the work for us and making certain every area of the fresh concrete receives a steady supply of water. The multiple lines are all hooked to an irrigation timer that goes on for 15-minute periods five or six or more times a day, depending on site conditions. When standing water accumulates in the bottom, we just pump it out.
We do so because, in fourteen days, concrete reaches 80 percent of its ultimate strength – and then keeps hardening gradually for the next hundred years or so. The more water it gets during those first critical days, the better. (Yes, there are curing agents that can be added to accelerate the process, but that’s another subject – and anyway, these additives aren’t normally used in pool construction unless indicated by the structural engineer.)
As the curing occurs, various trades pursue other tasks on site that can be completed without adding any surcharge to the shell. The electrician will, for example, run conduits from the vessel to the equipment pad, irrigations specialists will set up sprinkler systems and lighting designers will install outdoor fixtures and controls.
In some places (including California), we can’t do anything more with the shell until it reaches a strength of 3,000 psi – a fact that must be verified in a lab with sample panels. I follow this procedure even in places where it’s not required, basically because I want to be assured that my shells are strong enough that I can proceed without compromising their structural integrity.
It only makes sense: I’ve never gotten a call about a structural failure, and I don’t plan on asking for one now – or years from now – by cutting any corners on site.
Next, we’ll begin a multi-part discussion of finish materials.
David Tisherman is the principal in two design/construction firms: David Tisherman’s Visuals of Manhattan Beach, Calif., and Liquid Design of Cherry Hill, N.J. He can be reached at tisherman@verizon.net. He is also an instructor for Artistic Resources & Training (ART); for information on ART’s classes, visit www.theartofwater.com.