


Sculpting Edges

When we think about the challenge of literally “shaping” a body of water, we must start by thinking about edges.
The edge is the pond’s DNA or blueprint. It tells us almost everything about the pond. Without being able to observe the edge, you can’t discern whether it’s a formal pond, lake or a sewage-treatment facility. It might be a beautiful water feature or an eyesore. The edges form our reference in defining the whole setting and are consequently of the utmost importance.
We find this defining-edge concept at work in nature’s own beaches, riverbanks and lakeshores, and it is a one that extends right through the heart of watergardening and all types of watershaping, whether architectural or naturalistic (or, as I commonly classify them, formal or informal). No matter the focus or intent of our designs, we must always consider what will be happening at the water’s edge. This is the part that demands the most thought, skill, care and expenditure.
The subject of edges is so massive that it will be considered here and in articles to come. For purposes of this discussion, we’ll limit our look to the use of edges in informal pond settings and situations in which we are attempting to create the impression that the body of water in question was originally created by nature.
THE INSIDE LINE
The importance of edges struck me when I first began noticing, more than 40 years ago, the absolutely dreadful concrete edges that rose above water that was supposed to look “natural.” I cringe when I think about the feeble attempts people made to help things along by balancing rocks around the edge to try to disguise the concrete.
I still marvel that so many people actually thought those beautifully toweled concrete rims adorned with their necklaces of stone looked natural. If the rocks were too small, they were mortared into place, and even painting the entire pond with a waterproof green or black product did nothing to mitigate the impression of a row of rounded teeth set in cement gums.
If they were big, often the rocks were placed in such tortured, overhanging positions that they would later tumble into the water with the slightest disturbance – only to leave behind an even more disastrous gap-tooth effect.
Many of these horrors date to times before the advent of flexible liners. Indeed, when I began working on ponds in the 1960s, my ponds were built entirely from concrete and, for the first couple I built, reflected the common tooth-and-gum effect. Luckily, it soon dawned on me that by using purpose-built shallow ledges onto which I could place partially submerged rocks, the offending concrete edge would disappear.
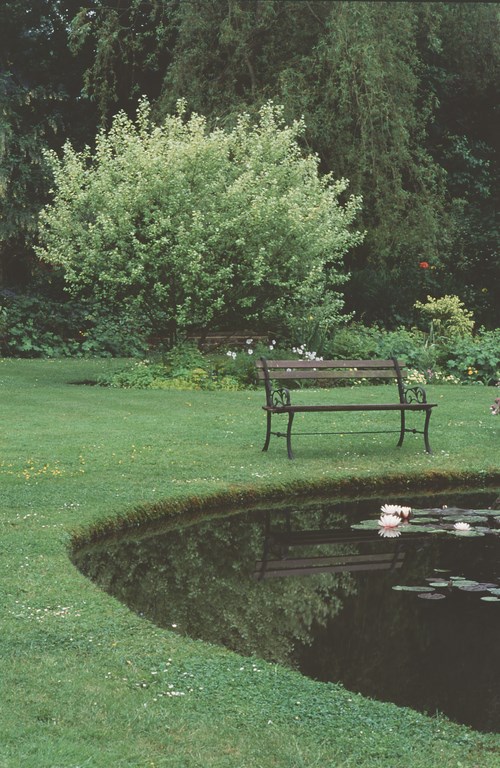
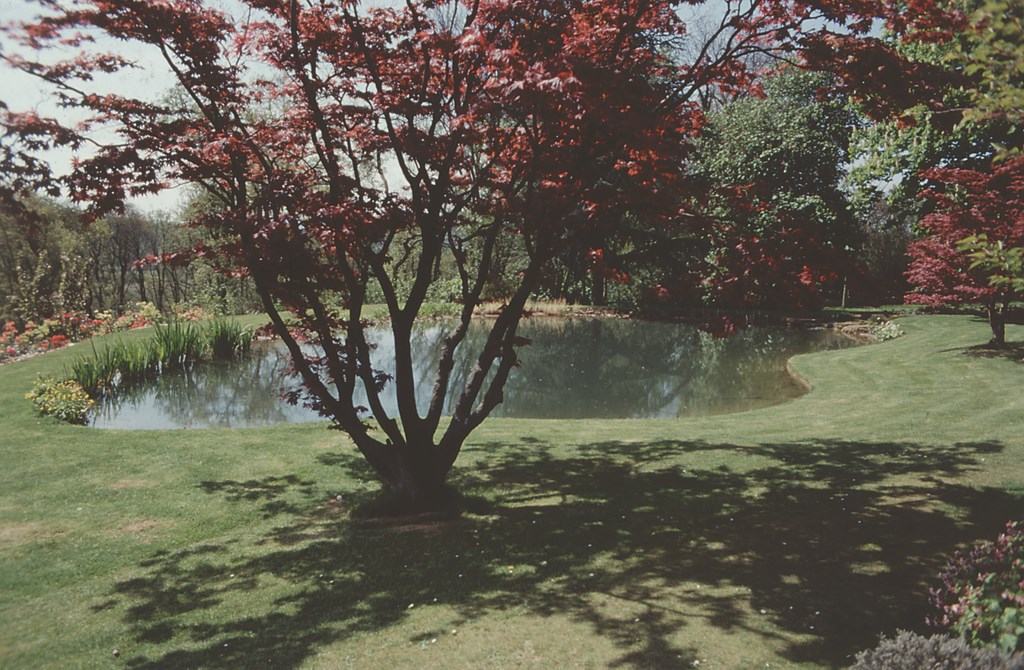
| Once I liberated my thought processes from the conventional need to have rockwork follow lines established by the predetermined outer edges of concrete structures, my projects took on more natural appearances and the rocks themselves began to ‘tell’ me where they belonged. What happened beyond the edge became relatively insignificant: The key was focusing on the inner margin, where we shape the water’s edge and deliberately, consciously define a space. |
This partial submerging was, believe it or not, a big design breakthrough at the time and did a lot to help avoid the telltale string-of-pearls effect we so strenuously sought to avoid.
For a time following that revelation, however, I knew that something in my approach was still incomplete. Specifically, the limitation was the necessity of conforming tightly to a precise concrete boundary laid out well before rock placement took place. Too often, I found that I could not work to such exact confines because the shapes and angles of the rocks wouldn’t cooperate.
Depending on the rocks, I might end up with horrible, open-wedge shapes or have them overhang the ledge so much that they required additional support or valuable time spent cutting away their backs. I was, in short, still struggling to achieve the look I wanted and knew the quality of the rockwork still left a lot to be desired.
It was not before a considerable amount of effort had been expended that the breakthrough came. Ironically (or perhaps typically, for it is said that necessity is the mother of invention), this occurred while I was losing money on a job that involved three ponds set one above the other. I was taking so long in struggling to follow the edge while placing rocks in such a way that they would look natural that the entire project had become a time-eating nightmare.
After one particularly frustrating day, as I lay in my bath – which is, incidentally, where all my best ideas are born – it occurred to me I had it all backwards.
EDGY EPIPHANIES
It dawned on me in the midst of that fateful soak that the shape of the hole, which I had meticulously laid out on the ground so often in the past, was unimportant: Instead, it was the inner contour created by the edge treatments – the true visible edge – that was important. The shape behind the rocks with those beautiful edges I had so carefully plotted out was, in fact, something the viewer would never, ever see.
By this time, the age of liners had dawned and I asked myself what I was actually trying to achieve. The answer was a pond that would look completely natural, be waterproof and last for years. I further recognized that the pond liner was, in fact, a waterproof bag into which all the rocks, emergent and bog plants and various brick edges, stepping stones and structures would be set.
From that point onward, I decided to work with far simpler outer shapes – basic rectangles with rounded corners and extremely broad shelves around the edges – and ignore almost completely the shape of the outer edge with respect to aesthetics.
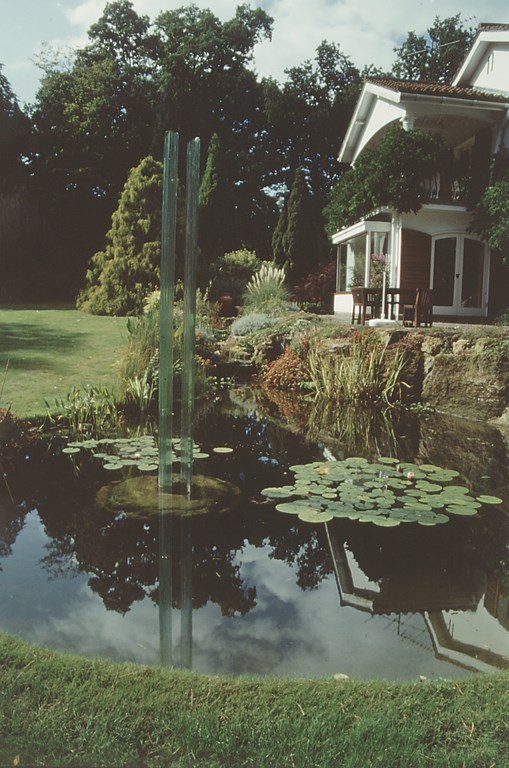
| Once the edge assumes paramount design importance and the limits of the liner or concrete underpinnings become less consequential, the contours of the water’s edge become much more organic and natural. They move forward and recede and undulate in easy response to the slopes and formations surrounding them and more readily take on the appearance of having been right where they are forever. |
This in turn enabled me to place rocks with much more freedom, allowing their shapes to decide the critical inner boundary of the body of water. As I progressed along these lines, the rocks were able to “speak” to me and dictate their placement. Having eliminated the tight constraints of a preconceived concrete or “plastic” barrier, I was now free to follow the rocks’ flowing shapes, grain and strata and compose them the way they demanded. At last, it was possible to emulate nature.
To this day, I work with liners (although the same principle absolutely applies with concrete) and extend them a few feet behind the envisioned limit of the rockwork. Even then it is possible, when necessary, to win a little more space by excavating beyond the liner and adding a piece.
Once the inside was done, then and only then was it time to worry about the backs of the rocks by smoothing them over with mortar or protective fabric and bringing up the liner behind them. Concrete or sand is then used to protect the liner and hold it in place. After that, the remaining area may be backfilled with soil and landscaped. This method has enabled me to obscure the back of the rocks completely, thus making them look much bigger and, more important, partially burying them as they would appear in nature.
Ultimately, I had moved my attention from the shape of the excavation or outer edge and saw it as something that should now be invisible. At the same time, I developed a focus on the inner edge as defining the shape of the body of water itself. For my natural ponds, I had arrived, in a sense, at a point where I deconstructed the manmade lines and allowed nature to tell me how it wanted to reveal itself.
BEYOND THE ROCKS
Although the evolution in my thinking about edges began with rocks, there are many other edge types to consider. Each brings different construction techniques into play, but the general necessity of focusing on the inner edge never really changes.
At one time, for example, planting shelves had generally been constructed using concrete coping at the front of the shelf with a bank of soil behind – or by placing plastic or wooden planting crates on the shelf. Again, this resulted in a concrete rim, this time with a necklace of plants rather than one of rocks and the same appalling results.
|
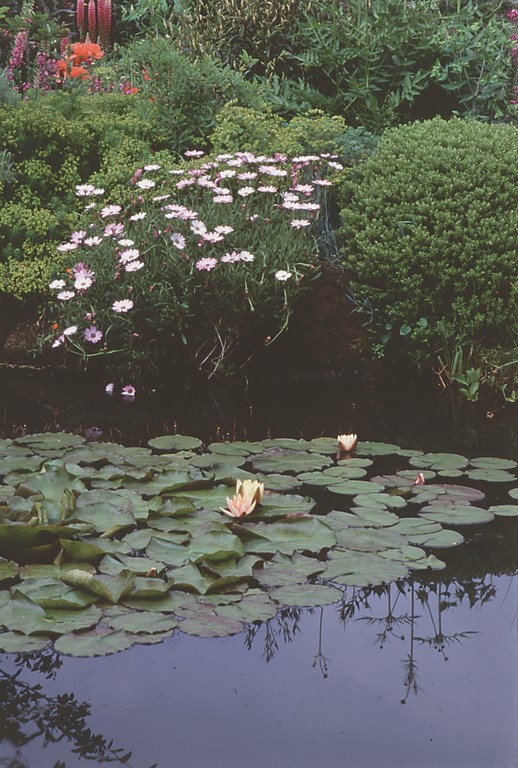
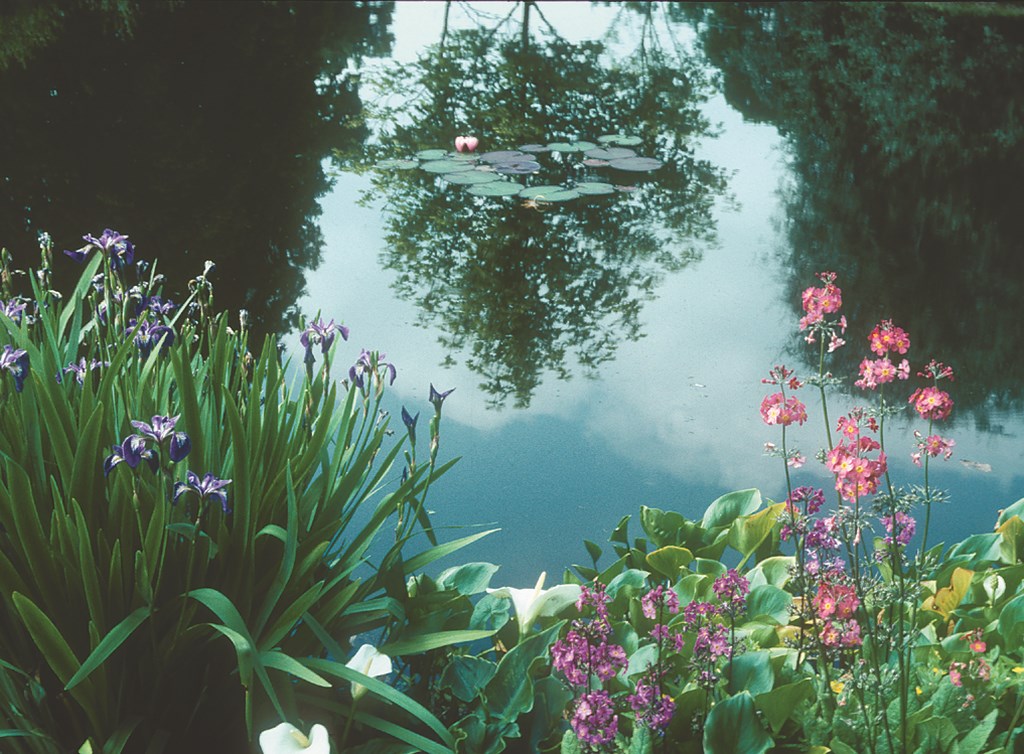
The Wild Edge You’ll never create an exciting, broad spectrum of wetland plantings alongside a watershape with a simple row of planting baskets. Instead, you need a broad shelf with areas of soil or planting pockets – space that enables you to create bays and peninsulas for creative natural planting. For inspiration, I suggest exploring nature, where you almost never see explosions of plant material in straight lines. As was emphasized in the accompanying text, my work is all about considering the inside edge: The liner will be relatively straight and hidden somewhere back behind the plantings. Where you put the plants and rocks inside that liner is what literally defines the shape of the water. In creating these undulating edges, I place tall plants on the promontories to enhance and emphasize the peninsular form. Lower plants populate the bays to enhance the sense of a natural inlet. This undulating high/low approach directs our eye and creates an impression of a naturally varied shoreline. When using bold, emergent plants, it’s important to think in terms of using plants in sets. Seldom in nature do we see a single specimen all by itself, so we need to think in terms of surpluses of each type of plant to accommodate the needs of the scene until the plants can spread and increase in numbers on their own. We also know that plants intermingle with each other, so in creating wild planting areas, we need to think in terms of bold groupings of plants that contrast with other plants types and shapes. Always look for good foliage contrasts. These well-considered variations of shorelines and plant types are critical in creating areas that appear wild. — A.A.W. |
Maneuvering around this visual problem, I began bringing the soil right up to the surface of the water and onto the concrete or the liner. Critics of this approach immediately jumped on the idea that this would invite wicking and great water loss over time, and while I’ve always agreed that wicking could be a problem, I’ve asserted that there are simple ways of mitigating it. Just placing gravel or clay soil over the rim, for example, will break the capillary action and create a barrier.
Not only does the soil hide the edge of the pond, but it also provides an ideal way of achieving a natural planting edge. It enables us to create a true transition from deep water through emergent, bog, moisture-loving and dry plants in turn – a gentle progression from hydric to xeric.
What really opened watergardening to its current spectrum of edge treatments, of course, was the advent of durable pond liners in the late 1960s and early ’70s: Although satisfying results can be obtained with concrete structures, the flexibility and relatively low cost of liners gave us freedom to replicate nature much more literally; sculpt edges with a range of flexible details that are almost infinite in scope; and satisfy the urge to establish comfortable interminglings of plants, rock, soil, timber and turf.
There are always construction issues with liners, concrete or clay (or combinations among them) that will influence the aesthetic decisions we make, which is why when I talk to clients, the issue of edges is never an afterthought but is instead one of the absolutely critical details that must be considered right from the start.
The language I use when speaking with clients reflects the value I place on the edges. I speak, for instance, of “lawn to the water’s edge,” or “lavender to the water,” or “gravel and shingle to the water’s edge or into the water” or “timber and decking at the water’s edge.” We always discuss what they are going to see and how it is going to look when finished. Indeed, our discussions regarding the treatment of edges carry as much importance as considerations of eventual size and shape.
A RULE OF THREE
The primacy of the inside-edge treatment to the design scheme stands as one of the defining principles of my work. The next logical step is the consideration we give to the combination of edges.
Certainly, there are many situations (especially in formal settings) where we settle on a single edge treatment, but for informal settings, we are generally placed in a position of working out the relationships between different treatments. In my case, this study of the combination of edge treatments has become quite refined and has led to guidelines that I’ve found to be remarkably effective and enduring.
One of the foremost of these guidelines is that I always limit the number of edge treatments I use on any given watershape to three. Why three? Honestly, I don’t know beyond the fact that it seems to work visually, but it probably doesn’t hurt that three is something of a magic number having to do with triangles, trinities and, of course, milking stools that don’t rock when you sit on them.
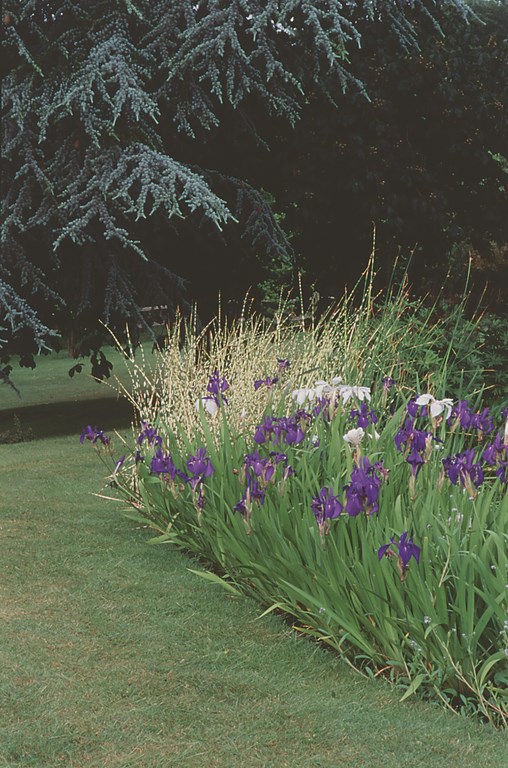

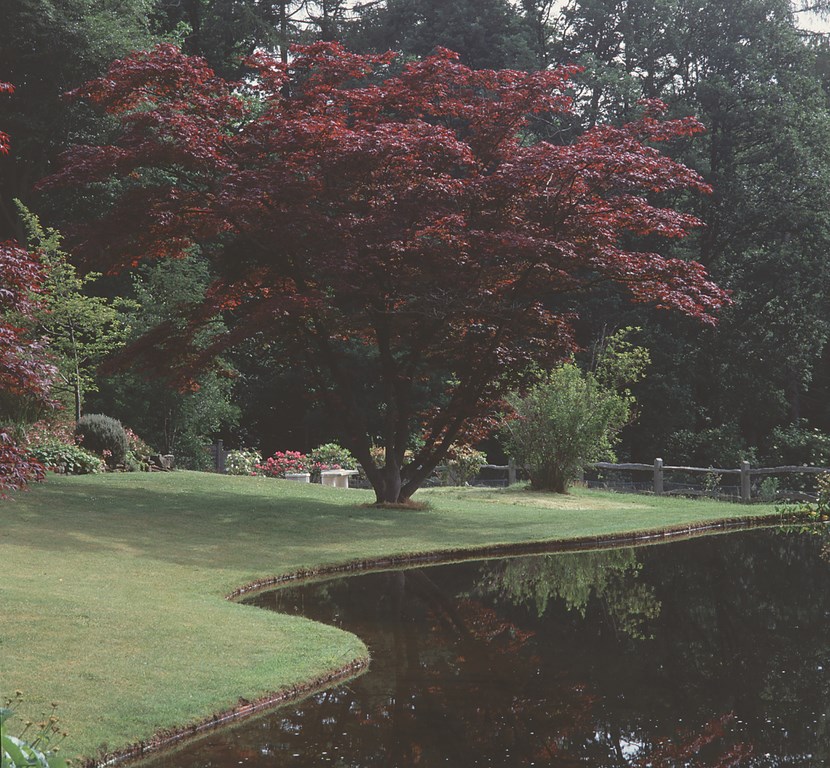
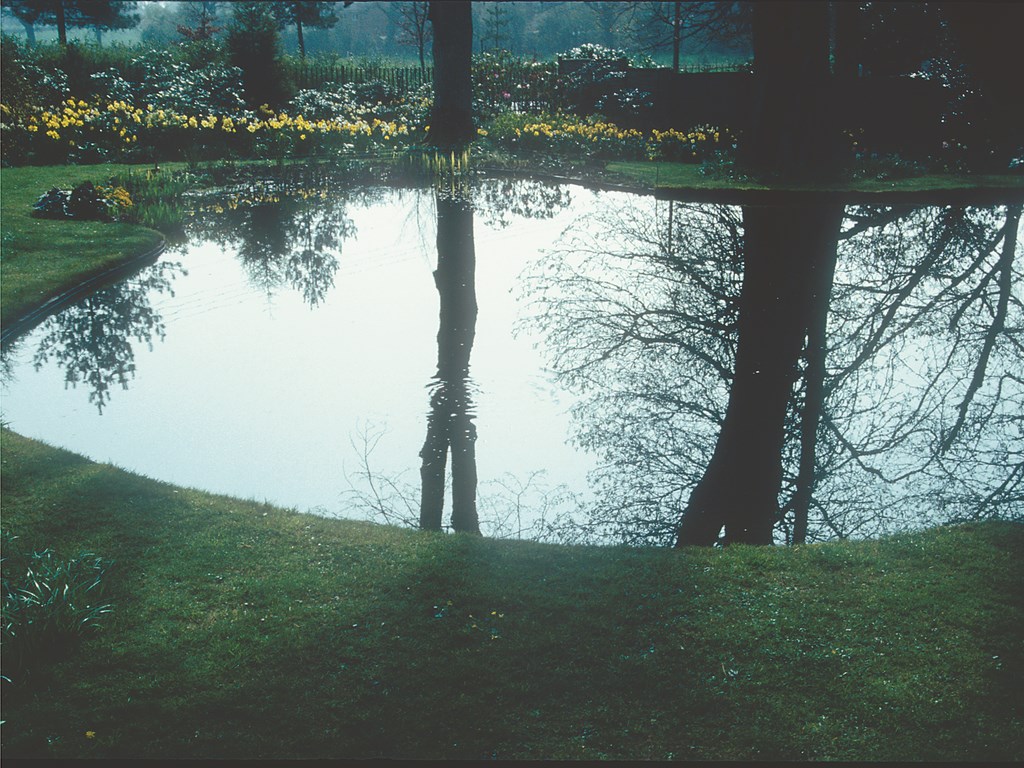
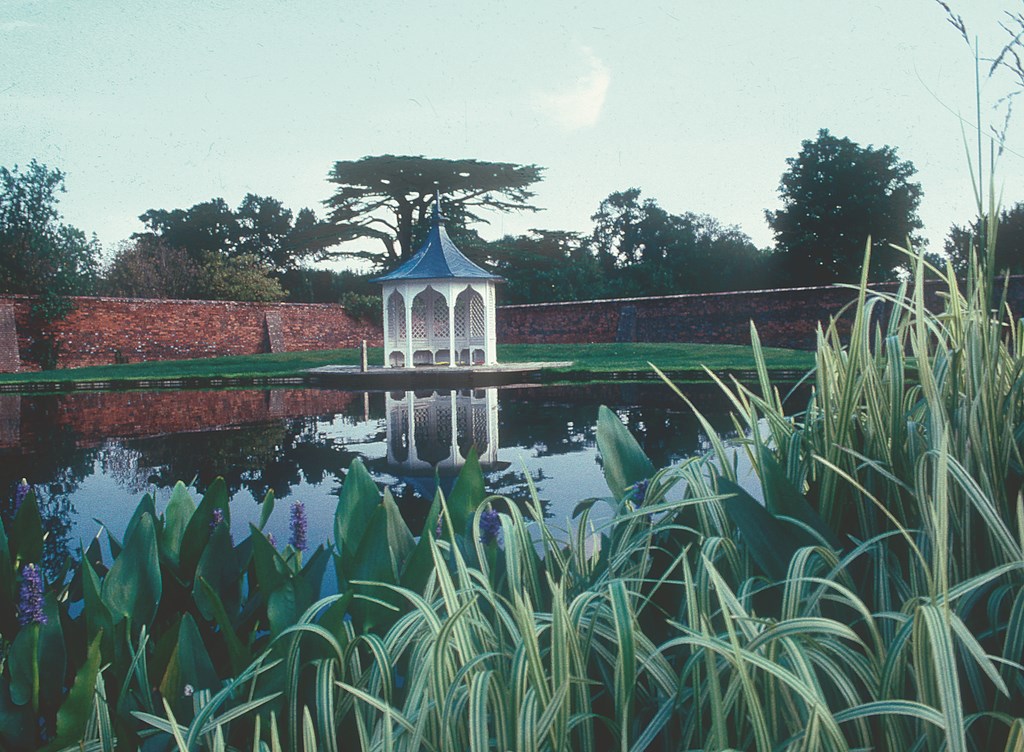
| The plants you use at the water’s margins have much to do with the way the edge treatment functions. I like contrasting lawns with plants that have a vertical presence, but I also work with plants that will reach out over the water and help define the visual edge in an infinite variety of ways by cascading over rocks and softening overall appearances. |
If pressed, I’d say edge treatments are best in threes because they create a beautiful visual balance. Yes, one edge treatment can work and so can two if you give proper respect to contrasting elements. But if you go so far as to have four, I think things immediately start looking fussy and complicated.
The superabundance of treatments is not restful to the eye and causes the viewer to shift focus from texture to texture. Where a pond with three well-considered edges can look balanced and soothing, add just one more treatment and the work starts to look like an exhibit in a retail center where the proprietor is trying to display all the different options for his or her clients.
Moreover, even with just three choices, you get yourself involved in a huge set of permutations and combinations involving a range of materials and treatments from, say, grass, low plantings or gravel combined with wooden decking, stone or flowering plants – and on an on in sweeping variety. The rule of three, I believe, proves invaluable in giving balance and harmony to the selections you and your clients ultimately choose.
VIEW POINTS
Once you’ve determined what and why, of course, you need to decide on where.
In my own projects, I organize edge treatments with primary focal points in mind. These may include views from inside the home, perhaps through a set of dining-room windows, or outdoor prospects that bring the viewer close to the water’s edge or keep them a few paces removed so they can enjoy a broader vista.
It may seem an obvious point, but when you consider these important viewpoints, you’ll see that the edge treatment you use on the near side of the body of water must be one with a low visual profile. You also must consider that these key viewpoints quite often will be enjoyed by someone seated at a desk or table and that tall things should not be placed in the way.
This narrows your choices immediately to lawn, gravel, low plantings or some form of hardscape or decking. There is, after all, little point in building a pond and losing half the water surface from the chief viewing position. From a low angle, even one foot of grass can obscure fifty feet of water surface.
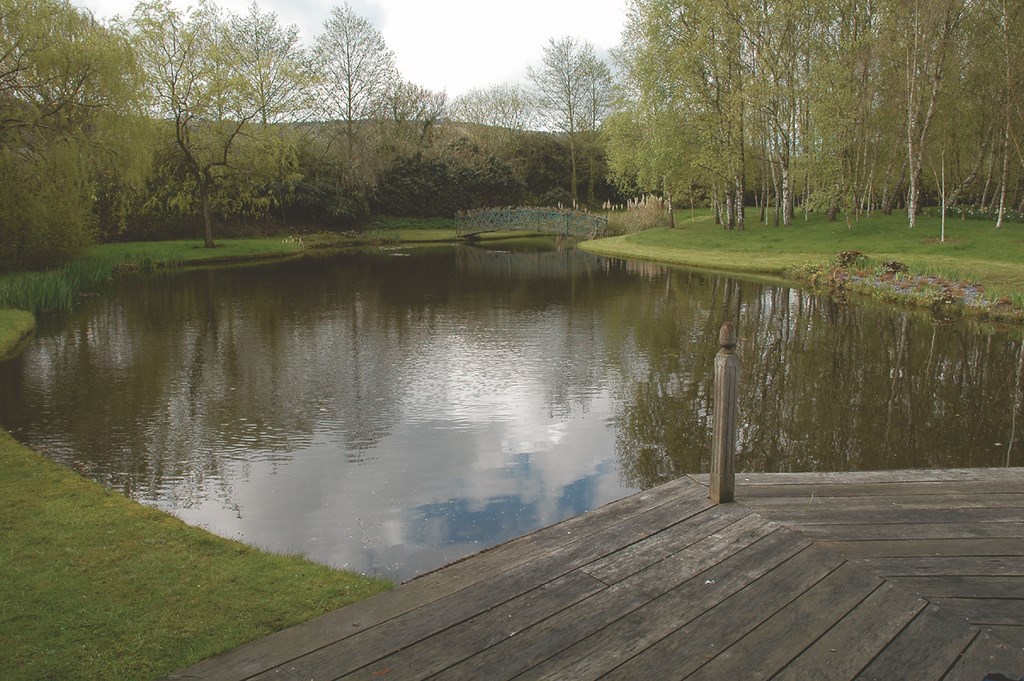
| One of my guiding principles is a rule of three: That’s the largest number of edge treatments I’ll use on any given project and reflects years of experience in working with all the permutations and combinations of the available possibilities. Shown here, for example, is one pond edged in lawn, plants and stone deck – and another bound by timber decking, plants and lawn. The vocabulary doesn’t have to be huge to encompass an infinite range of looks. |
I am not saying, however, that one has to see the entire body of water from these viewpoints. On the contrary, I recommend that some portions of the pond should be hidden. It is always important to maintain some element of mystery and surprise and the unseen places that invite exploration. In smaller bodies of water, a most satisfactory way of punctuating the primary views is by using one of the taller edge treatments (a big rock or, more often, tall plantings) to obscure part of the view of the water.
This is why I use taller plantings on the sides of the pond and, behind the pond, plants with good reflective qualities, thereby framing the view and drawing the eye across the water. Additional strategic plantings often will be used to draw attention to a distant view above and beyond the water. I find this particularly exciting in that when you deploy plantings or rocks to conceal and reveal views, you are now beginning to work at layering the close and distant vistas.
Some of my favorite combinations involve two low-lying edge treatments and only one vertically oriented treatment – lawn grass, timber decking and taller plantings, for example, or cobble, tall ornamental grasses and decking.
How you manage the transitions between these treatments will have everything to do with the way viewers approach the water’s edge and the changing views they will experience from differing points of view. As an example, I might use gravel and a wooden deck in combination with an emergent plant such as iris or (one of my favorites) papyrus, a magically sculptural plant.
GUIDING SIGHT
With our decisions about the various combinations of edge treatments, essentially we are controlling where viewers indulge temptations or stop to relax – or where they are encouraged away from the water’s edge.
As watershapers, we most certainly have that control and can guide viewers to approach from the best route and determine what they will see when they arrive. This means that, in many situations, we’re thinking about the edges at the points of actual approach in a different way than we’re thinking about edges that are meant strictly to be viewed from some distance.
There are times, of course, when the two functionalities are combined. Perhaps there’s a primary viewing point that features paving or gravel at the water’s edge and, on the far side of the water, a large, flat rock. This rock will function as part of the longer view, but it also serves to invite people to follow a path around the pond so they can stand or recline on the rock.
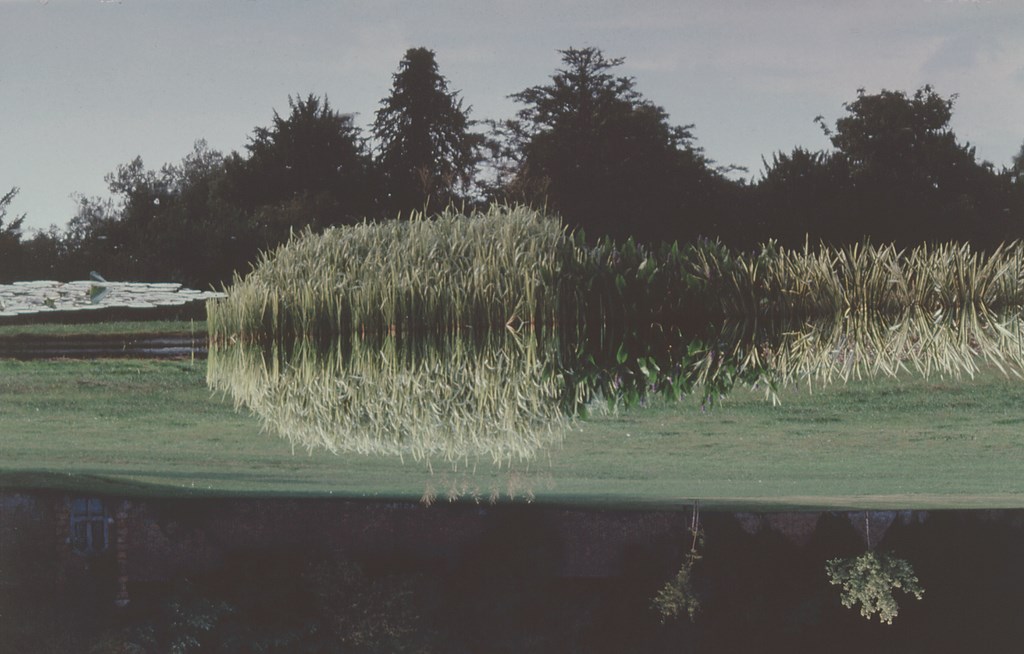

| While I never use more than three edge treatments in a single project, I often use just two. As is seen here, combinations of lawns and plants provide ample variety, create distinct focal points and, most important, serve the purpose of inviting observers over for closer viewing. In these three cases, taller plants are placed on the far side at some distance from a primary viewpoint to direct the observer’s interest. |
The placement of that flat rock now becomes crucially significant because it not only defines part of a view, but also becomes a potential viewpoint itself.
In contrast, a view of a cobble or shingle beach edge may be visually pleasing and in harmony with other elements while providing a safe point of transit for creatures that may find their ways into the water. But cobble is not the most comfortable walking surface and will not be nearly as inviting to people as will the large, flat rock.
In other words, we must always consider how the edge treatment influences the decisions visitors will make as they move toward or around the water. Happily, some of these design decisions boil down to common sense: We know that people will tend to shun steep slopes and, unless one is something of a hooligan, will generally avoid traipsing into areas of tall ornamental grasses.
Thus, the edge treatments we choose dictate not only the views, but also the physical motions of the viewer. When one thinks of these things in this way, I believe working with edge treatments becomes both great fun and a matter of real professional responsibility and fulfillment.
THE HUMAN TOUCH
One of the most interesting aspects of edge treatments in informal watershapes is that, in many cases, we succeed most by deliberately revealing our hand in the process.
We can, in other words, actually make a manmade body of water appear more natural if a manmade element is imposed on it in one place. This prospect is particularly exciting if it helps achieve the illusion that the body of water was there first and that, at some later point, someone came along and built a structure in or around or over part of the water. This leaves us with the impression that at some point in the past, human beings needed to impose some sort of control over part of the perimeter.
|
A Hard Edge One of the most difficult edge treatments to achieve is the one where lawn grass grows right up to the water. This requires what I call a “hard edge,” which means that whether we see the actual edge of the pond or whether rocks or plantings obscure it, there is a hard, level and functional water’s edge. Among other things, this edge protects the liner and enables us to create the brimming water that is so critical to convincing edge treatments. This is why, regardless of the aesthetic effect, I will use a hard material (stone, brick or concrete) to create a hard, dead-level edge and then extend the liner beyond it. Remember that the water will only be as high as the lowest point on the rim of the liner. Considering the hard edge with grass – that is, a situation where the hard edge and visual edge are the same – I’ve found that if you use a solid material beneath the turf, the grass will die. So I do one of two things: If it’s a concrete edge, I chamfer the concrete back away from the pond so the soil from the surrounding ground can come right to the edge. The other way (which I prefer) involves setting up an edge using engineering brick – the kind with holes through it. This sort of edge is fully hydrated because the liner comes up behind it, and the grass roots are able to grow down into the water to drink from the pond. When the water is brimming, the grass will grow right to the edge and actually form a nose over the inside edge of the brick. Conversely, if the water level is down a few inches, you’ll see the brick edge under the lawn – and that’s not too great a problem because the brick has a pleasant-enough appearance. This is an effect that can be used around the entire perimeter of a formal pond, and it can just as well be used for the edges of an informal pond where you want to have a knife edge with turf growing right to the water’s surface. The advantages of hard edges are several, including the fact that they prevent marshy areas of grass or, worse, places where the edge appears to be collapsing into the water. In addition, visitors can stand right on the brink without the fear of the edge collapsing: Even when the brick is completely obscured by the grass on the water, visitors will feel the secure ground beneath their feet and might even hang their toes over the edge and rock without worrying about sinking into the mire. — A.A.W. |
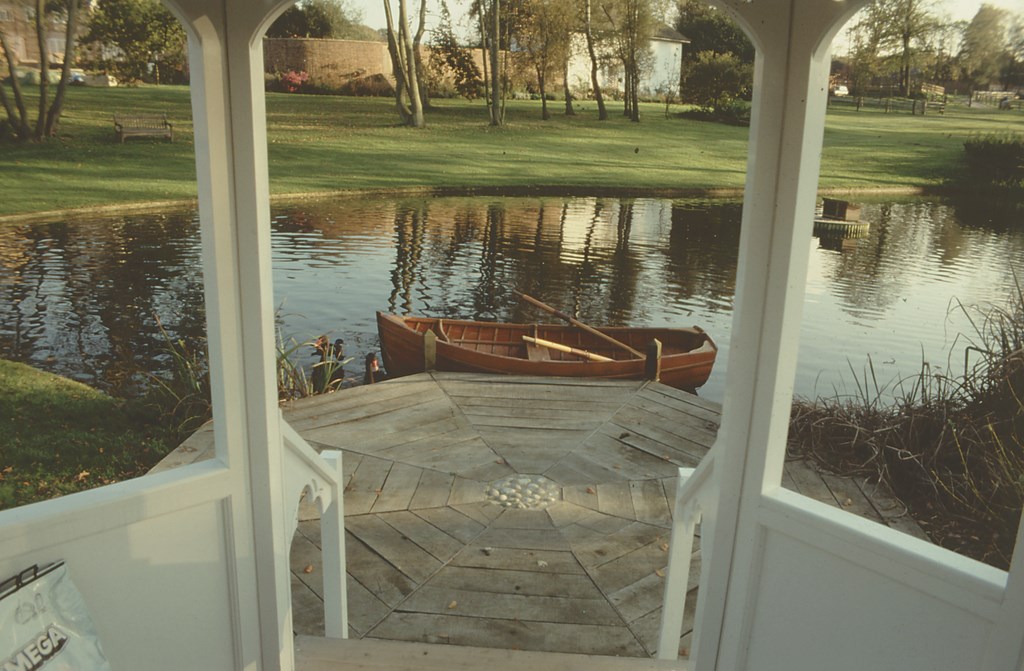
I’m a fan of wooden decks that extend out over the water for that very reason. The ability to walk comfortably from dry land out over water produces an invigorating, sensuous feeling. When we give visitors an opportunity to walk out and peer down into the depths, they feel a part of the scene and can enjoy the excitement of watching fish and observing plants and aquatic creatures at close quarters.
The protruding deck also gives us this impression that a portion of the water’s surface was expendable – reinforcing the idea that the water was there first and making the underlying body of water seem much larger.
I also love to use steps with shallow risers and broad inviting treads down to my waterfeatures, especially if they have inviting, curvilinear contours. With this hard landscaping approach, however, it is crucial to consider materials and textures in relation to the architecture and style of the property. The use of long-weathered stone that offers an impression of great age is incredibly appealing in these cases by virtue of giving the appearance of having been placed by a mason decades or even centuries ago. (This is a principle that applies just as significantly to formal or architectural ponds.)
Indeed, this sense of age is, to me, of near-paramount importance. It gives us the impression that we are in a space that has been influenced by the elements through time and has endured while gaining in visual character. It is true that these effects of age can be mimicked in some cases with faux materials, but for my part, I always try to locate old bricks, flagstones or large weathered rocks that I can use to construct these hard edges.
When we create manmade elements extending right to the water’s edge or out over the water, we also increase available patio space. Even more significant, they give us an opportunity to contrast an architectural edge with planted areas that feature a riot of emergent plantings. This can generate the tremendously invigorating feeling of venturing into an area that is wild and untamed from the easy safety of a built structure.
MUCH TO CONSIDER
What I’ve described in this lengthy discussion really only scratches the surface of edge treatments, and I hope to return to this topic again.
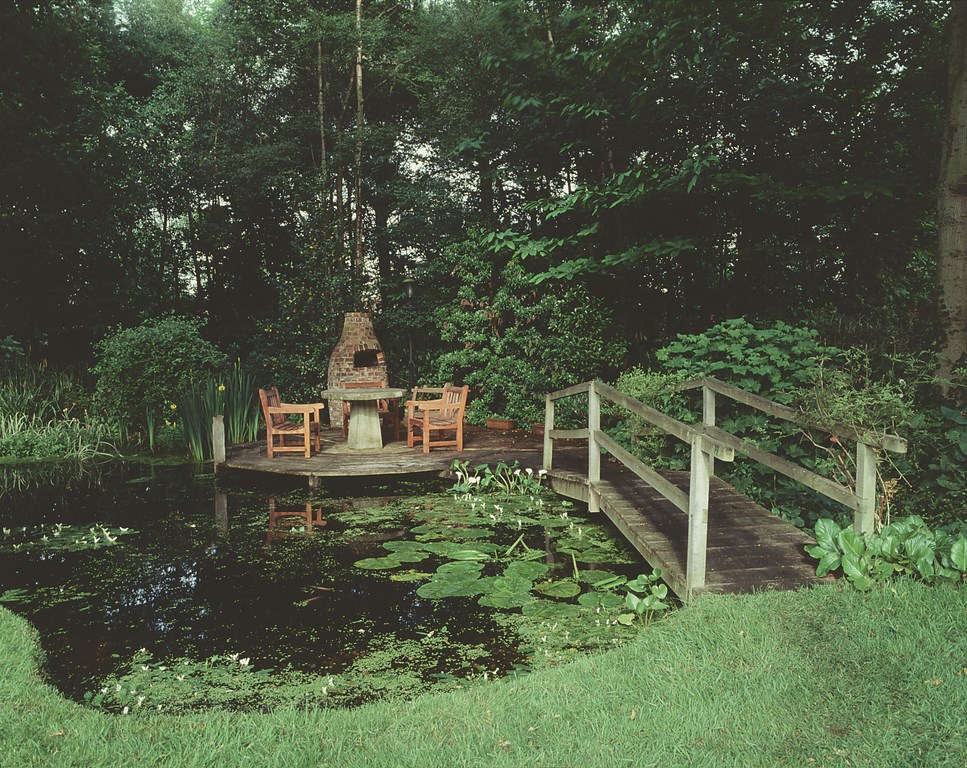
| It’s paradoxical, but I’ve long noticed that one sure way to make a manmade body of water seem more natural is to include an obvious manmade structure at the water’s edge. The impression this creates is that the water was always there and that, at some point, someone decided to impose on the natural space. The key, I think, is making certain that the materials you deploy can look old and settled, whether it’s weathered stone, oxidized wood or an old teak boat. |
One of the things that is exciting about edge treatments – and frustrating at the same time – is that it’s an aspect of watergardening that cannot ever be fully explored, learned or even wholly considered, nor will the possibilities ever be exhausted. As with so many aspects of watershaping, the real dialogues about edges must exist within the context of the specific project and, of course, in relation to the point of view of the client.
I can say this without any fear at all of contradiction: The greater our vocabulary of these edge treatments, the greater is our ability to realize our clients’ dreams and aspirations and fulfill our ambitions of being more adroit in our techniques. In the language of watershaping, we succeed by embracing the realization that it is the edge that makes our shapes.
Anthony Archer Wills is a landscape artist, master watergardener and author based in Copake Falls, N.Y. Growing up close to a lake on his parents’ farm in southern England, he was raised with a deep appreciation for water and nature – a respect he developed further at Summerfield’s School, a campus abundant in springs, streams and ponds. He began his own aquatic nursery and pond-construction business in the early 1960s,work that resulted in the development of new approaches to the construction of ponds and streams using concrete and flexible liners. The Agricultural Training Board and British Association of Landscape Industries subsequently invited him to train landscape companies in techniques that are now included in textbooks and used throughout the world. Archer Wills tackles projects around the world and has taught regularly at Chelsea Physic Garden, Inchbald School of Design, Plumpton College and Kew Gardens. He has also lectured at the New York Botanical Garden and at the universities of Miami, Cambridge, York and Durham as well as for the Association of Professional Landscape Designers and the Philosophical Society. Later this year, he will lecture on watergarden design at the Aqua Show in Las Vegas.