


Stream-Lined Effects


As is the case with a stream’s aesthetics, the functionality of any multi-level, gravity-driven waterway must be considered from the outset of any project. After all, no matter how natural and beguiling a stream may be in appearance, if it doesn’t hold water, work properly in terms of hydraulics and filtration or provide ecological balance, the whole thing can and will become a nightmare.
Fortunately, making streams work isn’t all that difficult – as long as you keep your eye on a critical set of fundamentals.
Last time, we laid out the stream course, created height transitions and dug both the channel and the pond at the bottom of a large stream/pond combination (see “Cutting a Channel,” April 2000; click here). Now let’s move beyond that initial, design-oriented phase and get to the nuts and bolts of installing the liner, equipment and plumbing – each operation critical to making a stream function at its very best.
TRANSITIONS
First, let’s recapture the scene: We’re looking at a 95-foot-long earthen channel that flows downslope into a 25-by-35-foot pond. We’ve cut the streambed, dug the pond and established the major points of the stream’s elevation transitions, all the while working against the backdrop of what I define as the underlying structure of the site and its contours.
The last step in this shaping process is the important one – that is, the point of entry of the stream into the pond. This is a particularly critical transition in terms of aesthetics for some people and probably will draw the most attention of any stretch of the installation. It must look and even feel natural.
I achieve this in one of two ways: For small projects – those with waterfalls measuring two feet or less or streams that are less than six feet in length – I’ll often set up a vertical transition with a narrow channel and boulders, creating falls that cascade into the pond. In larger installations such as the one we’re discussing here, I’ll usually take a different approach, flaring the stream out wide and slowing down the flow so the water meanders into the pond.
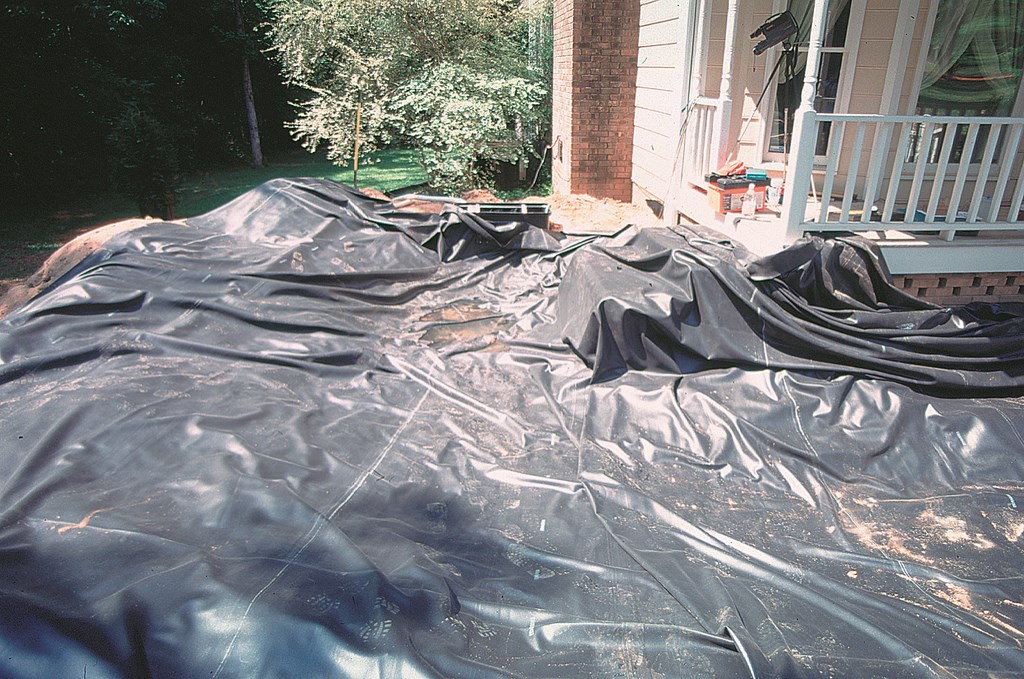
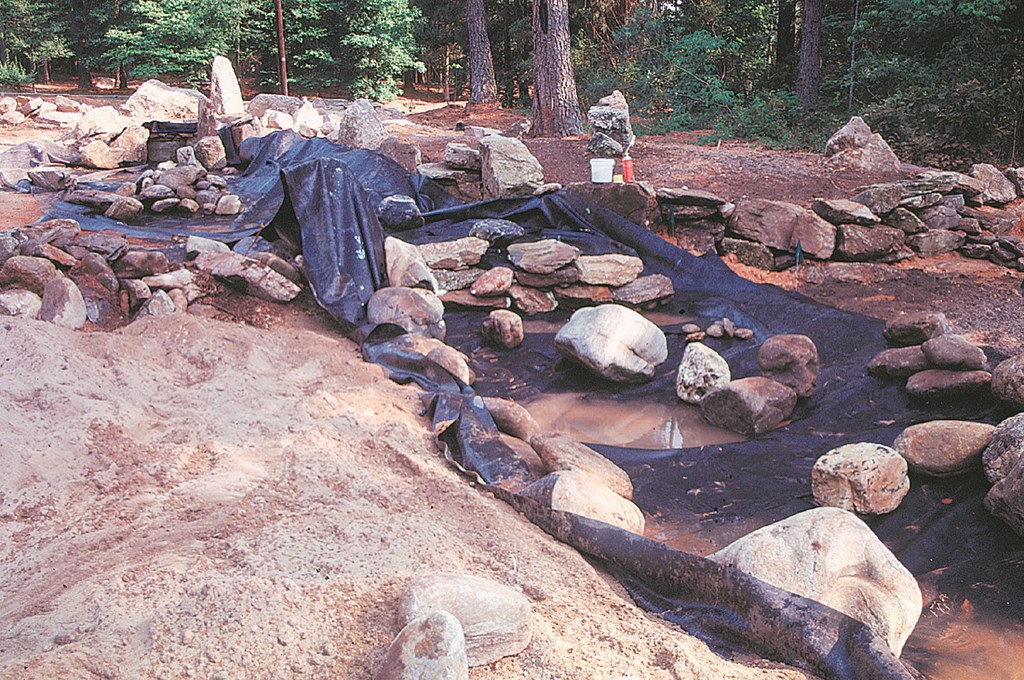
| Laying out the liner for the pond is a straightforward process once the excavation is done and you’ve set the location of the skimmer – but it gets more complicated when you need to work a square or rectangular liner around existing structures, as was the case where we butted up against the patio and steps in making our L-shaped pond. |
Here, I began by widening the stream just below the last major height transition (about 25 feet upstream). I pushed the channel out to approximately six-and-a-half feet, then put a gentle bend (or meander) in the path. Observed from the prime viewpoint, the stream now sweeps toward the viewer and rolls into the pond in a sort of “lazy river” effect.
Once I’m satisfied that these details are just right, I put aesthetic considerations aside and get to work with the liner, equipment and plumbing.
Basically, I use a bottom-up approach, starting with the pond, its liner and skimmer. (We in the pond and landscape business call these things skimmers, but they’re different from the devices installed by pool and fountain people. Our skimmers are all-in-one units that skim surface debris and also house filters, debris baskets and the pumps that drive our recirculating systems.)
The skimmer, or “mechanical filter” as it’s also known for reasons I’ll explain later, serves as the terminus for the stream’s flow. In this case, I set the skimmer exactly opposite the above-mentioned stream/pond transition point. That way, I make best use of the system’s direction of flow in collecting debris. More important is that the skimmer should be as far away from the stream falls as possible to enhance the total circulation of water in the pond.
In the vast majority of the streams and ponds I build, the skimmer is the only suction or collection point in the circulation system. Many pondmakers also install main drains in their systems, and there are good arguments for doing so. For a variety of reasons, however, I fall into the camp that believes a well-designed gravel-bottom pond can form its own ecosystem and can function perfectly well without a main drain.
IN THE POND
These combined skimmer units can be bought as kits, but if your system requires it, you also can buy pumps and skimmers separately. Either way, you have to assemble them according to manufacturer instructions and make sure they’re compatible.
Several companies make these devices and they’re all pretty easy to put together. The key is selecting a system according to the size and length of the stream, the flow you want to achieve and the configuration of the skimmer and pump. As with any hydraulic system, there are some key interrelationships at work. The flow of the pump determines the skimmer opening size, and both flow and aperture size should be congruent with requirements dictated by the volume of water in the system and by the feet of head created by the falls and the plumbing.
In this case, I used a skimmer with a 15.3-inch opening combined with a 1/2-horsepower pump rated to provide a flow of 4,200 gallons per hour. With an eight-foot rise to the top of the stream and a 100-plus-foot run of two-inch plumbing, the flow will actually work out to be about 3,500 gph as it emerges from the reservoir box at the top of the stream. Our project carries 11,000 gallons of water in all; the system will turn that volume over every three hours.

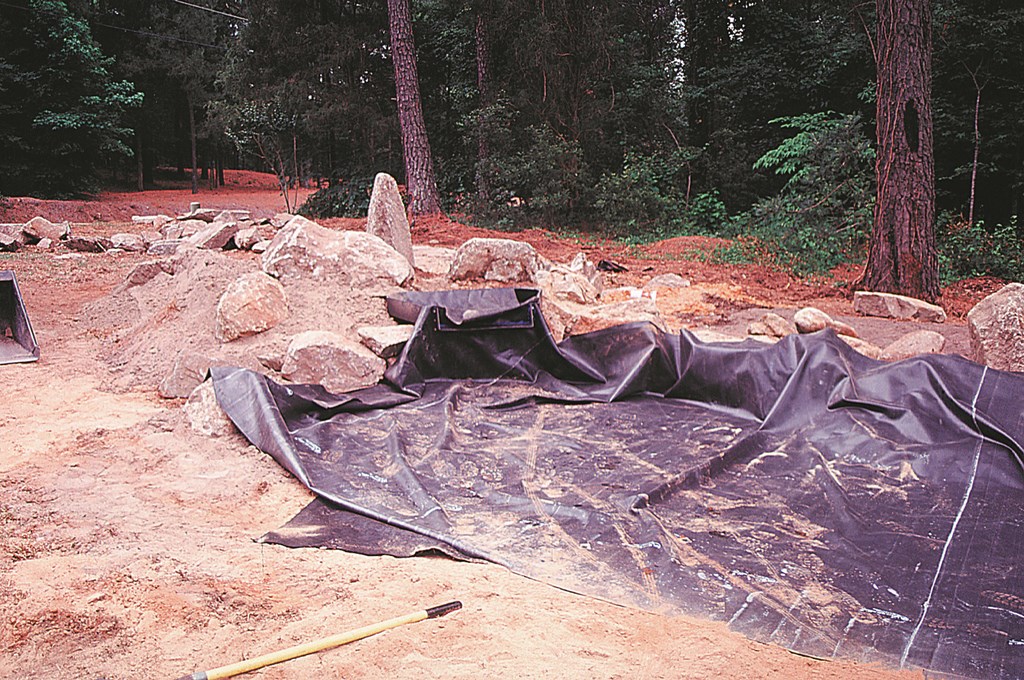
| After the liner was placed, we attached it to the skimmer’s face and stubbed out the plumbing that eventually would run about 100 feet to the reservoir at the top of the stream. |
The skimmer’s hole is dug according to the dimensions of the unit. In this case, the unit is 25 inches tall and 16-by-20 inches across the top. If the soil is soft, moist or loose, we compact it to ensure a stable base for the skimmer. In this case, however, we were lucky to find hard, dry, competent soil throughout the site.
We set the skimmer elevation with a simple rule of thumb: We want the waterline to rise to two-thirds the height of the skimmer’s mouth when the unit is in operation and the stream is flowing. This raises a key point: The capacity of the pond itself must be large enough to contain all of the water in transit from the reservoir and stream when the system is turned off for maintenance or repair. (For most projects, we also recommend using a check valve on the pump. This way, when we shut off the system the water will not drain down into the pond from the reservoir box and the plumbing.)
The plumbing connects directly to the back at the top of a pond skimmer. I install the plumbing line in a shallow trench just below the surface adjacent the stream, using ribbed flex plumbing of a diameter determined by the flow rate. (I have the good fortune in my area of working in stable soil, so laying out and burying the plumbing runs is pretty straightforward. If the situation demands it, I’d advise wider trenching and setting the plumbing in a gravel base to protect it against ground movement.)
The pump motor runs on 120-volt current and must be protected by a ground-fault circuit interrupter (GFCI). I always have a licensed electrician do the power installation: The extra cost is cheap insurance against the potential liability associated with electrical mishaps. Generally, they set up a junction box near the skimmer, then I simply plug in the pump. In some areas, however, hardwiring of the pump to a remote power connection may be required.
A good tip here is be sure the electrician installs a watertight cover on junction boxes for plug-in applications.
WORKING THE VINYL
Now that the mechanicals are all in place, it’s time to start working with the liner. With any stream/pond combination, I always start with the pond first – and for a very simple reason: The stream liner must eventually overlap the pond liner in order to prevent leaks.
I use 45-mil, “fish-safe” EPDM as my liners. I’m not sure what the differences are in chemistry between fish-safe liners and what you might use in roofing a house, but setting aside my ignorance, if you’re going to have fish in the system it makes sense to use a fish-safe liner.
Of critical importance here is proper liner sizing – or oversizing, as the case may be. The basic calculation is really quite simple: Just take the pond’s length and width and multiply each by twice the depth of the pond at its deepest point. In this case, the basic calculation gave me a size of approximately 25-by-33 feet. The liners I buy come in five-foot increments, so I ordered a 30-by-35-foot liner. This upsizing ensures that I’ll have plenty of extra to play with around the edges.
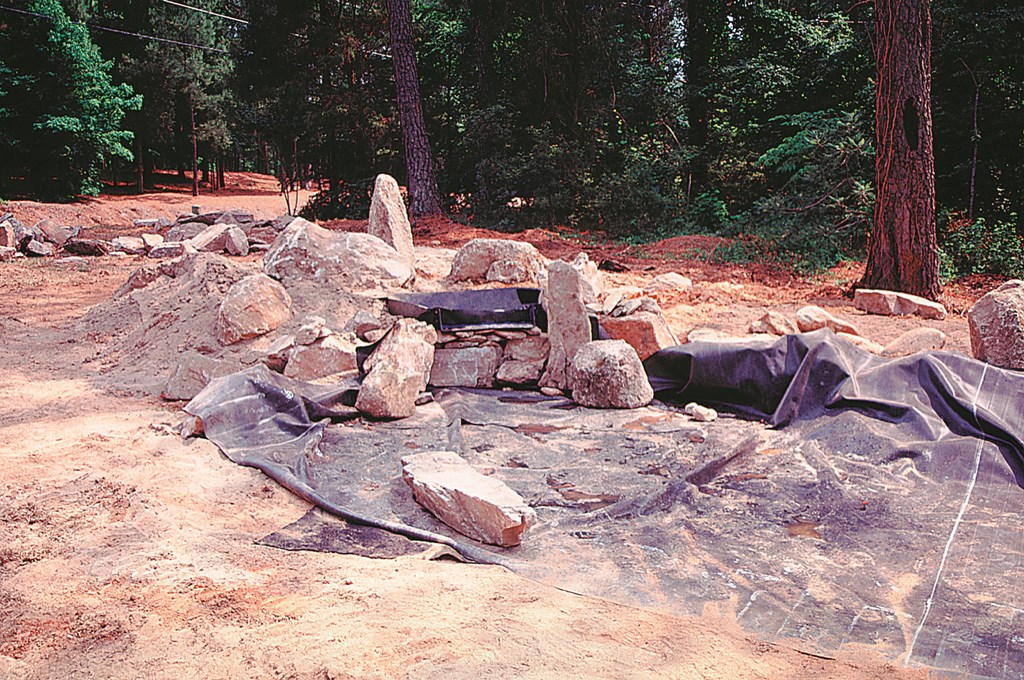
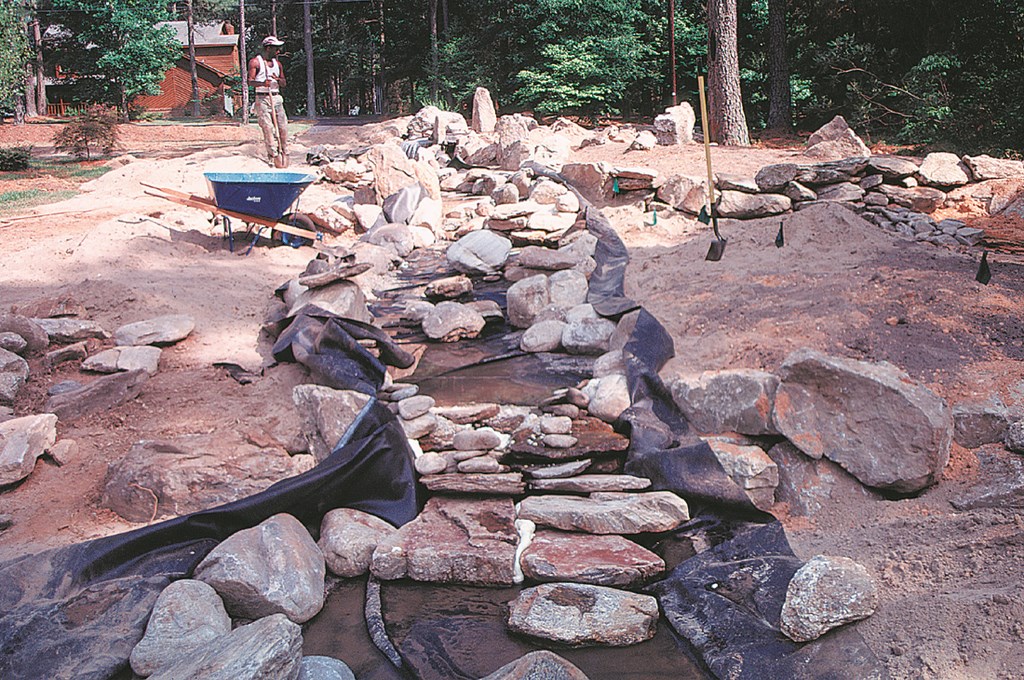
| The laying of the stream liner takes time and patience. We started by lapping about four feet of the liner over the pond then moved upslope, draping the liner pretty casually over spillways, the channel and some outlying stones (left). When we reached the first waterfall, we moved some stones to positions atop the liner (middle), keeping such placements to a minimum as we created the right aesthetics. Notice the large amount of excess liner beyond the stone stream-channel markers (right): We leave the excess in place until we’re absolutely certain it won’t be needed. |
Many pondmakers install some form of underlayment before the primary liner goes in – often a thinner (4-6 mil) liner placed to protect the thicker liner from sharp pebbles or even roots – and most of the large national suppliers will be happy to sell you material to get the job done. Again, it has a lot to do with where I work, but I’ve never really had problems with liner leaks caused by material being punctured from underneath, so I generally don’t use underlayments.
I start the installation by dragging the folded liner into the pond and then pulling it open on each side, always leaving a little slack in the bottom. When I’m satisfied that we’ve got it in the right position, I’ll attach it to the skimmer face. Each skimmer manufacturer has a different method for making this connection, some using screws and faceplates, others using two-sided tape. Most that I’ve used work well enough – provided I’ve followed directions!
Now it’s time to get into the stream and ascend toward its source. As I mentioned last time, I use 10-foot wide liners for my streams. With the widest portions spanning just over six feet, this gives me plenty of excess to play with along the edges, in the curves and in the channels of the height transitions.
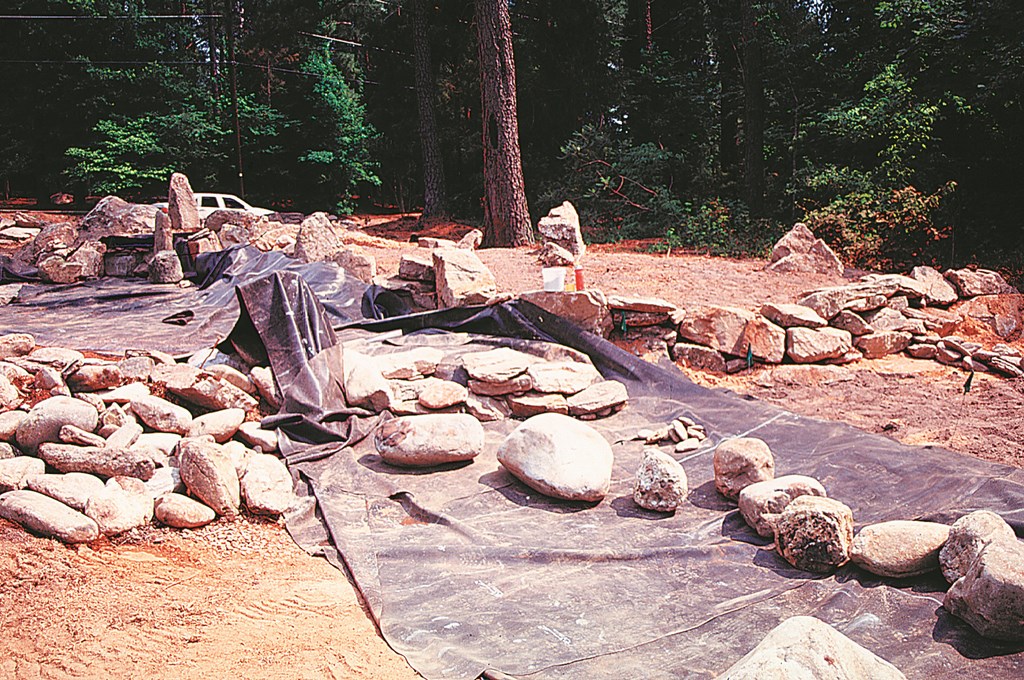
| Further upslope, you can see where we’ve brought in and compacted some fill (left foreground) to help define the edge. |
On this job, we went for two 50-foot runs of liner, knowing through experience that the sheer weight of a single 100-foot run would have been unwieldy. This is at least a two-person job. I actually used three people for this stream project – and four for the pond. Using many hands divides the load in terms of weight, and the liner can be spread evenly in multiple directions at the same time.
I worked on the lower portion first, overlapping the pond liner by about four feet to prevent any chance of water leaking. Without that kind of overlap, I’ve seen situations where water will migrate uphill via a wicking action created by its surface tension in a process known as transpiration. I may be using a little overkill at four feet, but I don’t like to come back and fix leaks!
We then pulled the stream liner up into the channel and spread it across the bottom and up the sides as we went. When we reached transition points, I took care to tuck the liner carefully in and around the contours of the large, structural boulders I placed during the excavation. Later on, I’ll place the weir stones and their companions on top of the liner to set the waterfalls and lock the liner more firmly in place.
At this point, I lay the excess liner up and over the sides, where I’ll eventually place rocks and create other edge treatments. I don’t usually trim the liner until the end of the job – and certainly not before the system is full of water. And where the two stream liners meet, I again made sure I had plenty of overlap between the upper and lower pieces.
RESERVOIR IN A BOX
With the streambed liner in place, I moved up to install the reservoir box. These units go by a variety of names – source box or water box or spill box – and sometimes are simply known by brand names. I often use a product called Biofalls, which is sold by Aquascape Designs of Batavia, Ill.; many others are available.
Like the pond skimmer, a reservoir box is a hybrid device. It provides the stream’s only “return” point or source and houses its biological filter (as opposed to the mechanical filter in the skimmer). This biological filter is extremely important for the health of the stream.

| In setting the waterfalls, we use a good bit of expanding foam to seal the bottoms and backs of the stones. The idea here is to make as much of the water as possible flow over the stones rather than around or under them. When this foam dries, we simply cut the excess with a razor knife, being careful not to nick or cut the liner! |
At this point in time, this is the cutting edge approach in residential water features of this kind: a mechanical filter (housing the pump), a biological filter housed in the reservoir box, bacteria treatments during the growing season – all combined with gravel and rock as coverings for the liner’s bottom and sides. These elements, used in conjunction with a healthy combination of plants and fish, make for a clean, inviting and vibrant stream and/or pond.
The two-inch plumbing connects to the bottom of the reservoir box. Using flow provided by the pump in the pond skimmer, the water is forced through several layers of a material known as “bio mat.” This is a basic filtration medium that captures particulates far too small to be caught in the skimmer below.
The water then flows through multiple mesh bags filled with lava rocks. Depending on size, the biofilter will have one to four bags, each containing approximately 30 pounds of lava rocks of the sort you can buy at any garden-supply store. (When you buy a reservoir box, you get the bags empty: It’s up to you to fill them with one- to two-inch rocks.)
In the porous structure of these lava rocks, bacteria set up shop and consume organic nutrients in the water that would otherwise fuel algae growth. This natural process enables “living” streams and ponds to remain relatively algae-free without the use of chemicals (such as chlorine or algaecides) that can be harmful to fish and other residents of the watershape. (The care and feeding of a living watershape is a special subject well beyond the scope of this discussion.)
| By the time we’re finished with the stream, all of the falls, turns and transitions have been set, reset and brought into line in achieving just the effects we’re after. Experience accelerates the process somewhat, but it still takes time and patience. |
After you install the reservoir box and fill the stream with water, you need to charge it with bacteria. These bacteria are widely available and consist of tablets or powders that contain billions of certain beneficial bacteria.
As was the case for the skimmer down in the pond, the reservoir box is rated for a certain flow rate. (You also need to consider total gallons in relation to the capacity of the system’s biological filter.) On this job, I used a box that provided up to 4,000 gph, as required by the pump in the pond skimmer, the plumbing run and the grade differences. The opening (or weir) from which the water emerges is 23 inches wide.
I bury these boxes in the ground. This allows me to bring soil up to the top of the sides and the back, thus allowing for planting right up to the water’s edge. This means that only the front of the box requires the proper amount of stone needed to create a natural look, thus allowing me to use less stone and get away from the pillar or “volcano” look.
Most manufacturers sell a faux stone for the weir, but I strongly recommend using a compatible flagstone for this all-important visual and functional component of the system. I seal this decorative rock with silicone sealant. Again, the liner connection depends on the preferences of the box’s manufacturer: All I do is follow directions.
BACK TO THE FALLS
Now that the pond skimmer is in place and has been plumbed with a single line to the reservoir box, now that the liners are set in the pond and the stream and have been connected to the skimmer and reservoir box and tucked among the large boulders of the height transitions, it’s time to get back to the project’s aesthetics.
The next step is the placement of the weir stones mentioned above – stones I selected for their special characteristics in the first phase of the project. Good weir stones are flat with clean edges. I surround these with companion stones that create channels in which the water flow is contained.
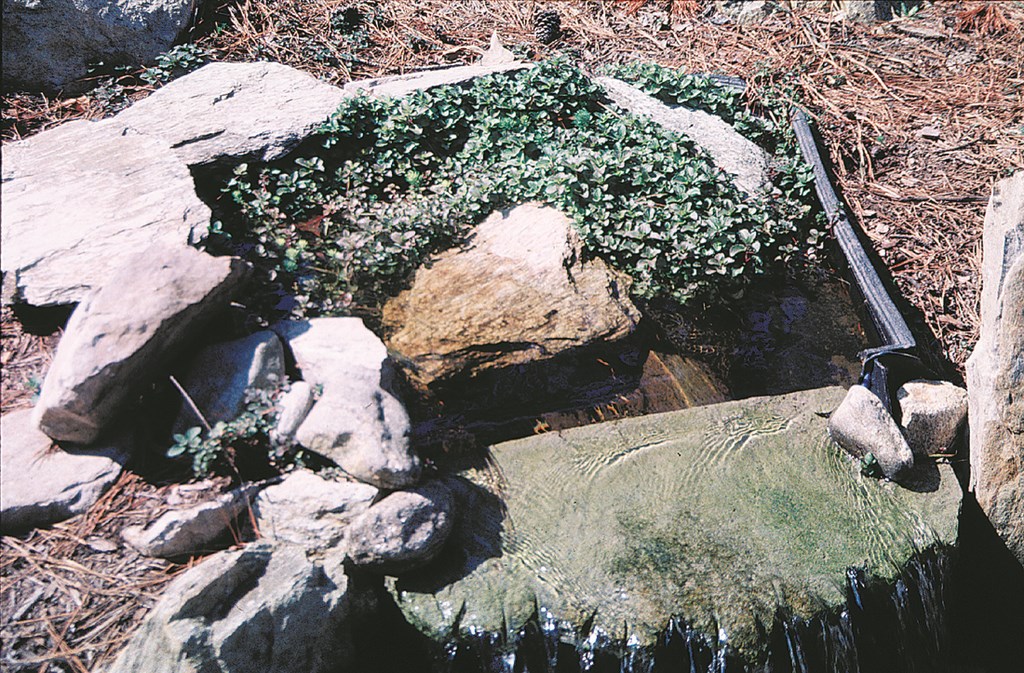
| Up on top of the stream, we hide the reservoir and its weir with rocks and plantings. Now it’s time to move onto the project’s next phase. |
Once everything is ready, I place these boulders right on top of the liner, carefully placing them at the transition sections. I inspect each boulder before placing it; if I see a sharp edge, I’ll use a piece of scrap liner to protect the original liner.
This is a point where intuition and extensive experience in observing natural waterways kicks in and dictates placements. I make an effort to select and include the rocks and boulders that have the most color and interesting features in and around the transitions, knowing that these are the sections of the stream that ultimately attract the most attention. And when I have a particularly colorful or interesting boulder, I’ll be sure to place it where it will be wet when the system is running, a trick that further enhances the colors and textures of the project.
I want the water to flow over the weir boulders and not under them, so I seal the backsides and bottoms of the boulders with plumber’s insulation material or a bead of silicon. I know that many of us use a product known as Great Stuff, an expanding foam insulation. With the weir boulders in place, the second phase of the stream-construction process is complete – and phase three is about to begin.
Next, we’ll cover boulder placement along the edges as well as other edge treatments you can set up with the excess liner. We’ll also get into plantings, laying gravel, trimming the liner and stocking the stream with fish and aquatic plants.
Rick Anderson is owner of Ston Wurks, a landscape-design firm in Columbia, S.C. A designer and artist with 22 years of professional experience, Anderson’s work focuses on the use of natural materials, particularly stone, in naturalistic settings. He is the founder of The Whispering Crane Institute, a landscape design “think tank” dedicated to exploring our physical, emotional and spiritual relationships with the land. The institute stages Philosophy of Design Symposia each year. Anderson is a past director of the Association of Professional Landscape Designers and has contributed numerous articles to a variety of trade and consumer magazines.