


Illuminating Outdoor Rooms

For more than 10 years now, outdoor rooms have been growing steadily in both popularity and complexity. That’s great, because it enables designers – architects, landscape architects, landscape designers and pool builders alike – to bring interiors outside and provide living spaces where activities previously associated strictly with indoor spaces can move comfortably into the great outdoors.
It’s a fantastic way to expand living areas and create useful spaces while also adding entirely new types of experiences to the lives of homeowners.
Among this trend’s many implications is that it has challenged landscape lighting designers to think in all-new ways about how we light exterior spaces. For starters, we need to be aware that most homeowners will enjoy these spaces exclusively after dark – and also be conscious of the fact that these environments require much more complicated lighting schemes than classic suburban patios ever did.
The differences are so profound that I believe lighting designers need to talk to clients in new ways that take into account not only their aesthetic desires but also create an understanding of how the lit spaces will be used – for food preparation, for example, or for dining, lounging, playing games, dancing or even holding wedding ceremonies.
Accommodating these various activities while still adhering to the basics of aesthetic design, safety and comfort adds layers of complexity to our projects that have rippling effects of design, system layout and installation. It’s challenging, but it can be great fun as well.
DESIGN TIME
The vast majority of these spaces are covered by some type of shade structure, arbor, awning, trellis or pergola, to name a few possibilities. While this gives the lighting designer a wonderful array of options with respect to fixture placement, those possibilities must all be balanced by consideration of the fact that, unlike traditional landscape lighting, the fixtures in overhead structures are meant to shine down on people below them.
In addition to decorative lighting, we’re more or less getting ourselves involved in task lighting. What this means, first and foremost, is that glare is a huge issue – not so much where people are standing (because they don’t tend to look up), but much more so when they’re seated: You never want to have light shining down in their eyes as though they’re under a spotlight.
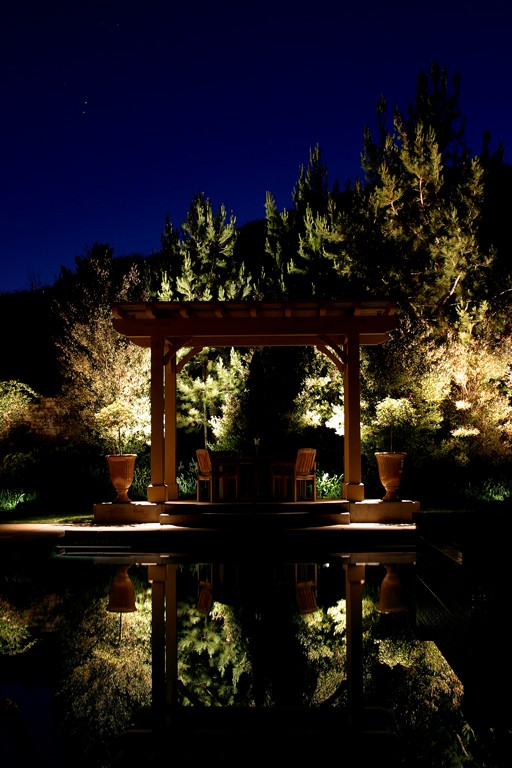
| In lighting patio spaces, we will often use an indirect approach and light the trees, plants and structures that surround the space to fill the area with a warm glow. This tends to make these spaces seem larger (which is almost never a bad idea) and also helps avoid problems with glare. |
This leads to the first and primary principle of decorative-lighting design for patios – that is, it’s almost always preferable to use indirect lighting. This means you want to light the pillars or posts holding up the shade structure; plant materials bordering the patio; or the walls of the house or other structures, such as stone fireplaces, sculptures or retaining walls.
This indirect approach enables you to direct light to the sides of the gathering spots and thereby avoid most problems with glare. Furthermore, it draws attention to the structures and features that define the boundaries of the patio itself and can make the space seem larger. In many respects, this is not unlike landscape lighting in the way features are lit and remain relatively static: Effectively, they’re either on or off.
Of course, this lighting simply casts a controlled glow over a defined space. While it may even represent the majority of the lighting, you still need to provide lighting within the outdoor room to make it suitable for various activities. By definition, this requires the installation of banks of lights controlled by switches, sub-switches and dimmers – whatever it takes to illuminate all the uses homeowners envision for their outdoor space.
Communication is key: You need to know the full extent of the homeowners’ plans for the space and accommodate their thinking to the fullest possible extent. You might, for example, have a need to set up a bank of lights over an outdoor cooking area as well as bright lights dedicated to a countertop, sink or stove location – all of which can be turned on when the features are in use but also turned off individually while the rest of the space stays lit.
Barbecues are a special challenge because (unless they’re built in, of course) they can be moved to various locations. In such cases, you may even need to plan out multiple cooking areas with separately controlled, relatively bright lights and focused beams that will put light right where it’s needed.
In the dining area, your approach needs to be different and should involve the use of dimmers to allow the homeowners either to read or work in the space while also enabling them to set the mood for intimate dinners. The same is true of areas adjacent to outdoor fireplaces (where people might lounge, relax and enjoy conversation in dim light or need bright light to read by the fire) as well as spaces devoted to outdoor games or watching television.
PERSONAL CONTROL
The design goal throughout these spaces is to give homeowners as much control as possible over how the space and various areas within it are lit. This is not generally the case with general landscape lighting, where the control for the entire array is basically on or off and brightness is an issue determined once and for all: With outdoor rooms, your clients should be able to control not only which lights are on, but also how bright some of them may be.
Brightness is a complicating factor, because people vary dramatically in what they want and what constitutes their personal comfort zones. Some don’t mind tremendously bright light that brings an area to near-daytime illumination levels and won’t object to a bit of glare that comes along with it. There are also those who prefer very dim lighting to create a distinct ambiance – and if they encounter even a hint of glare, they claim to be blinded by the light.
That’s why the use of dimmers is so important in outdoor rooms: This allows the clients to set the lights at levels that suit their purposes, depending on comfort and the needs of the specific activity. If, for example, they’re playing cards in a dining area, they may want the lights all the way up to enhance visibility – but for the quiet dinner the next night over a great bottle of wine, they may opt for lower, more romantic lighting levels.
Dimmers make all of these possibilities available with ease and come in a few different forms that lend even further flexibility to lighting designs. Primarily, they’re made for service with either low-voltage (12-volt) or line-voltage (120-volt) systems, with the latter being far more common because the switches are used extensively for indoor applications.
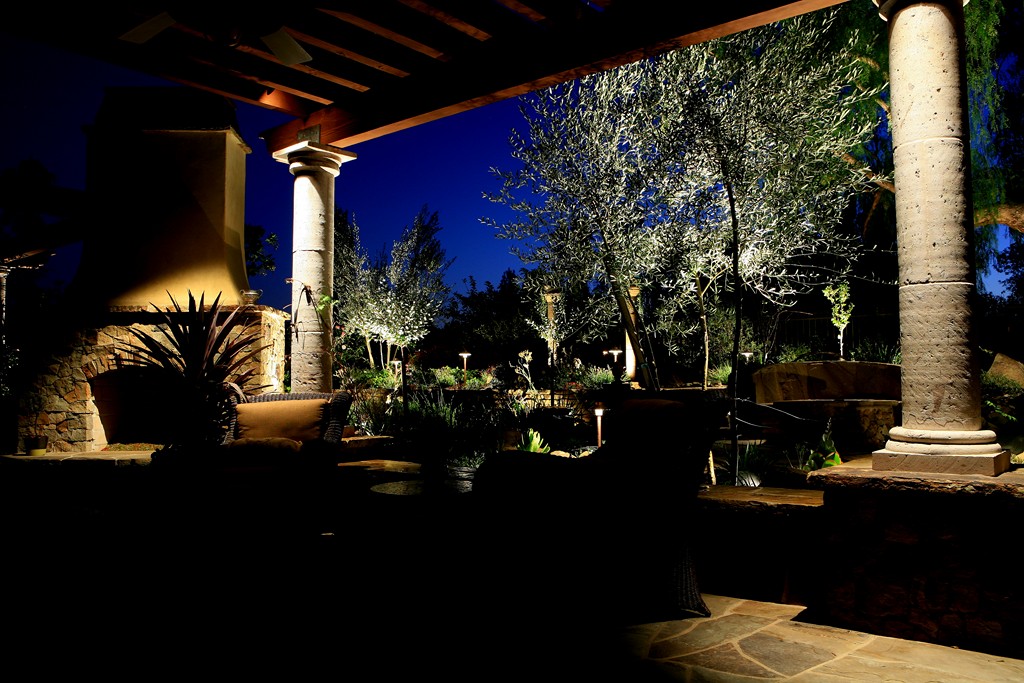
| However an outdoor room is illuminated, we do what we can to minimize the fixtures’ presence by day without compromising nighttime performance. This often means finding fixtures that match the surrounding structure’s colors, or powder-coating them to make them blend in. Alternatively, it means hiding fixtures within the structure to make them as visually unobtrusive as possible. |
By and large, I prefer working with 120-volt dimmers for outdoor rooms because they adjust the power input to a transformer and therefore can easily be used to control multiple fixtures. Low-voltage dimmers, which, when you can find them (and it’s not always easy), are good for controlling single low-voltage fixtures, are less useful and flexible than their 120-volt cousins.
Also, many of my clients ask these days for lighting controllers to run the dimmers and turn various zones or individual lights on or off. So in addition to switch- and wall-mounted dimmers, we have the option to offer clients complete lighting-control systems that allow clients to determine how the space will be lit via a handheld remote.
As you work out the details of these programs, you must also consider safety in the same way you would in the landscape. Thus, for example, primary steps within and around the outdoor room must receive the same sort of treatment as do pathways or entryways – that is, they must always be clearly lit with no shadows!
Finally, it bears mentioning that when you light cooking and dining areas in particular, you need to pay attention to the color of the light itself. If the lamps you select produce light that tends towards the “cool” color-temperature end of the spectrum, for example, food will tend to look blue or green and distinctly unappetizing. As a rule, you want the lighting over those areas to be “warm” to give things within the space an inviting look. (And although it’s not necessarily recommended, for outdoor lighting, pink or rose colored lighting is known to enhance skin tone in a positive way.)
MORE TO INSTALLATIONS
For the most part, the fixtures in the lighting schemes for outdoor rooms tend not to be decorative and instead are meant to blend in with the overhead structure.
In other words, in these settings you don’t want to draw attention to the lights themselves because this will cause the homeowners and their guests to look up and be exposed to sources of glare. And excepting situations in which you’re dealing with a solid sort of cover of the sort you’d find inside the home, you won’t be able to use recessed or countersunk lights and the fixtures will be exposed.
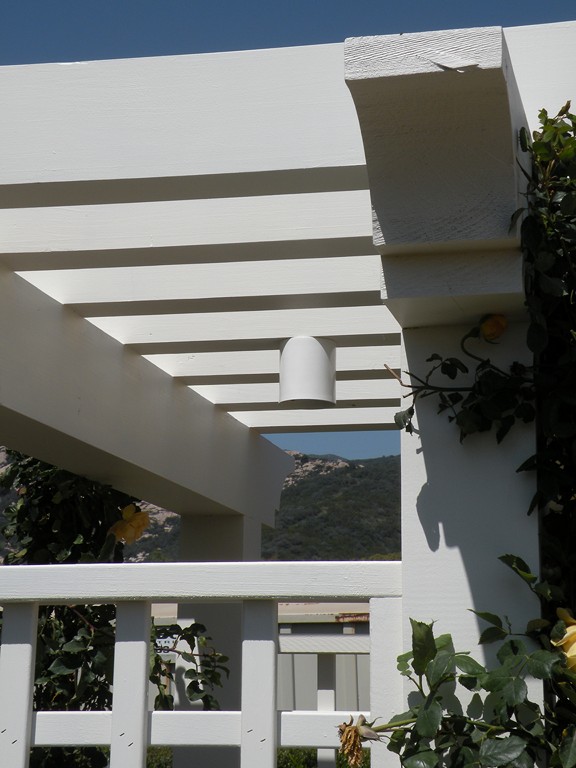
With all that in mind, we tend to use dark or black fixtures and have fixtures chemically stained or powder coated a dark brown to “hide” them within the overhanging structure. If that structure happens to be white, we’ll order powder-coated fixtures with white finishes – and the same goes for exposed conduits or junction boxes.
Indeed, we do our best to hide both the fixtures and their wiring runs. We install conduit, for example, on top of the shade structure whenever possible and run it down the back sides of columns and posts where they’ll be least visible. We’ll also run properly shielded wiring in rain gutters and downspouts (a fantastic concealment method) while making certain, of course, that we don’t interfere with the water’s flow. Sometimes hiding power cable this way is not possible, in which case we must be creative in our use of routers or strategically placed moldings to conceal things.
With these aesthetic boundaries, mounting lights over patios requires a good bit of creativity – and it’s almost always far more work than is installing standard landscape lighting. In fact, you have to become part carpenter as well as part electrician in these situations: up on ladders, cutting channels or holes in wood structures, mounting fixtures any way you can to a variety of materials.
We also do all we can to work with what the site gives us. Nearby trees might come in handy, for example, and we often place fixtures beneath roof overhangs and eaves. Every site is different, but one thing we know for sure: With overhead lighting for outdoor rooms, we’re almost invariably forced to get creative!
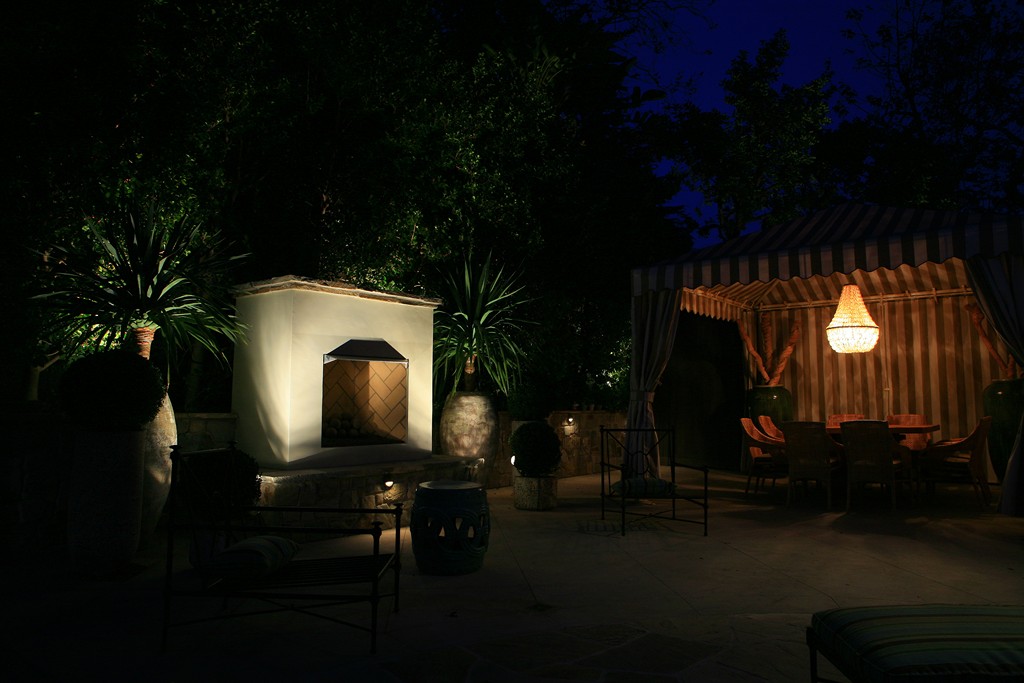
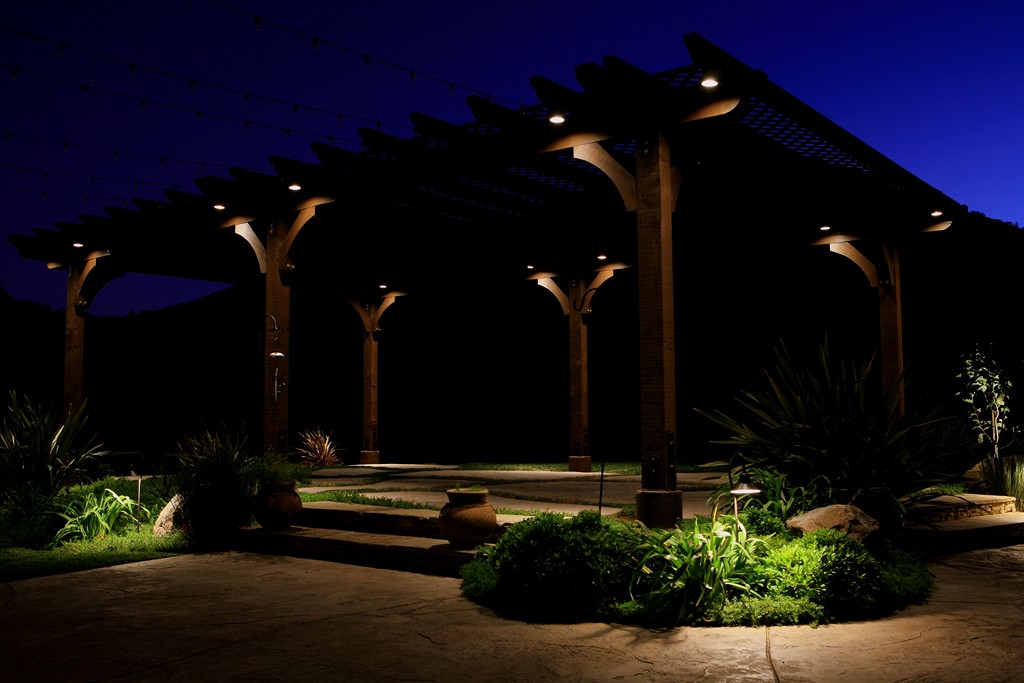
| I’m not a huge fan of using fixtures to make bold statements, but in some cases a pendant or chandelier can be the right choice so long as it’s truly suited to outdoor use and is set up on a dimmer so the light can be adjusted to suit the need as well as the mood. |
That need for improvisation grows even larger when the outdoor spaces you’re lighting have no overhanging cover. Here, it all boils down to exploiting whatever opportunities the site has to offer: nearby trees, adjacent fences and walls, distant structures. On occasions, we’ve even had to use streetlamp-style lighting – a last resort in my book because they can look tacky, draw too much attention and are an immediate and unavoidable source of glare.
(I also have a problem with lights mounted in the room’s floor. Sometimes they’re the only possible design solution, but unless you can make them completely flush, they become a trip hazard in addition to getting hot.)
Finally, there are instances where homeowners will insist on using decorative features, which often happens when an interior designer is in the loop and wants to make a statement by bringing an indoor-style fixture to the great outdoors. For all my resistance, I have to agree that the right chandelier can be a beautiful addition to an outdoor dining area, but in such cases I insist on the fixture being safe and fully intended for outdoor use.
OPEN DIALOGUE
As mentioned at the outset, the lighting of outdoor rooms offers the landscape lighting designer wonderful opportunities to get creative. At the same time, it also brings a lot of responsibility, basically because the element of human interaction comes into play on so many levels.
Bottom line: You need to learn to communicate with clients in a slightly different (and certainly more accommodating) ways. When lighting trees and structures in the landscape, clients will have their preferences, but to a large extent, you make the calls. On a patio or in an outdoor room, by contrast, the client tends to be more involved in the decision-making process and you need to do a lot more to accommodate their preferences, likes and dislikes.
To be sure, there have been instances where I’ve suggested and then done things about which clients were initially hesitant but came subsequently to appreciate and enjoy. I’ve also had clients react negatively and insist on adjustment – at my expense, naturally. This is why I do everything I can to make certain we’re always on the same page and that I know how they plan to use the space. It’s also why I use lots of dimmers and build as much flexibility into these systems as possible!
As I see it, these projects are about as fun as it gets in lighting design: They let me take what clients tell me they want and need and use my knowledge of the effects I can achieve to exceed their wildest expectations – the best of all possible situations.
Mike Gambino owns and operates Gambino Landscape Lighting of Simi Valley, Calif. A licensed lighting contractor since 1990, he has specialized since 1995 on high-performance low-voltage systems. He may be reached via his Web site: www.gambinolighting.com.