


Out, Back and Under

It’s not too unusual to replace all of the plumbing, equipment and electrical lines as part of a swimming pool renovation project. It’s quite another story, however, when you need to make sure all of it happens without disrupting the deck surrounding the vessel.
As mentioned in my last two “Details,” that’s precisely what we’ve been asked to do in renovating a 70-year-old pool in the historic Los Feliz neighborhood of Los Angeles. The presence of a beautiful, valuable, imported limestone deck means that we’ve had to do all of our work from inside the pool, working our way to daylight and equipment vaults by cutting cores in the diamond-hard shell.
Burrowing beneath the deck involved some risks, because we had no idea what we might run into along some of the vectors we’d chosen. But we proved to be lucky, and the holes we cut to the existing equipment vault and to a nearby planter have enabled us to run new lines for all of the spa systems, new returns and drains for the pool, electrical runs for a new set of lights in the pool and lines for a low-voltage remote control system.
At this writing, the conduits through the cores have all been set, a smaller spa has been formed – and we’re now working out all of the details of setting up the new plumbing and electrical systems for both pool and spa.
THREE THE HARD WAY
The basic game plan encompasses three equipment locations outside the pool.
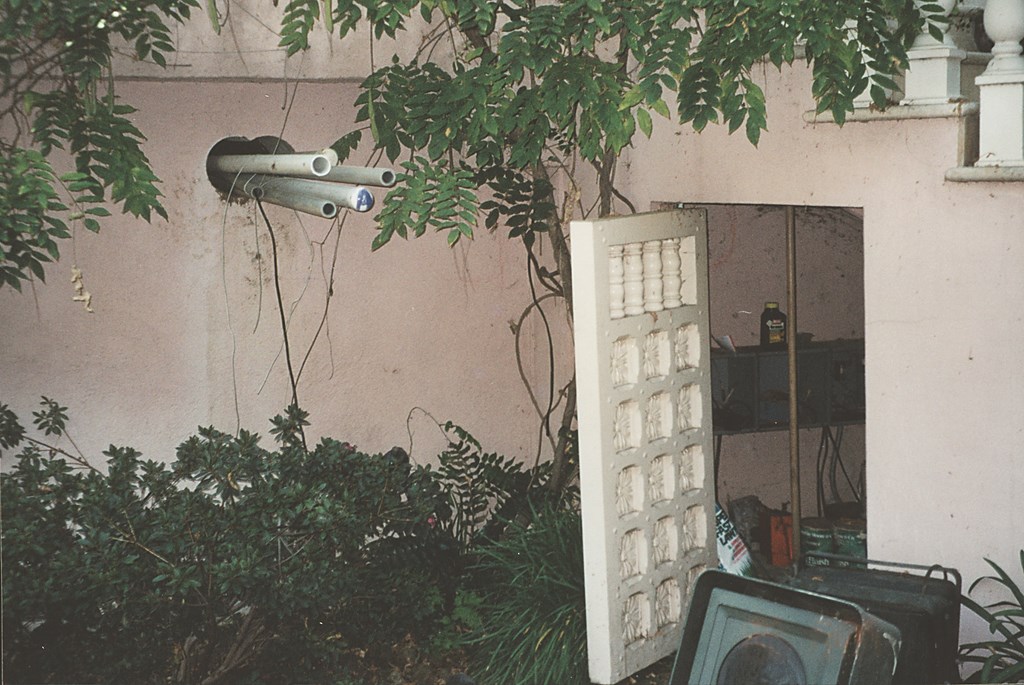
The first is the existing equipment room just mentioned. It’s located adjacent to the deep end of the pool – a sub-grade room that shares a wall with the shell and gives us a good amount of space in which to maneuver. The second is in a small planter about ten feet away from the spa – the only patch of open space anywhere on the pool deck. The third is in a small, sub-grade utility space about 15 feet from the shallow end of the pool.
What will make this all work is the fact that the renovation involves adding new features to the inside of the pool – not just the spa, but also a bench that runs the length of the side of the pool next to the spa, revised steps in the shallow end and a floor raised 12 inches above the existing deep end – that will enable us to hide all of the conduits and lines we’re setting up to drive the new pool/spa systems. These new features were developed and planned with detailed drawings and discussed in an extensive series of design meetings.
The first equipment area is the existing sub-grade vault where the pool’s old pump, heater and filter were located. As luck would have it, the floor of the equipment room is roughly even with the bottom of the pool. This meant that we could core the concrete – specifically, three slightly overlapping eight-inch holes – at the deepest available spot in the shell and directly reach the equipment room with new plumbing and electrical lines.
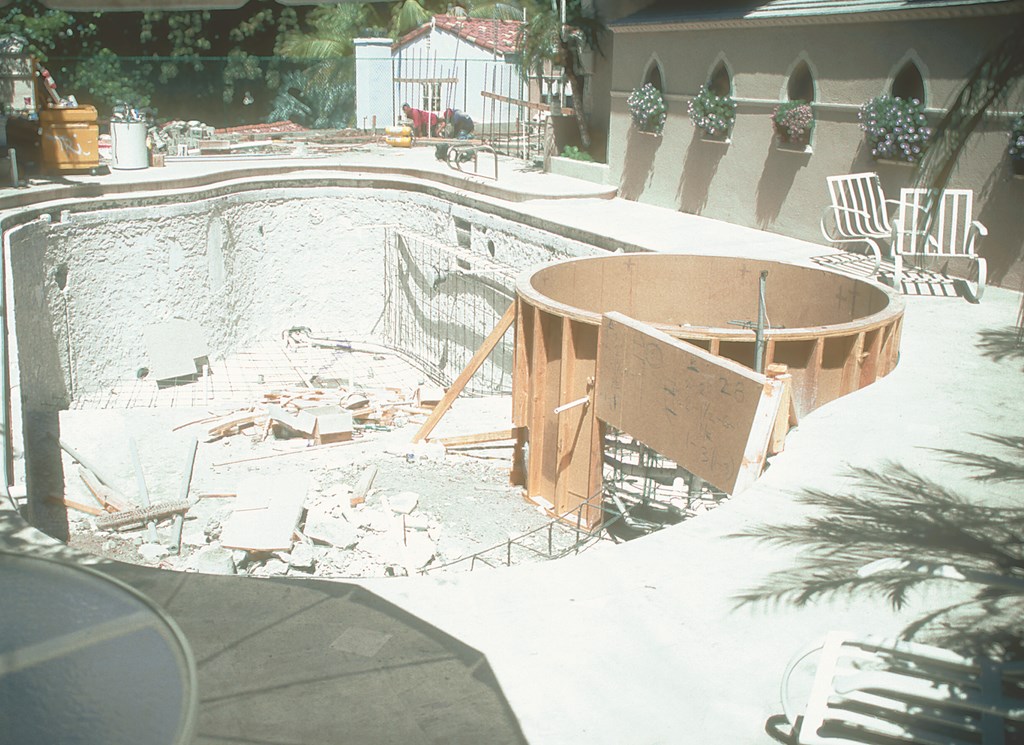
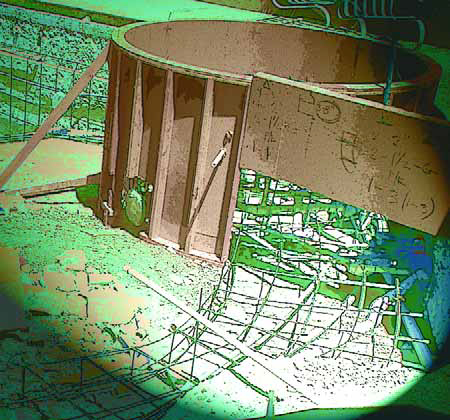
| The new spa will be smaller than the one we’d originally framed, but it will be tucked into the same corner in the shallow end of the pool. The bench that will now run along the side of the pool beyond the new spa is there for practical as well as functional reasons: It carries key plumbing lines from the main equipment vault as well as lines for the remote-control system. |
This room will still be used for all the primary pool systems – a new pump, filter and heater made by Jandy – along with Jandy’s One-Touch remote-control unit. All lines will enter the space through the cores and will be buried under the new floor we’ll put in the pool’s deep end. Some of the spa’s lines will be carried within the steel and gunite of the new bench we’ll run along the wall of the pool. The bench also will house two of the four lights we’ll put in to provide as even illumination as is possible along the length of the pool. (A third light will be placed in the dam wall, the fourth inside the spa.)
The planter near the spa – equipment area #2 – will hold the spa’s booster pump, the electrical J-boxes for the lights and the loop for the blower, which needed to be elevated above the level of the spa. The cores we cut near the base of the spa will handle the traffic in suction and return lines. The blower loop runs from the spa, through the core, under the deck, to the planter, back under the deck, through the core then out of the pool through a line and another core that will be hidden by the new shallow-end steps.
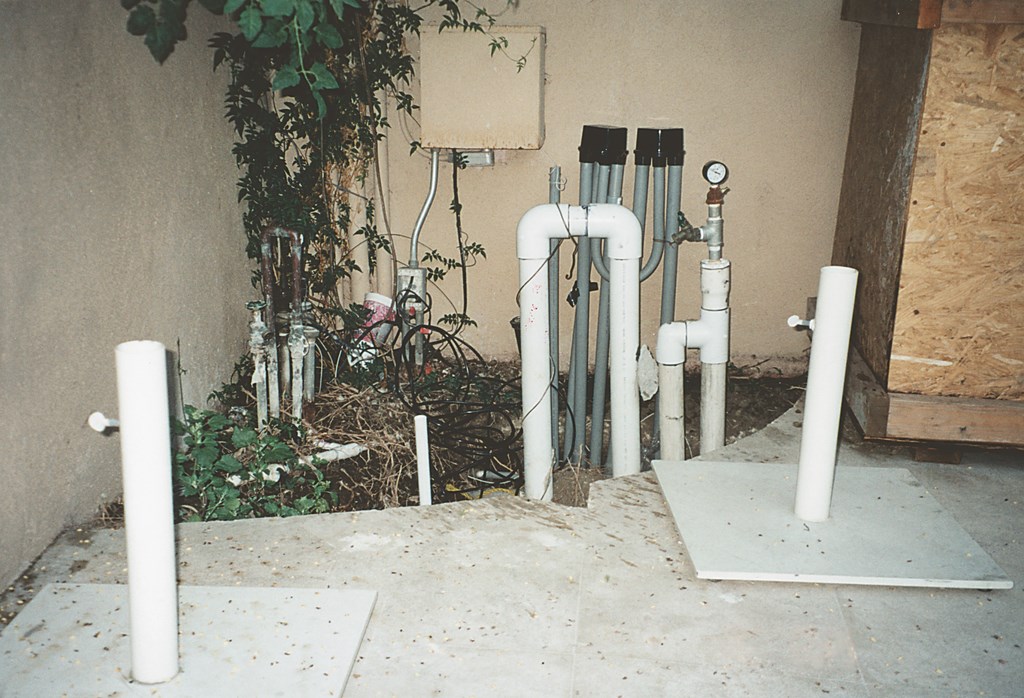
To set up the third equipment area in the sub-grade utility room, we cut a core through a nearby retaining wall and ran it meet the core in the pool’s shallow end. We’ll box in the cored area, tie its appearance into a wall adjacent to the utility room, and set up the blowers in a space where they’ll never be heard. Lines will run through the hole in the wall, under the deck, over to the pool, through the shallow-end steps and into the spa.
NOT SO TOUGH
There’s a lot going on here, but once access was set up by cutting the cores and inserting the sleeves for our lines, the fact is that it became a reasonably straightforward matter of following a schematic we’d worked out for the plumbing and conduits.
What makes this come together is the fact that I am a designer who knows how to build and can communicate to subcontractors about what needs to be done. Perhaps someday, the watershaping industry will be filled with designers who know about construction and builders who know about design. In the meantime, it’s tough enough to find people who can read and follow plans.
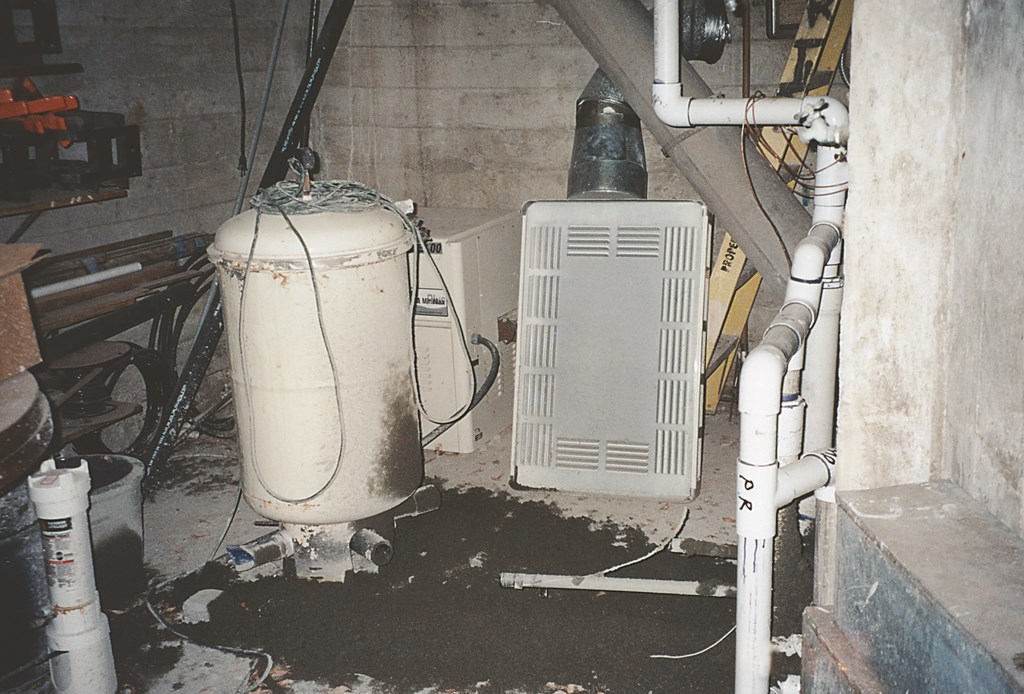
| The main equipment space (shown here with old equipment but new plumbing), is adjacent to the pool and was reached by coring through the common wall. The cores and associated lines will be hidden in the pool’s newly raised floor. |
The key to all of this, not surprisingly, was having thought everything through ahead of time – all of the system needs and all of the physical issues of the layout in addition to setting up some extra sleeves for contingencies – and having worked out all of the details for the plumbing and electrical subcontractors.
The main task was sensibly laying out all of the new lines and conduits within the available space created by the raised floor and bench and the new spa, specifying the right locations for the lighting niches and, most important of all, figuring out plumbing runs that would avoid hydraulically costly 90-degree turns.
That last point is major: Just because we’re running plumbing and setting up the equipment in unconventional ways because of site constraints offers no relief from the need to create a hydraulic and heating systems that are reliable and as energy-efficient as possible.
| A second equipment space is in a planter a few feet from the spa – the only open space in the whole limestone deck. This will host the spa’s booster pump as well as J-boxes for the lights and is a pass-through and looping point for the blower system. |
Likewise, adding structures and new gunite to the inside of an existing pool leaves us no wiggle room at all when it comes to constructing a monolithic vessel that will continue to endure the test of time. This is why we doweled in new structural steel to support the additional gunite in every area of the pool, including the new steps in the shallow end.
The new concrete is inevitably going to do what all concrete always does, expanding and contracting over time. Without structural mats to support it, the added concrete would display all sorts of problems where new work butts up against old. With support and adequate preparation of the old surface for a good mechanical bond, we set up a renovated shell that will be as stable as it can possibly be.
CONCRETE MYTHOLOGY
This leads me to another issue that bears mentioning: It blows my mind when I see elements such as benches and steps being set up without any steel in them. Steel itself is cheap, and setting it up isn’t a big-ticket item. The way I see it, steel is absolutely essential – and cheap insurance against failure!
And don’t even get me started on contractors who use or permit the use of “rebound” in setting up steps and other pool contours. It’s worthless garbage and should be thrown away!
| The third equipment area is below the deck near the shallow end of the pool. We cored through the wall and aligned the hole with a corresponding shallow-end core. The piping will be boxed in and will run to a blower in the small utility room. |
Misinformation about concrete abounds these days. And unfortunately, it seems that some gunite contractors are part of the problem rather than the solution when it comes to helping pool contractors understand the material. I’ve actually spoken with a gunite contractor who told me, point blank, that rebound was perfectly acceptable not only in steps and benches, but also in floors and walls. He also informed me that there is no need to wet gunite as it cures, no need to use steel in steps or benches and that the material doesn’t shrink or expand, steel or no steel.
I’m sorry, but that’s mind-boggling nonsense from someone who should know better. In this project, we’ve headed in the opposite direction and made certain everything is up to snuff by providing an engineered steel cage, reforming the benches around reinforcing steel and shooting everything to the highest standards.
After that, we’ll hydrate the pool and let it cure for 14 days before doing anything more – in this case, before lining the surface with all of the new tile and gorgeous materials that will follow.
Next, we’ll talk about waterproofing, resealing the cores and, finally, applying the tile.
David Tisherman is the principal in two design/construction firms: David Tisherman’s Visuals of Manhattan Beach, Calif., and Liquid Design of Cherry Hill, N.J. He can be reached at tisherman@verizon.net. He is also an instructor for Artistic Resources & Training (ART); for information on ART’s classes, visit www.theartofwater.com.