


Glass Tasks

A great many wonderful things can be said about all-tile pool finishes once they’re done, but you can’t lose sight of the fact that that such finishes require lots of planning, are difficult to apply and, as your clients will tell you, are far from inexpensive. And by “far from inexpensive,” I mean that the price tag will usually give pause even to people of great means.
This is all especially true with glass tile, which is applied using different (and generally more complicated) techniques than is ceramic tile and costs proportionately more. But that cost brings with it a great and stunning beauty that can be well worth it.
My project in the Los Feliz area of Los Angeles is a case in point. For all of the creativity and ingenuity that went into pulling off the technical aspects of this renovation project, it will ultimately be the beautiful, imported glass tile the clients selected that will lend the greatest degree of visual definition and distinction to the work. And even though these clients knew from the start that this was the look they wanted, the cost of doing it right warranted careful consideration and planning in every step of the design and construction processes.
STICKING POINTS
One of the big things with glass tile has to do with two schools of thought when it comes to the way the glass is bound into sheets that make up the mosaics. The first school endorses the use of a mesh background, while the second advocates use of what is known as the “blind-set” technique with paper-mounted tiles.
(There’s also a third possibility that won’t be discussed here: Some porcelain tiles – specifically those made by American Olean – come in squares held together with rubber dots between the tile pieces.)
I’ve worked with both systems with glass tile, and I’ve come through experience to prefer paper-covered, blind-set tile to mesh-mounted tile. Both systems certainly work, but because mounting tile to the substrate is a matter of adhesion, it seems to me that, with mesh-backed products, less of the surface of the back of the tile is available for adherence because the mesh, however fractionally, gets in the way. By contrast, with blind-set tile, the entire backside of the tile adheres to the substrate.
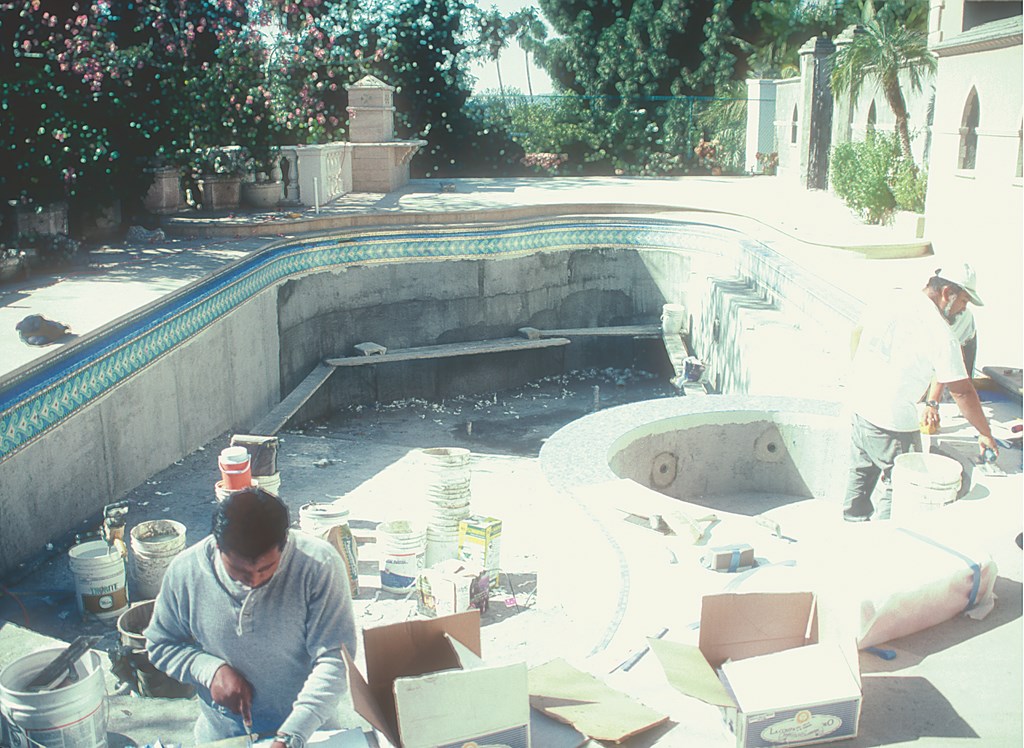
| The contours found in pools make application of all-tile finishes a challenge, basically because manufacturers prepare the material for easiest use on flat surfaces with squared corners. |
I’ve been in all sorts of discussions about this through the years, mainly with mesh-backed product suppliers who disagree with me, but I’ll stand by my preference on this issue. I’ll credit both sides, however, with making a big point that you need to use the manufacturer-recommended adhesive material, no matter the mounting method.
The challenge with blind-set tile is that applying it is far more time consuming than is applying mesh-backed tile. Of course, time is money, and there’s also the fact that installing blind-set tile requires special expertise on the part of the tile setter – yet another cost factor.
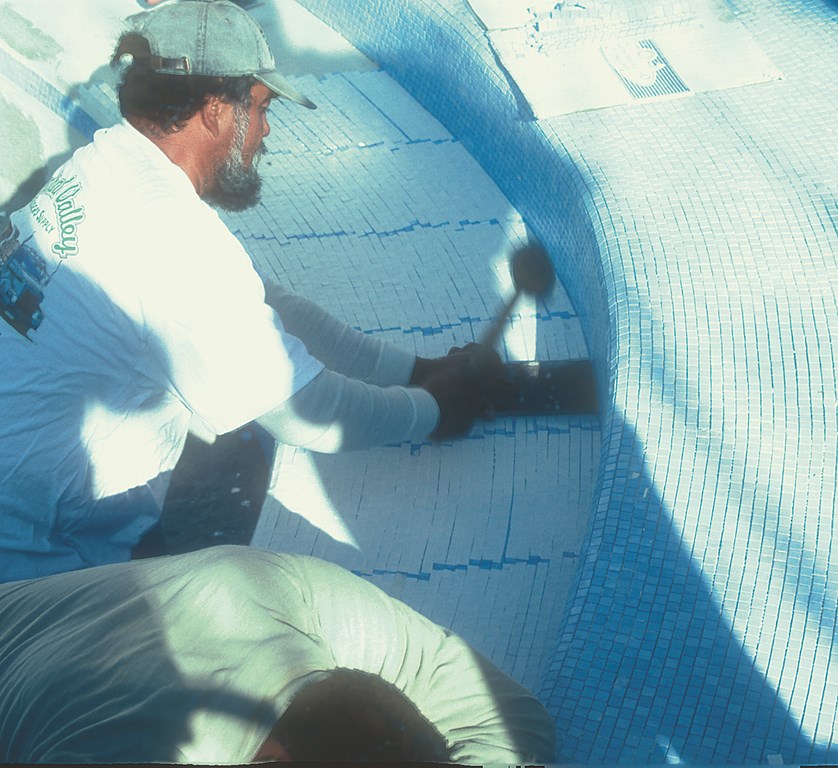
But the results can be well worth the price. The basic process involves mounting tile as sheets on an adhesive bed (using only a product, such as Laticrete, recommended by the tile supplier), then soaking the paper that’s attached to the front of the tile and removing it. At that point – and this is what I like most about this technique – each and every tile is adjusted and moved precisely into place by hand before the adhesive sets. (For a concise explanation of this process, see “Beads on Glass,” October 2003, page 56.)
This painstaking process of individual adjustment of the tiles can, in the right hands, produce incredibly beautiful results – and that’s just what we wanted to see in revitalizing this classic Los Angeles pool.
As design discussions moved forward, I recommended a blind-set product from my friend Scott Fleming and the folks at Oceanside Glasstile of Carlsbad, Calif., but the clients opted instead for an Italian glass tile. The samples we’d seen were blind-set, but when our order finally arrived – following a two-month wait that stalled the project – some of the tile was mesh-mounted and some of it blind-set. Fortunately, the difference didn’t give us problems beyond the fact that we had to work with two installation processes.
NO PIE SLICES
What makes glass tile such an expensive option for pools and spas has less to do with mounting techniques than it does with the fact that pools and spas tend to have lots of curvaceous surfaces.
In the vast majority of general construction projects, glass tile is installed on flat surfaces with squared corners. The fact that we work with rounded steps and benches and radiused dam walls means we’re installing tile pieces or sections with rectilinear shapes over curved areas. Under those circumstances, the simple fact is that it’s easier to work with offset or “jog-jointed” tile sheets, no matter whether they’re mesh-backed or blind-set.
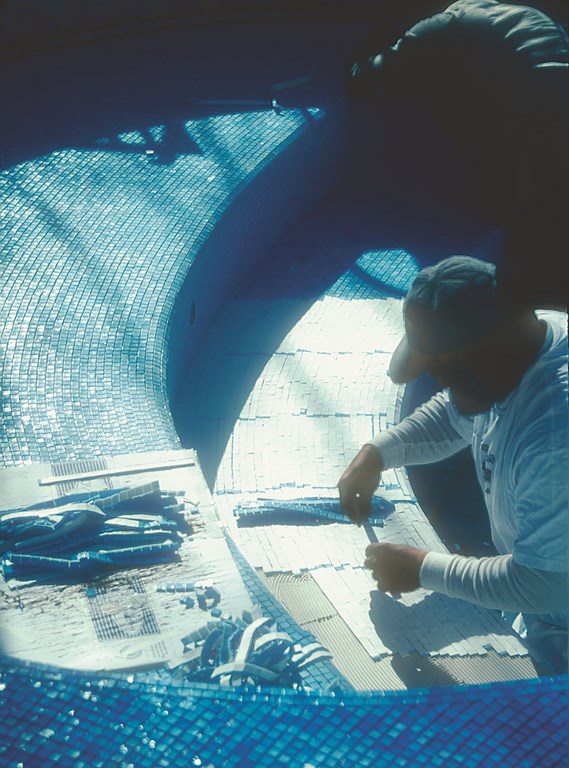
| The most visually satisfying approach to tiling curved steps involves a painstaking process of cutting the tile into strips, setting them into place and then, one by one, adjusting the tiles to maximize visual appeal and continuity. |
Glass-tile samples invariably come in stack-mounted configurations, meaning that all of the grout joints line up. If you tried to use such a sheet on a curved surface, such as a step, fanning the tile would mean ever widening grout lines that will form pie-shaped spaces between the tiles. By working with offset sheet configurations, tile setters are able to work around radiuses much more easily, with only slightly splayed grout joints that disappear without visually disrupting the tile pattern.
 The only other way to deal with radiuses would be to cut tiny, pie-shaped tiles – and the tile setter would be at it forever! Instead, by using jogged tile, the tile setter can cut the sheets or mesh and lay down single strips to allow for much greater refinement of the jogging pattern. This approach eliminates virtually all mistakes, and pie-shaped shaped grout joints become a non-factor.
(I’ve also seen those who use stacked tile sheets use tiles of smaller sizes to fill the widening grout gaps. To my eyes, this is a poor solution – and a dead giveaway that an awkward problem needed some sort of desperate solution.)
As I say, working in radiused spaces takes greater skill and more time on the part of the tile setter. It also means getting a tile supplier to send you tile in offset patterns, which usually means a special order – and more cost. All this is something that needs to be discussed with the client up front, because it adds a couple of dollars per square foot to the installed cost of the finish.
In my view, if I can’t get a client to see the distinction between the stacked and offset products and they insist on saving a bit by ordering stacked rather than offset sheets, I generally do all I can to walk away from the tile option. In fact, I begin to talk up other finishes because I know what they want won’t work. Tile costs too much and is too hard to install for me not to want it to look its very best.
In the project at hand, the homeowners took a good bit of convincing. Fortunately, they finally did come to appreciate the distinctions I was drawing between the two patterns, but I could see through their questions how difficult it was for them to see the big picture so early in the process.
RAMIFICATIONS
Of course, the selection of glass tile as a surface option has consequences that reach well beyond the way you order the product and set an installation price. In past columns, for example, I’ve discussed the importance of setting up perpendicular walls and floor joints for all-tile pools.
This is, obviously, easier to do if the vessel is new and you have control over the way it’s being built. In new construction, it’s all a matter of setting up the floor as a footing for the vertical walls – a more expensive way to go because it requires more steel, more concrete and greater skill on the part of subcontractors, but a good way to ensure a sharp, clean, elegant look for an all-tile pool. The squared corners create wonderful changes of plane that gives a beautiful “attitude” to the way the light plays on the surface of the tile.
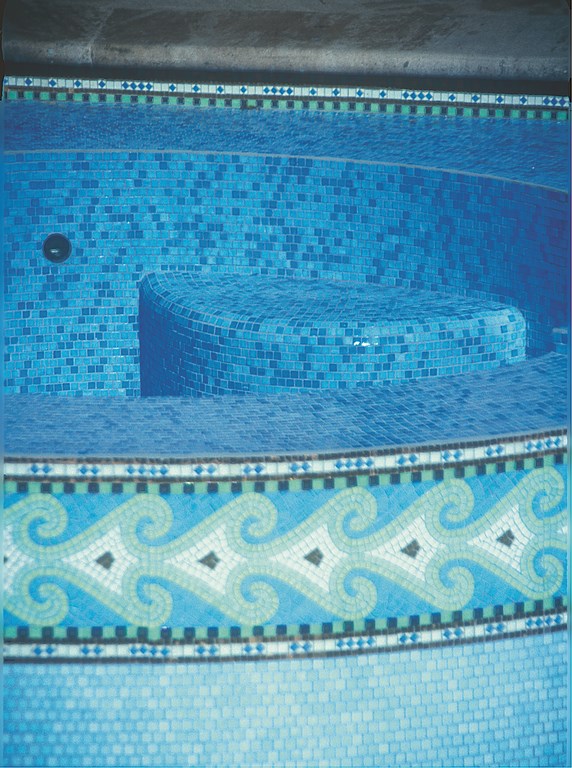
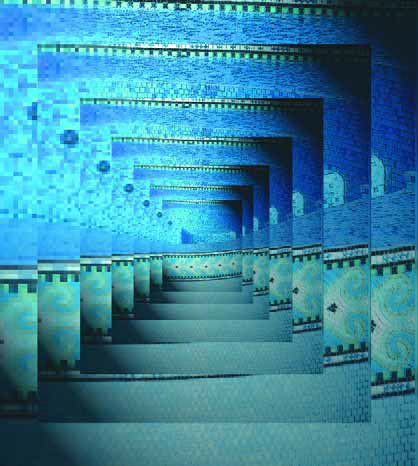
| The classic, graceful contours of the pool are accented beautifully by the waterline mosaic band and by the offset, “jog-jointed” mounting of the field tile. |
In fact, in pools where there are no radiuses and floors and walls are all squared, you can easily go with a stacked tile and achieve great aesthetics. In the case of the renovation project we’ve been discussing, however, there were just a few squared surfaces and we needed jogged joints to accommodate, for example, the circular spa we added to the structure and the sweeping radiuses of the steps, the spa seats and the dam wall.
Tile color was also an issue. In this case, the clients were working with a color specialist who had helped them with interior and exterior decorating choices. Wanting to make a “statement” with the pool (as opposed to seeing it blend in with the earth tones of the house and the splendid trees that flanked the deck, which also would have been nice), they settled on a beautiful and visually striking periwinkle as the field tile to surround a set of mosaic details.
The spa is a deep periwinkle, while the pool has a lighter shade of the same color. At the waterline is a twelve-inch-deep, multi-colored mosaic pattern based roughly on a classic fleur de lis. Above that in what had been the pools original scupper, we installed tile in a diamond pattern. (Rather than functioning as a component of the circulation system, the scupper is now a beautiful visual detail.)
Instead of using quarter rounds to cover the edges of the steps in the shallow end of the pool, we shaped the edges with a broader, European-style bullnose over which we were able to install three tiles that follow the radius, further enhancing the visual unity of all the tile. This was possible because in this case we were working with very small tiles – a little more than half an inch square rather than full inches.
All of this had to be considered and laid out before we even began construction of the pool, which put a premium on communication with client about these issues from the very first stages of the process. As I mentioned at the outset, good outcomes with all-tile finishes take planning and care from Day One.
David Tisherman is the principal in two design/construction firms: David Tisherman’s Visuals of Manhattan Beach, Calif., and Liquid Design of Cherry Hill, N.J. He can be reached at tisherman@verizon.net. He is also an instructor for Artistic Resources & Training (ART); for information on ART’s classes, visit www.theartofwater.com.