


Core Conditions

If the art of watershaping is ultimately about visuals, then creating a situation for yourself in which you’re virtually guaranteed to create visual disruptions is something you certainly do not want to do.
That’s the situation I currently face in the renovation of a pool at a stunning, 1920s-vintage home in the heart of Los Angeles. As I indicated in my last column, it’s a remarkably beautiful setting that features a 70-year-old pool that was well designed, expertly installed, well worth keeping – and surrounded by a gorgeous, imported-limestone deck.
Trouble is, when you slice up a finely placed stone deck for the sake of renovating the swimming pool within it (or any other architectural element, for that matter), you can never, ever return that deck to its pristine condition. Even if you exercise extreme care in cutting and lifting it, when it goes back down there are going to be all sorts of subtle differences – in grout, in the matching of grain patterns, in color and patina, in minute differences in level and more.
And the stakes here are high: The house was designed by the famous architect William Dodd, and Lloyd Wright (Frank Lloyd Wright’s son) worked with Dodd on the project and gardens. It’s a joy to spend time in an environment that has seen meticulous care for so long and a delight to work with clients who are so well informed and knowledgeable – and it was immediately apparent that messing up the deck was no option at all.
BASIC DECISIONS
As suggested last time, the presence of the deck led us to develop an overall game plan that will have us renovate the pool from the inside out. We’re now moving along in that process, and we’ve already run into some surprises.
The first had nothing to do with the pool itself, but rather with a substantial adjustment the owners wanted to make to the size of the spa we’d designed and had already framed within one of the soft, offset radiuses in the pool’s shallow end.
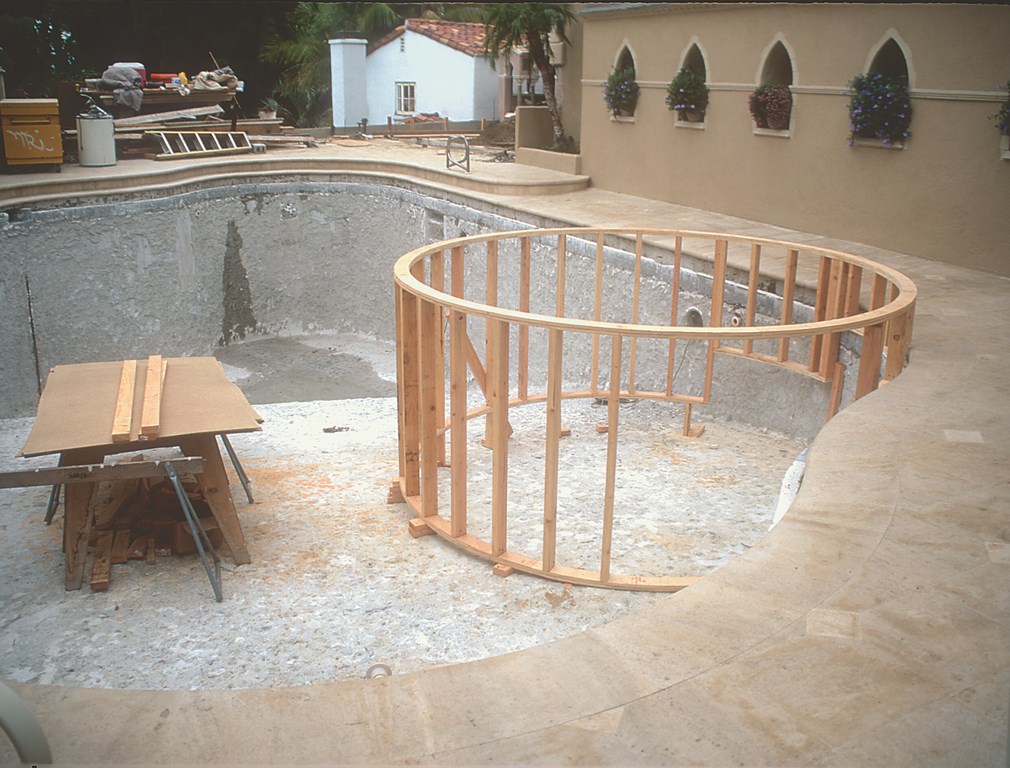
| Once my clients saw the initial framework for their spa, they decided it was too large, reconsidered what they were after and asked me to set up a smaller vessel. |
The original idea had been to add a large spa with an inside diameter of eight feet and an outside diameter of ten feet. Even though we had discussed the spa’s size many times in great detail, had laid it all out in the pool using tape and discussed it once again just before we began construction of the forms, once the forms were complete I received a call saying, “It looks too big.”
So we reopened the discussion and broke it down to considering who was really going to be using the spa. Originally, they’d kept coming back to the idea of their kids and their kids’ friends and thinking that a big spa that could hold eight or nine people made the most sense.
As we tossed things back and forth once again, they came to realize that, in fact, they only occasionally had many people over and that most of their entertaining involved groups of four to six people. Breaking it down further, they began to see that the spa would most consistently be used by just two people at a time – the homeowners themselves or their kids.
So we reduced the circular spa, which now will measure eight feet on the outside and six feet on the inside. It’s still in the same location and still has the same perfectly circular shape, but it’s smaller. We did have to rip out the forms and start over, and while it was inconvenient and costly to tear down the solid two-by-four forms I use, we’re all happy the decision was made when it was rather than later on in the process.
Ultimately, the advantage of working with such involved customers is that they are doing everything they can to think about what they’re doing and getting exactly what they want. As it turned out in this situation, it wasn’t until they could actually “see” the spa in context that they understood how they felt about it.
BUILT TO LAST
I’m certain there will be other adjustments as we go along, and what’s happened so far with just the spa confirms my observation that, to a large extent, high-end renovation work is a matter of expecting the unexpected. That was certainly the case with the swimming pool as well.
Work on the pool began, as do many rehabilitation projects, with stripping the plaster. The walls had been finished with two coats of plaster at different times, and both had obviously been applied by plasterers who knew what they were doing. The surface was rock hard, and stripping it took a lot of time.
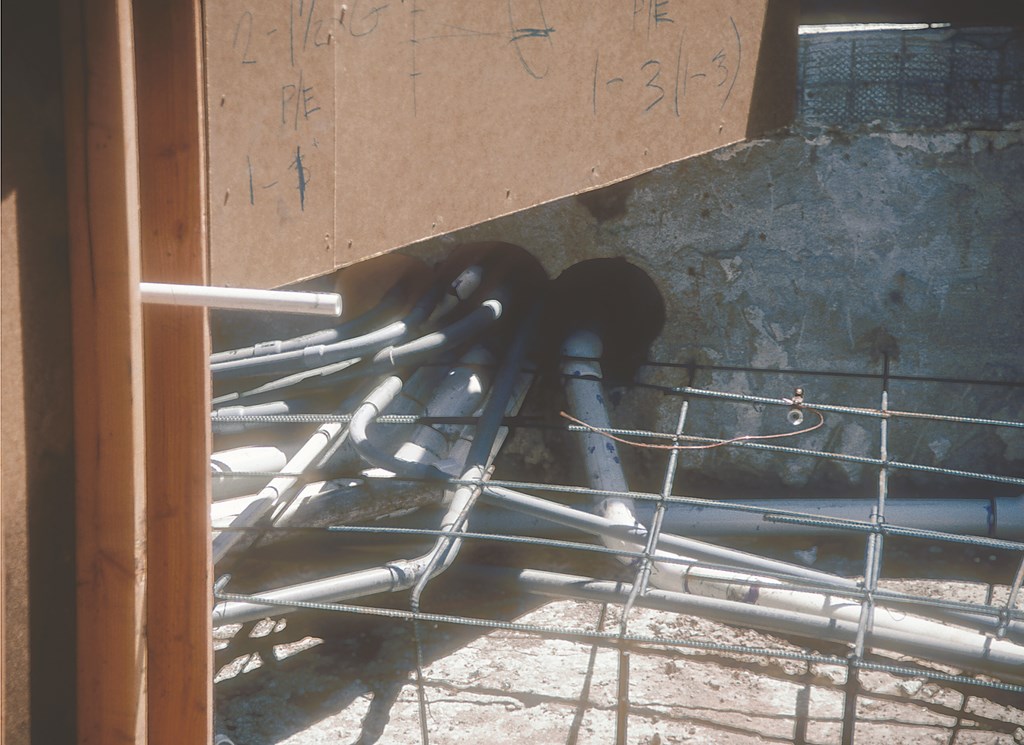
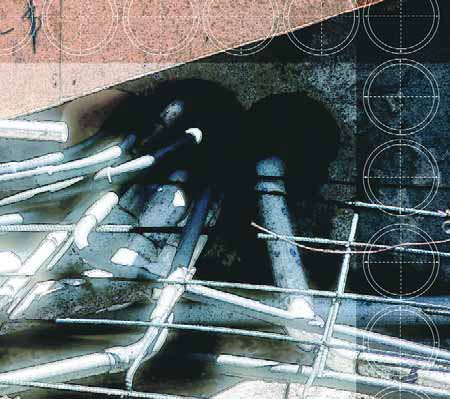
| The cores were cut all around the pool to allow for complete replumbing and rewiring – 15 holes in all, each through 16 inches of old, superhard concrete. |
With the plaster apparently in such great shape, could we have taken the easy way out and not bothered stripping it back to concrete? Maybe so, but there’s no assurance that everything beneath a pristine surface is completely up to snuff, and it’s never been my way to take chances with such things.
In this case, we’ll be installing a beautiful, custom glass tile mosaic as the finish, and I can’t see compromising a work of art by placing it over a questionable substrate. So we took off all the plaster we could, cleared away the tile, scored the surface to ensure a good mechanical bond with the new finish and then properly and completely cleaned the stripped shell.
While all of this was going on, I spent my time figuring out how to replumb the pool, set up the spa system and place the equipment.
Given the need to work everything from inside the pool – new lights, new controls, new suctions and returns and everything associated with making the system work – we faced no small challenge. I’ll get into detail on the approach we settled on next time, but to preview, we’ll be setting up three sub-grade equipment vaults adjacent to the pool, use a new bench that will run the length of the pool to carry some of the key lines and take advantage of the fact that we’ll be raising the floor of the ultra-deep pool by a foot to accommodate some new plumbing runs.
Before we get there, however, let’s discuss core drilling, the process of cutting holes in the shell in several key locations – and what we found when the dust settled.
PUNCHING THROUGH
Core drilling is one of those things where, no matter how well you plan, there’s really no telling what you’ll find. We didn’t know if we were going to get through the wall and hit old plumbing, electrical lines, sub-grade rocks or foundations of some kind. We didn’t really even know the thickness of the pool’s walls.
In all, we needed to drill 15 eight-inch-diameter cores to accommodate all of the anticipated plumbing runs. Steve Skaggs of Skaggs Concrete Coring in Santa Clarita, Calif., did the heavy lifting here. I’ve worked with Steve and his dad, Phil, from the very beginning of my career as a watershaper, and they’re the only people I’ll use for concrete cutting in southern California. Not only do they do incredible work, but they’re more than willing to jump into the unknown.
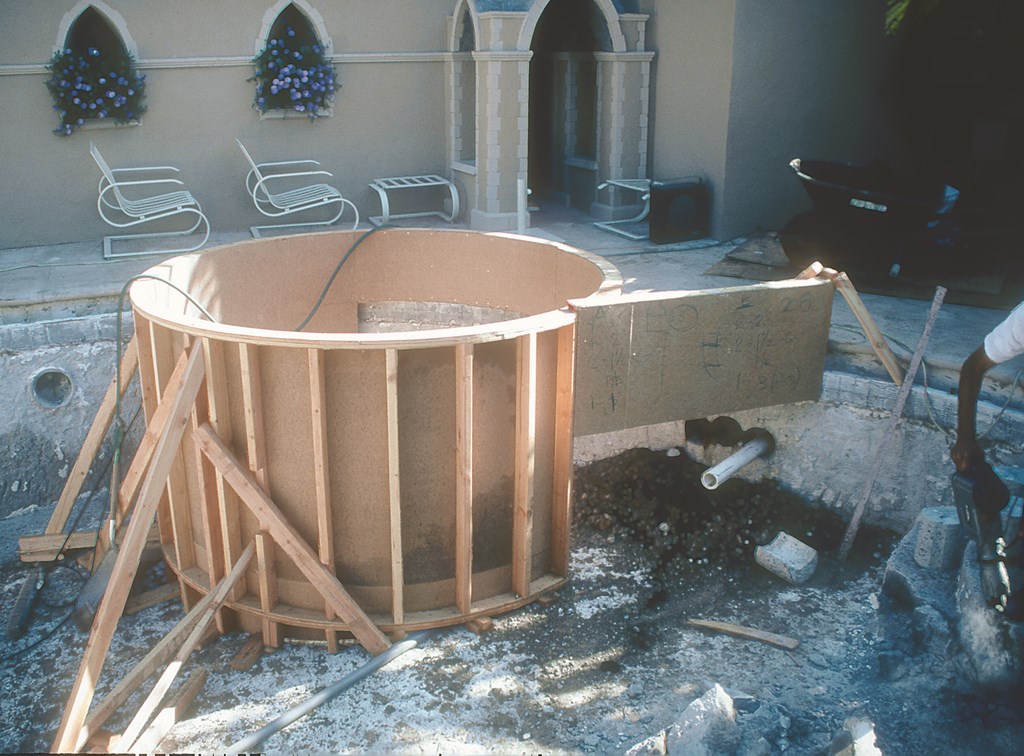
| We shaped the smaller spa, then used the cores to set up all of the new plumbing runs and electrical lines without even touching the limestone decking. |
We laid out the cores’ positions and Steve went to work. We were lucky in one sense: We cut through the walls without running into anything unexpected. But getting to that point was another matter altogether: The walls turned out to be a full 16 inches thick. To be sure, 16 inches of today’s gunite would be challenging enough, but this was 16 inches of poured-in-place concrete that had been getting harder and harder since 1931.
Let’s just say the cores didn’t pop the way most do: It took hours per core – three days in all to cut the 15 holes.
When he examined the shell, Steve guessed that it started out at about 5,000 psi and was now much harder than that. The material featured extremely large aggregate and was extraordinarily hard and heavy, but to our amazement, we didn’t run into one single piece of reinforcing steel. That is extraordinary when you consider that the pool has been there, intact, on a sloped property in seismically active southern California – without apparent cracking or movement of any kind!
It would be fascinating to talk to the people who built this structure in the first place. I’d be curious to know if they had any idea that their pool would be in place more than seven decades hence and that it would still be in such incredible shape after big earthquakes in 1932, 1971, 1988 and 1994. As it is, we only have these big, nasty cores and this indomitable vessel as evidence of the way these pioneering watershapers applied their skills.
The only thing that we can know for sure is that they certainly worked with a very different mindset than we see in today’s world of minimum-standard construction – but that’s another story.
Jumping back to the here and now: With the work done on the cores, I met on site with my ace plumber, Johnny Rodriguez, my top-notch electrician, Chuck Succa, and the best steel man I know, Jim Pope, to plan the runs in and out of the pool and to various remote locations – all of which we’ll visit next time.
David Tisherman is the principal in two design/construction firms: David Tisherman’s Visuals of Manhattan Beach, Calif., and Liquid Design of Cherry Hill, N.J. He can be reached at tisherman@verizon.net. He is also an instructor for Artistic Resources & Training (ART); for information on ART’s classes, visit www.theartofwater.com.