


Achieving Realism: Finishing Techniques for Cast-Concrete Rocks
It’s true that some artificial rock installations are not convincing. In an effort to solve those disconnects, today’s cast-concrete rock panel systems are taken from natural stone. When installed and finished correctly, rock panels can look like the real thing.
By Zayvian Camacho
One of the ways to enhance a backyard pool environment is to use cast-concrete, artificial rock as part of watershape design, or in the landscape.
Growing numbers of watershapers and their clients are choosing the cast-concrete rock option not only due to the realistic appearance, but also because the material holds up extremely well to the freeze-thaw temperatures in regions such as the northern US and Canada. And, on balance, the artificial rocks are less expensive than buying, transporting and placing real rocks.
In order to ensure cast-concrete rocks truly look real, you need to follow a set of important finishing steps. The idea is to stain and mortar the rocks to support the illusion that they are natural stone.
It’s detailed work and there are several tips and tricks used in staining and shading to ensure that you provide your clients with the most attractive rock water feature possible.
STAINING AND SHADING
When staining and shading cast-concrete rocks, it’s important to be sure they visually blend with the pool’s surrounding decks and other hardscape structures. This is one of the most common mistakes watershapers make when deploying artificial rock; they don’t harmonize with the surrounding hardscape, or landscape.
Builders can use various concrete stains as a cost-effective method to create beautiful decks surrounding the pool, that will provide a smooth visual transition between the rocks and overtly manmade structures. Staining concrete is a true art form, but experienced builders agree that staining a cast-concrete structure can be easier than getting natural stones to match and look good together; and, it’s more cost effective.
Cast-concrete rock manufacturers provide kits to dye the concrete stone to mimic the surrounding natural hardscaping and deck treatments. Remember to select a blend of acrylic stains specially formulated to bond to cast-concrete rocks.
There are stains and paints in the marketplace that are formulated to bond to porous surfaces and do not bond to a high-tech, virtually waterproof product like the FRC (fiber reinforced concrete) that is manufactured for pool environments.
Natural stones absorb stains differently than artificial rock. In fact, cast-concrete rock absorbs even less than shotcrete types of rock. As a result, many pool builders find staining and shading of custom work ideal to ensure the colors blend within the pool’s surroundings.
GETTING STARTED
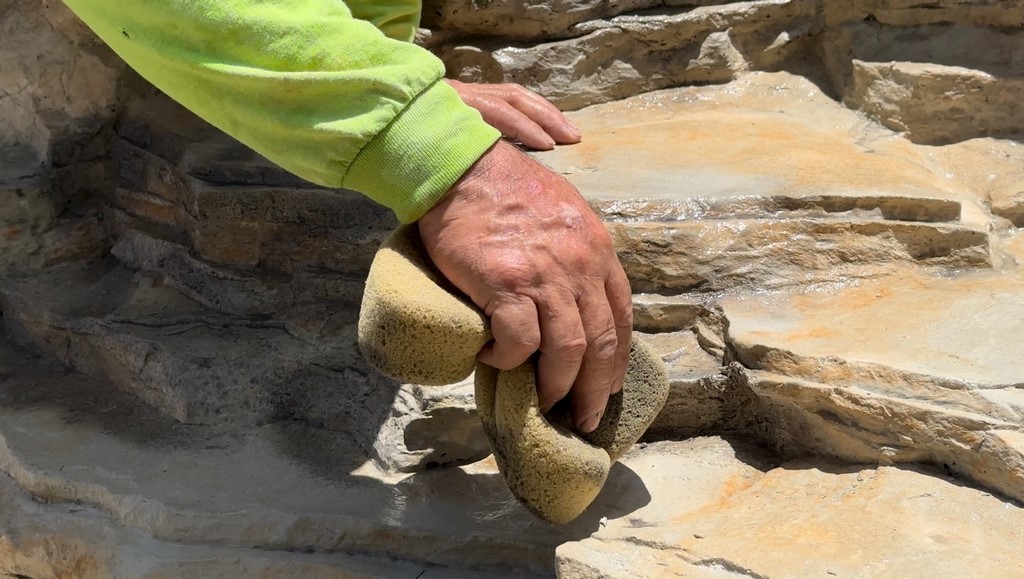
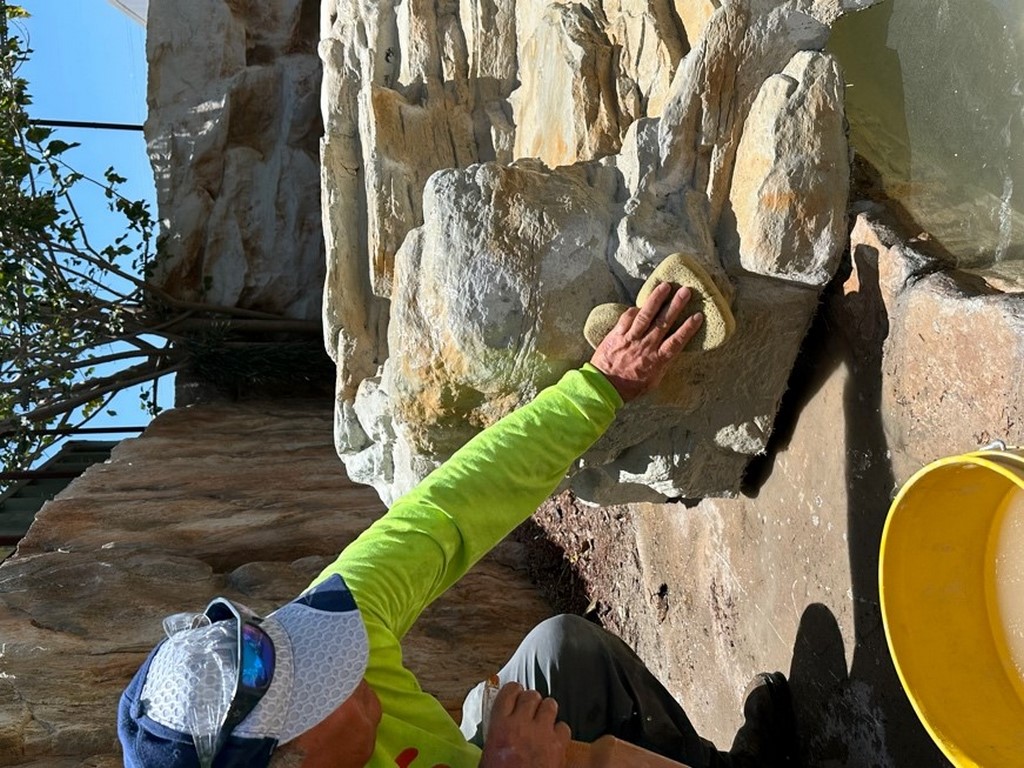
In terms of tools, having a bucket, hand-sprayer, water hose and a sponge are typically all you will need.

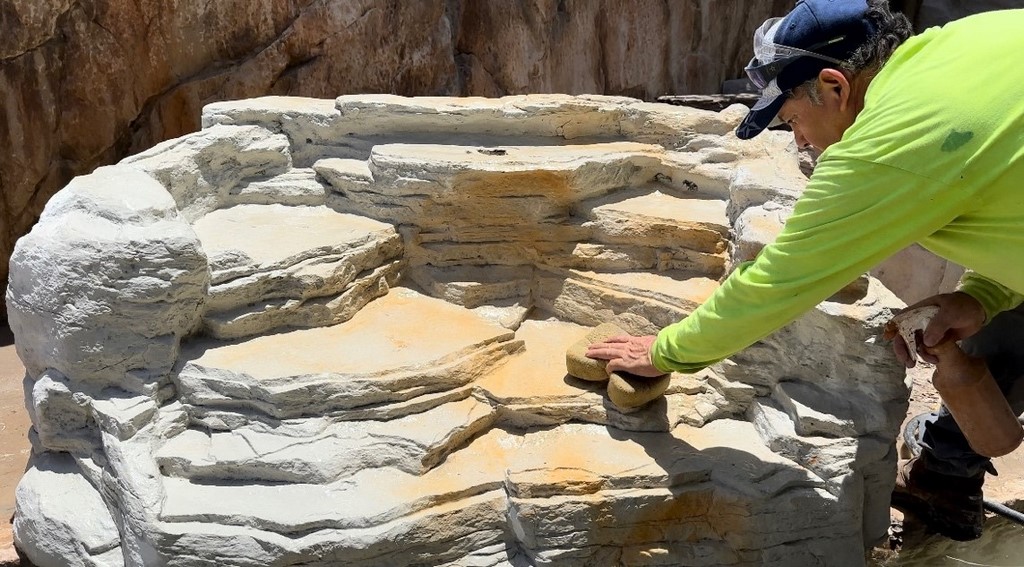
As a general rule, we recommend installers begin the staining process at the back of the rock structure and work toward the front. It takes a good eye and some patience to get the cast-concrete to look like real stone. Testing small sections at the back of the feature is a typical approach as hardscape designers master the art of staining concrete.
Staining requires multiple layers to achieve a truly realistic and natural look. Building these layers of stain happens both before and after the placement of each panel. The initial staining happens before placement and the final staining happens after the water feature is complete for custom artificial rock water features.
With custom staining, which is what we’re talking about here, builders should plan to spend time standing back and looking at the cast-concrete in relation to the deck and any real stones that might be integrated into the greater landscape. It’s an entirely visual process and builders should plan for adjustment and modifications, as there is a bit of artistry involved.
Many manufacturers can also pre-stain the artificial rock at the factory. The builder need only touch up the color on mortar joints or smaller patches as needed.
In all cases, it’s important to ensure the feature’s rock color complements and matches the deck finish. Most experienced builders agree that choosing a standard stain color, rather than custom creating a stain color, will make it easier to do touch-ups in the future if needed. Fortunately, the variety of standard colors available will often suffice.
ON THE SURFACE
There are some several specific, best practice steps to take when staining cast-concrete water features for pools to help ensure the best, realistic-looking artificial rock:
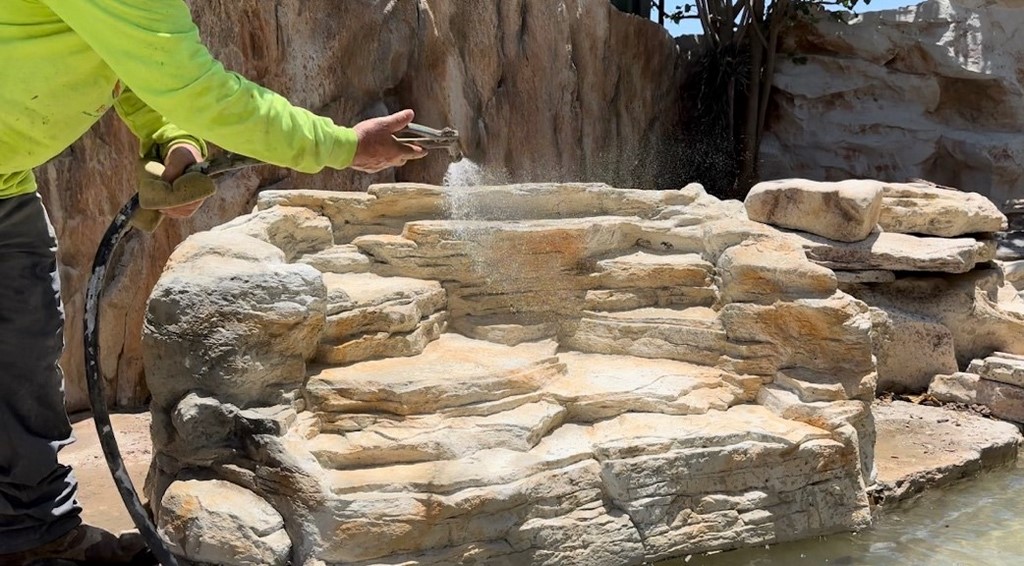
- Washing: Start the color-staining process by first washing off the rocks. Be sure to remove anything from the surface that might interfere with the color bonding. Power washing is recommended.
- Moistening: It’s important that the acrylic stain be applied to a moist surface. It’s helpful to use very large sponges to moisten the cast-concrete rocks for the stains to apply properly. Make sure the rock is not too wet or too dry before adding the acrylic stain. If the rocks are too dry, the color will quickly absorb into the concrete causing a very dark, deep color.
- Applying the stain to a damp surface, rather than a wet surface, allows the stain to blend with soft tones as well as hiding “overspray” errors. The intensity of the stain color is changed by applying the stain to either a wet, damp or dry surface. After wetting allow to dry for a few minutes — adjusting for the outside temperature. Very hot and dry conditions may require frequent re-wetting. The moisture level of the rocks should be damp, not too wet and not too dry. The mist from a water hose tends to be ideal for moistening the rocks.
- Application techniques: Remember to always apply the accent color first. Examples of accent colors include rust, reddish brown, and golden amber. These colors create a realistic base tone to the rocks. It’s very important to apply the color in a random fashion and avoid using the spray bottle to overspray in an area, as that spot could become overly saturated or could drip.
- Additionally, avoid spraying in random locations as it could start to look like a bunch of dots that can make the artificial rock look very fake. If the accent colors are concentrated too heavily in one area, the color will start to look unnatural.
- Once you apply the accent color to the damp surface, use a damp clean sponge to either lighten heavily stained areas or sponge to blend-in the color to create the desired color that matches the surrounds. Sponging excess color also creates variations in color tone.
- Experienced artificial rock builders understand that layering the stain colors — adding color a small amount at a time — is much easier than trying to lighten a color once it has been applied. Many acrylic stains appear brighter after they dry, so applying the stains slowly and carefully in light layers, will make the job easier.
Tip: Shake the stain bottle frequently to keep the stain fully blended during application.
- Adding color: Once the rock has dried, the stain colors may appear to be lighter than when the surface was wet. As a result, this is a good time to add more color. Layering is a considered a best practice when staining cast-concrete rock. It’s much easier to add color than attempting to lighten applied color.
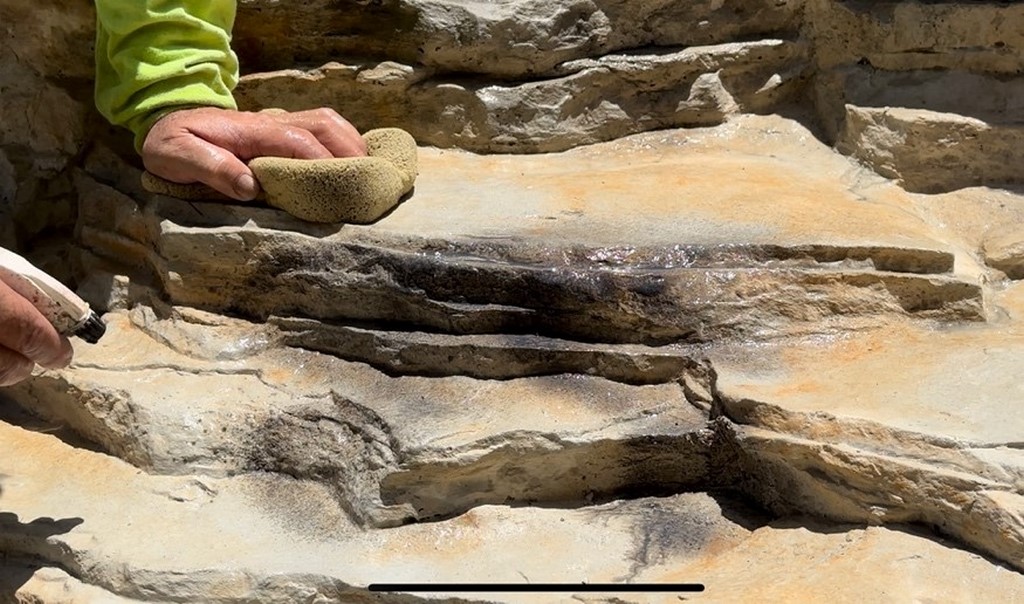
Many builders find that once they have achieved their desired color, the addition of the well-known and proprietary antique finish is an excellent finish that gives rocks a weathered, natural look that will make the rock visually “pop” more. This antique finish highlights the natural cracks and crevasses or areas of heavy texture in cast-concrete rocks. It’s a coffee-like color that ages the concrete artificially so it doesn’t appear to be concrete/ artificial rock.
Tip: Once the rocks are damp, apply base color, sponge away any excess amount of stain, dampen the rock again, add the antique finish and repeat, using the sponge. In order to get nice, deep dark cracks, you want to concentrate the antique in the cracks and sponge away everything else around it, and definitely remove any dripping, which will visually mar the finish.
- Because this color is a darker grey color, it is very important to have a clean damp sponge on hand in order to be able to sponge-off any excess antique color from the rock or it might compromise the accent color. Be cautious when applying the ‘antique’ finish to avoid compromising the accent color. Be sure that the accent color is dry to avoid having the ‘antique’ finish mix with accent color and inadvertently creating a third color.
Tip: The initial application should be finished and allowed to dry for one day before applying heavier layers.
- Accent stain colors provide visual interest to the rocks in the water feature. Although natural stones can have intense color variations, pool builders find that it is best for artificial rock used around pools to have less variations throughout the water feature as clients will find the finished product more appealing. Too much stain concentration can lead the eye to notice the intensity and could potentially create an ‘eye-sore’ for the client.
- If builders find themselves needing to lighten a heavily stained area, or blend the color to better match the surrounding deck color, we recommend turning to using a white-wash technique. It’s a terrific way to soften the color of the rock by simply re-wetting the rock and applying a few drops of a much lighter color that can be blended to lighten the overall color of the artificial rock.
Tip: Always keep a bucket of clean water and a clean sponge handy to wash away excess finish or color. As is true of any painting process, drop cloths can be helpful to avoid accidental dripping on pool decks etc.
TAKES PRACTICE
There is no short cut to experience, but if you take your time, and follow these important steps and tips, you’ll find the learning curve is not too steep or treacherous.
For the most part, creating attractive water features using cast-concrete artificial rock panels is not difficult. By using stains designed specifically for cast-concrete and using the techniques mentioned above, getting a handle on the process isn’t as daunting as it might seem.
It’s important to know the process takes time and does require some patience and a little artistry. Builders will need to stand back and use their eyes to be sure the colors blend with each other and with the pool and backyard landscape.
Remember, as mentioned above, there are also options to use pre-colored artificial rocks to make the process less intimidating! Many builders are going the route of using pre-stained water feature kits to avoid the extra time and patience needed for custom staining artificial rock—this is a terrific option for busy pool professionals.
Zayvian Camacho is part of the design and fabrication team at Rico Rock, developing new climbing wall, water features, and working on commercial aquatic and non-aquatic construction projects. Camacho studied landscape design and has overseen construction for dozens of unique cast-concrete artificial rock projects in backyards, hotel resorts, bowling alleys, zoos, and more. Camacho finds his rock construction work meshes perfectly with his passion for rock climbing. He can be reached at zayvian@ricorock.com.