


A Basement’s Bounty

In our usual run of business as installers of stone and tile in and around New York City, we can get involved in projects that take years to complete and involve us in applying tens of thousands of square feet of material within or onto a single high-rise building. In some of these projects, a pool or spa comes as part of the package, but they tend to be such small parts of the overall picture that it’s fairly tough to focus on them.
This was not the case, however, in our work on the renovation of the swimming pool and spa in the historic Woolworth Building in lower Manhattan. When it opened in 1913, this was the tallest skyscraper on the city’s skyline and held that distinction for 17 years. For a time, it was the second tallest structure in the world, surpassed only by the Eiffel Tower in Paris.
As the building’s hundredth anniversary came near, the top 30 of its 60 stories were sold in 2012 to an investment group that set its sights on renovating the aging tower’s units as ultra-high-end condominiums. Also included in the transaction were some basement facilities, among them an old swimming pool long associated with fitness pioneer Jack LaLanne: The vessel had been part of one of his nationwide collection of health clubs, and it’s been reported that he was a frequent lap swimmer here.
But after 100 years, the basement facility was in sad shape and definitely needed attention to make it a worthy calling card for the upscale residents the developers would be pursuing. We at Countrywide Stone & Marble (Brooklyn, N.Y.) had been brought into the overall project by CNY Group (New York), which served as the project’s general contractor. As part of our much grander scope of work, CNY asked us to get involved with the old pool and spa.
We figured the watershapes would be a nice, quick change of pace – but that impression changed in a hurry once our work began nearly 40 feet below street level.
TESTS OF TIME
First, a bit more background. As mentioned above, the Woolworth Building was once the pride of New York. Designed by architect Cass Gilbert, it was commissioned in 1910 by retailer Frank Woolworth, who’d parlayed his chain of five-and-ten-cent stores into a vast empire and an even greater fortune.
The building consists of a broad 30-story base topped by a narrower 30-story tower. From top to bottom, it was set up as a showcase for sculptures, mosaics and fine architectural details and finishes. Originally, all 60 floors were leased to commercial tenants (among them Woolworth’s own company). By 1998, however, the various Woolworth enterprises had ceased operations and the building was sold to an investment team that eventually transferred the top 30 floors to the developer who came up with the idea of repurposing the former office space as multi-million-dollar residences.
All of this transpired in a structure that had become a National Historic Landmark in 1966, which meant that everything happening within the Woolworth Building needed to pass through reviews to make certain the structure’s essential features and character would always be preserved.


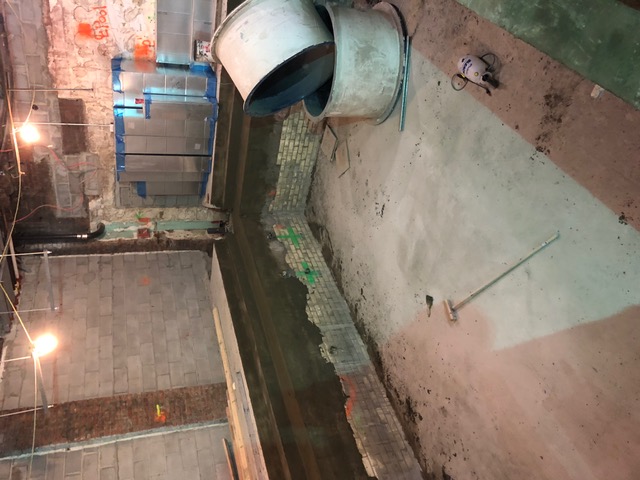
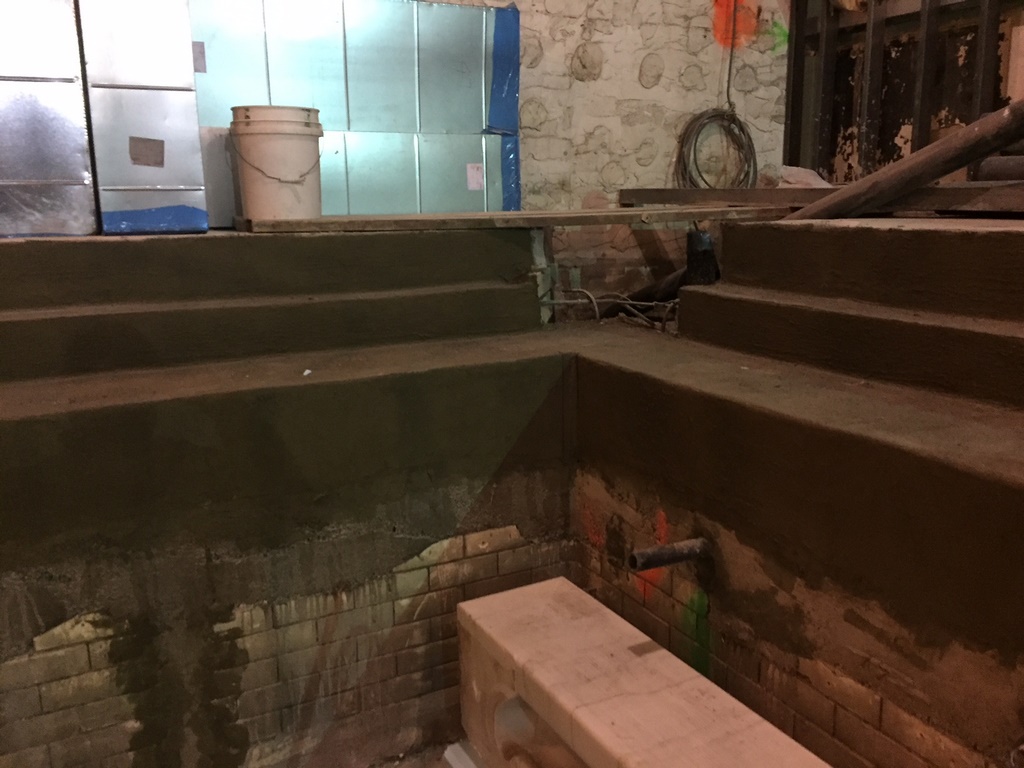
| To correct all of the basement pool’s plumbing issues, the top level of the shell had to be removed to allow for placement of new pipes and fittings. This left us to apply fresh concrete to the top of the walls and reproduce the shelves that supported the huge, heavy sections of the coping/gutter system that had been removed and set aside at the start of the demolition process. |
As we learned at first hand, the building has been through several remodelings and renovations through the years. I won’t get into anything that happened on the upper floors, however, because there was more than enough history for us to deal with in the basement.
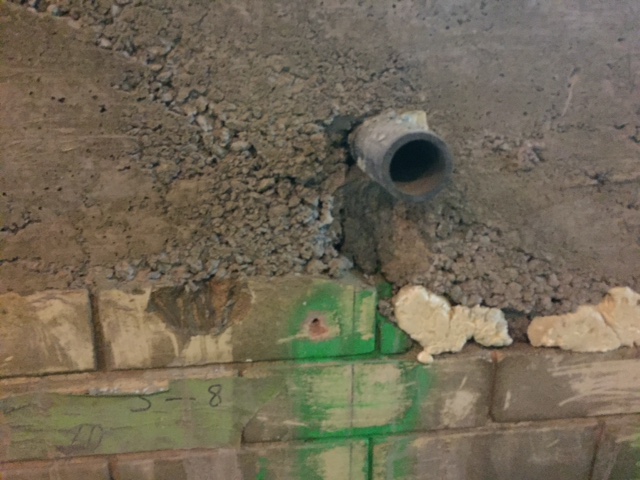
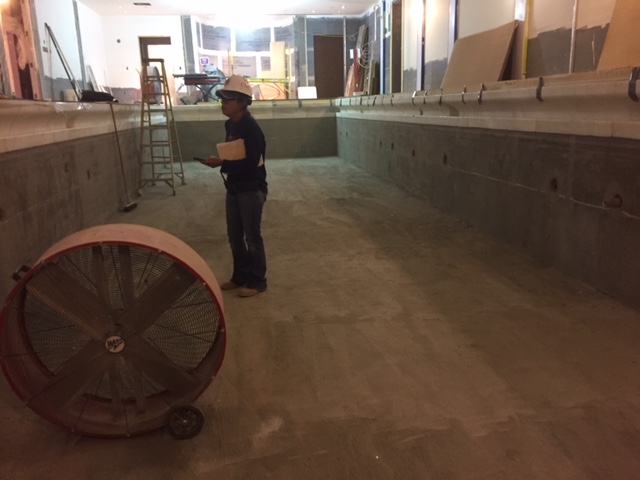
The original pool had been fashioned from pale, ceramic-edged bricks topped by an elaborate marble gutter/coping system that ran around the pool’s full perimeter. All of the old plumbing was shot and needed to be replaced, so after the marble had been marked, cataloged and removed for storage or repair, the top 18 inches or so of the brick wall were broken out and, once new pipes and steel had been placed, rebuilt with new concrete.
In addition, the original floor had a perfectly flat four-foot depth. The redesign called for inclusion of a gentle slope because, unlike most pools, the main drain in this watershape was actually intended to function like one. The new slope was intended to create a gravity flow to waste that would considerably ease pool maintenance.
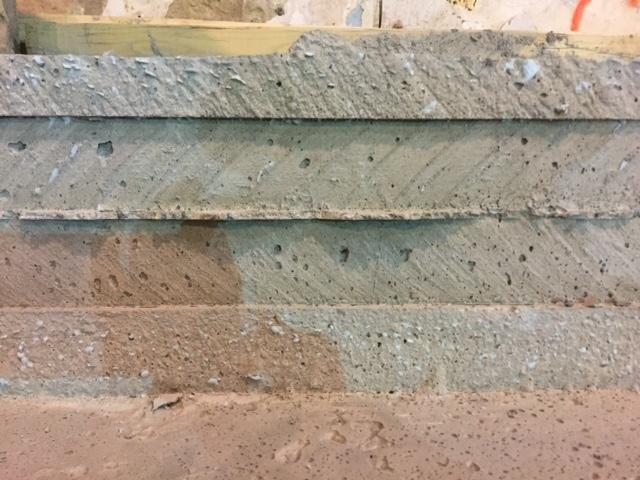
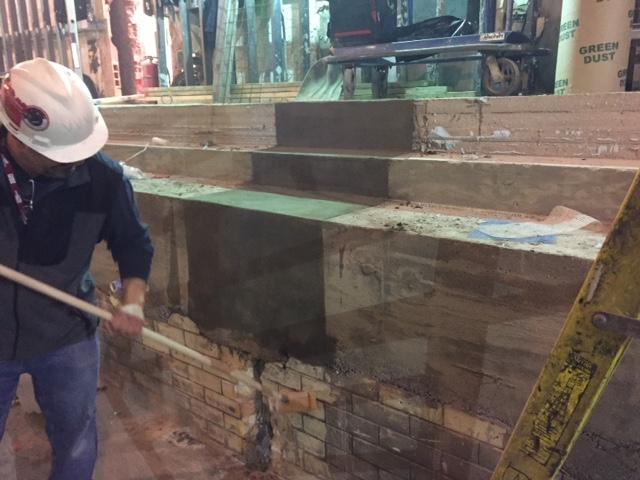
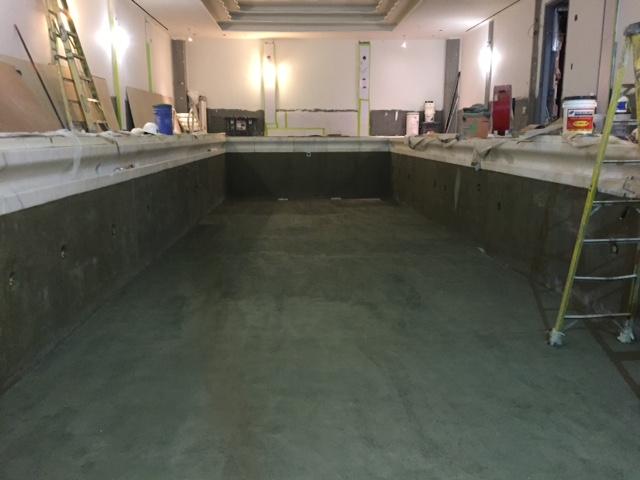
| The newly applied concrete wall sections had a vertical profile that was even more irregular than the original ceramic-coated bricks that had lined the old pool. We spent a good amount of time hunting for ways to waterproof and square these surfaces before finally settling on the material that accomplished both of these tasks – a performance we proved with thorough testing. |
With the walls stripped and the floor’s slope addressed, we immediately had to confront an issue or two. First, the modified walls were nowhere close to being plumb and square, which would be essential in making ready for the application of a beautiful glass-tile finish.
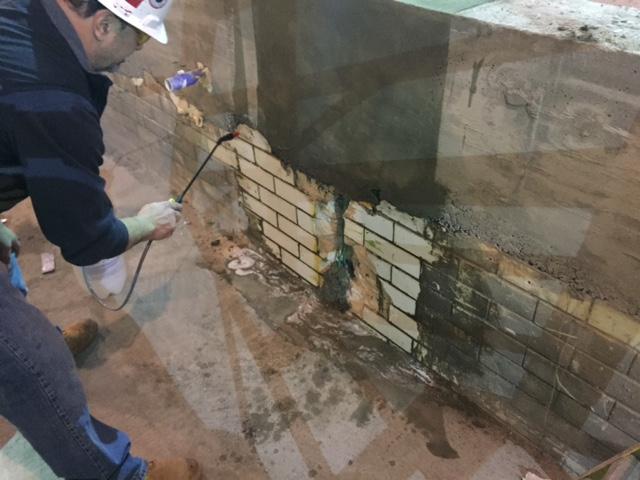
Second and more significant, the materials we’ve historically applied to waterproof our pool walls for tile application weren’t appropriate in this case: The bricks were large – basically 12-inch squares three inches thick – and their exposed faces had been coated with a slick material that was clearly intended as the original waterproofing medium. Unfortunately, the slick surface wouldn’t allow our usual waterproofing solutions to bond effectively, so we began considering our options.
A NEW PATH
One thought we had was to chip away the ceramic layer, but we knew that would be futile because the raw brick we’d be exposing would have offered no better bonding surface than the slick ceramic. We set that idea aside and briefly considered breaking out the old shell entirely and starting over, but that wasn’t feasible because of how directly the pool structure was tied into the building’s foundation.
After some head-scratching followed by extensive research, we contacted Basecrete USA (Sarasota, Fla.) to ask about a product we thought we could safely apply over all of the exposed surfaces inside the shell – and at all of the required thicknesses – without having to worry about adhesion to the different substrates that existed within the shell.
After a detailed presentation by Basecrete’s local representative, Paul Perrina, we knew we were on the right track and had found a material that could do the job. Now we had to figure out how to apply it!
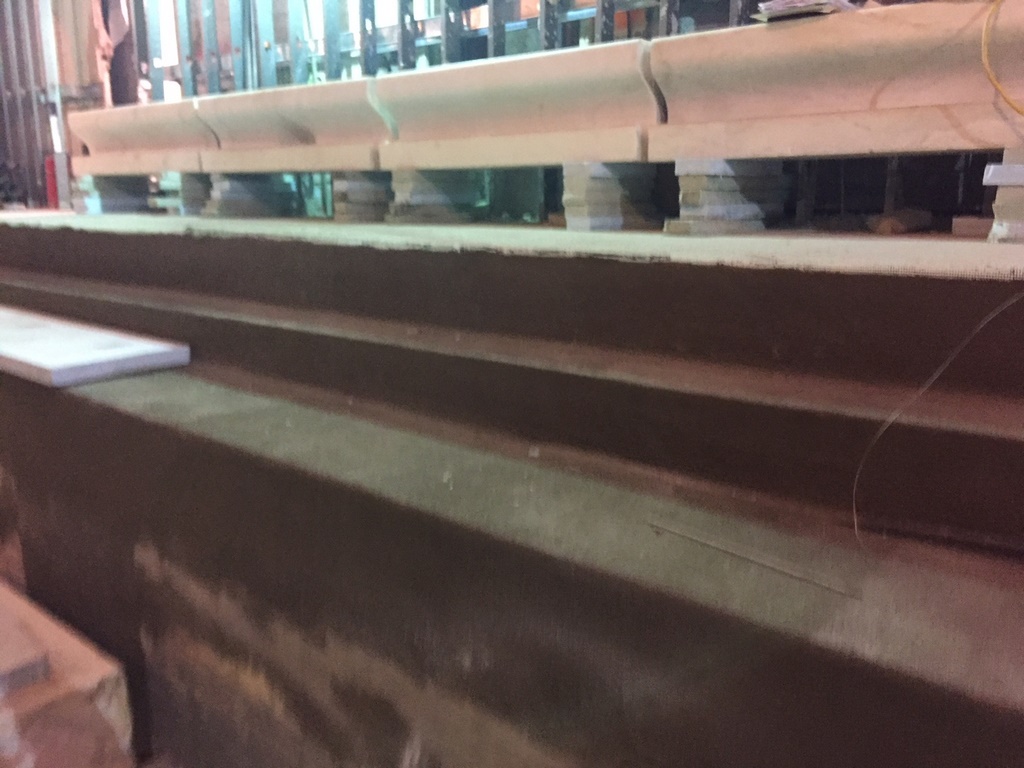
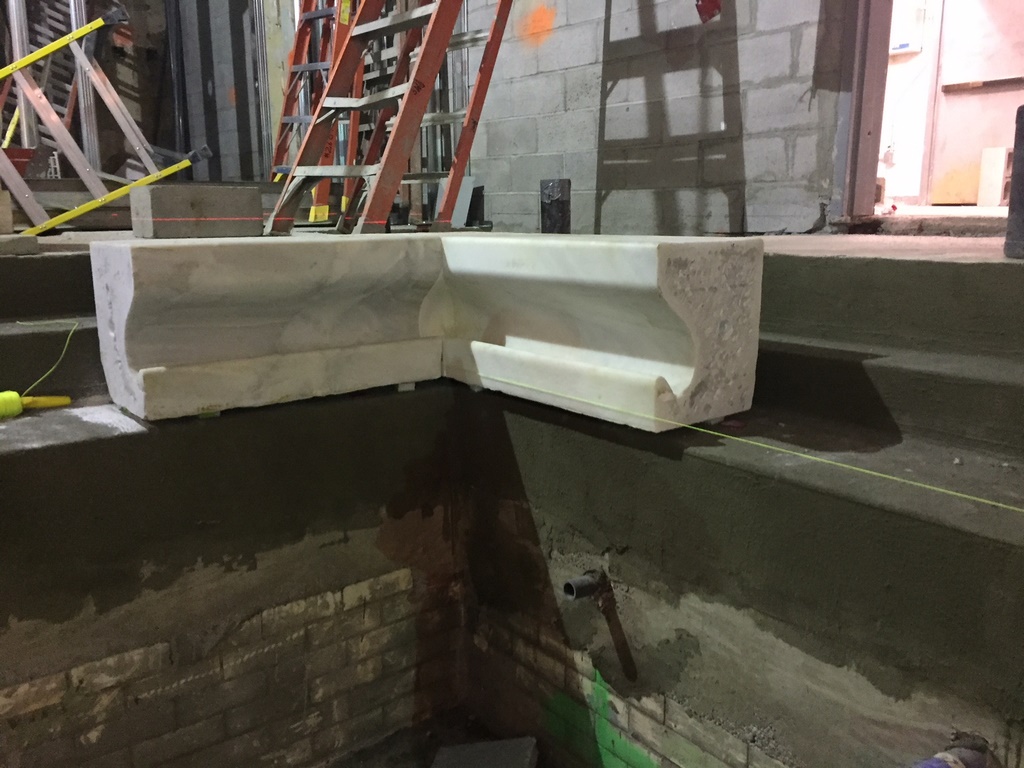
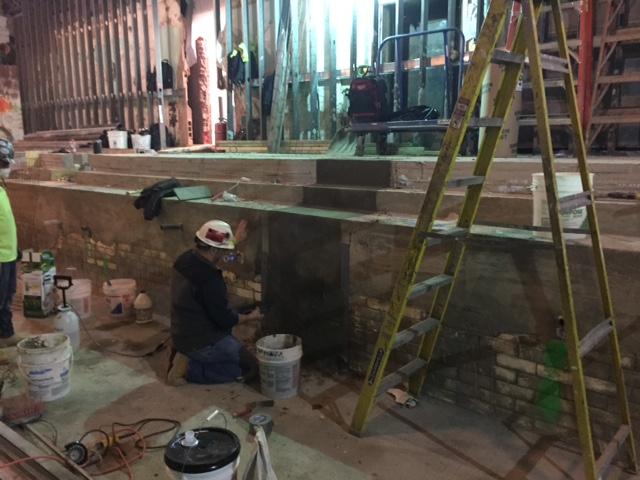
| Resetting the coping/gutter system was a major task: They were large, extremely heavy and quite fragile – and were an essential historic component of the pool we had to preserve no matter the difficulty. Many sections removed and stored intact; a few others had suffered damage through the years and were sent out for repair. |
In typical applications, Basecrete is a two-coat system that brushes on to a finished thickness of about an eighth of an inch. In this case, however, we essentially needed to use the material as our float, in some areas applying more than two inches of waterproofing material to the shell to lift it out to form the desired, uniform planes.
This possibility wasn’t in Basecrete’s playbook to that point, but their technical staff saw no reason why it couldn’t be done the way we were suggesting – and all that was left was figuring out how to make it happen. In short order, I drew on my experience in applying various cementitious materials and adapted a simple spraying system to sputter the material thickly into place.
It took time and an amazing amount of material to get the job done (see a brief video on the application process by clicking here), but by the time we completed our work, the interior surfaces were plumb and true to within a tiny fraction of an inch.
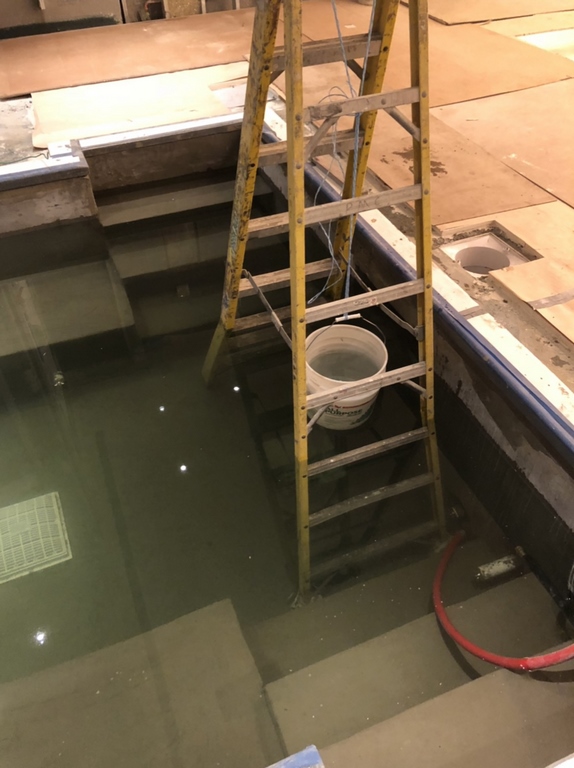
| Once the shell had been completely waterproofed – including all basic features, fixtures and penetrations – we cleared the shell and added water for an evaporation test using a bucket suspended over the water to make certain the water was being fully contained within the pool. The test was a success and we were finally ready for tile application. |
Before we could apply the tile, however, we needed to conduct an evaporation test to make certain water losses within the pool were equivalent to what we observed in a test bucket suspending in the pool area. When everything checked out with the topped-off pool, we drained the water and our renovation process headed into its final phases.
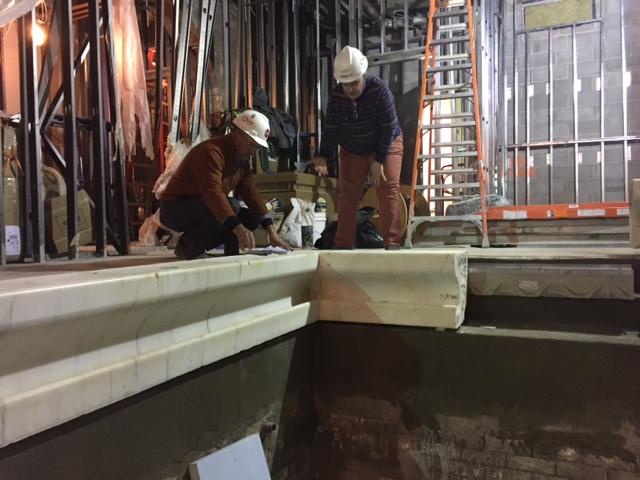
First came reinstallation of the amazing coping/gutter system. Each of these units weighed hundreds of pounds and all had to be hoisted carefully into position on the shelf we’d waterproofed for them near the top of the shell. Completing this step allowed the decking crew do its work – then at last we were ready to apply the tile.
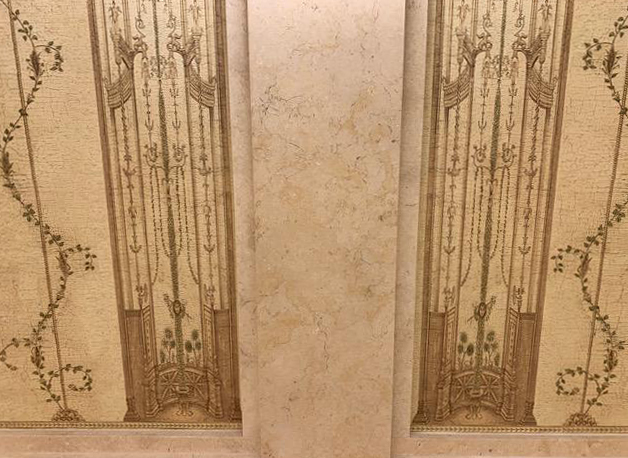
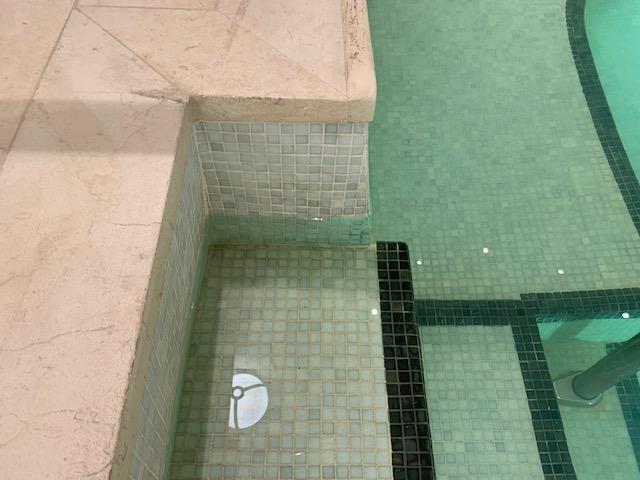
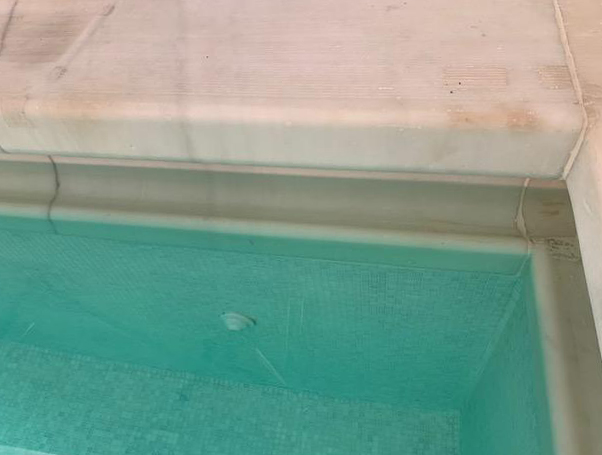
This all happened in accordance with the design wishes of SLCE Architects (New York) – the creative force behind the overall renovation project and the decision-maker when it came to the pool and spa as well. The choice for the pool’s interior was perfect: It was an exquisite glass tile from Bisazza (Vicenza, Italy) that we applied without incident.
WRAPPING UP
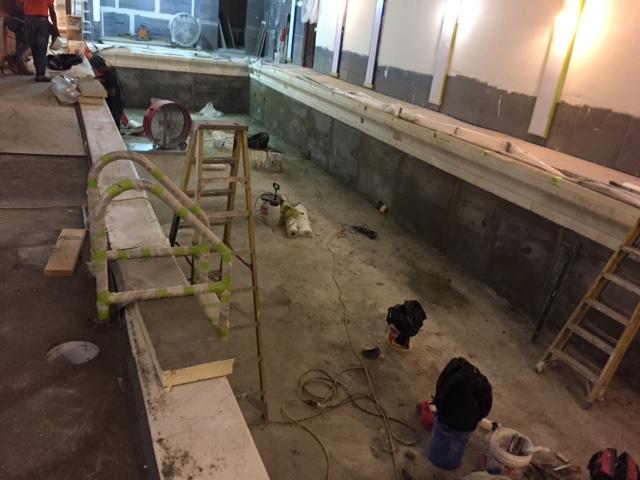
At some point in the basement’s history as a health club, a spa had been added to the mix. The redesign also called for transforming its blockish appearance into something far more elegant in a large niche at one end of the pool. This hearkened back to the facility’s original service as a sort of Turkish bath and added a distinctive upscale touch to the overall setting with even more wonderful tile arrayed across its surfaces and surrounding walls.
In this case, we had no “original,” 1913-vintage materials to work back into the design, so we improvised and came up with marble waterline details that harmonized visually with the style of the stone treatments seen at the top of the restored pool. All in all, it looks as though the pool and spa belong together and had indeed always been together.
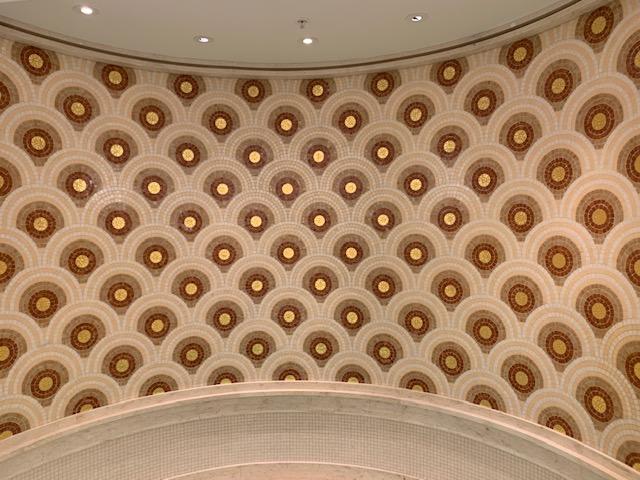


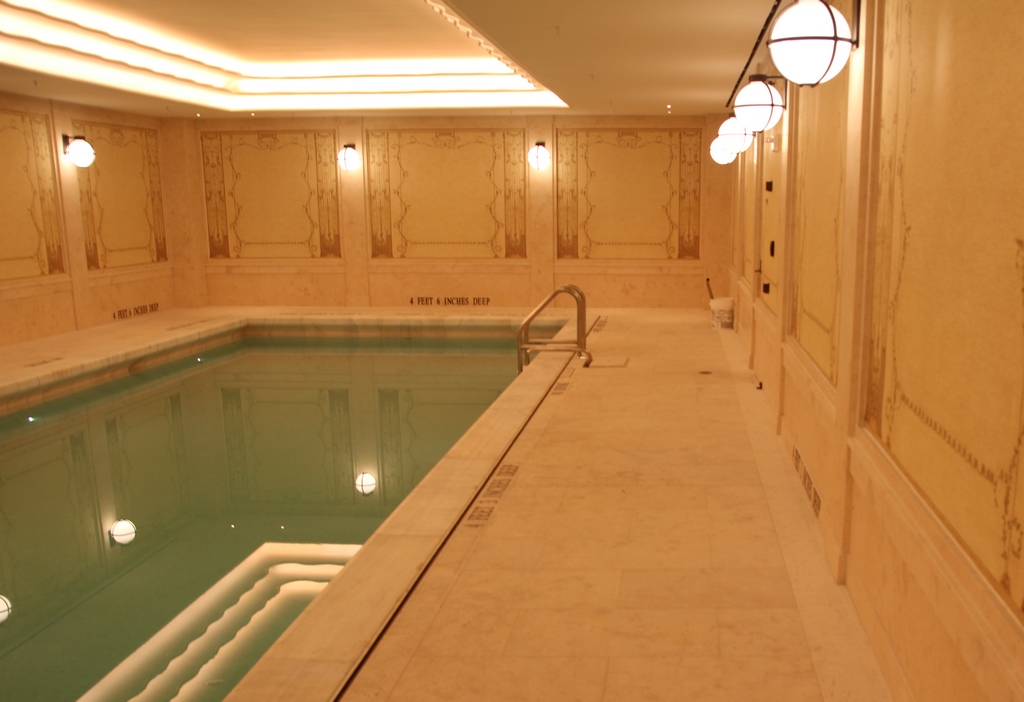
| The pool is definitely magnificent, but in keeping with the overall design, the room surrounding it is just amazing, with stone, tile and lighting treatments ranging from delicate to bold and back again. The new spa fits right into the program, now a visual companion to the pool and another highlight of a beautiful recreational space. |
The upshot of all of this is that we spent far more time in the basement than we had anticipated. Between squaring the pool and dealing with its waterproofing needs, this part of the overall project was much less a break from the routine than it was a distinct challenge that required all our skill and experience to resolve.
For all of these reasons, we walked away with an extraordinary level of pride at having done so much to align a battered basement facility with the top-drawer ambitions of the overall restoration project – the icing on the cake, as it were, even though it was hundreds of feet below the towering cake itself.
In the time since we completed our work, the venture has thrived: The 33 units in the newly minted Woolworth Tower Residences are attracting attention among just the sort of hyper-affluent prospects the developers aimed to please – and we like to think that the pool and spa will help close more than a few of those deals!
Rick Randazzo is a consultant for Countrywide Stone & Marble in Brooklyn, N.Y. He’s been in the stone business since 1986, running a company he sold a couple years back in anticipation of retirement. Countrywide pulled him back into the business to lend his expertise to the Woolworth Building restoration. He may be reached at [email protected].