


Perfecting the Look

This was a project that might easily have run off the rails.
First, the glass tile selected by the interior designer wasn’t appropriate for pool applications. It might have been lovely as a backsplash in an interior kitchen or bathroom, but it came with no solid information about its source or pedigree that would have made it a wise choice for use in a critical outdoor application.
Second, the tile was rectangular and, at one-and-a-quarter by five inches, was too big for its intended use as an all-tile finish for a complex pool and spa – particularly given the interest the clients had in a look that would involve precious few visual breaks in the pool’s and spa’s fields of tile.
Third and finally, the tile was the wrong color given the clients’ pursuit of classic turquoise water. The selected hues simply had too much intensity and would’ve glowed like neon in full sunlight or when the pool and spa lights were on at night.
Happily, we at Rock Solid Tile (Calabasas, Calif.) became involved early enough in the process that suggesting a different approach was possible. The upshot is that the project moved along with absolutely beautiful results – just what the clients wanted.
STAYING FOCUSED
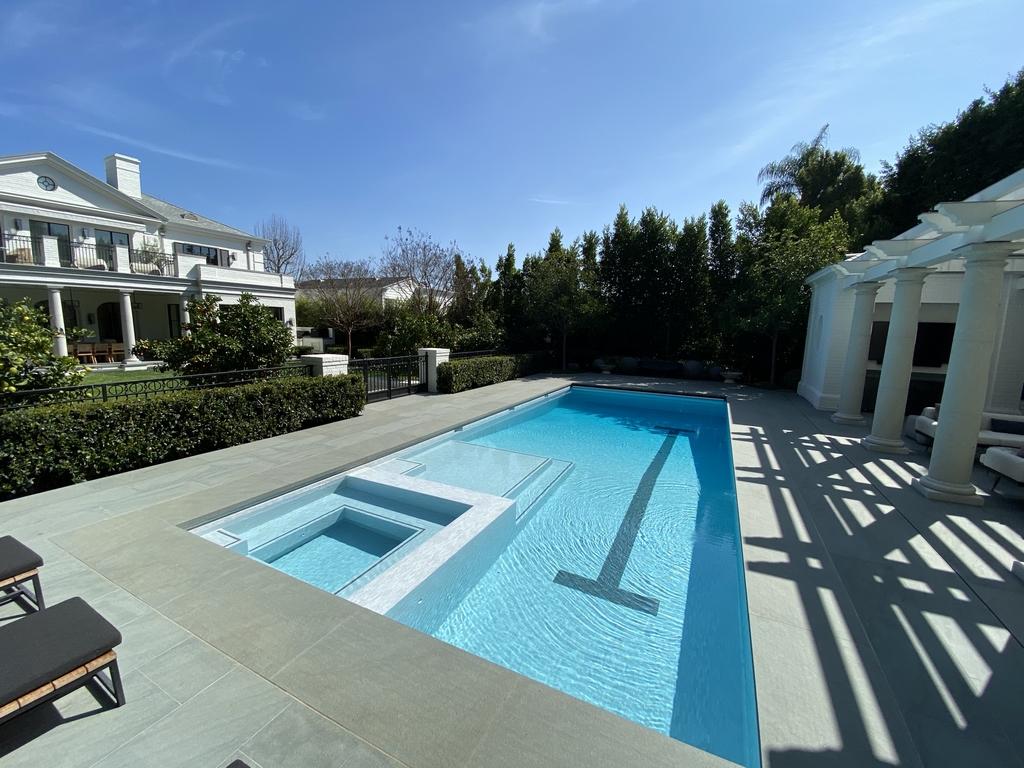
The property is located in a hilly section of West Los Angeles. We were asked by the homebuilders – our frequent collaborators at JRC Group (Los Angeles) – to join the team along with pool builder Dave Penton (Fluid Dynamics Pool & Spa, Fullerton, Calif.).
At that point in early 2016, construction of the home had only just begun, with the basement and some structural walls in place. Given the usual staging of these projects, we knew it would be a long while before the watershapes and their pool house would be completed, but we’d gained enough confidence with the clients – who participated in almost every design meeting – to make certain we would be involved in any and all discussions or decisions relevant to our workspace. And there were lots of them.
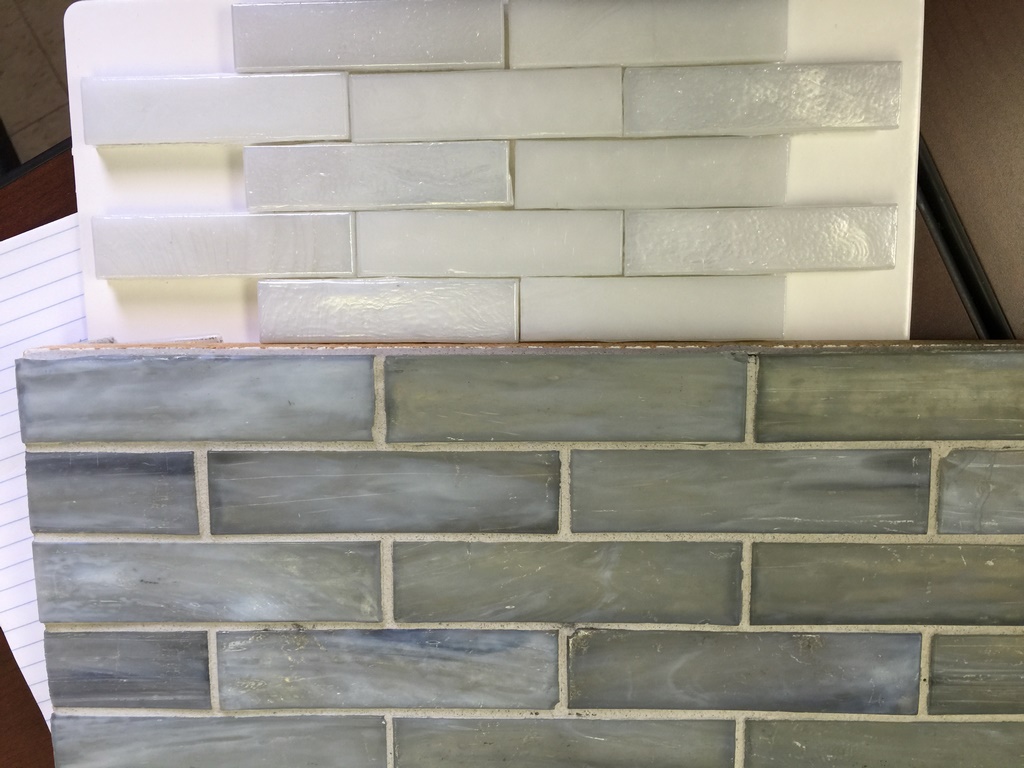
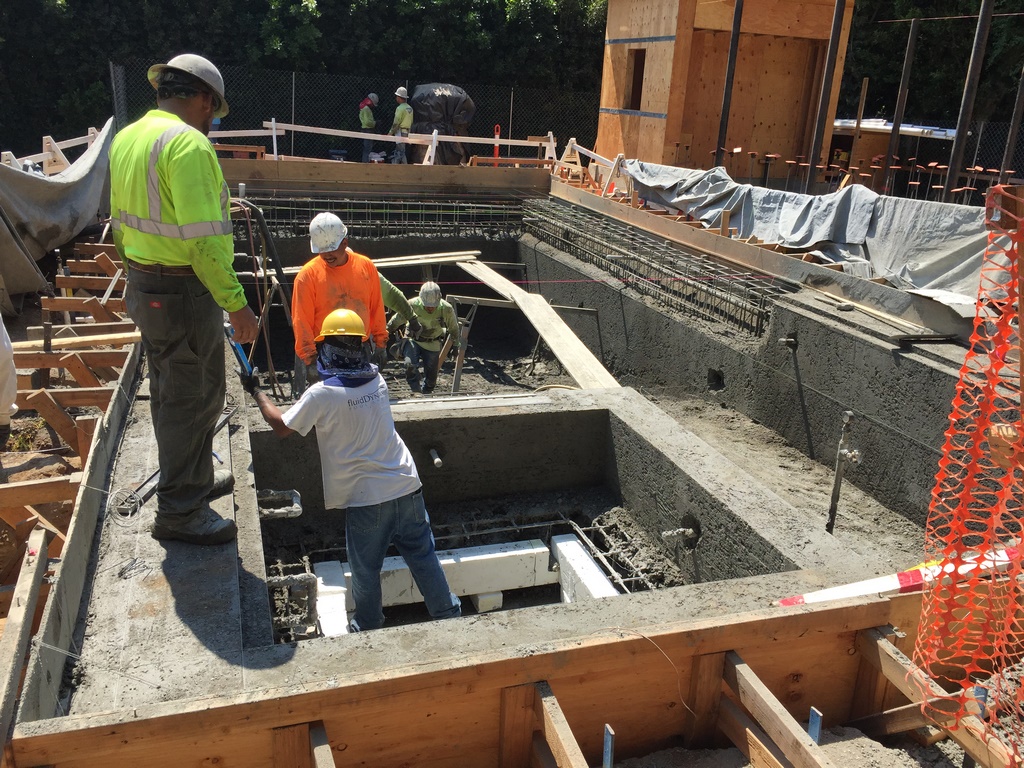
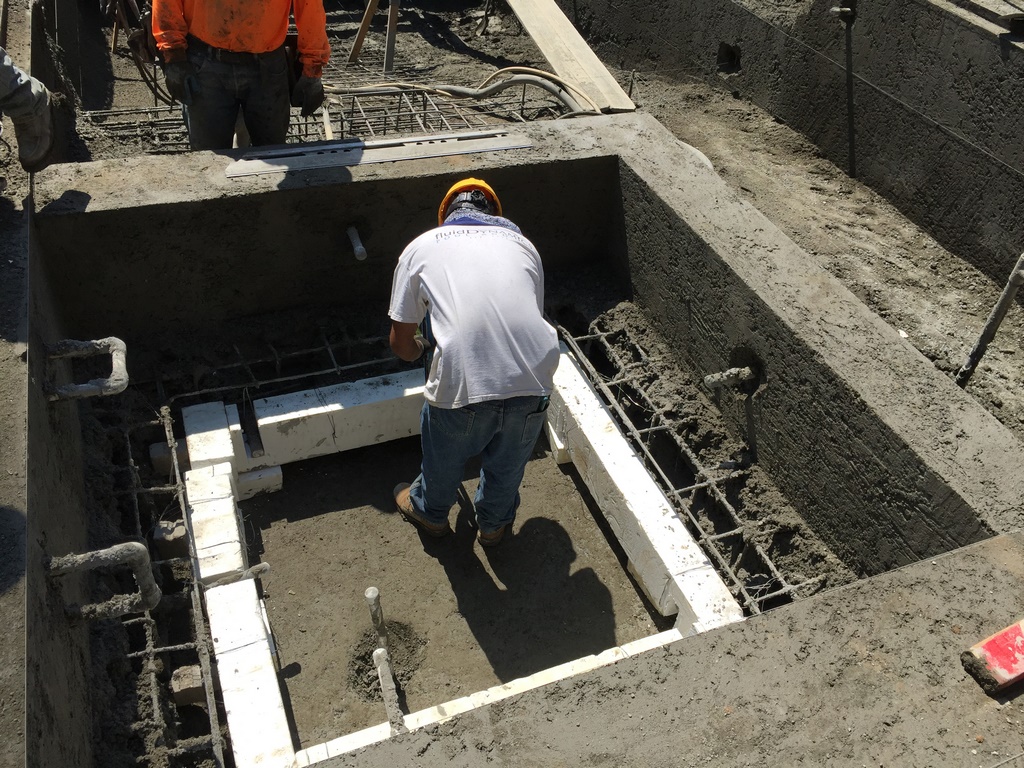
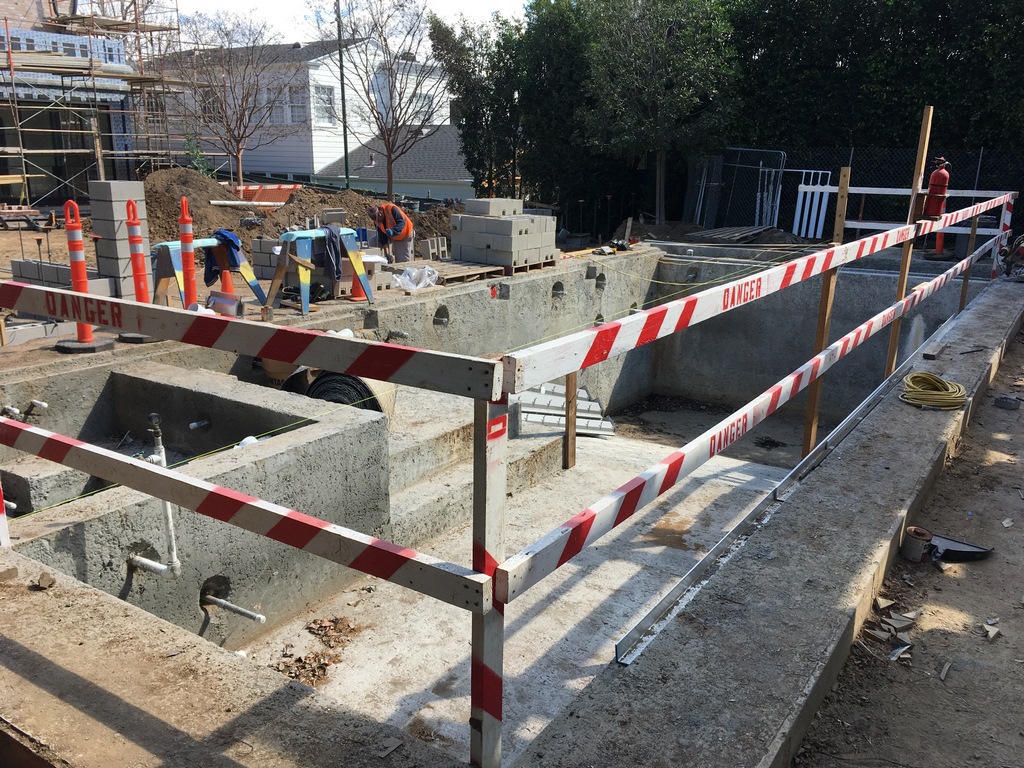

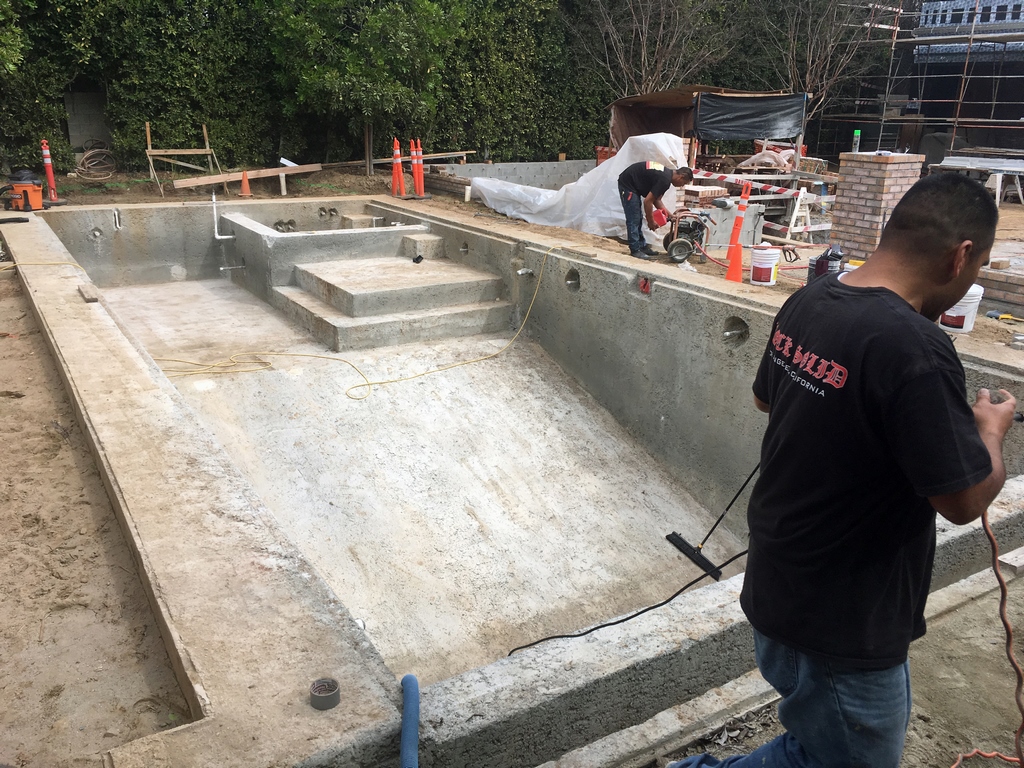
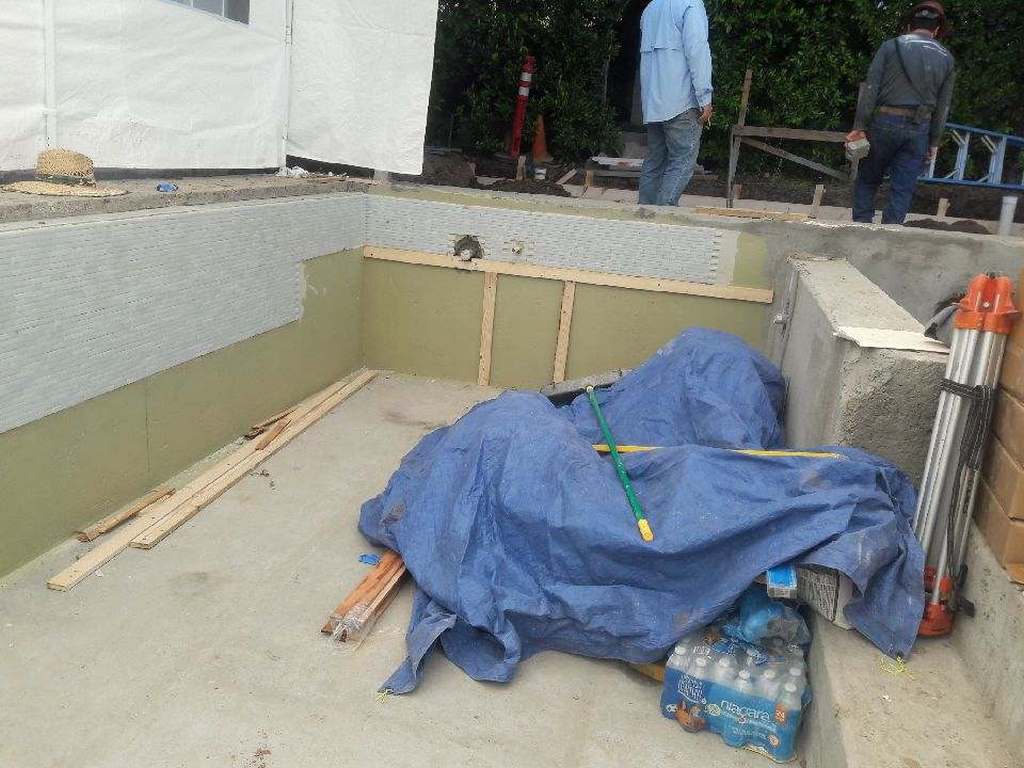
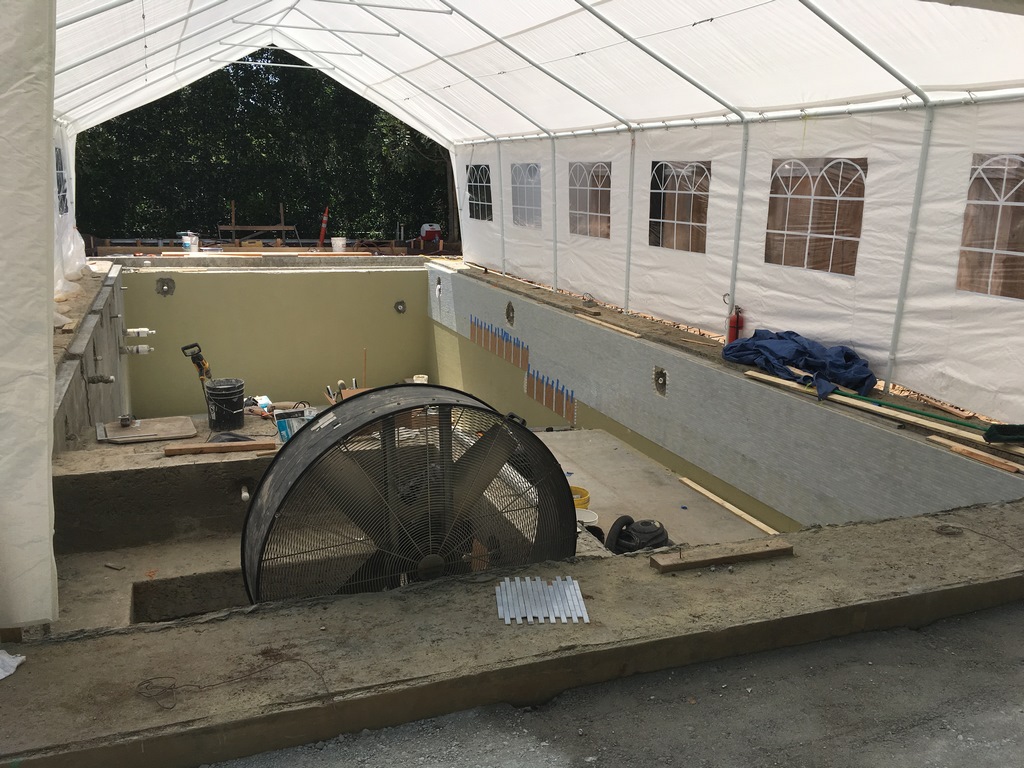
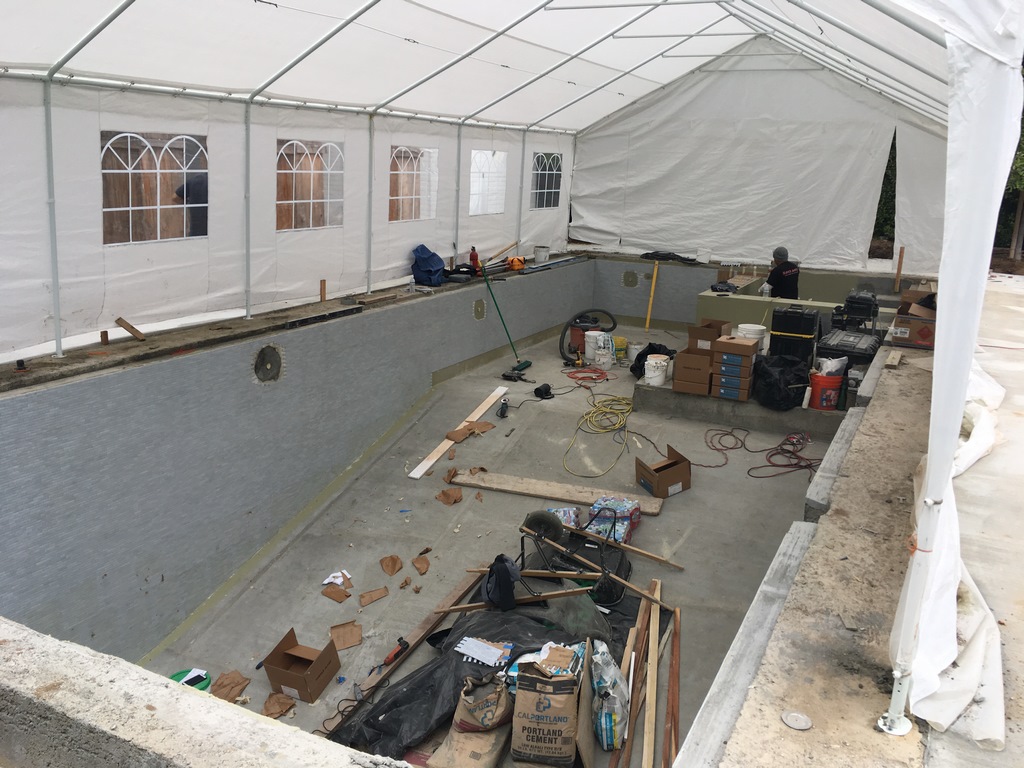
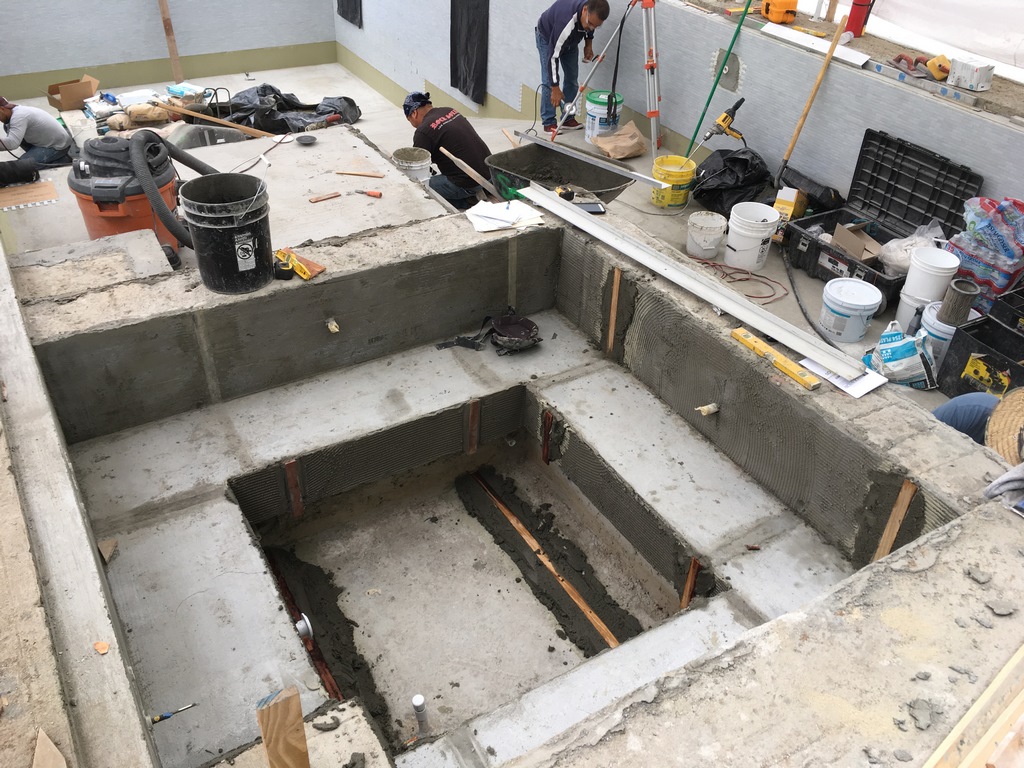
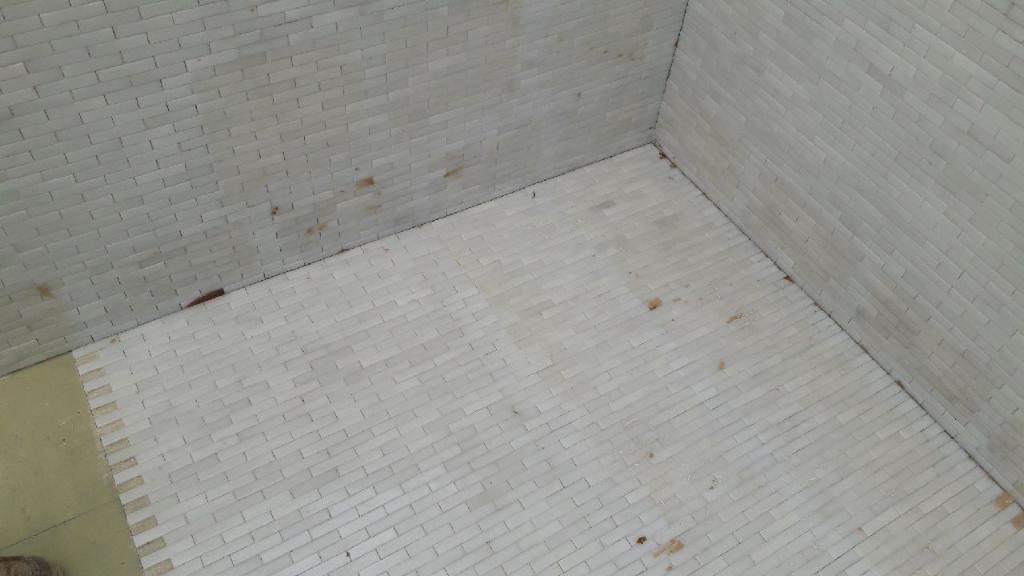
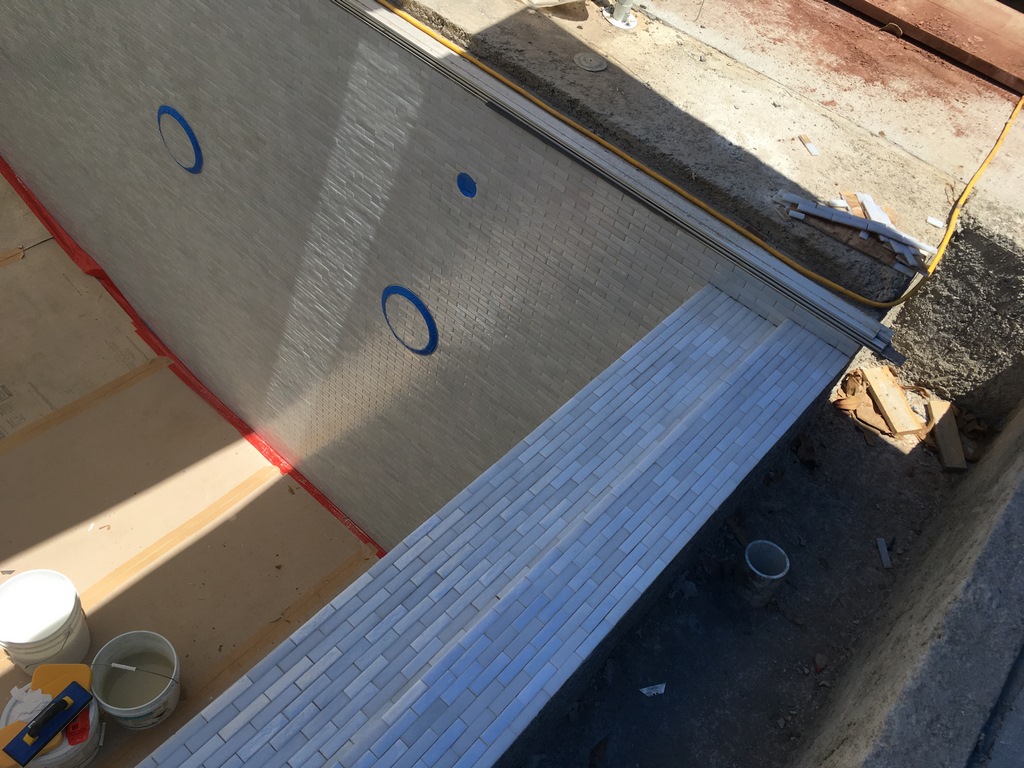
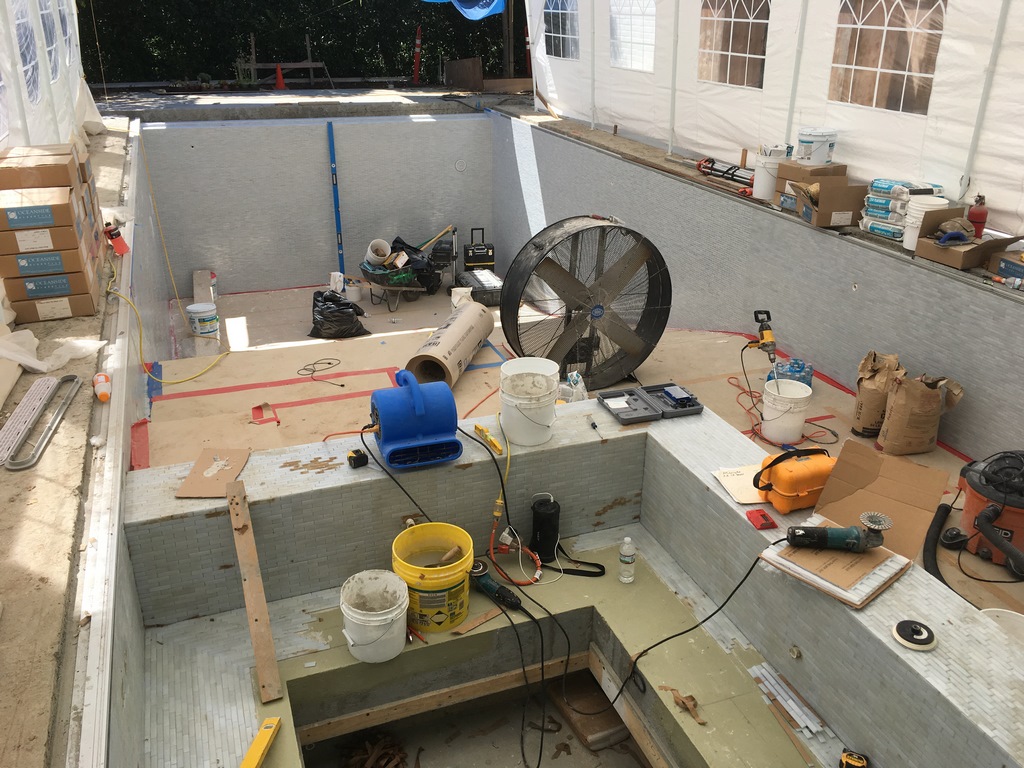
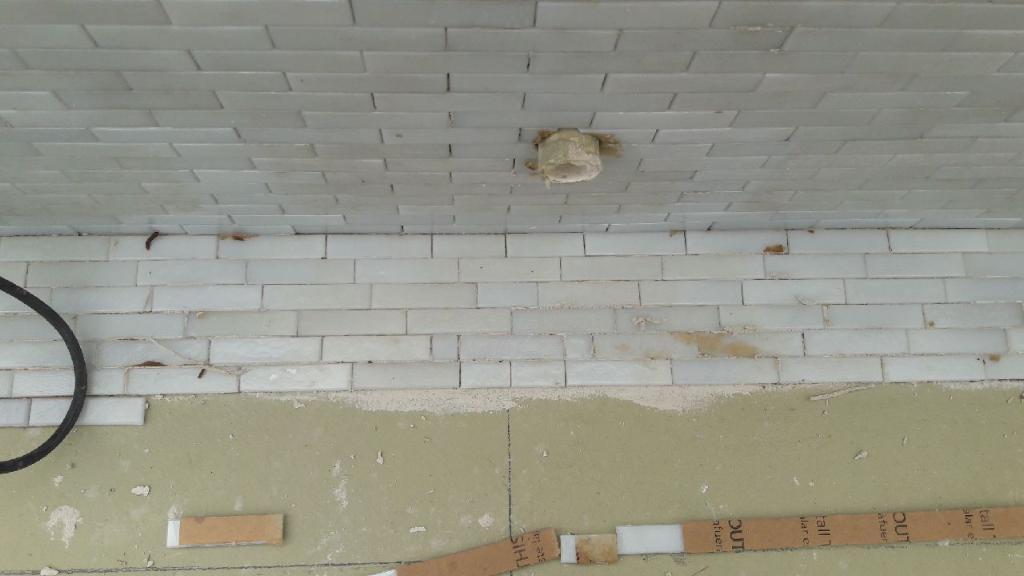
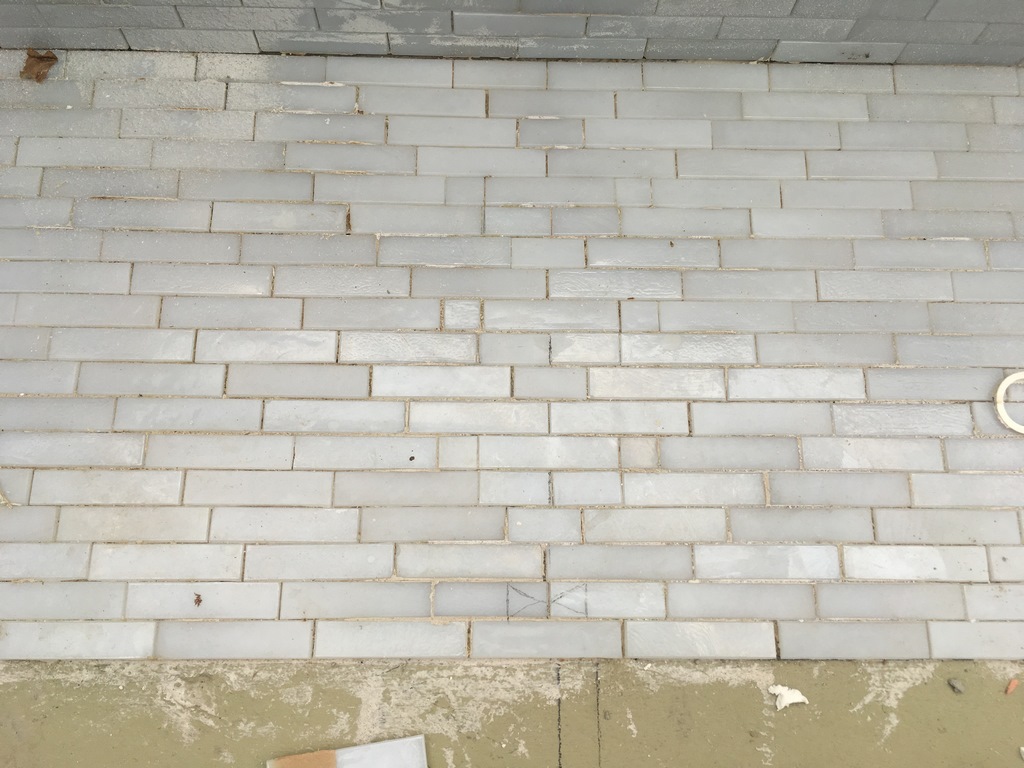
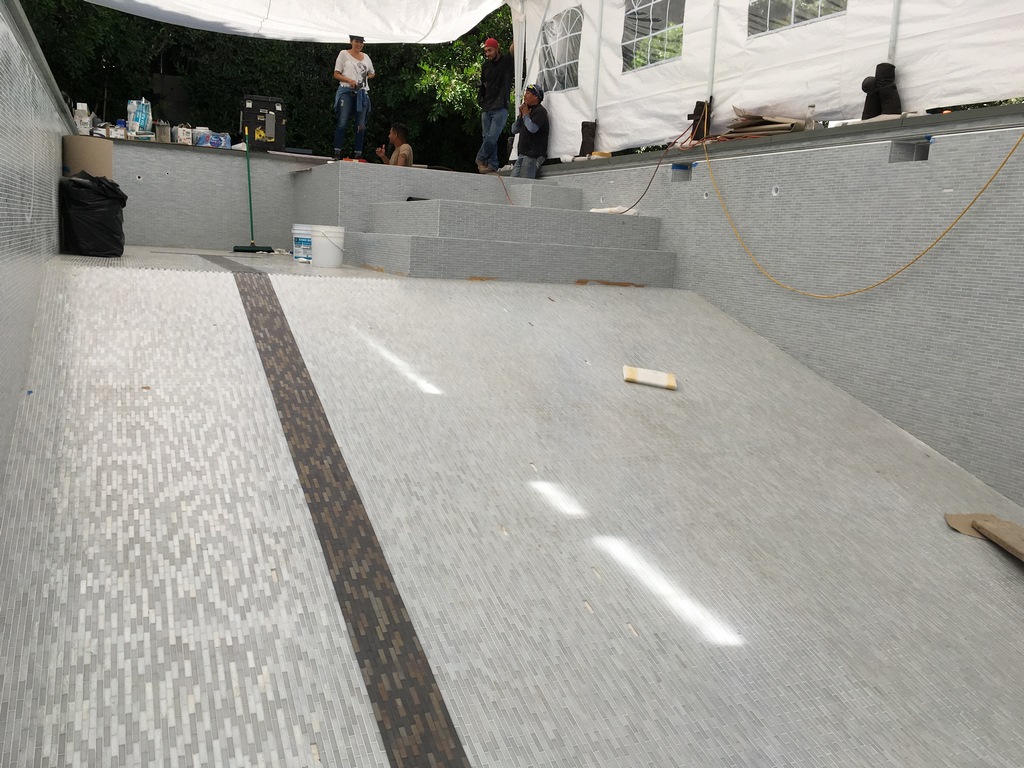
| The tile originally chosen for the pool’s interior was both too big and too colorful to meet the clients’ expectations (top left at the bottom), so we recommended a smaller tile that would achieve the visual effects they wanted. Once the crews at Fluid Dynamics completed their work on the shell (top middle left through top right), it was cordoned off and stood empty while the pool house was built. At long last, we arrived on site, cleaned up the shell and made ready to prepare the surface for precision tile installation (bottom left and right). |
As expected, a fair amount of time passed before we came on site. In fact, we didn’t start our work April 2018 – by which time the home was almost finished, the shell for the 40-by-16-foot pool had been shot and the pool house was nearly complete. In that span, access had dwindled down to two narrow strips alongside the house that were all-too-often impeded by scaffolding.
Once we laboriously moved our tools and materials to the pool area, we set up and began our usual process of surface preparation, first applying a topical sealant to the shell. Then, with the basic geometry of the finish worked out, we began applying our float to square and plumb all of the surfaces to exacting tolerances and create the sort of planes that make our pursuit of visual perfection possible. Once the float was ready and a waterproofing membrane was in place, we began tile application.
As usual, we pursued our program of working with whole tiles and minimal cuts, but while these tiles – five-eighths of an inch by two and seven-eighths – were of an appropriate size, they were still rectangular. So our ambition was to work in ways that most of the necessary cuts would all be half tiles to make it look as though pieces had effectively been bent into or around corners. This look was fine and relatively easy to achieve on the vertical surfaces, but it left us with substantial challenges on horizontal surfaces that included the tops of steps and benches as well as a large shallow-lounging area.
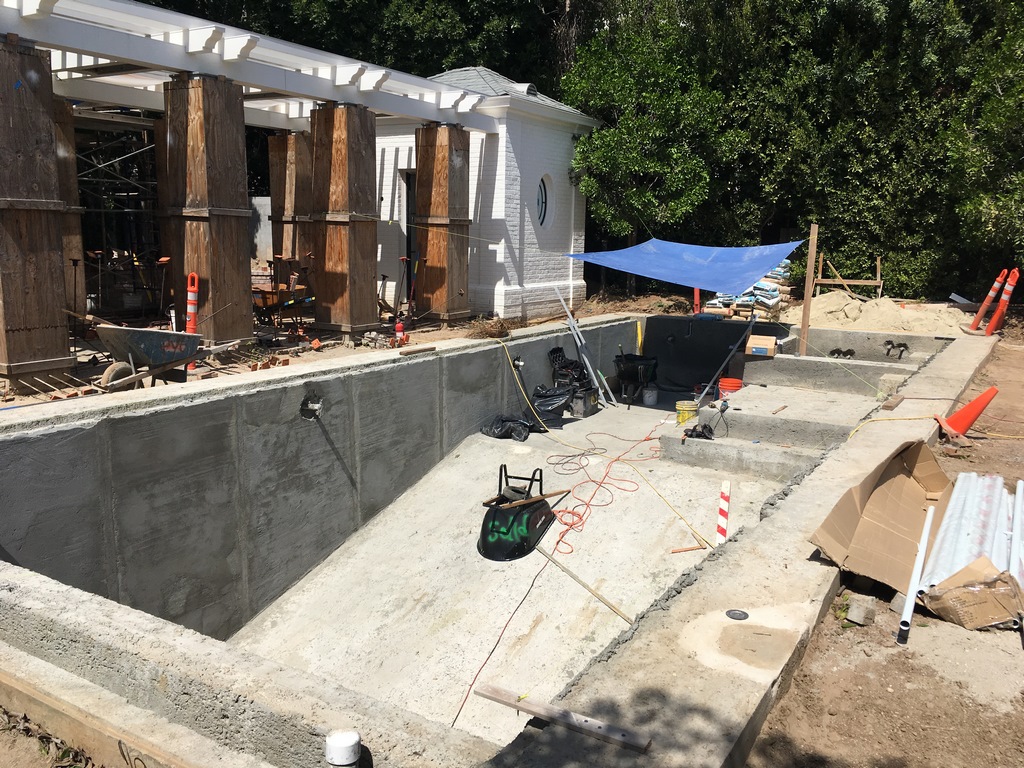
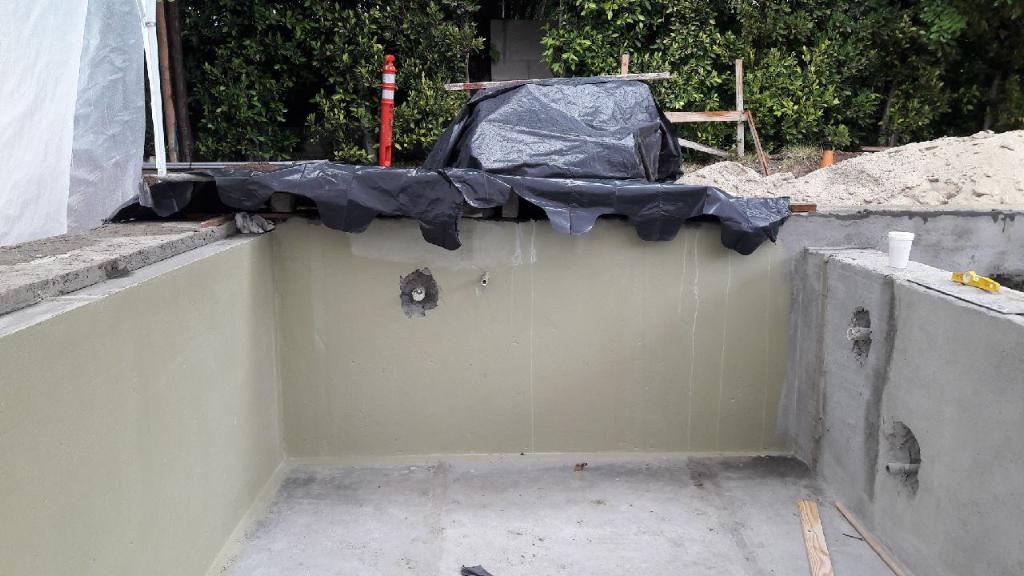
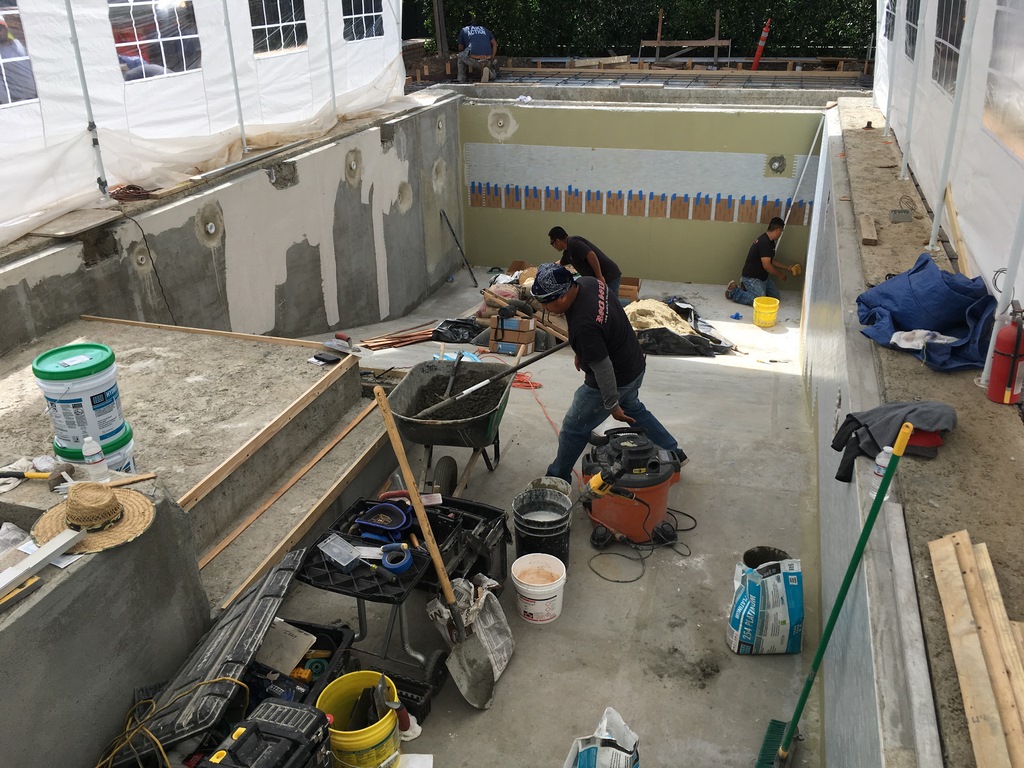
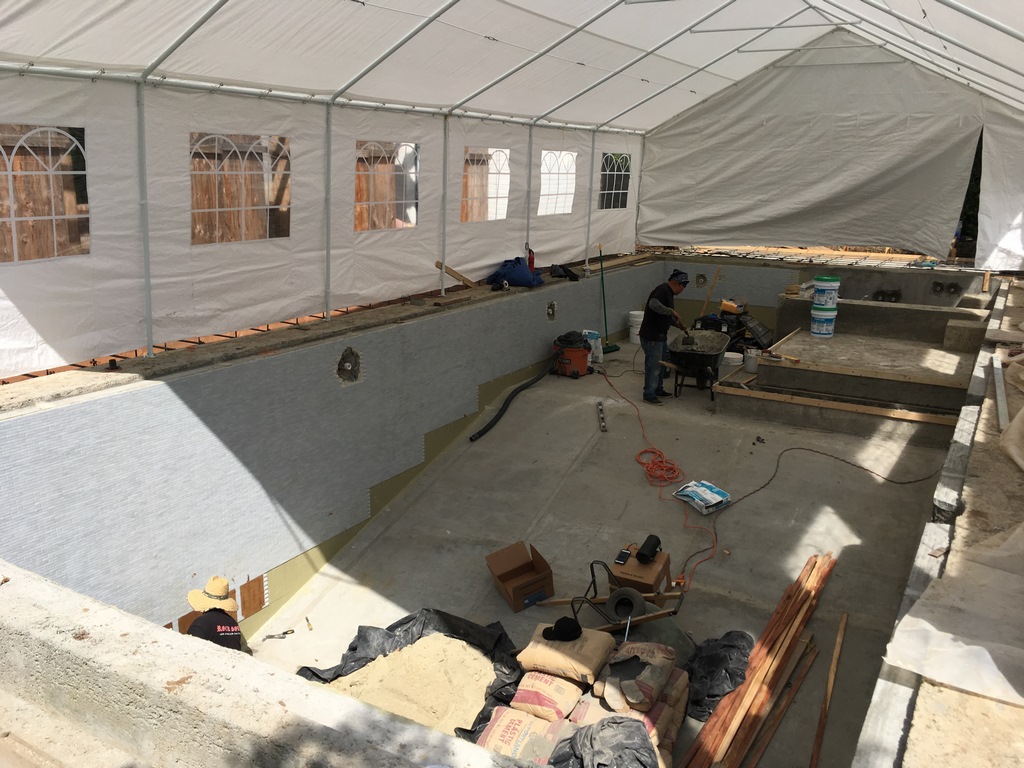
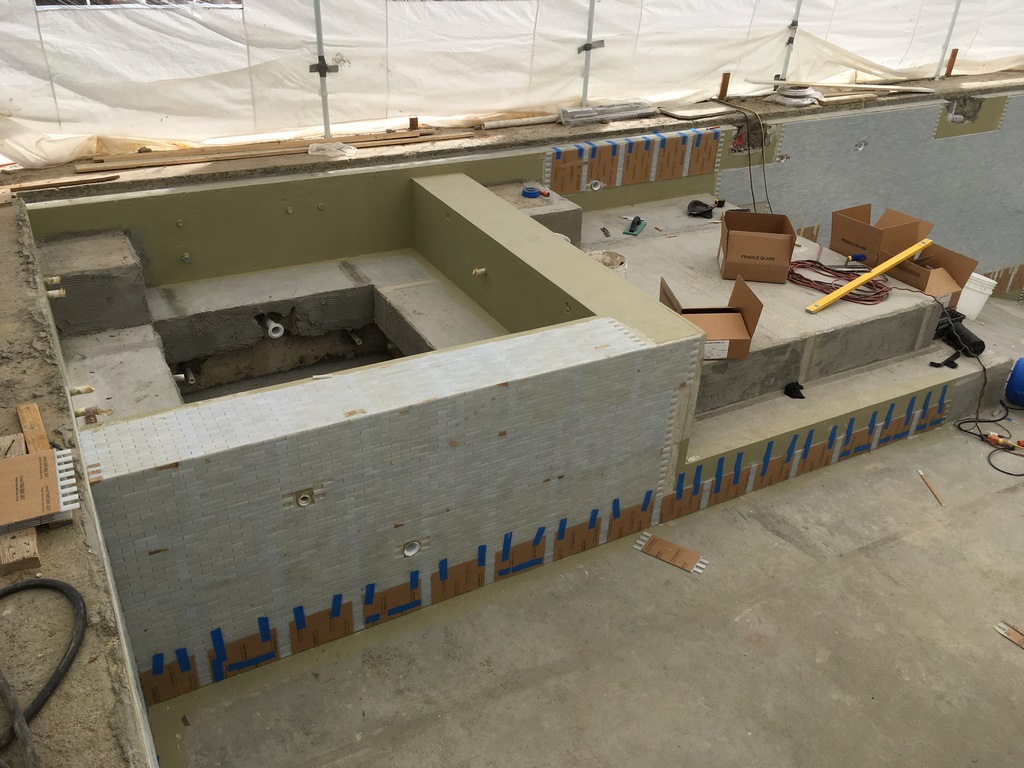
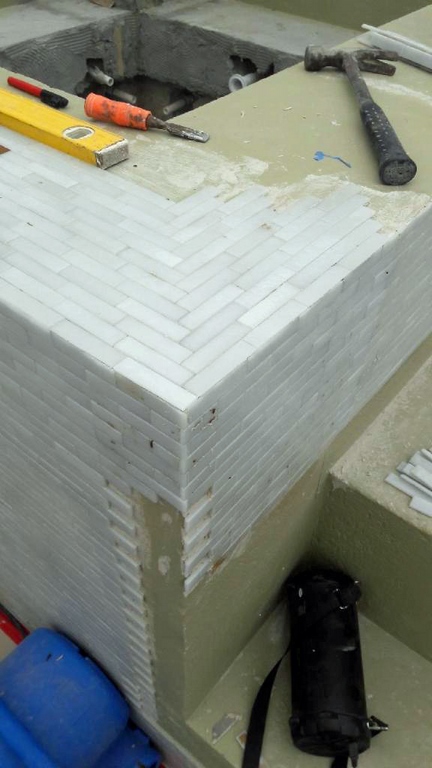
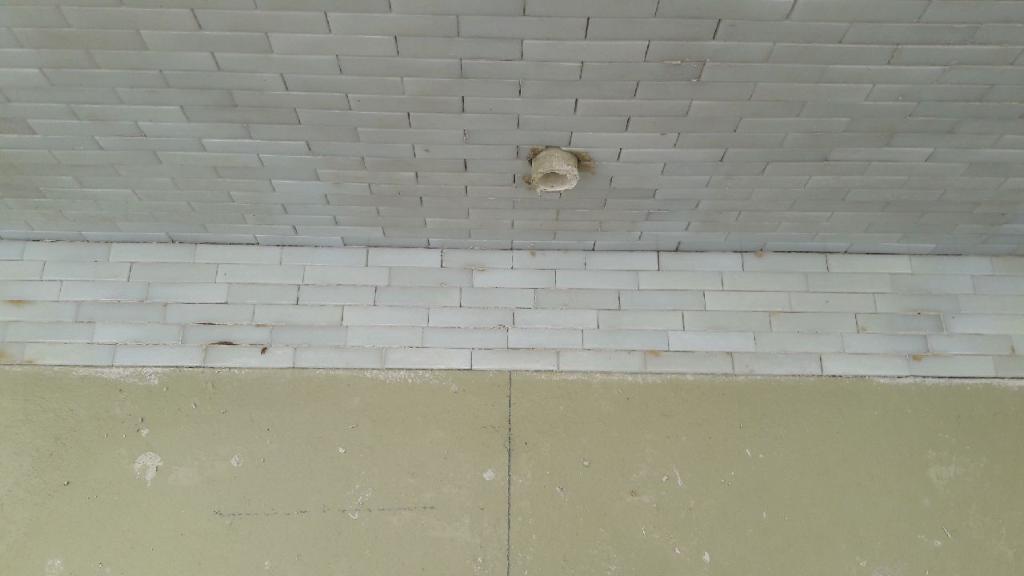
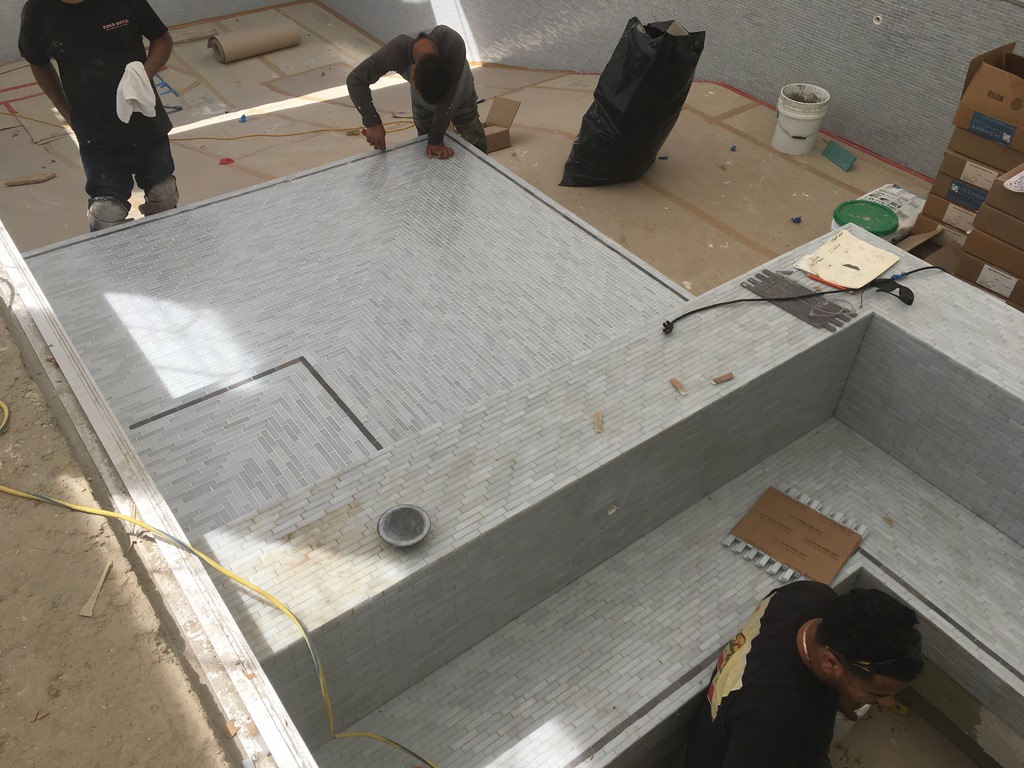
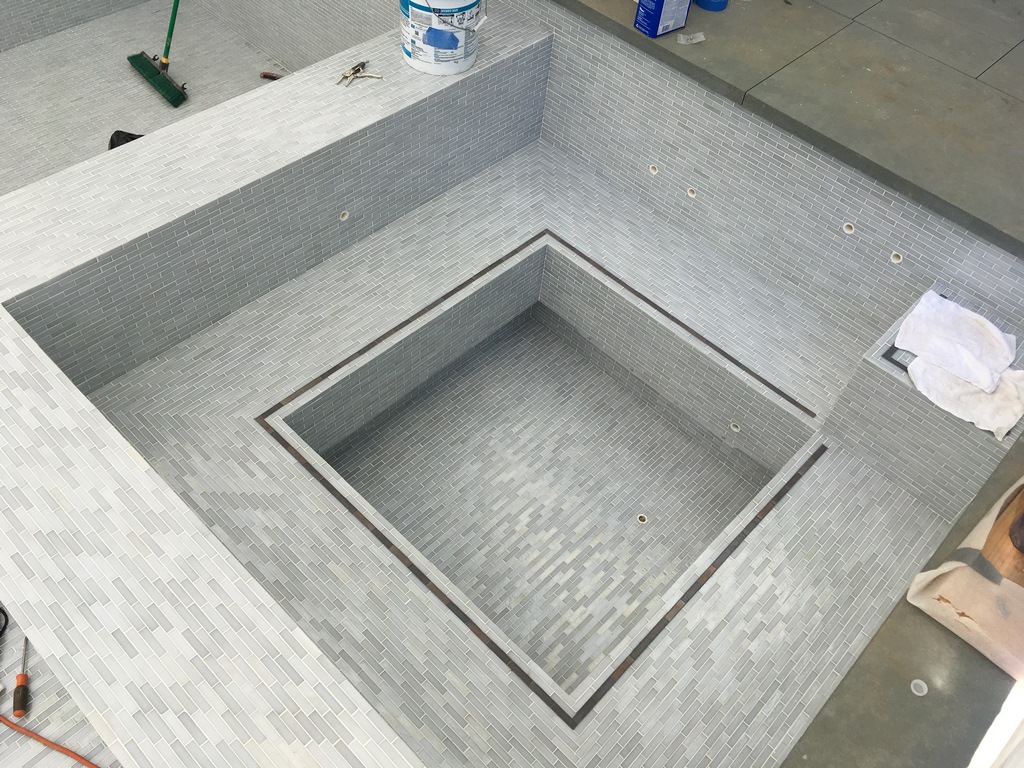
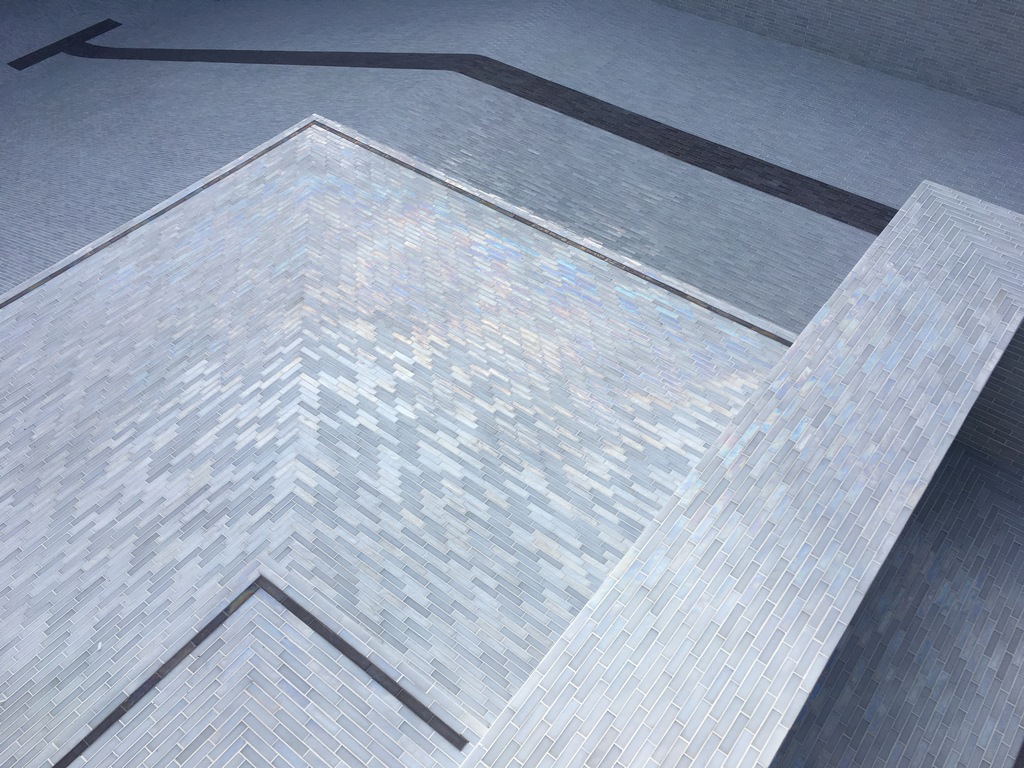
| Once we’d applied our float and established exactly the vertical and horizontal planes we needed, we waterproofed the surface and began applying tile to the vertical surfaces, working with full tiles other than in the corners, where we used half tiles to fill gaps in the sheets. As this process moved along, we also began preparatory work inside the spa (bottom right). |
In these spots, we needed to weave the corner pieces together, for the most part in chevron patterns but in some areas in modified herringbone patterns (particularly in the spa). And then there were the paired ends of the dark-tiled swim lane the clients wanted to run the length of the pool: This offered us perpendicular intersections unlike any other we encountered in the pool.
The thing about the way we work with tile is that we’re perfectionists: We’ll settle on an approach, install a section of tile and then stand back and study it. Sometimes we hit it on the first pass, but quite often we go back, knock sections out and try again until we achieve just the right look.
With these rectangular tiles (supplied by Oceanside Glasstile of Carlsbad, Calif.), the first look we produced at the most complicated transitions often wasn’t the last: While we focused our attention on the horizontal surfaces, for instance, we knew that we also had to put them in context with the adjacent vertical surfaces and process a bigger picture. In the spa in particular, it was a game of detailed giving and taking for more than a solid week to make things work out harmoniously on small portions of the overall horizontal surfaces – lots of trial runs, lots of chipping, lots of hard (and occasionally frustrating) work.
BUILDING ON TRUST
As I mentioned up front, operating at this level is about winning the client’s trust and then making certain we don’t betray it. We know that working with us costs homeowners considerably more than is the case with most other installers, so we know what’s at stake and do what we must to define and manage heightened expectations.
This puts us in the spotlight, of course, and we know that our part of the process is typically one of the last in projects than can span several years, as this one did. So we’re accustomed to drawing lots of attention on site: The home is usually done and might even be occupied by the time we start working, so it’s easy to sense the scrutiny.

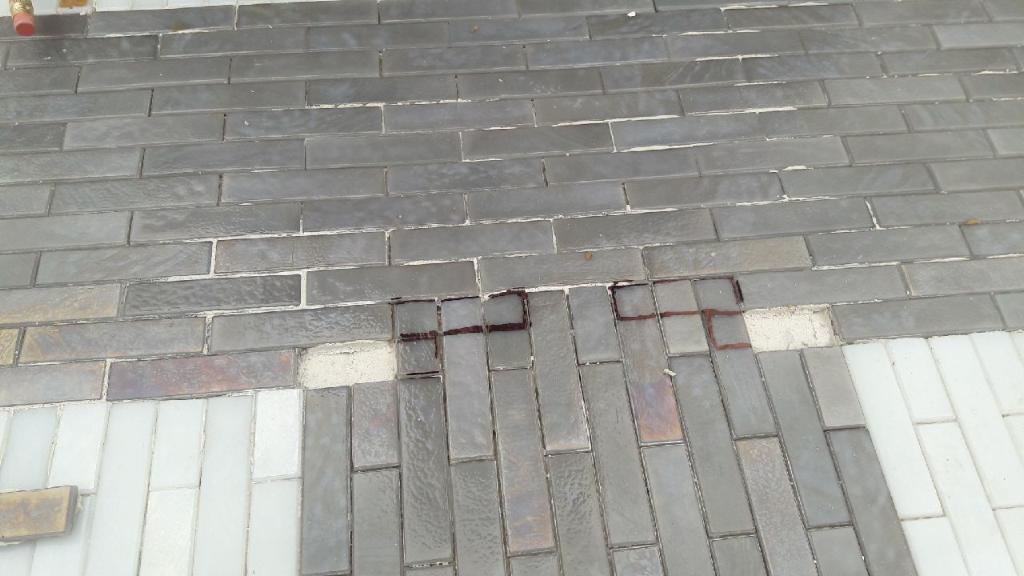
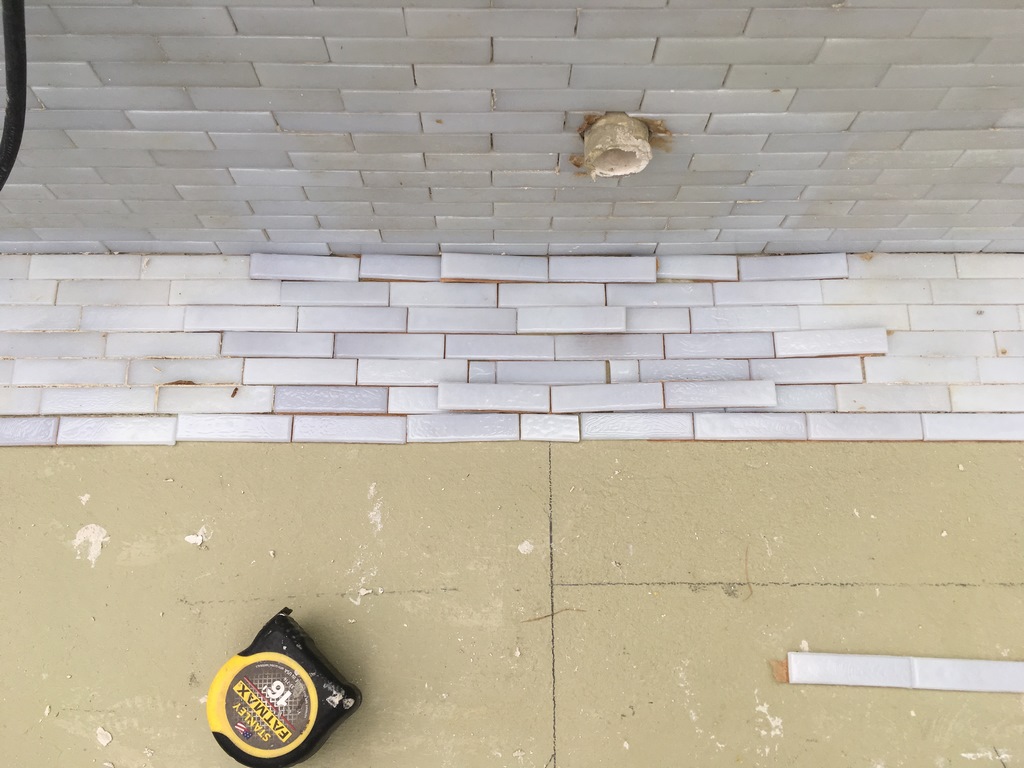
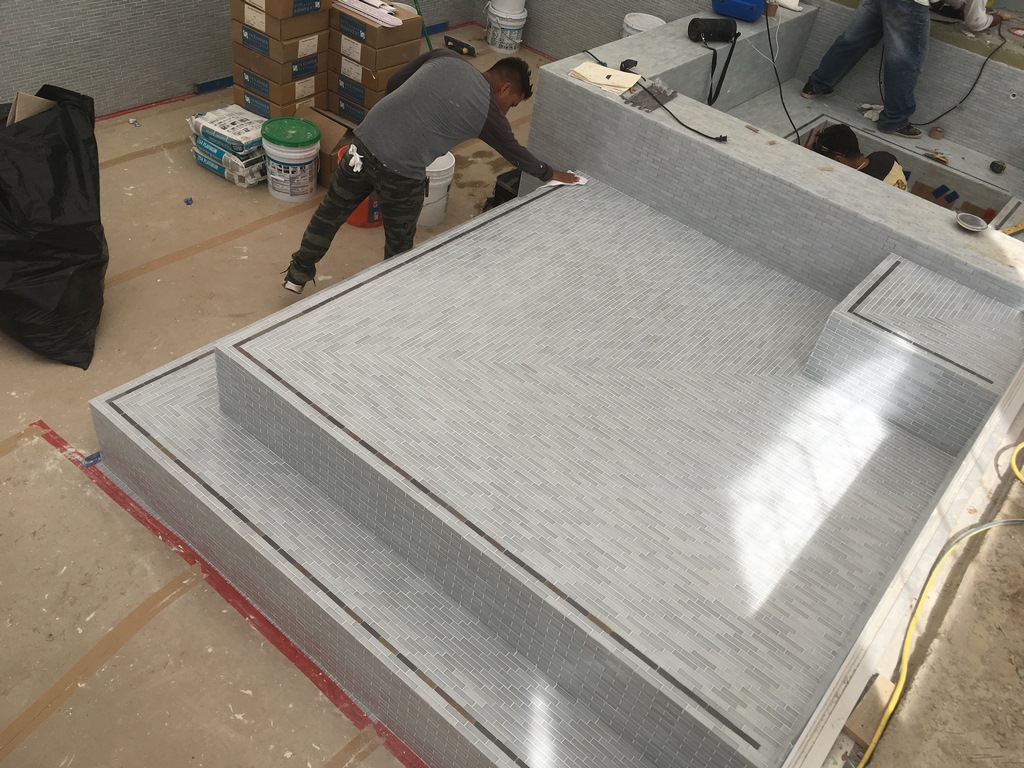
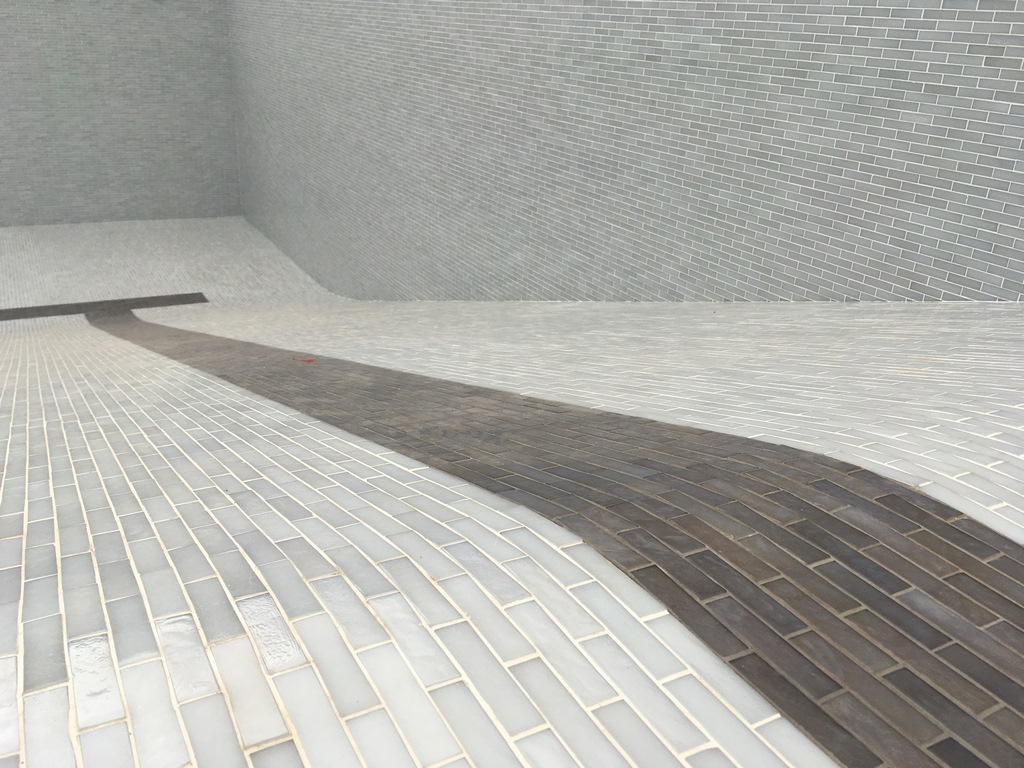
| We started our work on the horizontal surfaces with a great deal of care – working gradually up to intersections (top left), figuring out how to contour the surface to ease the break down to the hopper (top middle left), aligning horizontal tiles with patterns established on the walls (top middle right) and aligning the squared intersections in the corners (top right). At some intersections (bottom left), we were able to work with a simple but meticulous chevron pattern (note the finger-jointing of the vertical corner – and the custom-bullnosed edges!). At others, including the perpendicular joint on the swim lane’s tile, we played with several patterns before settling on a final approach (bottom middle left). As it all came together, we focused on keeping the diagonal lines dead on and consistent (bottom middle right). And we even used full tiles, precisely placed, in the approach to the automatic cover box (bottom right). |
We know all of that and prepare our clients for the fact that what we do takes time. Surface preparation alone is a set of tasks that can take many weeks or even months to complete, and tile application itself can be a long, involved process. It’s the kind of thing that wakes me up at night, gripped by an idea of how to complete a certain detail or with a wild thought about a better way to make a great detail even better. So quite often we start a day by chipping out the previous day’s work – that’s just the way it has to go!
In this case, the clients were completely engaged in what we were doing, and it was fun for me to chat with them about what was happening and how things were going. We had explained all we could at the start of the project, but as tile application actually unfolded on site, they were clearly getting into what we were doing and were intrigued, even impressed by how complex the process was. Happily, this made them patient: They came to appreciate our attention to detail and were increasingly confident in our ability to produce the outstanding results they wanted.
And believe me, the details we pursued through multiple revisions were well known to them – so much so that we knew, long after we’d left the site behind, that these were areas of the pool they’d look at with pride but also with critical eyes, knowing that the subtle adjustments we’d been making were dedicated to giving them the level of excellence that had brought us together in the first place.
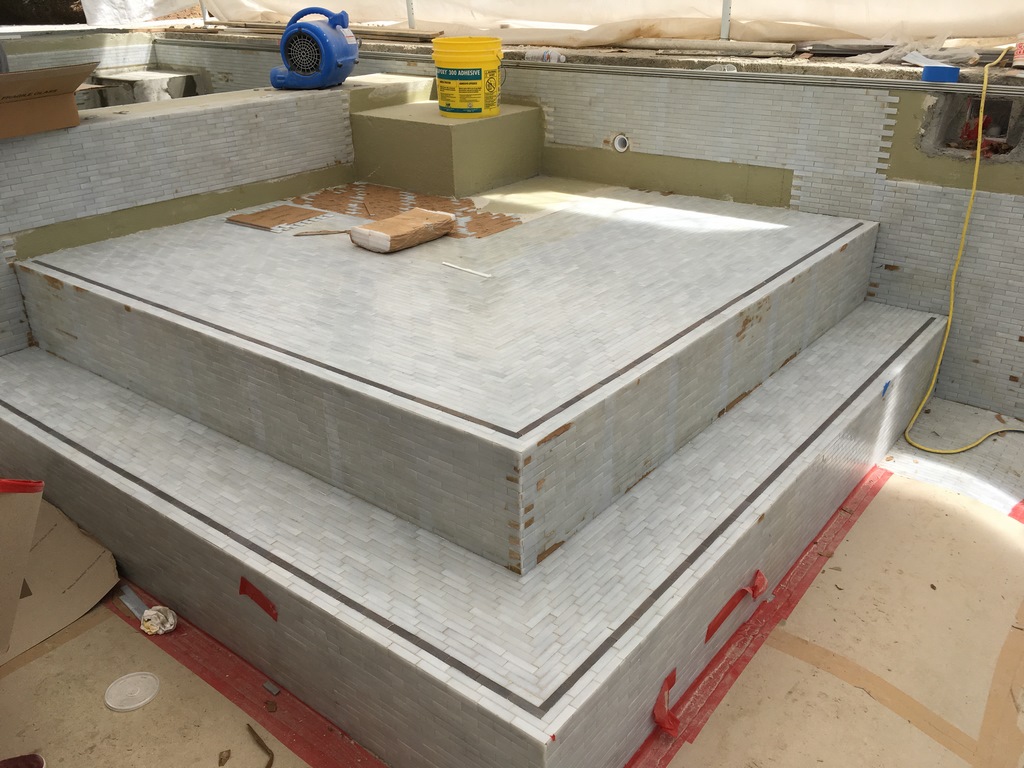
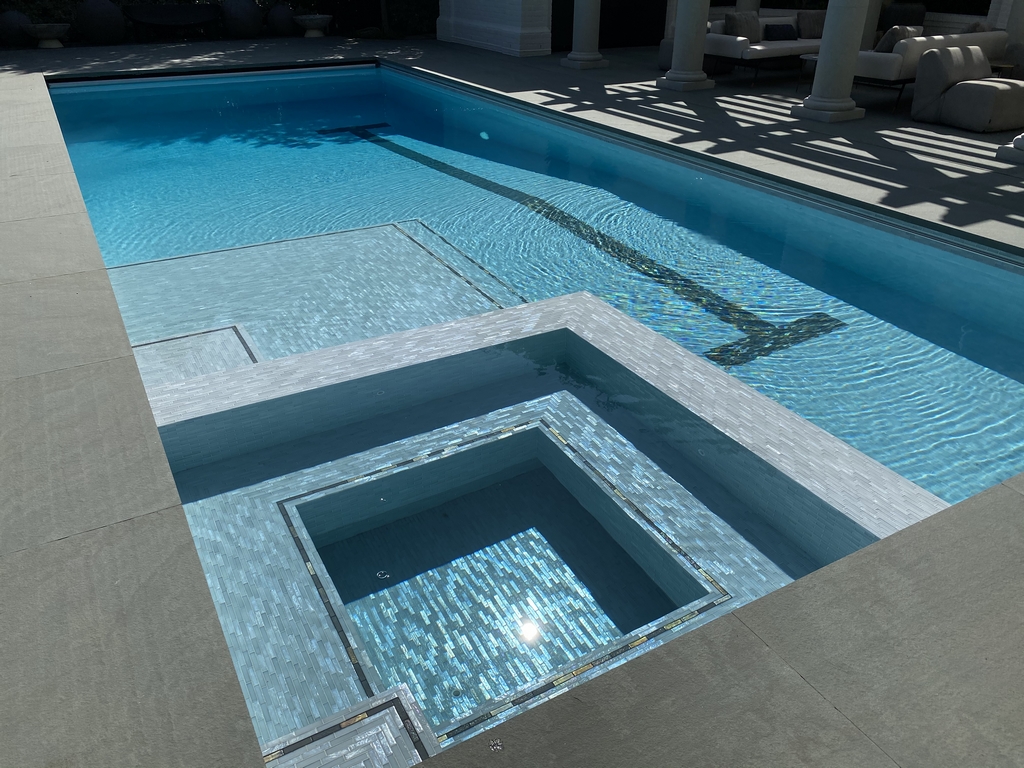
| The tighter confines of the spa posed special challenges that truly fascinated the homeowners. It was easy starting out from the corner step to the adjacent corners, but when we reached the opposite walls, keeping the chevron patterns intact meant adjusting the mid-bench patterns (top left and middle left). We played with all sorts of possibilities – setting tile, breaking it out and often starting over – and sometimes worked with loose, overlapping drafts in a process that ultimately took about a week (top middle right and right). When we finally settled on the final spa patterns (bottom left), we applied finishing touches throughout the pool, applied grout and polished every surface. |
More often than I care to consider, I’ve been asked if it’s disappointing that so much of the craftsmanship we bring to our jobs is obscured by the water that we eventually add to our pools and spas. It’s at those times that I think about clients like these, who had such a close awareness of our favorite details that they will always notice them and point them out to friends and neighbors with pride.
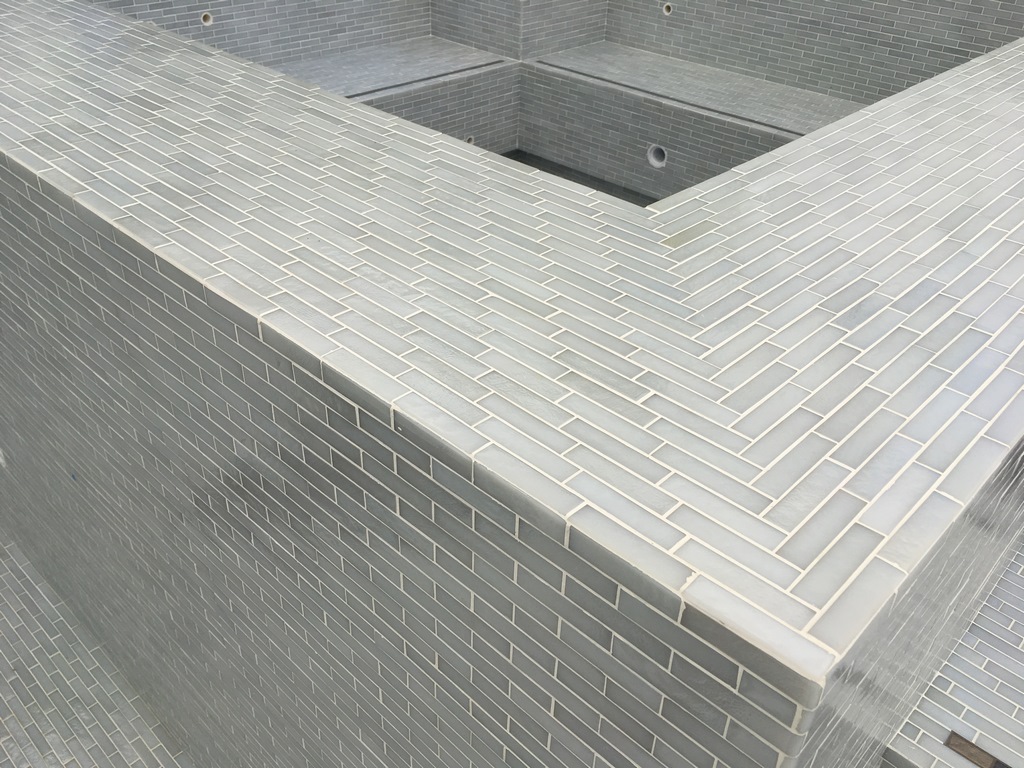
It’s the little things, like the vertical joinery on vertical corners of steps, for example, that fall into the class of key details: The clients will always look at the way we finger-jointed these intersections, then went to the trouble of bullnosing the edges to make them visually consistent and smooth to the touch. We didn’t have to do it this way, but to us it was simply the right thing to do.
Ultimately, it’s an adventure we take together with our clients: With persistence, care and patience, we’re all happy with the results.
A READY-MADE CLASSIC
This project isn’t unlike dozens of others we’ve tackled through the years, but it’s one that particularly pleases me because it started out along lines that would’ve produced far less optimal results. To be sure, we didn’t score many points with one upscale tile dealer or the interior designer whose selections we helped veto, but we knew there was a better way and did what it took to guide the project to that path.
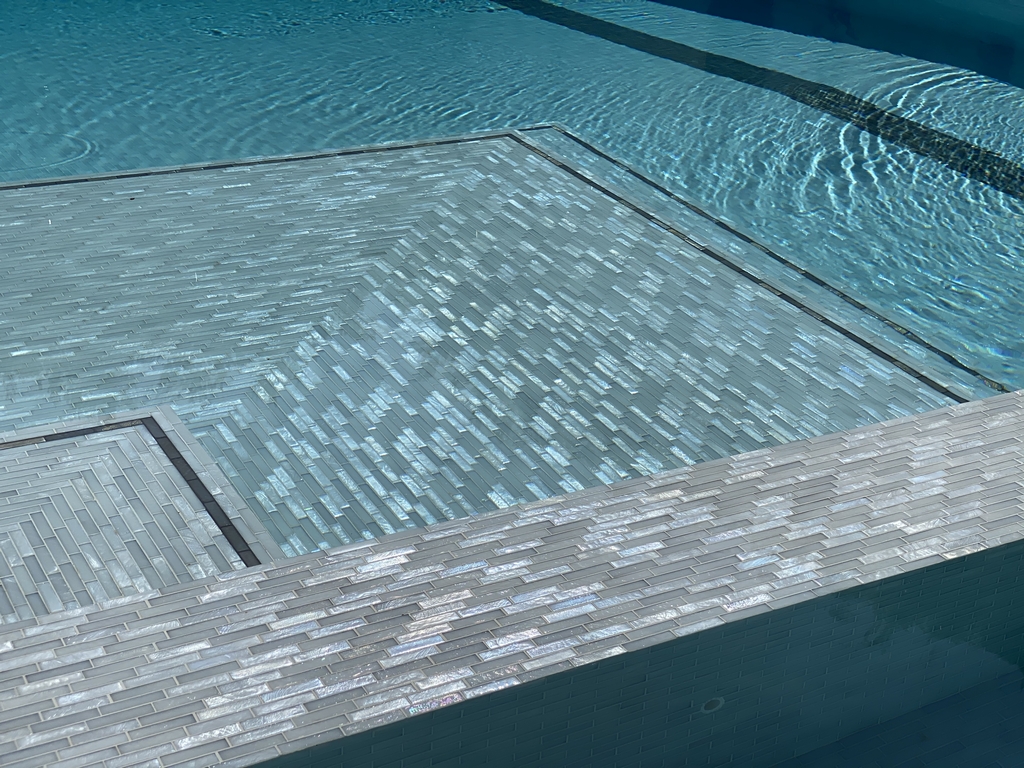
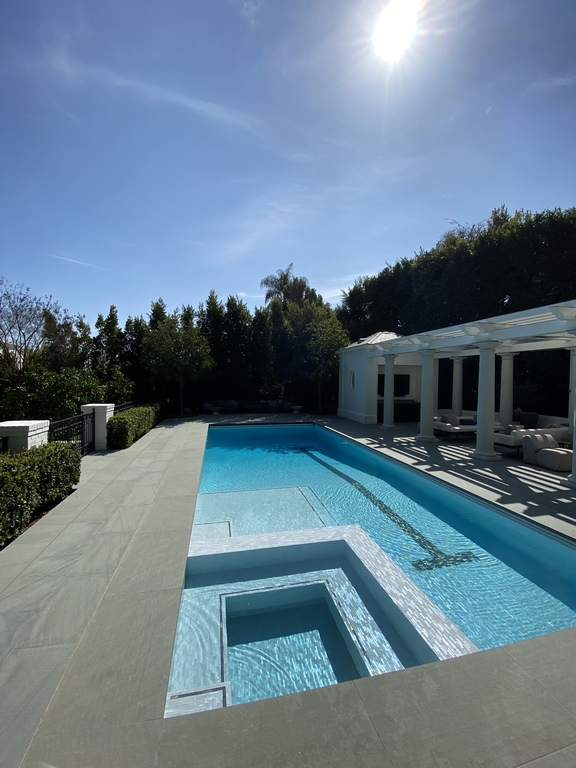
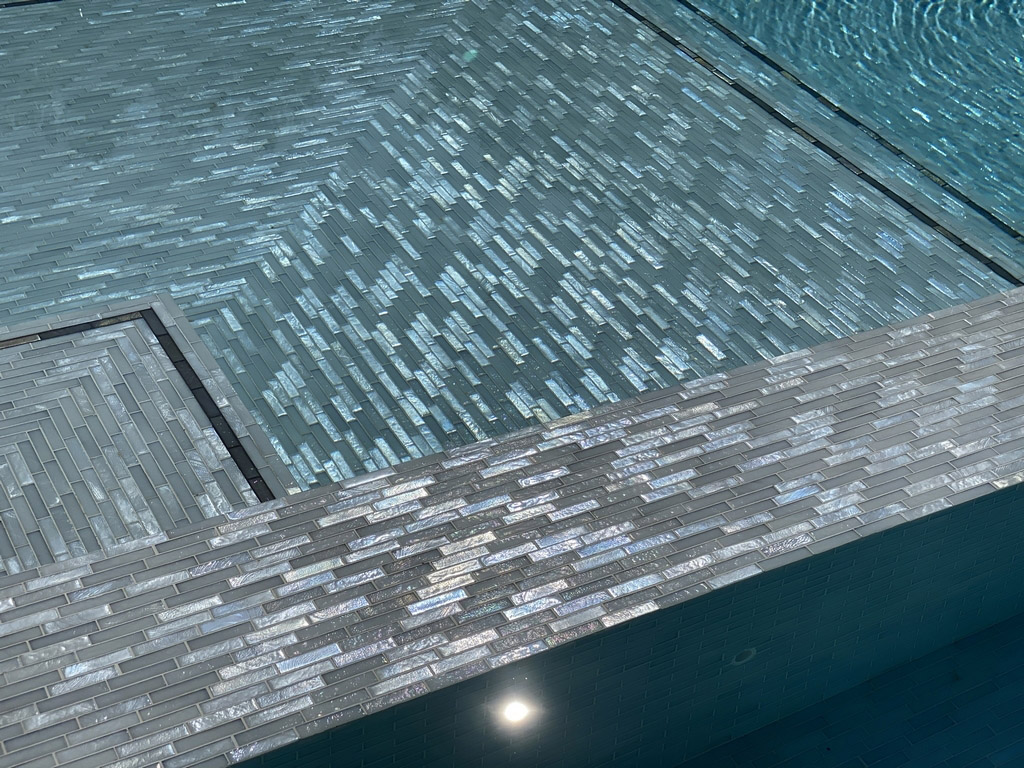
| We hit the mark in every possible way throughout the pool’s interior, meeting and exceeding the homeowners’ passion for visual details that made the installation truly custom, truly special for them. It was a level of craft they came to appreciate and value, and the great thing from our perspective is that all the hard work is evident with the pool filled and ready for use. Best of all, when you step back a few paces, it has exactly the 1950s-vintage, white-plaster look they wanted, right from the start. |
It certainly helped that the home builder knew our work and wanted to get us involved; it was also good that Fluid Dynamics came aboard and built a pool that functions beautifully, right down to its automatic cover. But I also give credit to the clients, who knew what they were after and trusted us to interpret their desires and deliver exactly the look they wanted from the start.
To a great extent, the pool now has the look of a classic, 1950s-vintage white-plaster pool, particularly from the second level of the home. But as you get closer, the details of the tile take over and the shimmering blend of iridescent and non-iridescent pieces make their impressions. And we aren’t alone in loving the outcome: The clients are right there with us!
Jimmy Reed is president of Rock Solid Tile, a tile design/installation firm based in Calabasas, Calif. He founded the company in 1985 after spending his teens and early 20s learning the tile-installation trade. In between, he attended Art Center College of Design (Pasadena, Calif.) and spent several years working in the entertainment industry. For the past 30 years, Reed has focused most of his creative energy on designing and installing tile finishes for high-end custom watershapes, a process that has seen him work with some of the industry’s leading designers and builders. He may be reached through his web site: www.rocksolidtile.com.