


Elevated Ambitions

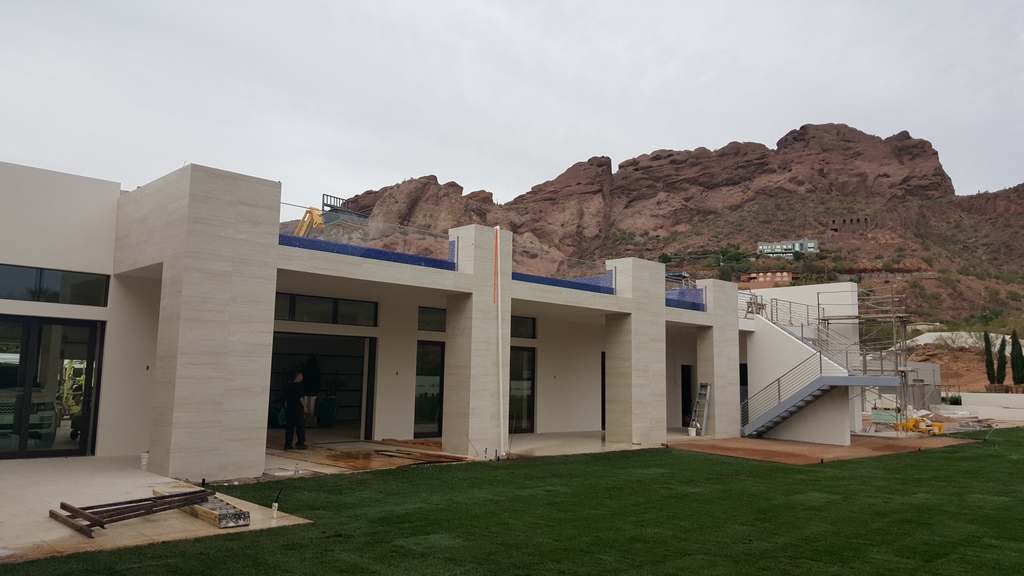
Elevated watershapes present challenges you don’t typically encounter on inground projects. That was certainly the case with this ambitious residential installation where the rooftop pool and entryway waterfeatures were all integral to the home’s luxurious, ultra-contemporary design.
We were part of a project team that included a custom homebuilder, a company we had known of for years but had never worked with before because of a long working relationship the company had with another local pool builder. This project was unlike any that the pool company had ever tackled before and was well outside of their wheelhouse. Seeing trouble ahead, the homebuilder wisely decided to put some alternatives in play. We were lucky enough to be one of those options.
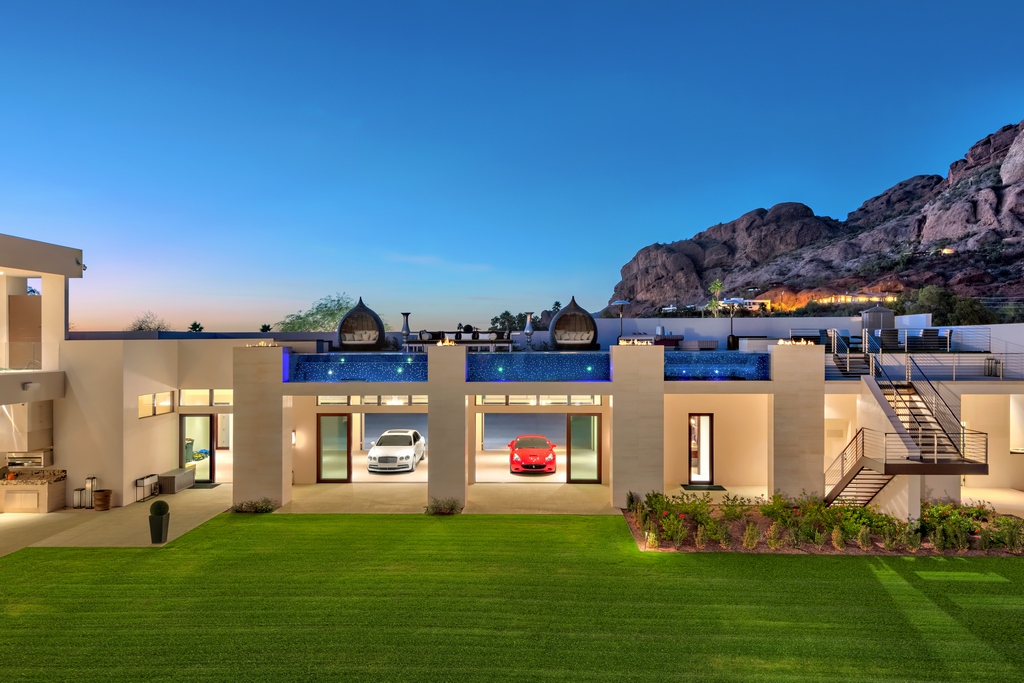
The design called for a pool on the roof over a garage for show cars and an adjacent patio that are part of a wing of the house adjacent to the primary living areas. As is typical of custom pools during the planning phase, the architect had put a blue block on the roof and hadn’t yet delved into the details or feasibility. When we became involved, the plan called for a pool that could be only one-foot deep, mostly because the deck structure added up to a whopping three-feet thick.
Obviously one foot isn’t even deep enough for a wading pool and given the location if you stood up in it you might fall off the roof. No one wanted to raise the profile of the pool to make it deeper, which would have disrupted the clean architectural lines of the house. It was our job to find a different solution.
ARCHITECTURAL CONSISTENCY
The answer was a structural pool floor that also serves as the building’s ceiling, meaning the bottom of the pool, its support structure and the ceiling are all one piece. The idea was to keep the visual thickness of the pool bottom consistent with the rest of the architecture, which is based on large expansive decks that appeared one-foot thick. Normally with elevated pools, we build a containment structure that’s waterproof, and then build the pool inside that’s also waterproofed, but this wasn’t an option. The pool had to appear and perform as an integral part of the structure itself.

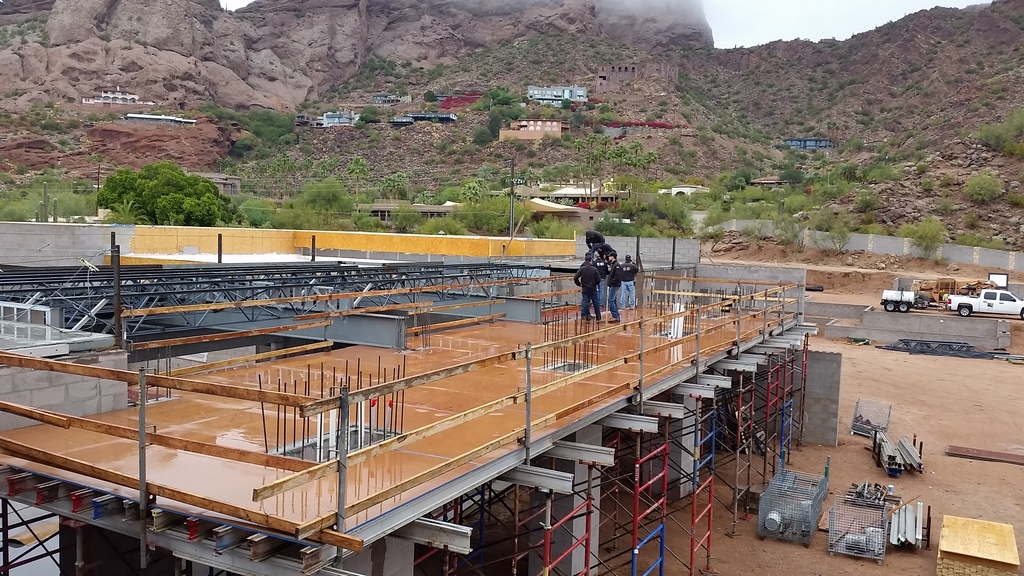
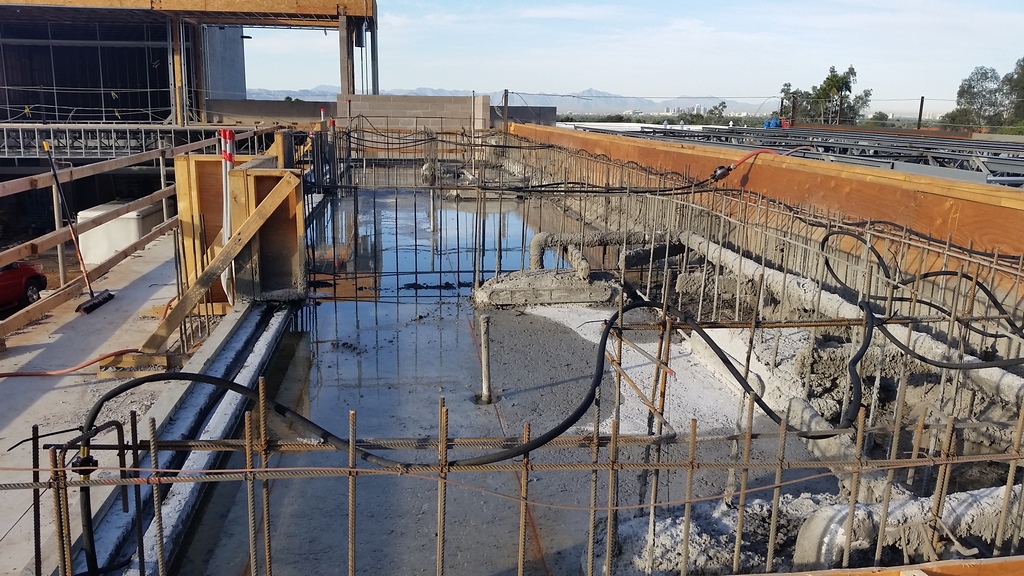
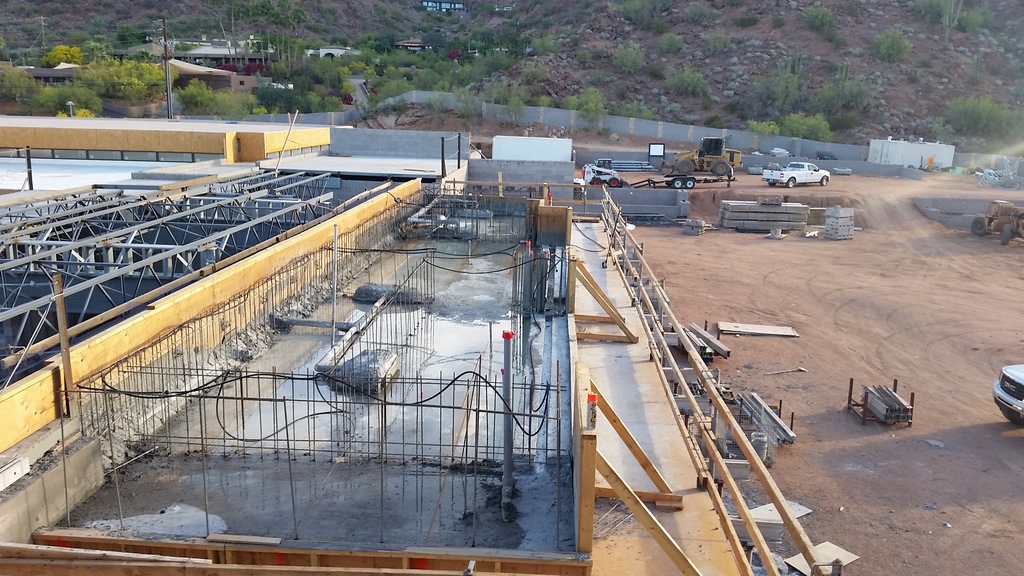
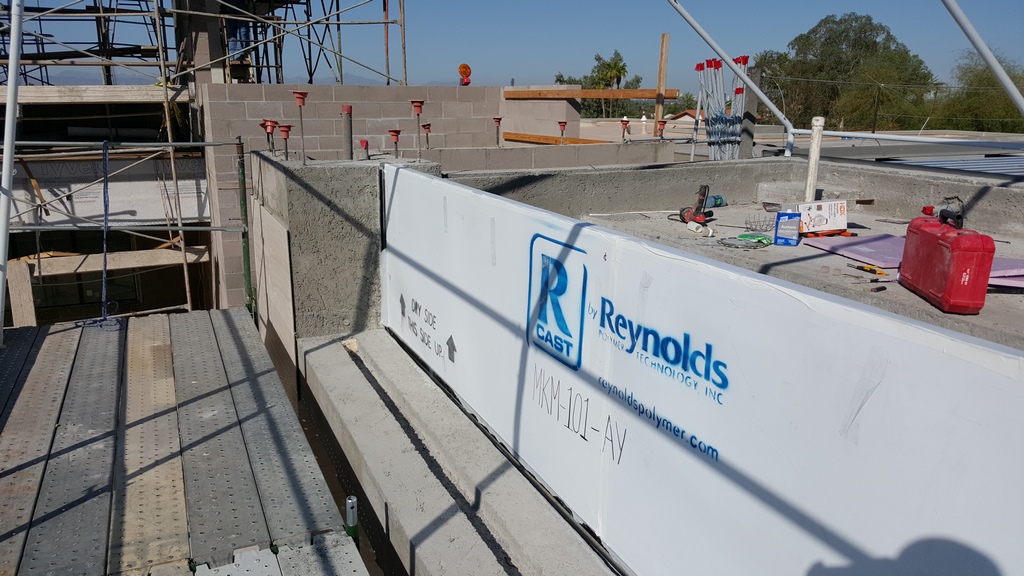
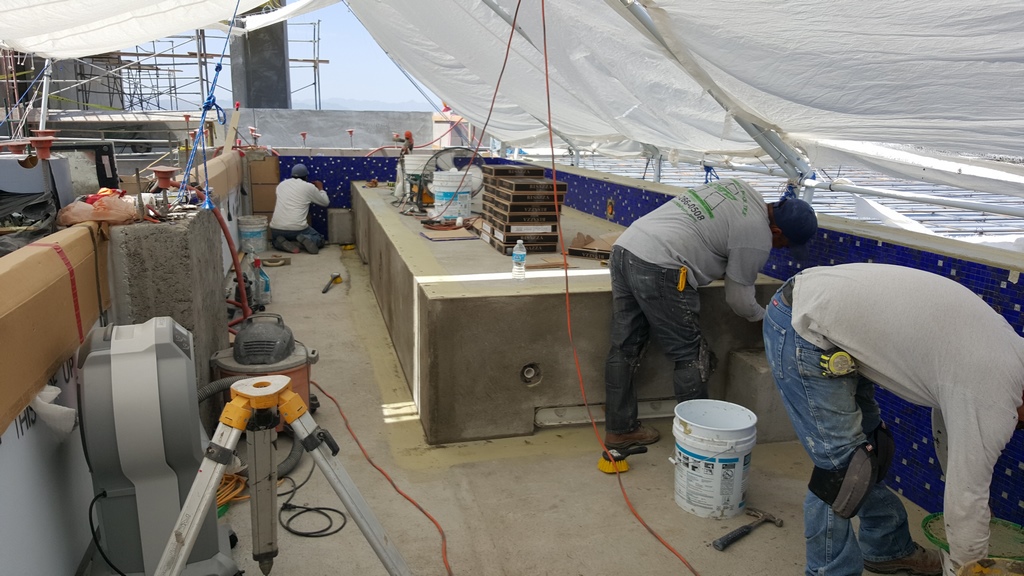
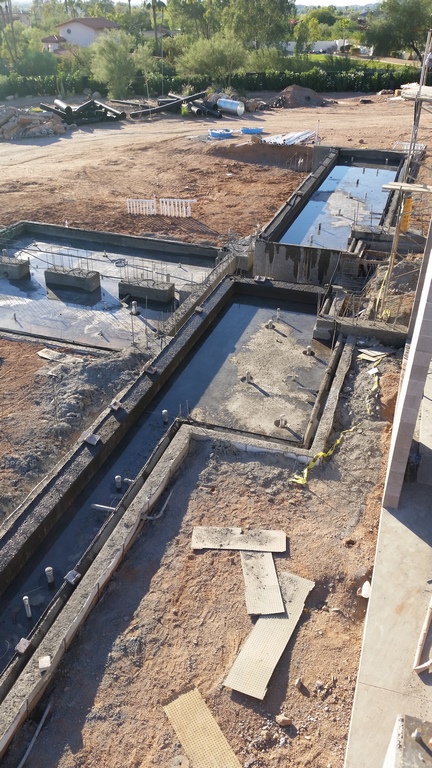
| We set the table for the pool installation with a large elevated scaffold that provided a working surface for the pool’s major construction phases, which included a poured-in-place floor and shotcrete walls. It all required zero-tolerance forming necessary to execute precise details such as the Lautner edge and mounting slots for the acrylic windows. |
The rectilinear pool became three feet deep, 54-feet long, including the spa, and between nine and 11 feet wide. It has three acrylic panels of varying lengths, each three feet high, and a large tanning shelf. There’s a Lautner edge on the deck side of the pool, but there’s no vanishing edge over the panels because there was nowhere to locate a trough without significant altering the architecture of the building.
As true of all elevated pools, there was no room for the slightest chance of leaking. We used an integral waterproofing add mixture from Kryton, called KIM, which densifies the concrete and gives it some “self-healing” capability in case of minor cracking. Where the floor meets the walls we used a Sika sealant system, which expands when it comes in contact with water making the join able to seal itself. For further protection and insurance against leaking, we lined the entire pool with Laticrete Hydro Ban.
FLOORS AND WALLS
There is no plumbing in the floor of the pool. With only 12 inches to work with, we didn’t want to put drains or anything else in the floor for fear of compromising structural integrity, and there just wasn’t’ much space. So we ran all the plumbing in the walls. The drains are in a toe-kick detail, where they’re both completely safe and almost invisible.
The one and only penetration in the floor is the main conduit for a fiber-optic star system in the bottom of the pool. The client really wanted the cosmic effect and we were obliged to make it work. When you install these kinds of fiber systems in a plaster surface, you plan on loosing about 20-30% of the fibers.

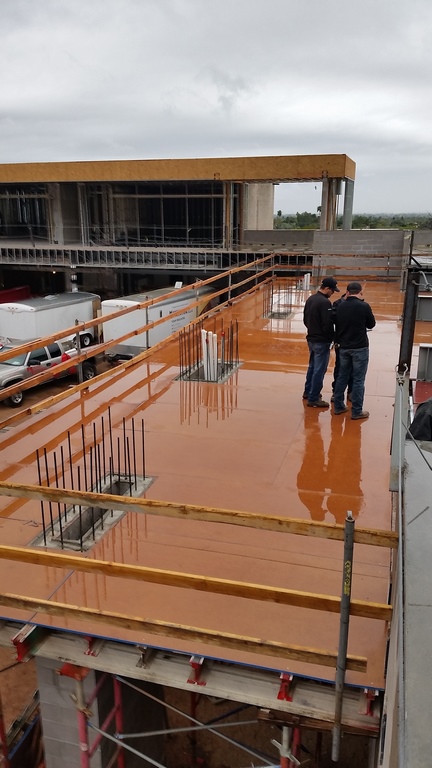
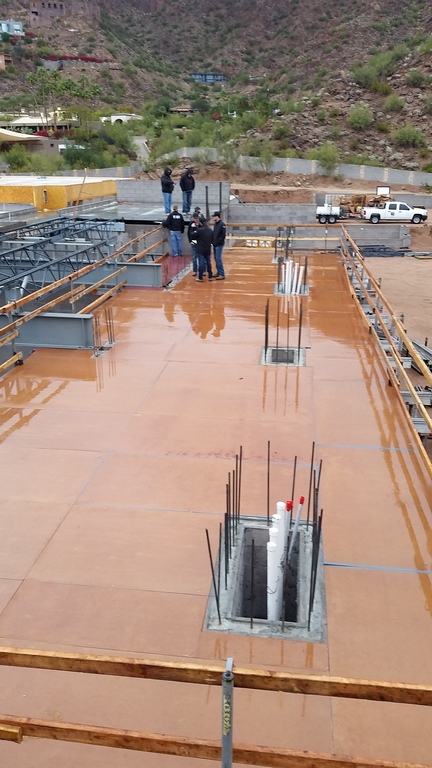
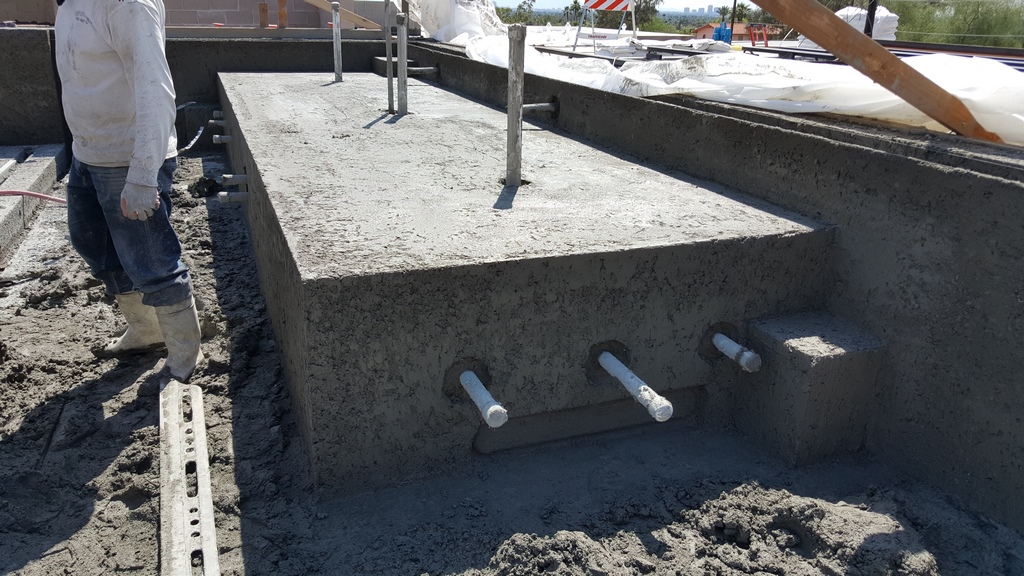
| Because the pool serves as the ceiling for the patio and show car garage, as well as the pool floor, it’s poured in place with no plumbing runs. The only penetration is for the fiber optic starry night lighting system. |
In this pool with the mosaic tile surface, we lost about 60% because there’s no way to place the fibers so they line up with grout joints and it’s very difficult to protect the fibers during the tile installation process. It’s inevitable and the main reason you must set realistic expectations with your client. It’s what the client wanted and they didn’t mind paying for all those missing points of light. It does actually look pretty good.
The pool also has a system of LED lights. At night when the lights are on, the acrylic panels glow and really show off the water, a dramatic effect that harmonizes nicely with the architectural design’s glass handrails. The interior pool and spa surface is finished in all glass-tile mosaic from Bisazza with a blue field and different shades of white, gold, green and silver mixed in. It looks really beautiful, both when looking down into the water from the deck or viewing through the acrylic panels.
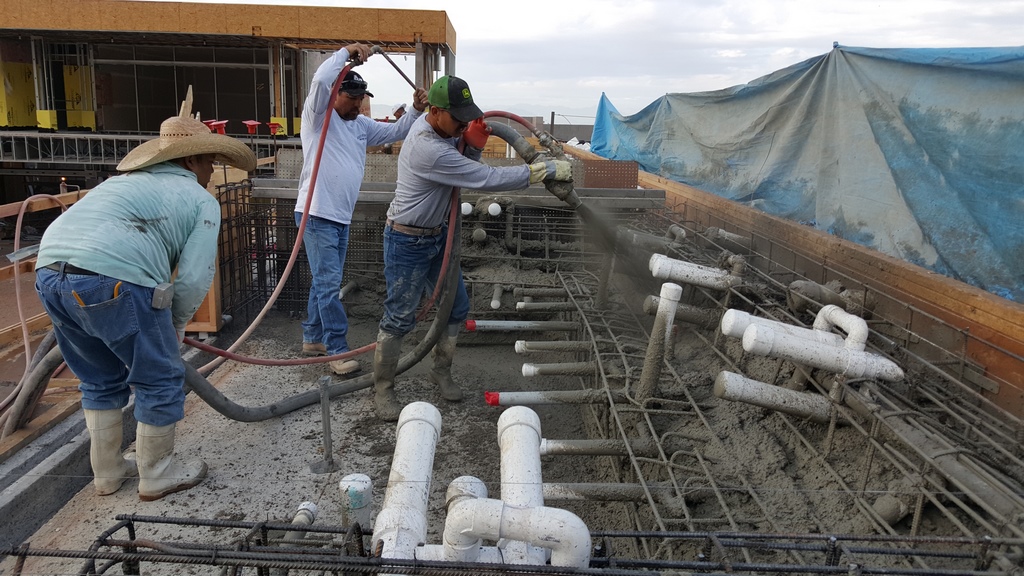
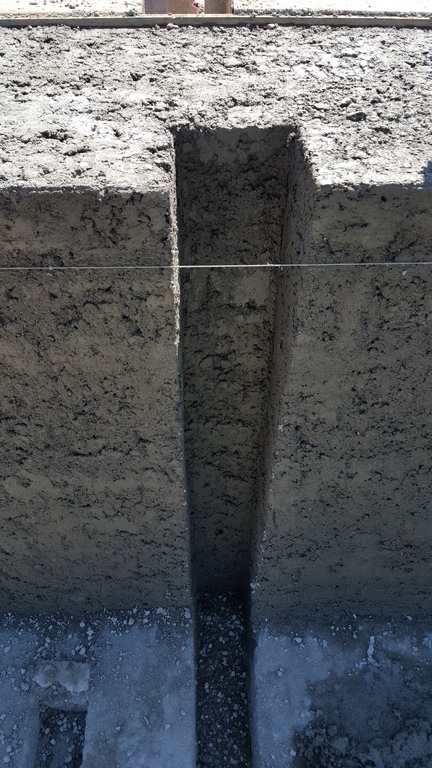
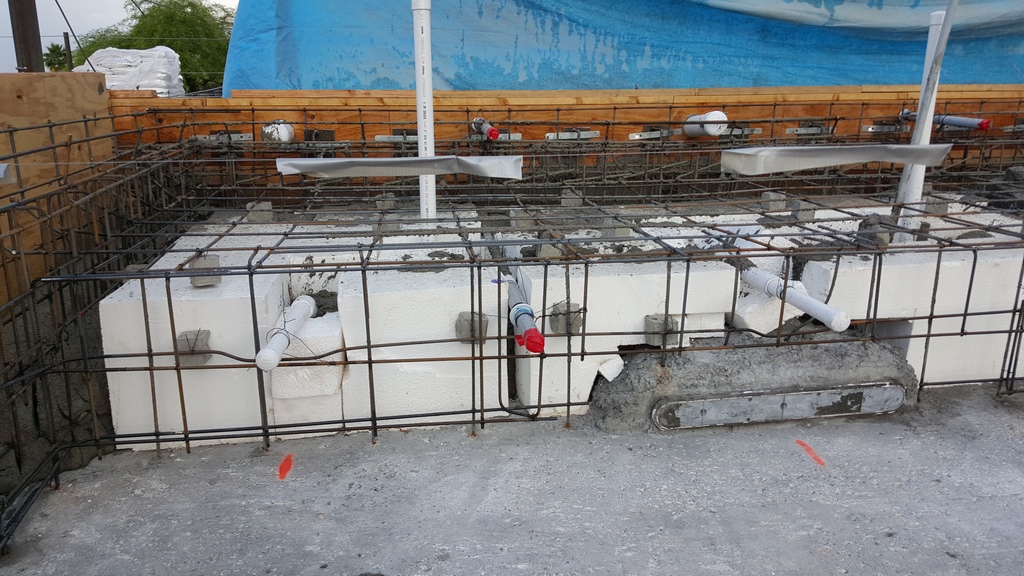
| While the floor is poured in place, we used shotcrete for the walls. Joining the floor and wall required following guidelines for the ‘concrete surface profile’ and making sure the area accepting the shotcrete was completely saturated but with no standing water, a condition known as ‘Saturated Surface Dry.’ |
The joint between the shotcrete walls and the poured-in-place floor can be a problem if it’s not done correctly. However, when you follow basic guidelines known as “concrete surface profile” meaning you create a rough surface, it increases the surface area you’re bonding with, which facilitates a mechanical bond. To improve the results, you must to keep the concrete surface as wet as possible but with no standing water (A condition called SSD – Saturated Surface Dry) and you need to ensure no rebound, overspray or laitance is on concrete surface. When you follow those guidelines there’s no issue at all with shotcrete placed on an existing concrete surface. There’s no cold joint and the interface is no weaker than any other part of the shell.
Our usual process is to fill the shell with water to test its ability to withstand the weight of the water without creating undue movement and stress cracking. We could do that on this project because the acrylic panels had yet to be installed. We had to wait until much later in the project to make sure the shell was watertight. Jumping head, when we did put water in it after the panels were installed, to be sure it didn’t leak or move. So, the measures we put in place the stay ahead of those issues worked.
CLEAN DETAILS
The client wanted the edge detail around the pool and spa, and they wanted the spa at the same level of the pool, but they didn’t want to mix the water between the pool and the spa, they just wanted it to look as though it’s all one body of water. The solution: we ran a tiny stainless steel gutter down the center of the dam wall to prevent the water from mixing. It all spills into the same gutter, but there’s no polluting the warm spa water with colder pool water, or vice versa.
The spa has seating with dedicated jets for six people, but at 15-feet long, it can easily accommodate a dozen people, or more. Because of the acrylic panels, we held the benches back away from the wall so you wouldn’t see the profile of the bench through the acrylic. The clients were different heights, he’s tall and she’s much shorter, so we designed different bench heights. We also sloped and contoured the benches for their comfort and body size.

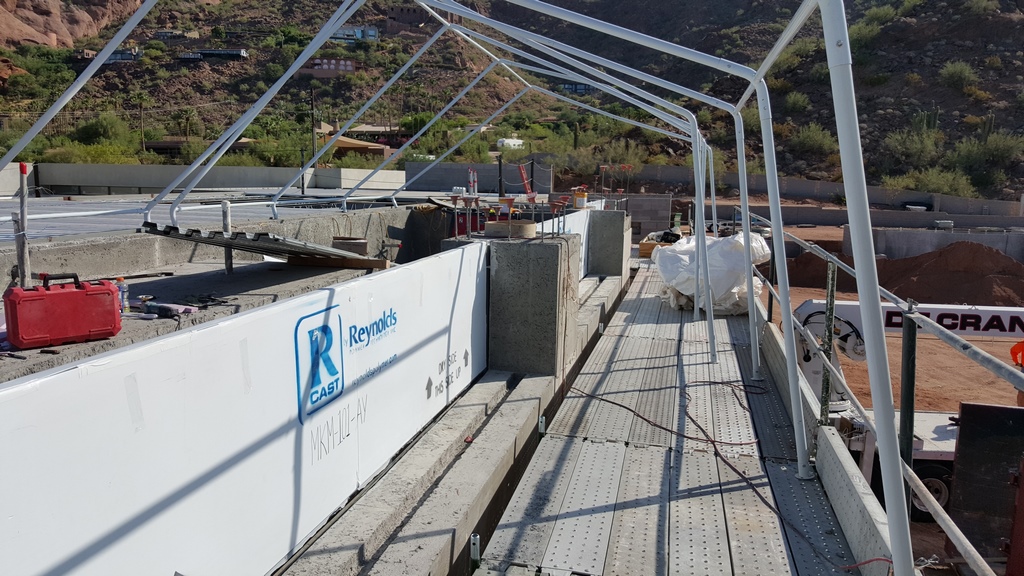
| The acrylic windows are mounted in a slot on the outside wall, where we used a flexible, watertight sealant material that allows for minor panel movement due to fluctuating desert temperatures. |
We’ve done quite a bit of work with acrylic panels in the past and we’ve found that problems with leaks have less to do with the panels themselves, but the workmanship of the concrete that holds them in place. If the concrete is shot in place there can be problems with voids and shadowing. If you don’t do a good job patching those spots the water can migrate around the panels.
The three acrylic panels are three inches think and measure 42 inches tall by 16- and 14-foot lengths. They’re installed in wall slots that are eight inches deep around the bottom and sides, which are filled with flexible sealant that will allow the panels to move slightly with wide temperature swings.

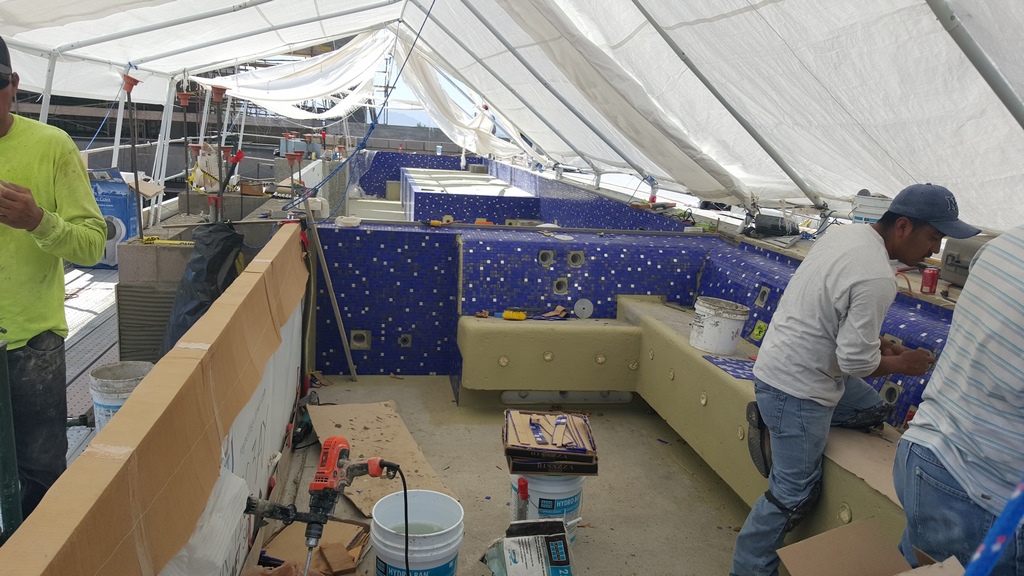
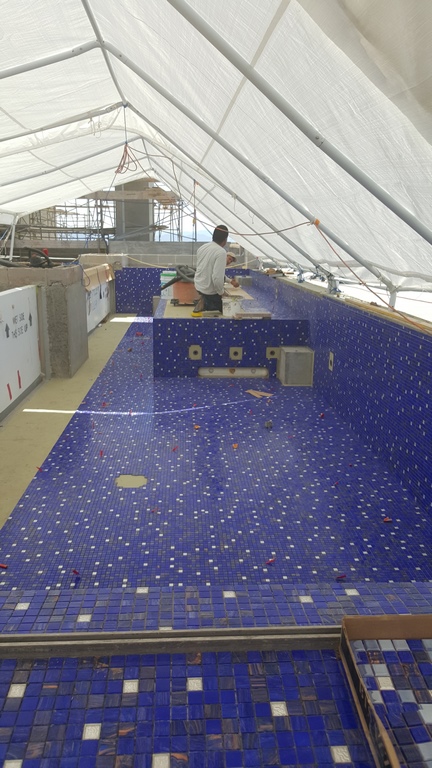
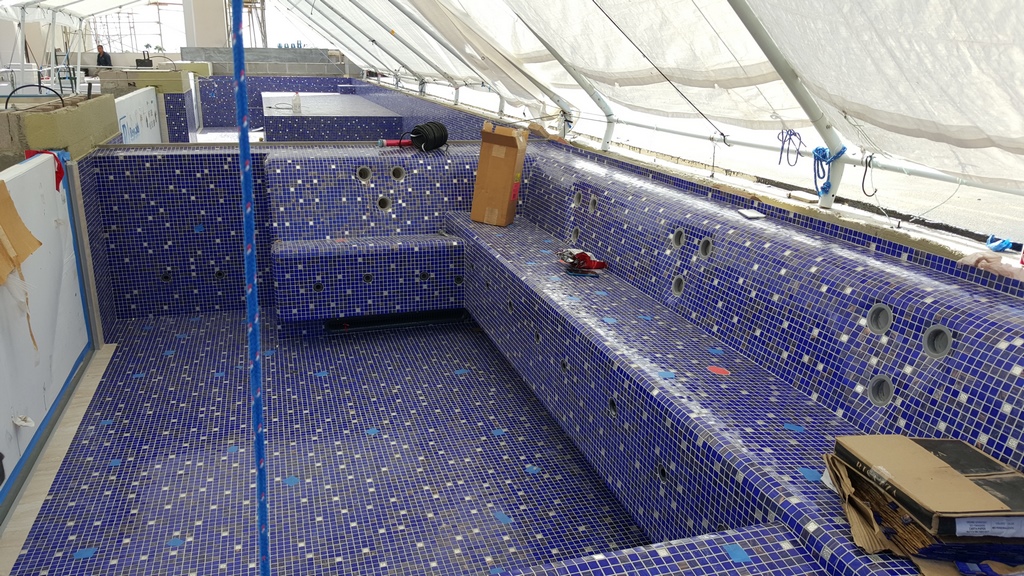
| The pool is finished in beautiful glass tile that required a tent to help control conditions during the installation. Precise cuts around the many contours were essential to achieving a seamless appearance. |
Working on the first floor, the equipment location changed three times during the course of the project. It’s now located in a small interior room downstairs. This is where the computer modeling really comes into play. Moving the equipment locations and changing all the plumbing runs could’ve been a nightmare, but because we avoided needless expense and wasted time by modeling every to the finest detail, we were able to avoid a wide range of possible problems. For example, there are 30-inch steel beams that would’ve been in the way had we not figured out how to work around it ahead of time.
We also were working around a series of steel imbed plates on the outside of the pool structure that were used to support the adjacent structure, deck system and trusses. We were able to route our plumbing knowing the exact location of the conflicts. That kind of precise planning and coordination is extremely important on all of our projects, but even more so on work like this where you need to fit everything into a structure and coordinate with multiple trades including plumbing, electrical, HVAC and everyone else.
CAREFUL COORDINATION
We use a type of Building Information Management (BIM) system which enables us to put all that in place and make sure we can get our plumbing from points A to B without disrupting the work anyone else is doing. On this project, we modeled the entire back of the house where the pool is located; enabling us to look at any cross section we wanted, at any time. That kind of modeling, which you see more typically in large commercial projects, takes more time and effort up front but when it comes time to do the work on site, there are no surprises for us or anyone else on the job. I’d estimate our detailed modeling saves time by a factor of 10.
This level of planning really comes into play in the equipment room. We plan where every piece of equipment goes and where every pipe comes into the room. There are no “creative” plumbing solutions that you see on projects where the plumbing and equipment placement are figured out on site. That’s a big part of why most of our equipment rooms are always very clean and very organized.

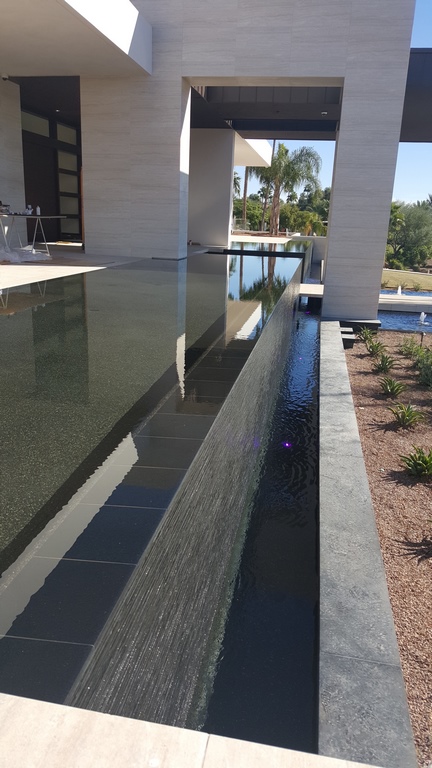
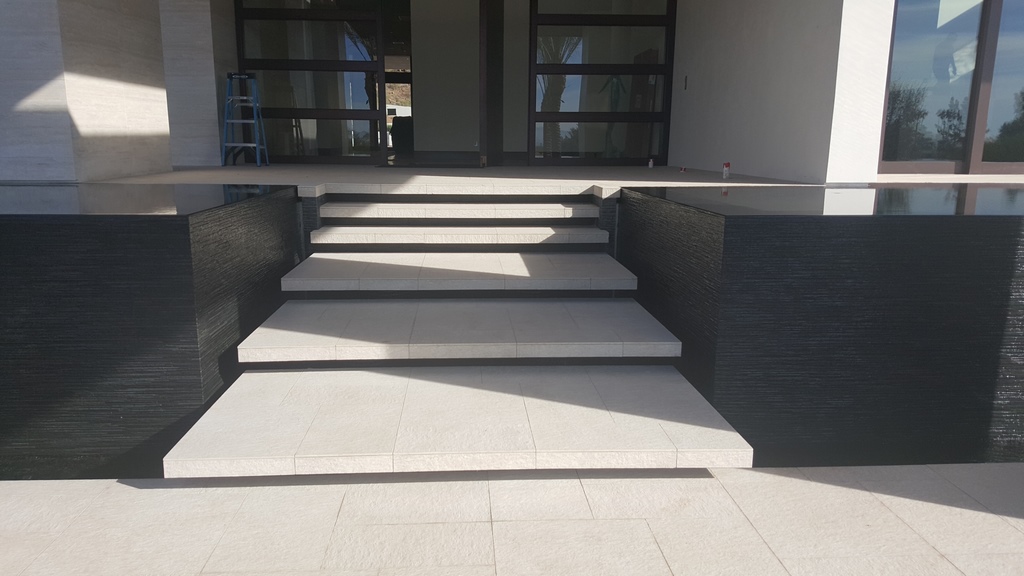
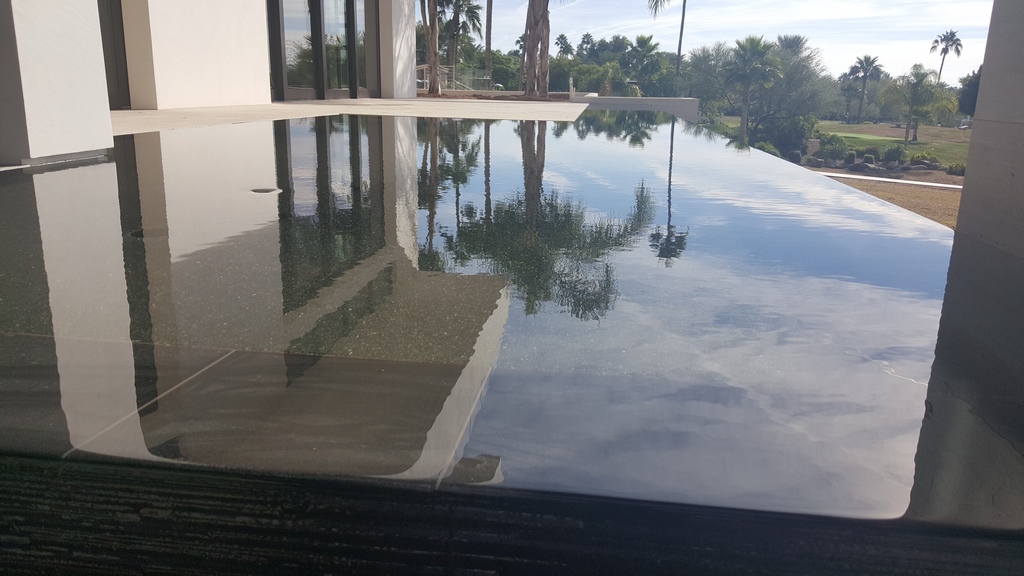
| A spectacular reflecting pool/fountain feature makes a bold entryway statement. It required some careful work customizing the Lautner edge overflow slot at the interface with the front columns. With an edge that long, we had to accommodate future movement by using stone material on the vanishing edge that can be polished to create an even flow of water. |
We used cartridge filters on this project because we want to filter down to a fine micron size. Water quality is important on every project, but with acrylic panels it really exposes any issues you have with water clarity. It has to look polished or the whole look falls apart. You don’t want anything floating around. We have an Intellichem system from Pentair managing the water balance and sanitizer level, and we have a Clear Comfort AOP generating system to provide another layer of treatment.
At the front of the house, the 105-foot-wide feature was originally meant to be a reflecting pond up high and a koi pond at the floating steps to the front door, in the end both wound up reflection pools. You approach the front door by a set of steps in the center of the feature, creating a dazzling approach for visitors. It has a vanishing edge on the front side of the feature, a Lautner edge around on the perimeter.
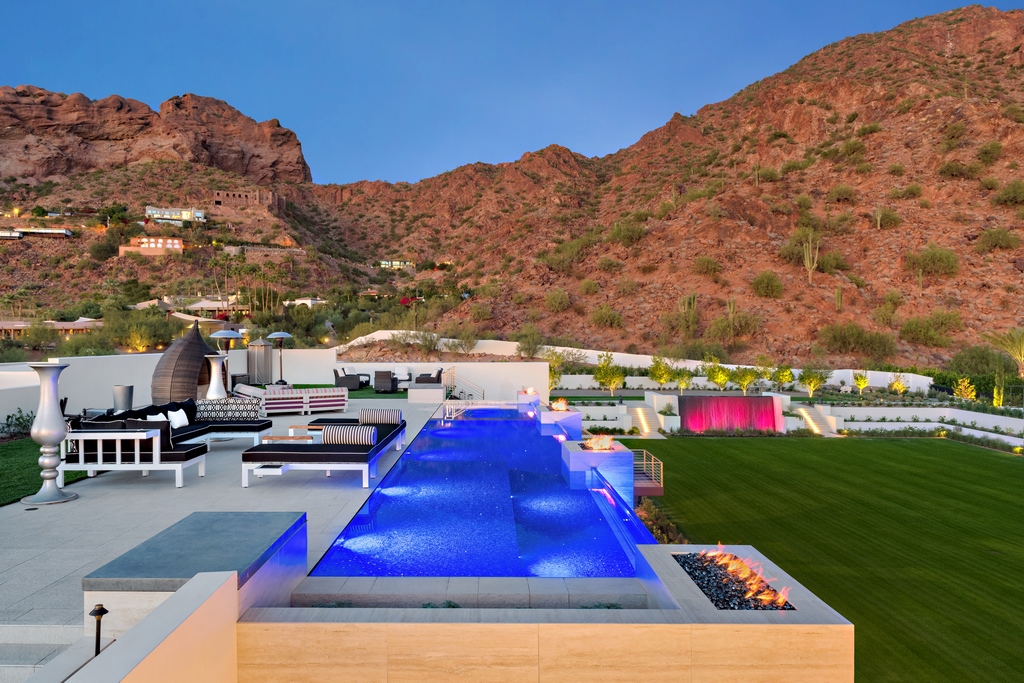
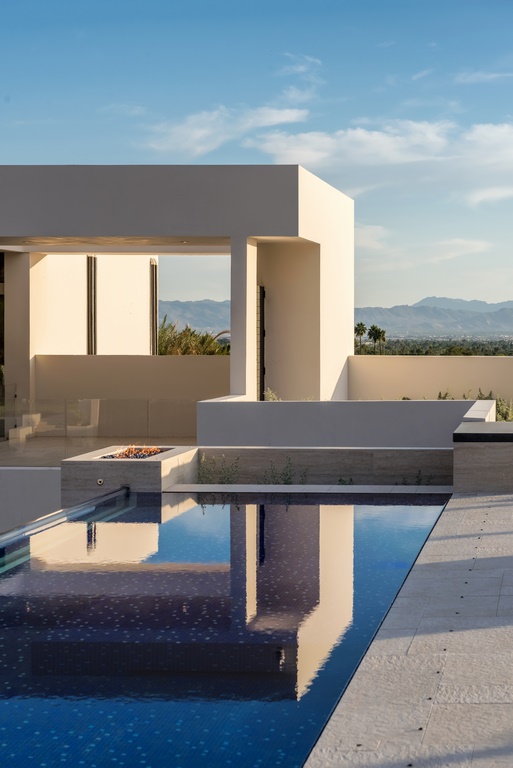
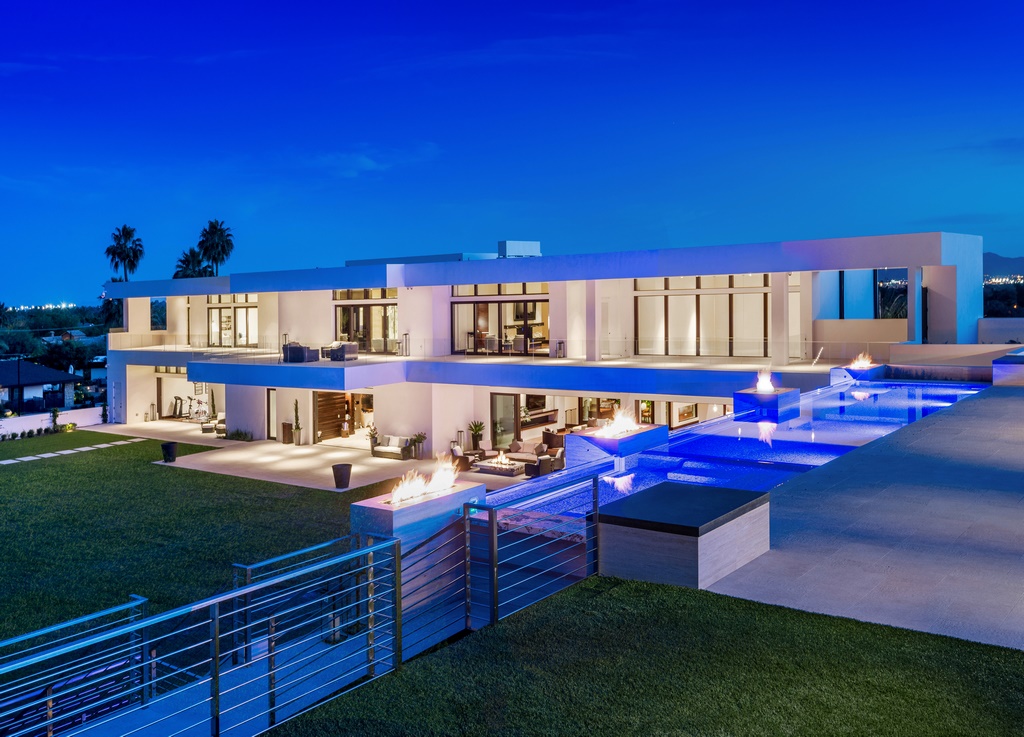
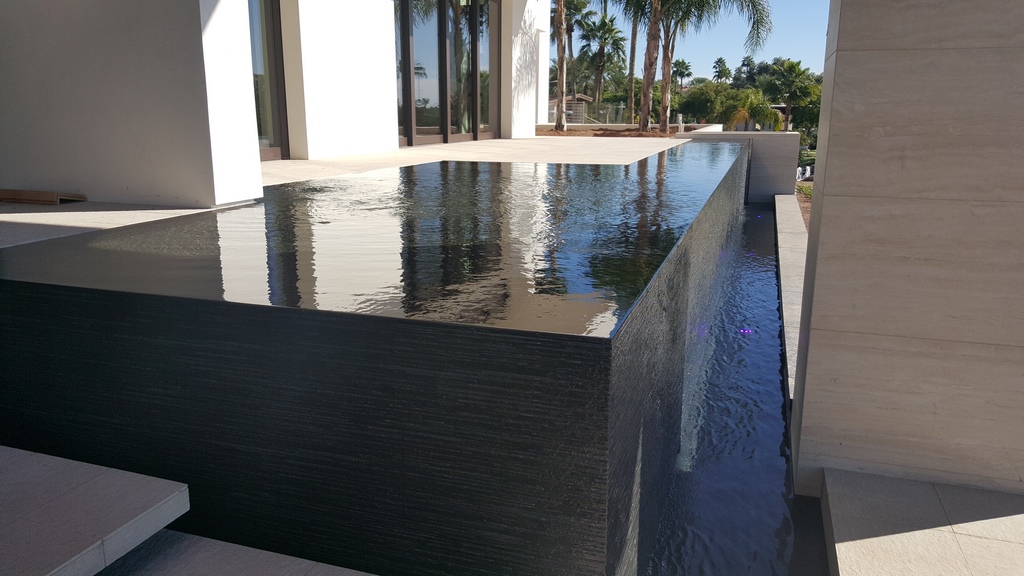
| The finished pool speaks for itself with its clean architectural integration and inviting blue waters, a perfect compliment to a home that is built on truly elevated expectations and design. |
There’s 320-feet of edge that have to be uniformly wet all the time. It has moved very slightly, but any time you have edges that long, you can anticipate some movement, which we explained to the client and the project team. With that in mind, we used stone material, black absolute granite, on the edges that can be ground to adjust level.
There are also some tricky details where we interfaced the Lautner edge detail with existing columns, which were mostly worked out on site. We had to fabricate some custom stainless steel corner sections of the perimeter overflow channel that are mounted in notched areas at the base of the columns. The front wall of the feature is finished in 24-36 inch ceramic tiles. The interior is all finished with black Pebble Tec.
FINE FINISH
Finally, we created a water wall feature in the backyard. It’s a canted wall measuring 25-by-9 with a basalt split-faced stone surface that creates a textured flow and soft background sound. The feature, which is based on the massive water wall at the front of the Aria Hotel in Las Vegas., has flow over the wall of a mere 6 gpm per linear foot.
At this writing, the project has been finished for more than four years. The pool and spa have not moved or leaked at all.
Because our team at Red Rock has extensive experience in home construction, we’re well suited for projects like this that require close integration of the watershape and home structures. Even with all of that going for us, this project was among our most challenging installations but, as it turned out, the end result matched the client’s elevated ambitions.
Rick Chafey co-founded Red Rock Contractors in 1998. He earned his bachelors of science degree in construction engineering and management from Arizona State University in 1995. With years of construction experience during high school and college, upon graduation, he was hired as director of construction for local manufacturing company, where he completed multiple large commercial projects including manufacturing plants, retail centers, residential subdivision developments, and commercial remodels and tenant improvements.