


Up Right

Have you ever noticed how often the costliest part of a project turns out to be something that will ultimately be hidden from view? This happens quite frequently in projects involving any sort of slope, where the piers and grade beams beneath swimming pools, for example, can cost far more than the rest of the overall project.
In my own work, I’ve noticed this budgetary quirk most frequently when it comes to retaining walls, where providing the foundation they need to withstand the forces applied by a slope can be startlingly extensive and expensive. It’s not what you’d call glamorous work, but it certainly is important – and will vanish completely from view.
Most often, we’re called on to build these walls when new homes are being built on slopes. To create level areas for driveways, parking pads, patios, pools and other key features, you need to insert retaining walls and fill the void behind them up to the desired grade. These are not project elements you want to revisit once your work is done, so getting everything right the first time is obviously important.
When I started in the business, I saw lots of retaining walls made from railroad ties and timbers and poured concrete, none of which are commonly used these days. I’ve also built many walls using natural stone: I’ve always loved them for their obvious beauty and design flexibility, and we still do the majority of our work in natural stone – assuming, of course, that it fits the design aesthetic and the client’s budget. These days, however, more and more projects are completed using pre-cast block systems.
ALL FALL DOWN
I’m among those who mourn the fading of those old-school walls, but there are many reasons why pre-cast retaining wall systems (also known as segmental retaining walls) have jumped to the fore in so many landscape projects.
When they first emerged, those products were mostly the sterile-looking, split-faced concrete blocks seen in every strip mall or shopping mall – truly homely stuff unworthy of use in well-designed spaces. Through the past twenty years or so, however, these products have evolved to a point where they provide reasonably convincing rock faces and mosaic patterns.
Better still, unlike natural stone walls that can require years of hard work to master, pre-cast systems are relatively easy to work with and can be picked up by most crews with some training and a bit of hands-on experience. The one subtlety here is that each pre-cast products has its unique aspects and detailing, so working with them in the field and getting accustomed to their idiosyncrasies is important.
Early in my working life, I spent a good amount of time building small terraces, step systems and larger-scale retaining walls using pre-cast products from Versa-Lok (Oakdale, Minn.) and Keystone (Minneapolis, Minn.) – a pair I refer to as the Adam and Eve of the pre-cast industry. Both make excellent products, but as is true in so many things, a product is only as good as its installation!
Just about every day, for instance, I drive past a property where a pre-cast retaining wall is holding up a garden – but barely, as it is in its last days as a retaining wall and will soon be little more than a pile of rubble. This is a clear case of an excellent product installed the wrong way.
I recall driving by the site years ago and seeing the installation in progress. I also remember wondering why on earth they were building it with no base or any provision for drainage. It was doomed to failure even before it was complete. If it had been a big wall where failure would have been catastrophic, I might have spoken up. But this was a small wall, so I resisted the temptation to run across the site screaming “No, no, no! That’s wrong!”
My point is, small or large, a retaining wall needs to be installed properly in order to perform its duties into the entirety of its foreseeable future. So let’s take a look at the actual installation process and break it down into sensible steps. In this case, the walls are small and some serve as planter boxes, but the installation principles are the same here as they are on major slopes.
[ ] Foundations: All building projects must start with solid foundations, and retaining walls are certainly no exception.
A variety of factors come into play here. In the northeast, for example, we obsess over freeze/thaw issues, while contractors in the west worry about seismic activity and all of us worry about poor soils. Whatever the case, it’s crucial with retaining walls to dig down far enough to find a solid subsoil base and then build back up with stone.
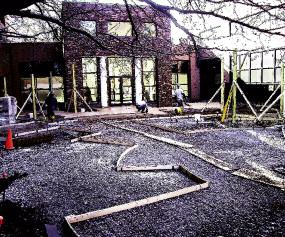
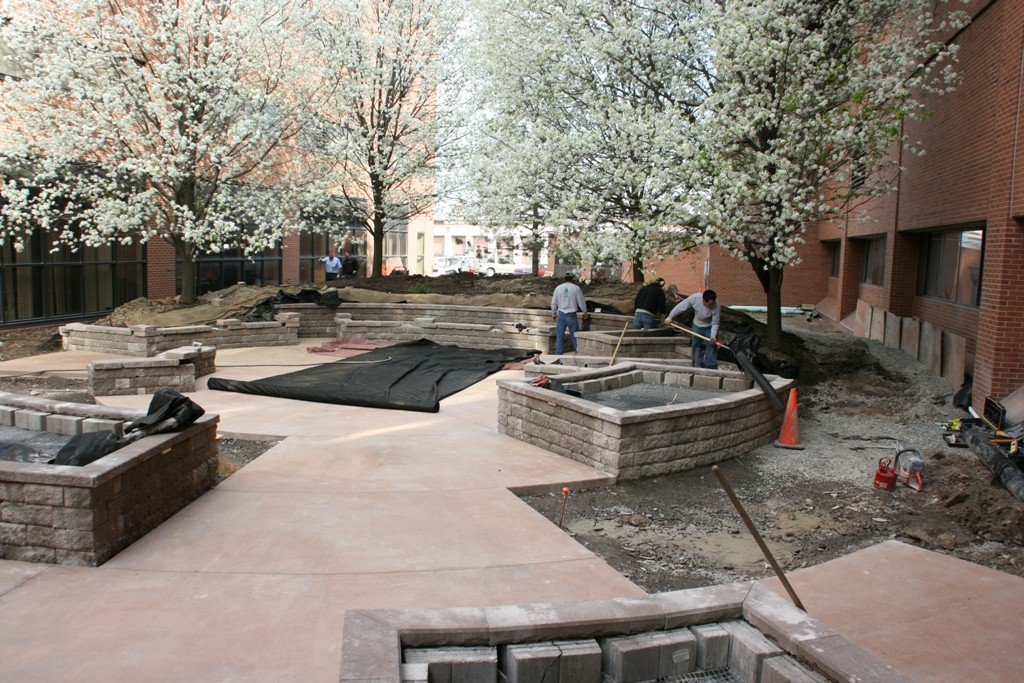
In my business, the stone we use in setting foundations is called crusher run – a mix of crushed stone and stone dust. In Figure 1, you see a large expanse of #2 crusher run used as a base for both the concrete terrace and the walls, which will be built with a product from Versa-Lok.
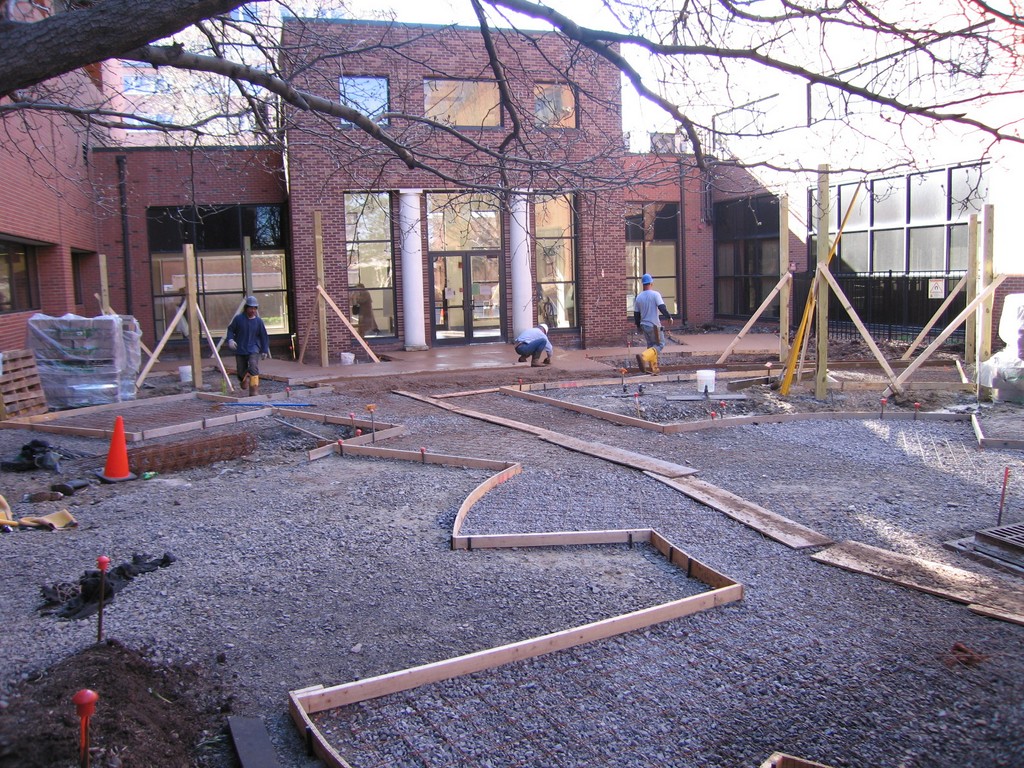
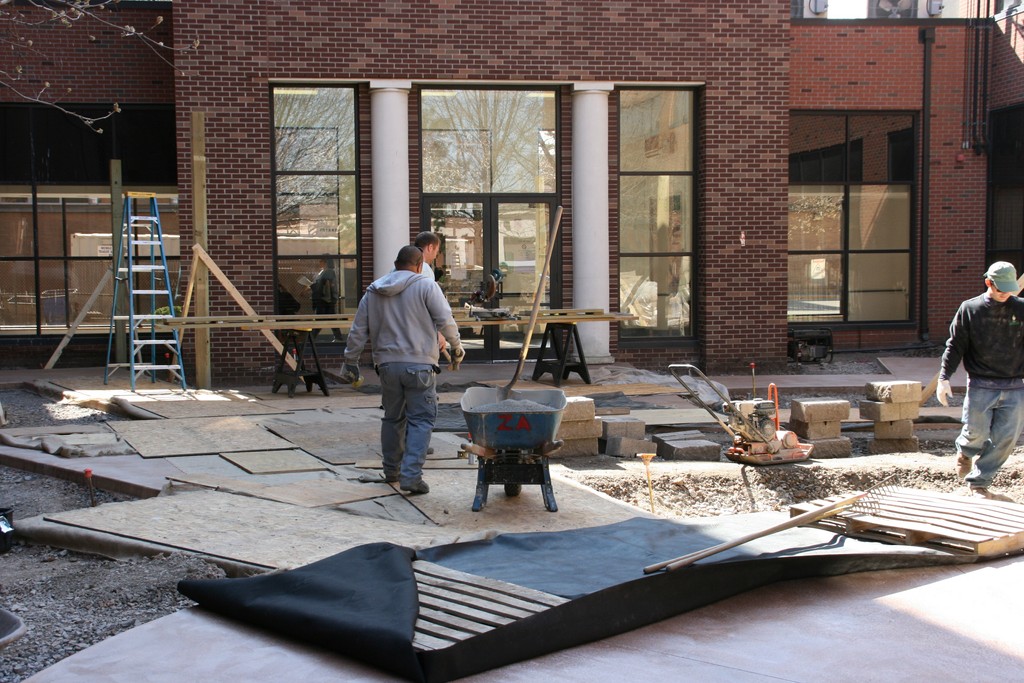
| Figures 1 (left), 2 (middle) and 3 (right). |
We tamped three-inch lifts of the crusher run into place, running it over with a plate tamper multiple times. I want the plate tamper literally hopping before I’m satisfied: This tells me that the base is rock-solid and ready to support the massive weight we’ll be placing on it.
[ ] Setting the Base: Once the terrace was poured, we covered it and began working on the walls and planters (Figure 2). The plate tamper sits atop a three-foot-wide plateau of stone on which we’ll center the 12-inch-wide base blocks. The space behind the blocks will be filled with washed drainage stone, while out front we’ll place another layer of crusher run to the top of the (buried) base course, which we’ll then cover with topsoil.
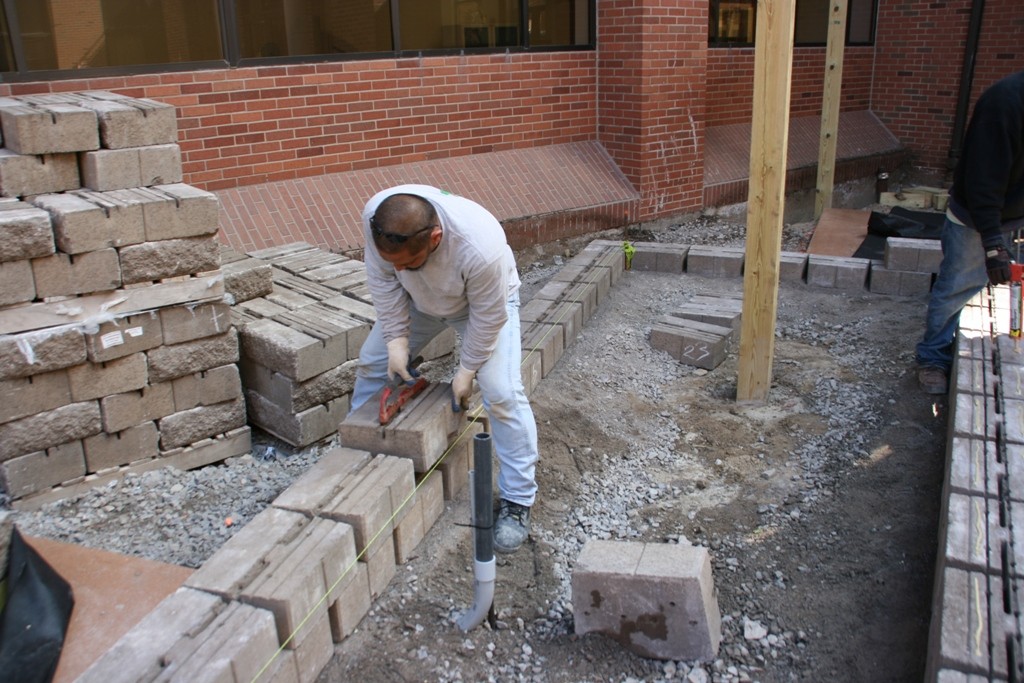
[ ] Leveling: We tamp and level the base stones to within a tolerance of an eighth of an inch, then apply either #1 crusher run or concrete sand as a leveling base. We place blocks on this base, smacking them down to set them and compact the leveling base. My preference is to use the top of a mattock (seen in Figure 3). Others prefer a dead-blow hammer, but I like the mattock because the wood head won’t mar the block but has enough heft that it helps me seat the blocks with ease.
[ ] Straight Up: In this particular project, we’re setting the planter-box blocks to be vertically plumb with each other, easing access to the beds by people in wheelchairs. In almost all common retaining-wall applications, however, the blocks are battered back with every course.
The holes and trenches in the Versa-Lok system are used to set their pins, which in this case would batter the blocks back about three-quarters of an inch. Once set, the pin drops into the trench of the block below. (Other manufacturers use similar pin systems or some sort of lip that acts as a guide in battering the blocks.) It’s all quite simple if that’s the look you want.
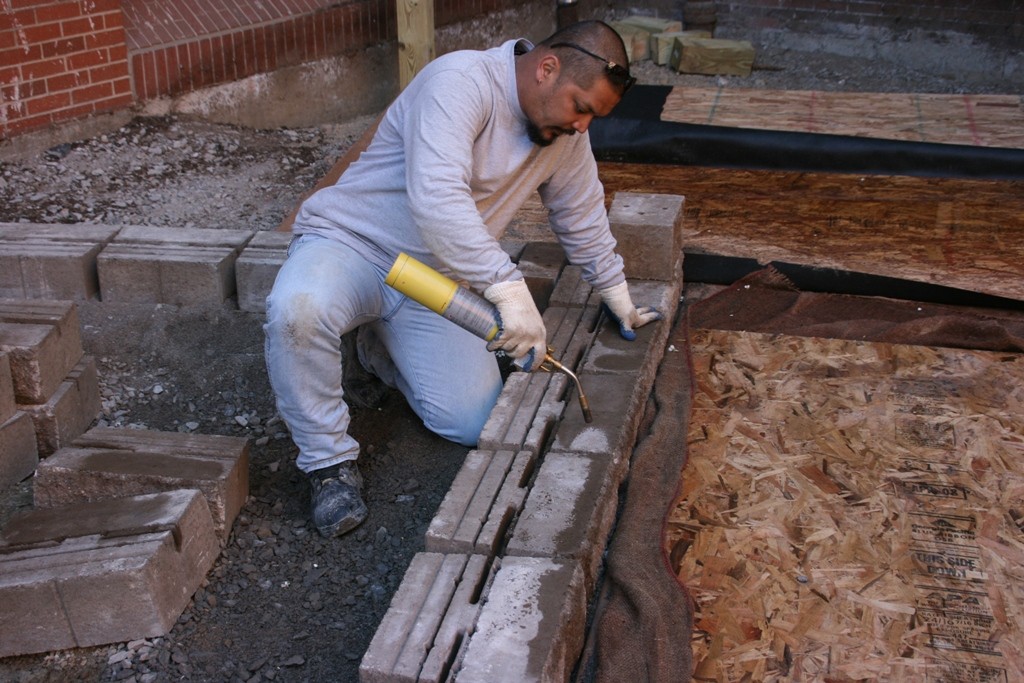
| Figures 4 (left) and 5 (right). |
In this case, however, we were going straight up. When that’s the plan, we glue each course as we go up, using a small, hand-held torch (Figure 4) to dry and warm each block so it readily accepts the construction adhesive. (While some of these adhesives claim to work well in damp or freezing conditions, I take no chances!)
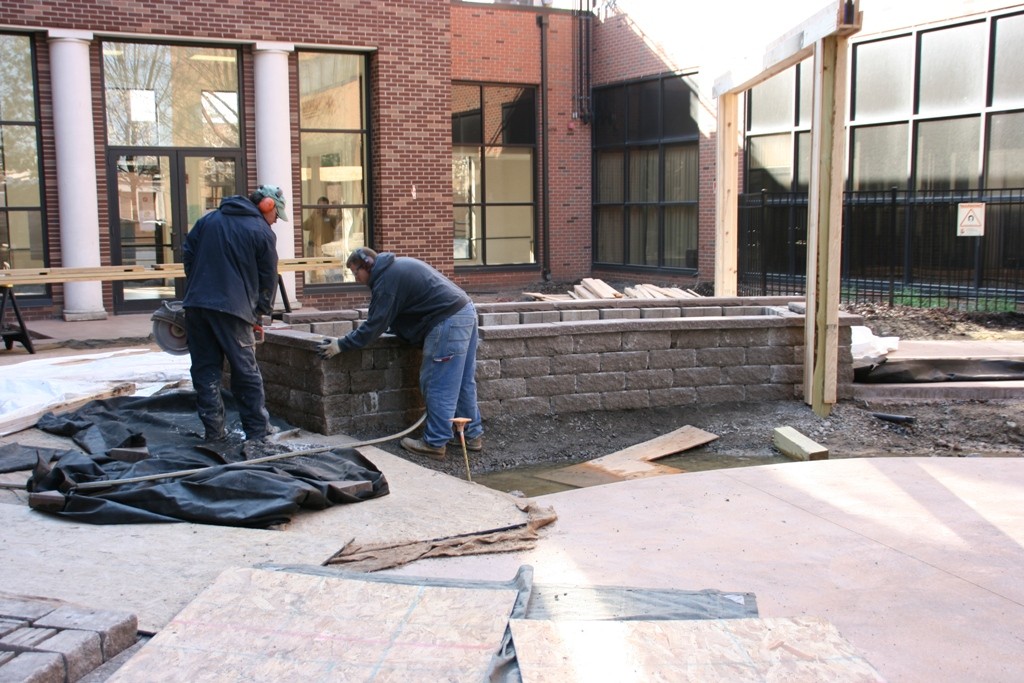
[ ] Row atop Row: Once the blocks are set up and beaded with construction adhesive, we simply place a fresh row (Figure 5). In this case, the walls will be 24 inches tall, so we’ll use four courses of six-inch block (with the first one set three inches below grade) and top the wall with a three-inch-thick cap. We string a line along the backs of each row to ensure straightness, doing so in back because the irregular fronts of split-face blocks are unreliable guides.
[ ] Preparing for Drainage: Once we’ve placed the third row of blocks, we set geogrid across the entire planter box (see the sidebar below for details on this material).
Before we place the grid, we backfill the entire void up to this level with #2 washed stone that will allow any excess water to flow down and away from the planters to a below-ground drainage system. We isolate this stone with a layer of landscape fabric to separate the stone from the soil that will eventually fill the space behind the completed wall.
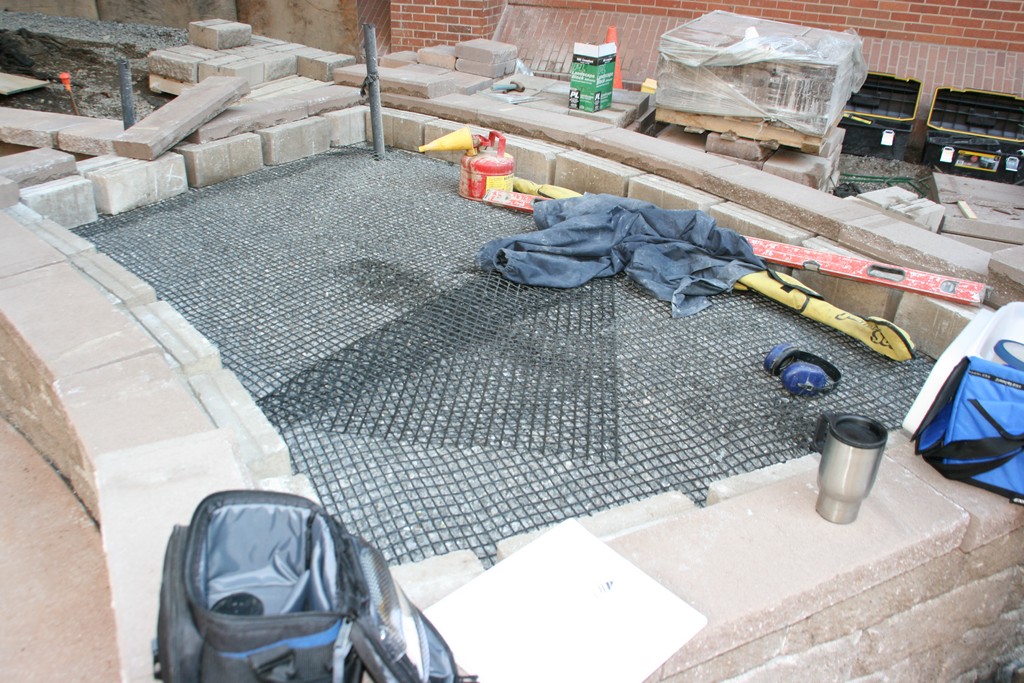
| Figures 6 (right), 7 (middle) and 8 (right). |
We position the grid material under the blocks so that their weight (and the adhesive or, in some cases, the pins) will hold it in place (Figure 6). With this step, we assure that there is virtually no chance of the wall blowing out.
[ ] Capping: As mentioned above, the walls feature three-inch-high caps. In most systems, manufacturers offer standard 12-inch-deep caps, but in this case, we used a product that was only nine inches deep to shorten the reach to the plants for people in wheelchairs or on gurneys. We cut each cap into place individually to ensure tight fits (Figure 7), then removed them, washed down and dried the top course of blocks and glued down the caps.
|
Earth Anchors With pre-cast retaining walls, geogrid is used in exactly the same way as deadmen in wooden retaining walls and auger-anchors in poured-concrete walls: Their purpose is to keep their walls from falling over as a result of the pressure generated by the enormous weight of the material behind them. To be even more precise, the geogrid actually separates the backfill material into a series of smaller backfill areas. Say, for example, that the geogrid in an eight-course wall of six-inch-thick blocks is placed atop rows two, five, and seven. This is actually a series of three walls, one of which is 12 inches tall (rows one and two), another that’s 18 inches tall (rows three to five) and yet another that is 15 inches tall (rows seven and eight, plus the cap). Separating the larger wall into these smaller walls stabilizes the entire structure. It is critical that the geogrid – whether it comes from Tensar Corp. (Atlanta), U.S. Fabrics (Cincinnati) or some other supplier – is placed properly between block layers and runs back beyond the angle of repose of the materials being retained. As a rule, we figure on a 45-degree angle for average soils. This means that, at a wall elevation of four feet, the grid will reach back at least eight feet – one foot for the wall’s thickness, about two feet for room to maneuver behind the wall, four feet to reach a 45 degree angle, then one additional foot for safety. If in doubt, ask your supplier: They’ll be more than happy to tell you how to deploy geogrid on any of your projects. — B.Z. |
Particularly in freeze/thaw areas, the single biggest cause for retaining wall failure is lack of proper drainage. In this case, we took care of that issue by placing a perforated four-inch pipe we’d wrapped in a fabric sleeve and sent to daylight downslope.
The entire area behind the retaining wall (with the exception of the top 12 inches dedicated to planting) was filled to the slope’s angle of repose with #2 and #3 washed stone, which is so porous you can blast it with a firehose without pooling any water. This means that we are getting all of the water out from behind the wall – meaning there will be none there to freeze in winter.

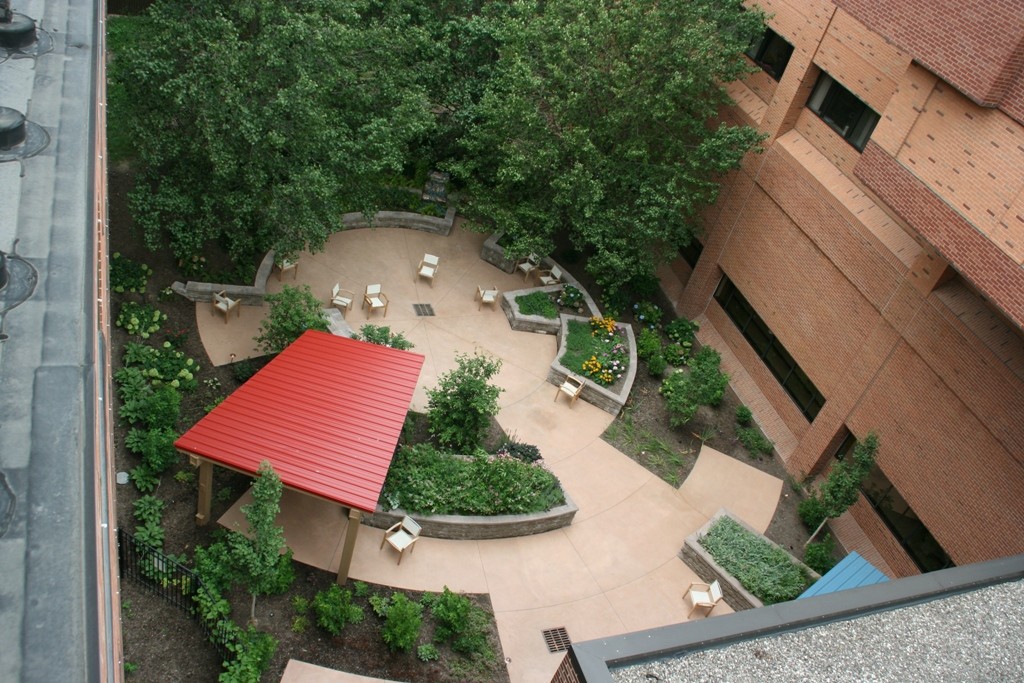
| Figures 9 (left) and 10 (right). |
[ ] Ready for Plants: With the fabric and planting soil in place (Figure 9), we’re all ready for plants. One of the last steps involves cutting off the excess fabric.
[ ] Done: The newly completed garden shows off its dramatic geometry (Figure 10).
Bruce Zaretsky is president of Zaretsky and Associates, a landscape design/construction/consultation company in Rochester, N.Y. Nationally recognized for creative and inspiring residential landscapes, he also works with healthcare facilities, nursing homes and local municipalities in conceiving and installing healing and meditation gardens. You can reach him at [email protected].