


Swiss Precision

There’s no denying the fact that, after many years of hard work, my company enjoys a solid and perhaps unmatched reputation for being able to approach perfection in the application of fine tile to the interiors of pools and spas.
As I see it, we’re all about discipline and mental energy – that is, the training and raw skill that goes into applying sheet after sheet of tile with precision as well as the level of concentration required to keep it from lapsing into any sort of routine exercise. My crews know what they’re doing technically, but they also know how to maintain their concentration and keep an eye on quality through long, repetitive operations on the job site.
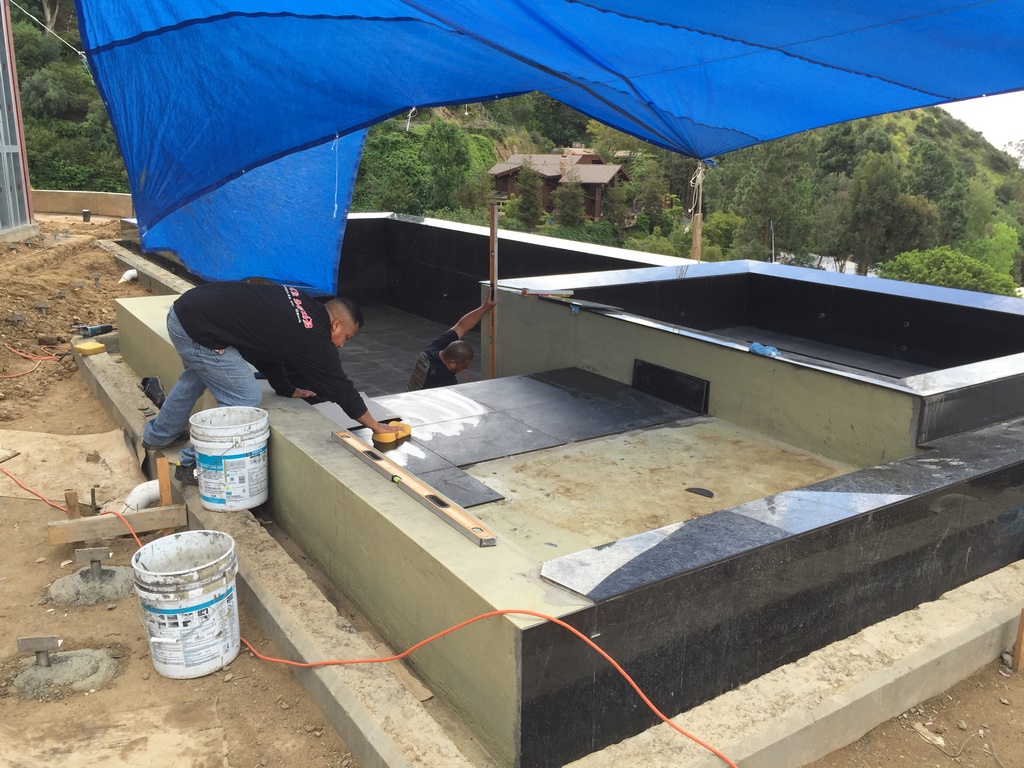
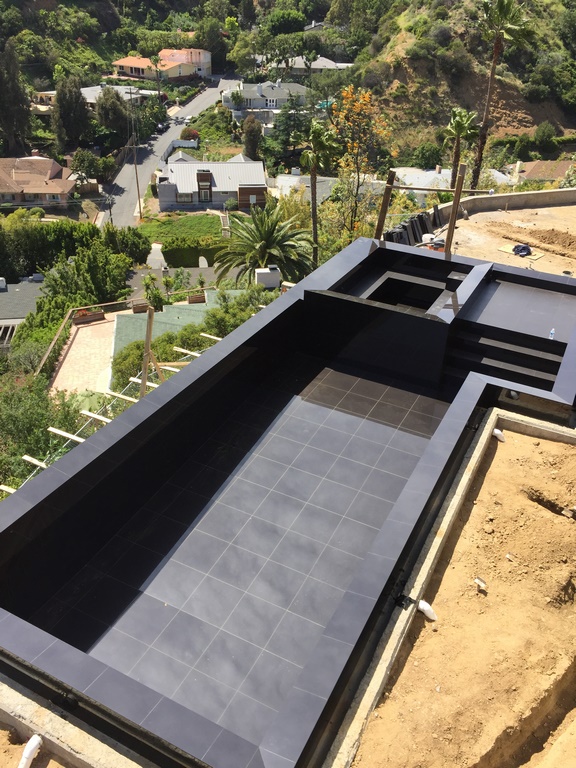
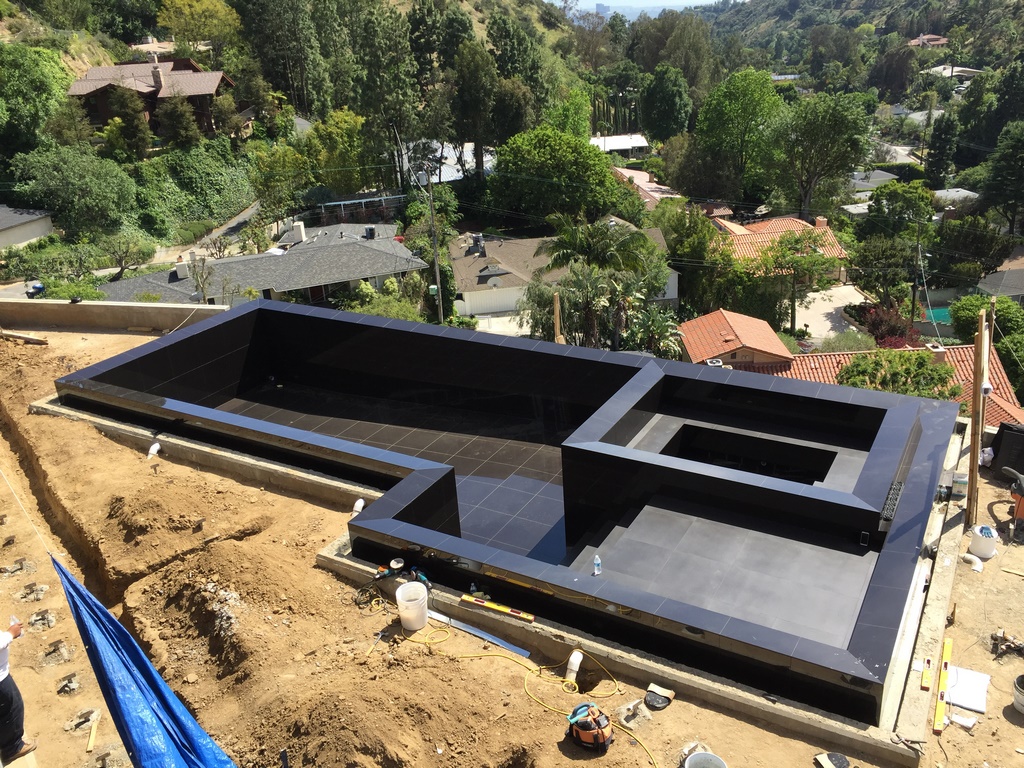
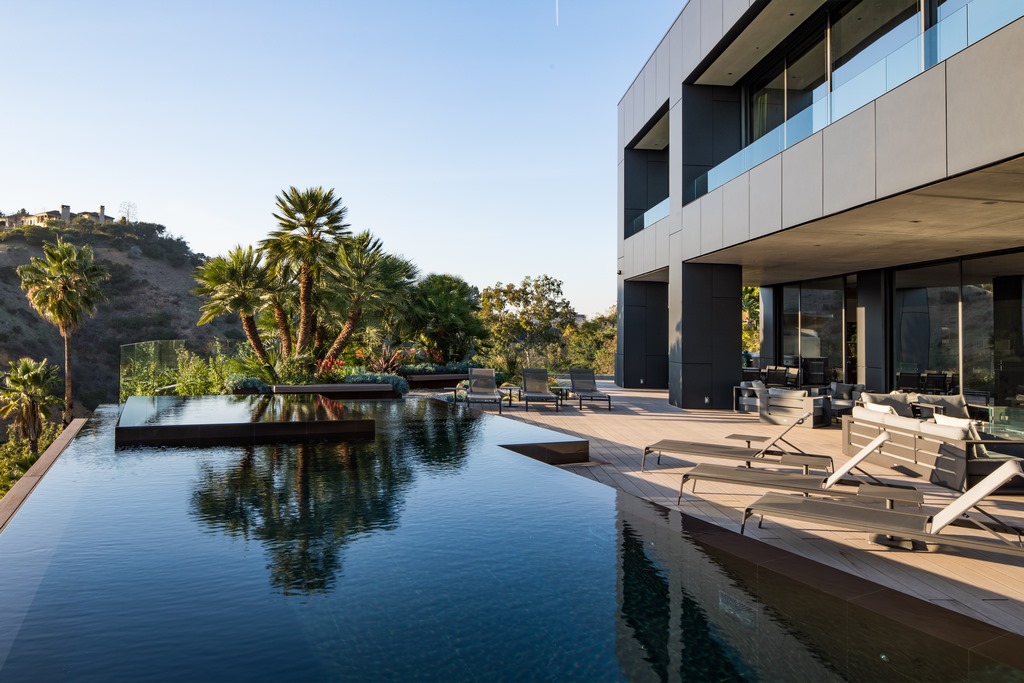
In the project under discussion here, the processes were all familiar, but the material we were applying was quite unusual: At a whisker shy of 24 inches square and with an unusual thickness, the porcelain tiles were heavy, shiny and utterly unforgiving; from the very start, we at Rock Solid Tile (Calabasas, Calif.) knew we were in for an interesting ride.
HIGHER AMBITION
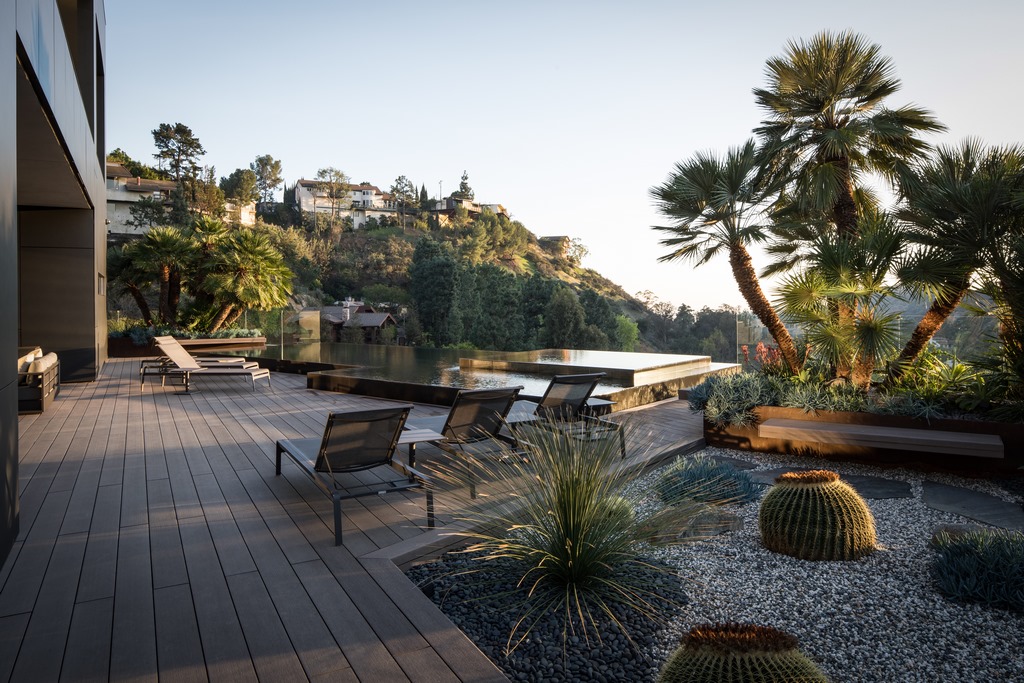
As has been mentioned in the first two articles in this “Collaborative Art” series, the client in this case was interested in the pool strictly as a reflective ornament: He didn’t care about steps or a shallow lounging area or the appearance of the water so long as it served as a mirror to its surroundings, and it’s to Atlanta-based pool designer Shane LeBlanc’s credit that he was able to persuade the client to think about the home’s future owners and their need for basic human-friendly pool and spa features.
But from my point of view as a tile applicator, leaving out those fun, functional details in this case would’ve simplified our task considerably!
It was LeBlanc’s creative discussions with the client that led to the choice of the large-format tile now found inside the pool and spa. The client really didn’t care as long as the interiors were dark and would encourage beautiful reflections, but LeBlanc sold the large-format concept by pointing out that it would neatly echo the pattern established by the home’s exterior cladding.
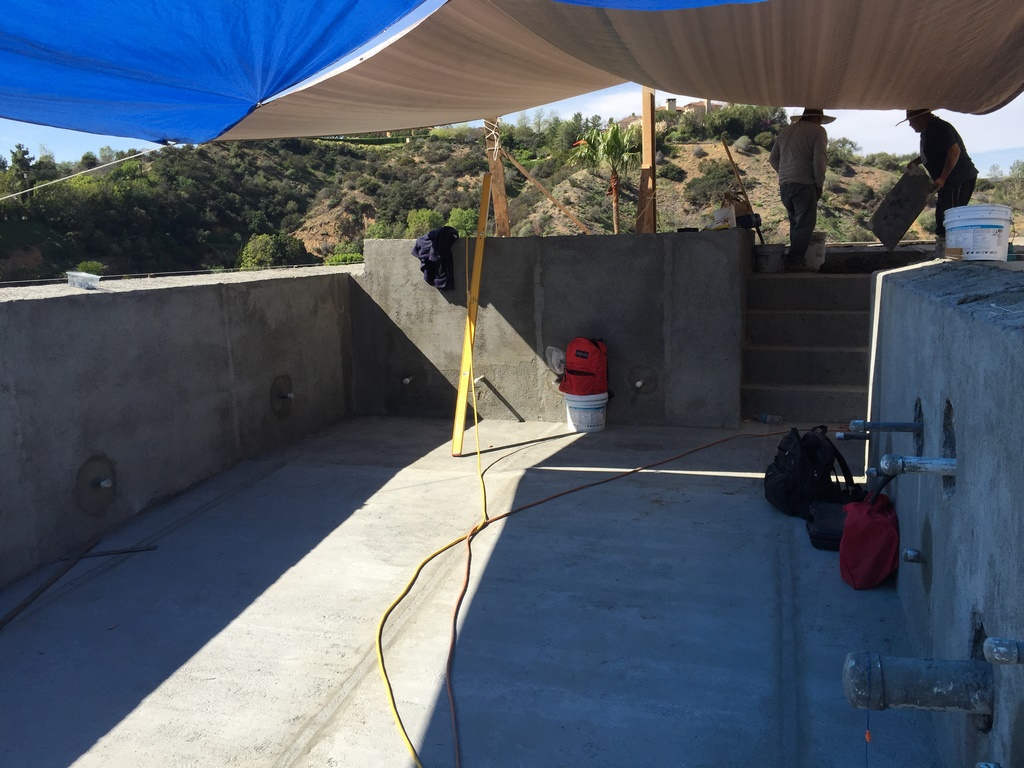
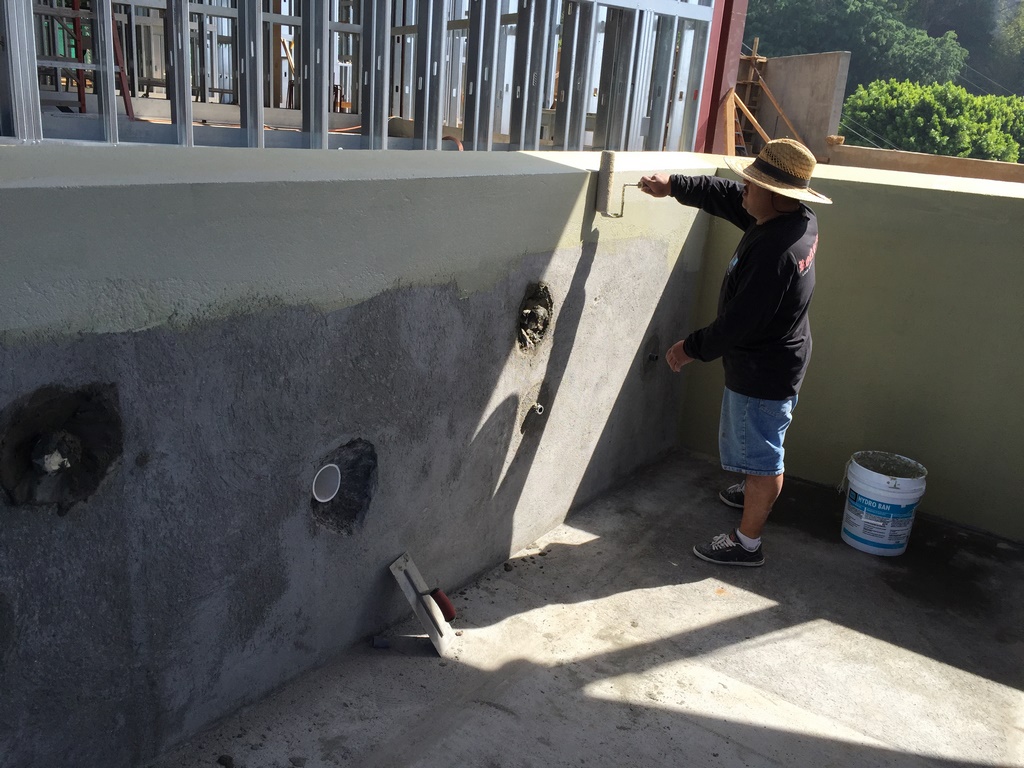
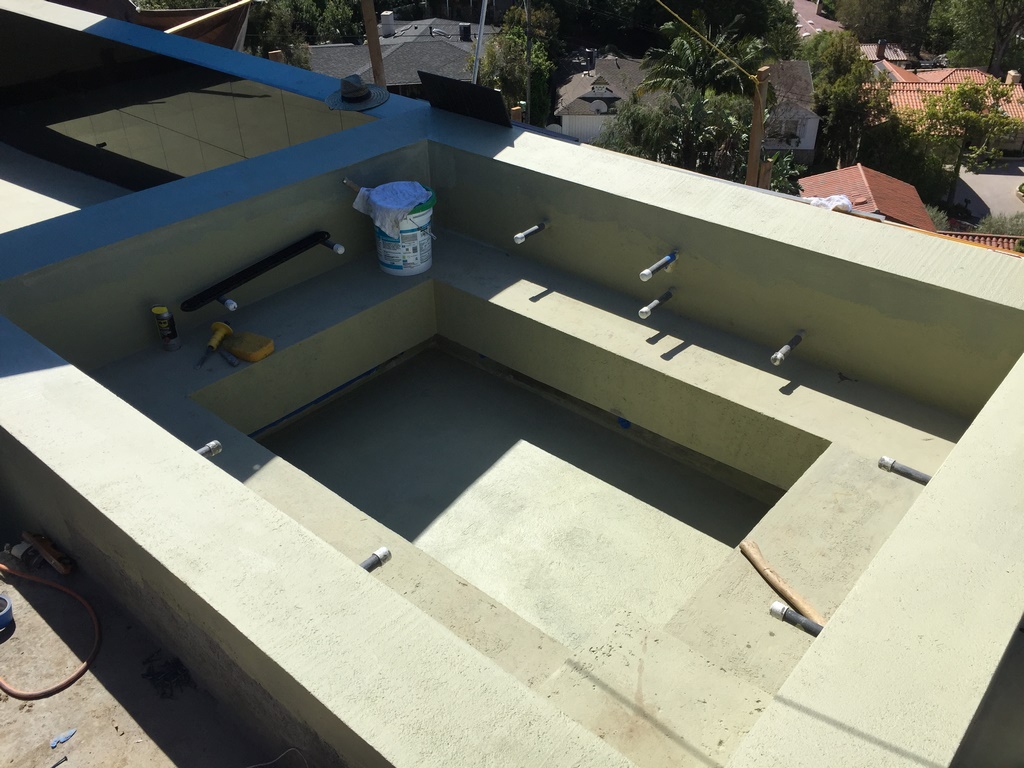
| The shell left to us by Dave Penton of Fluid Dynamics Pool & Spa was about as good as it gets, but we still had to correct imperfections and make ready for application of a highly reflective (and visually unforgiving) black porcelain tile in a 24-by-24-inch format. This involved floating all surfaces to the desired level, adding precisely angled edges to the tops of the walls and eventually waterproofing all exposed surfaces. |
I wasn’t involved in tile selection in this case (which is a bit uncommon for our projects), but it was clear I was in LeBlanc’s thoughts when he was doing the choosing. He knows I love challenges, and he also knows how important it is for me to be involved in the process as soon as possible to make certain that decisions made about the shell will help me achieve the effects we’re pursuing.
For one thing, the client – who started out convinced that his crews could build the pool following LeBlanc’s plans – had no sense that squared walls were an essential ingredient for this sort of tile job. If he’d been more stubborn, the pool would have had radiused coves at the base of all the walls and the overall effect we were after would’ve been totally trashed.
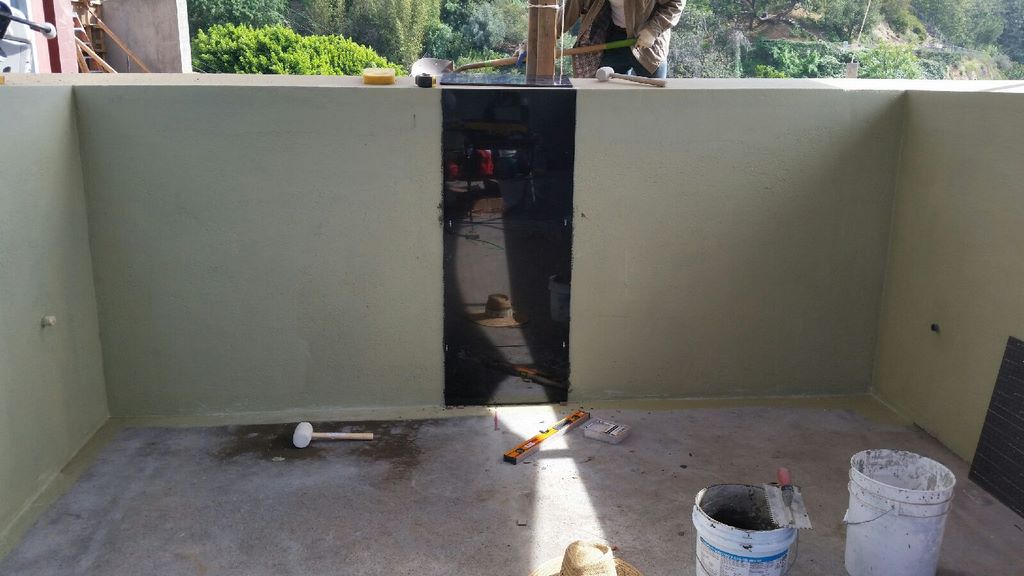

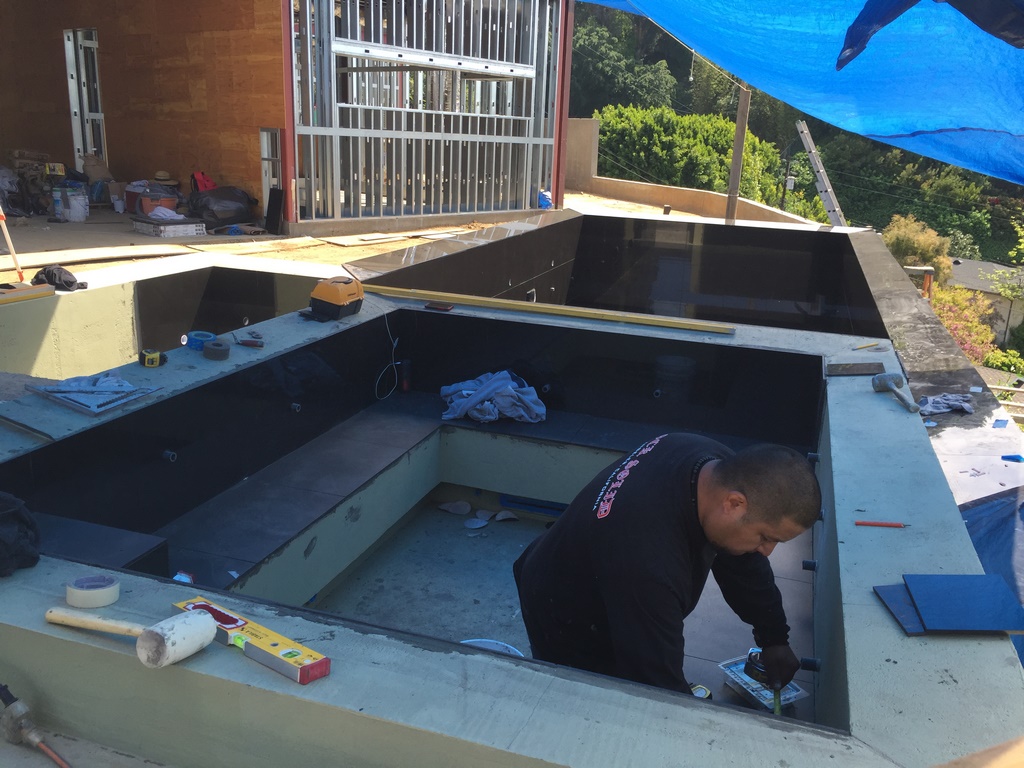
| We started with a single vertical strip of tile in the pool’s deep end, then worked our way along the walls before inserting the floors. All grout lines work to a grid pattern in all available directions, and the piping penetrations, as planned, steered clear of disrupting the visual patterns. |
That didn’t happen. Instead, Dave Penton (Fluid Dynamics Pool & Spa, Fullerton, Calif.) and I worked together on placing penetrations and working out precise dimensions that would set things up in such a way that there would be no pattern breaks anywhere in the pool: no interruptions in the grout lines, no awkward transitions, no visual breaks at all in the pool – or in the spa, which follows the exact same grid.
And while it might seem that working with such an unusual material would change our surface-preparation process, it really didn’t: We set up a central tile line that flowed from one end of the pool over to and up into the spa, made precise measurements that involved use of mainly full sheets of tile and developed a grid with a precise set of measurements that told us exactly the level we needed to set our float on all surfaces.
In some ways, the use of the two-foot-square tiles actually made setting the overall grid an unusually straightforward process.
FLOWING LINES
By combining a well-crafted shell with expert surface preparation, we achieved a level of perfection that impressed even a client who had previously declared a lack of interest about the pool’s interior finish.
The lines flow in both directions across the grid as though it was a two-dimensional surface, with the edge tiles on the perimeter and in the spa framing the composition while combining with the half-tiles on the floor to align with the overall system of 24-inch squares. That’s pretty cool (if I do say so myself), and it’s a bit amazing when you consider all of the detail involved with the raised spa – a structure set entirely within rather than atop a corner of the composition.
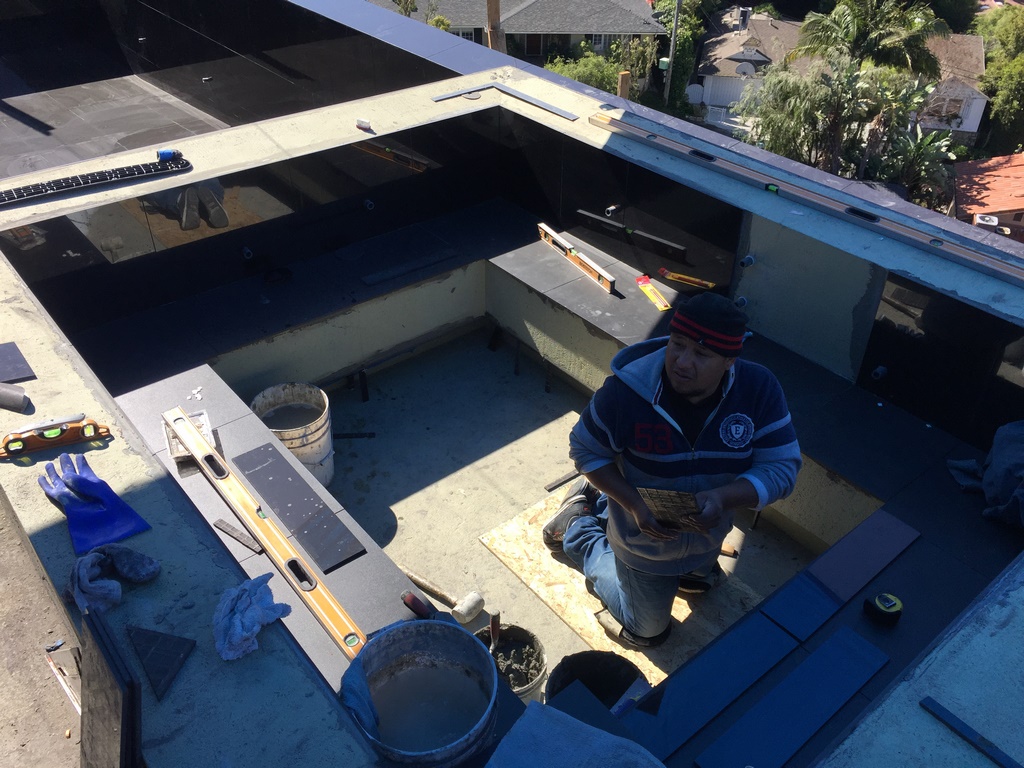
| Working inside the spa with such large pieces of tile was challenging, but we simplified the application process by doing all we had to do in surface preparation to make the dimensions perfect. If it weren’t for all the penetrations that go along with spa interiors, it would actually have been fairly easy to stick to the grid. |
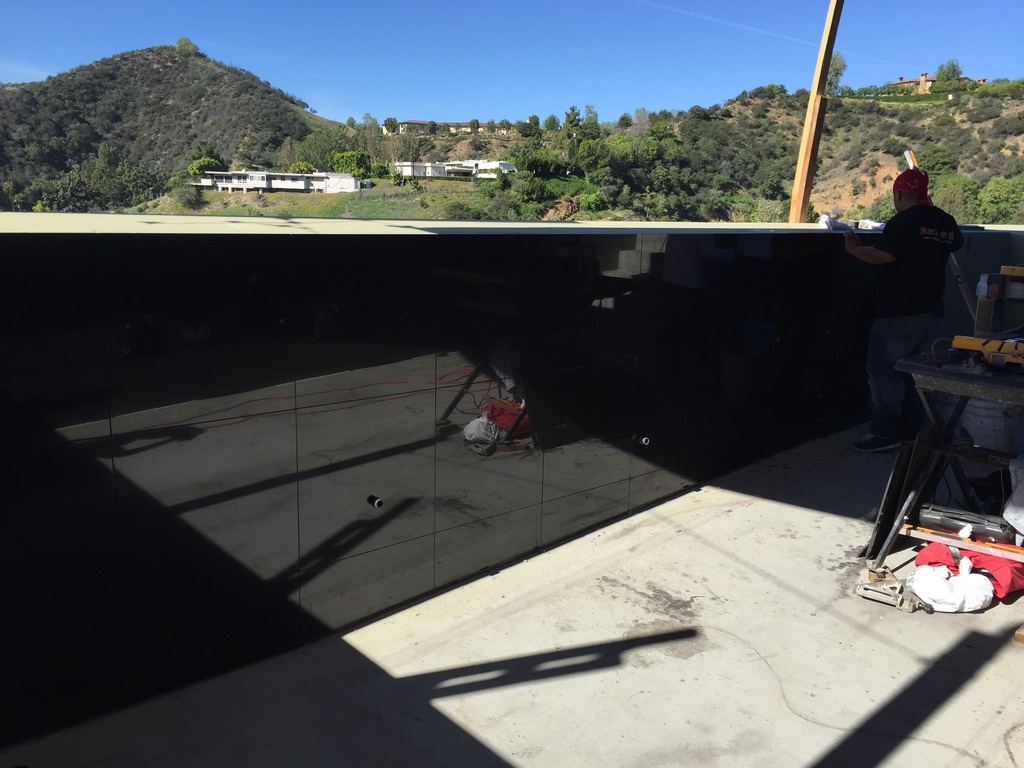
Another key point of craft is the degree to which the slabs of tile are perfectly level not only individually but as entire surfaces. So when a shadow crosses the pool or spa, the line between light and dark stays almost perfectly straight and unwavering because the tile surfaces truly are on the same plane.
This is why we at Rock Solid Tile (Calabasas, Calif.) put so much emphasis on maintaining focus and concentration no matter how repetitive the work can be: Training and experience really pay off in situations like this one, where the desire to avoid visual breaks was so strong that we did all we could to avoid any sort of compromise – even as the level of the floor dropped by a foot across the length of the pool.
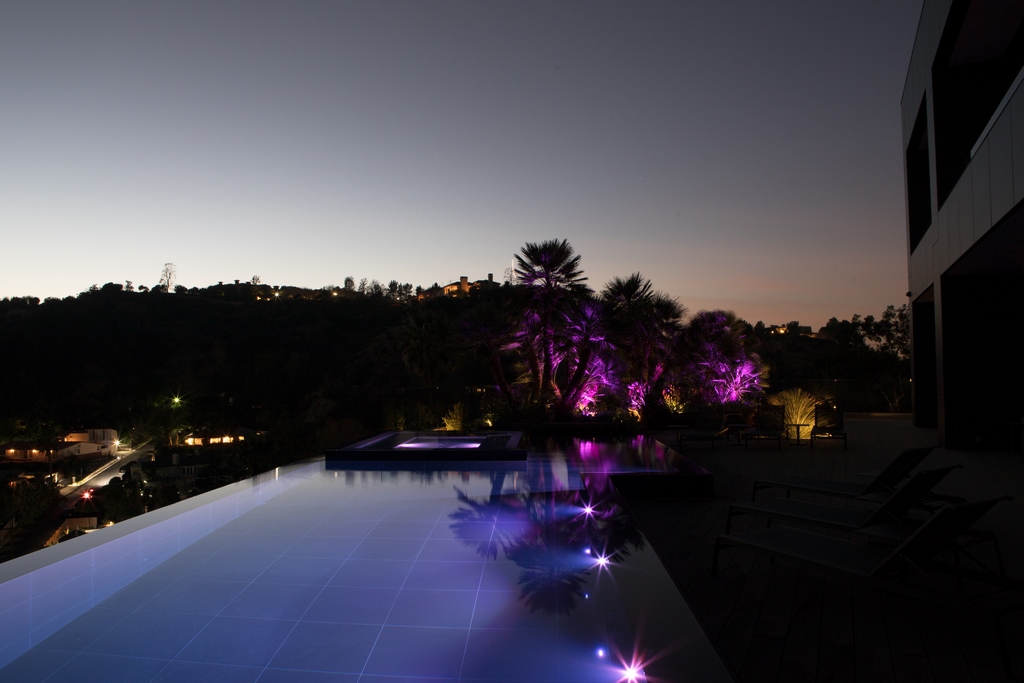
Another challenge with this tile was our desire to make it a mirror surface beneath a mirrored water surface. This meant that we had to clean and polish the material to make it “sanitary,” by which I mean clean enough to eat off of although we’d never suggest doing so. Once we completed that task, we applied grout and polished things up once again, this time to an even higher luster.
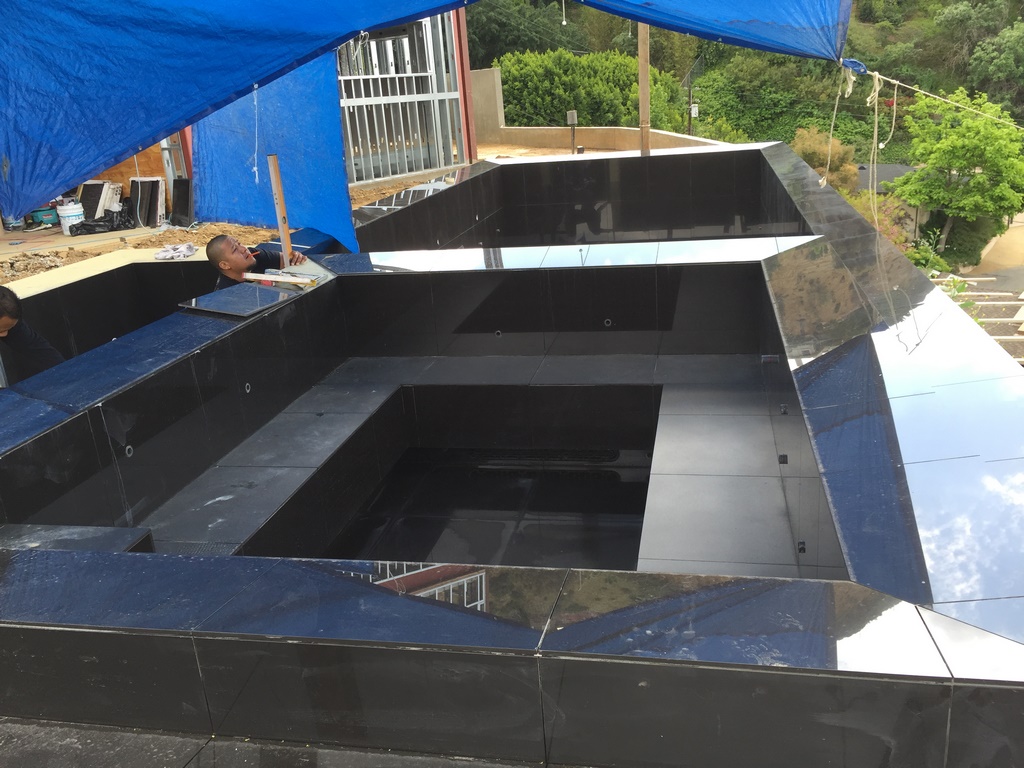
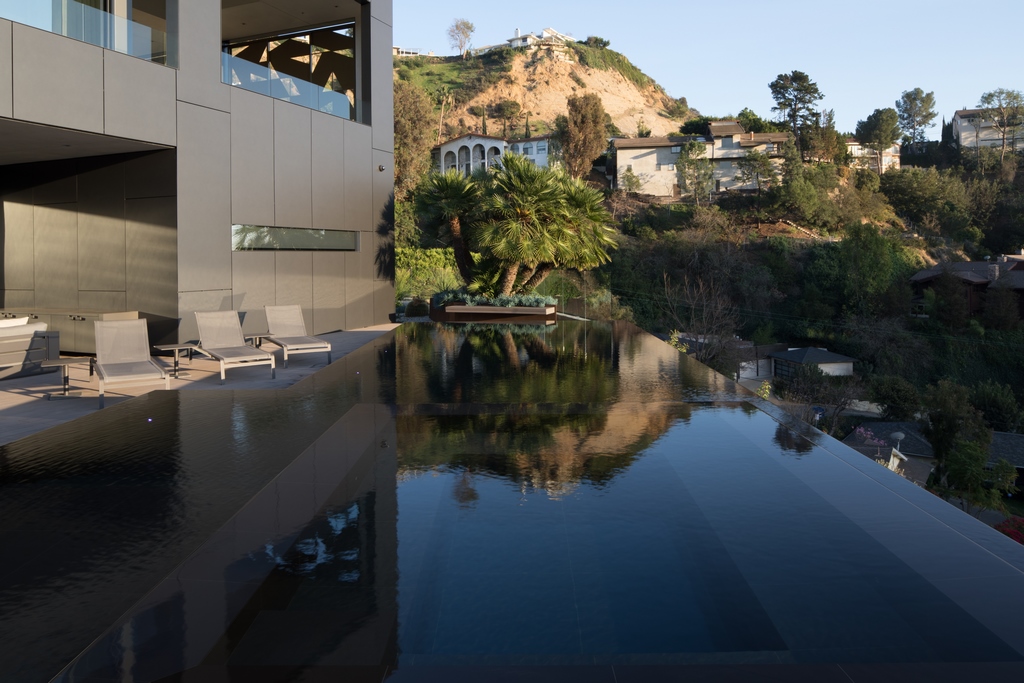
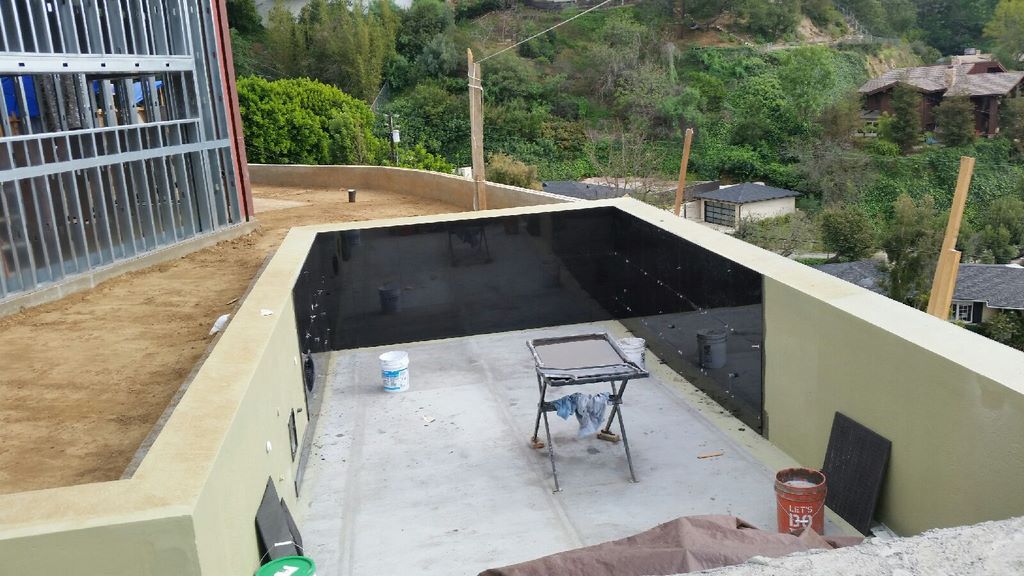
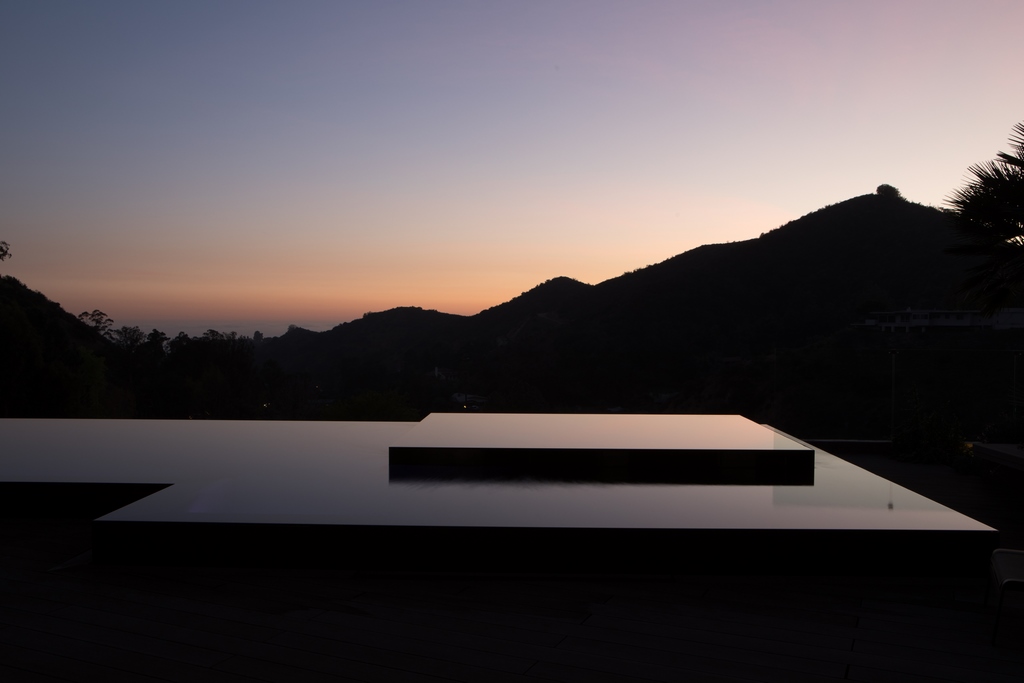
| Even empty, the pool and spa are unusually pretty, and as a tile guy who’s particularly proud of the work we did here, I have to say I wouldn’t mind it staying dry. But it also happens to be beautiful when filled, and I particularly like the way you can still see the way the grid flows throughout the structure – even with water included. (Photo at right by Douglas Hill, Douglas Hill Photography, Los Angeles.) |
One important point: The wall tiles have a super-slick surface that would have created slip hazards had we used them on the shallow lounging area, the spa benches or the steps in either the pool or spa. For safety’s sake, the tile in these areas has a slight texture and a slightly matte appearance – but not enough of a difference to create any visual dissonance when these surfaces are under water.
With the grid and the material and the setting, this was a job that called for an unusual pursuit of complete perfection – and the most important point of all is that we were involved early enough in the design-development process that we could set things up in such a way as to make that pursuit possible.
IN THE DETAILS
Along those quality-focused lines, penetrations are always the bane of tile-application process because they can so easily intrude on our ability to create pristine surfaces. And pools are so complex these days that the number of these penetrations seems to be increasing almost daily.
|
A Lingering Look I offer my thanks to both Dave Penton of Fluid Dynamics Pool & Spa (Fullerton, Calif.) and Jimmy Reed of Rock Solid Tile (Calabasas, Calif.) for taking charge and turning my design into the watershapes on display in this trio of articles.
— Shane LeBlanc (All photos by Douglas Hill, Douglas Hill Photography, Los Angeles). |

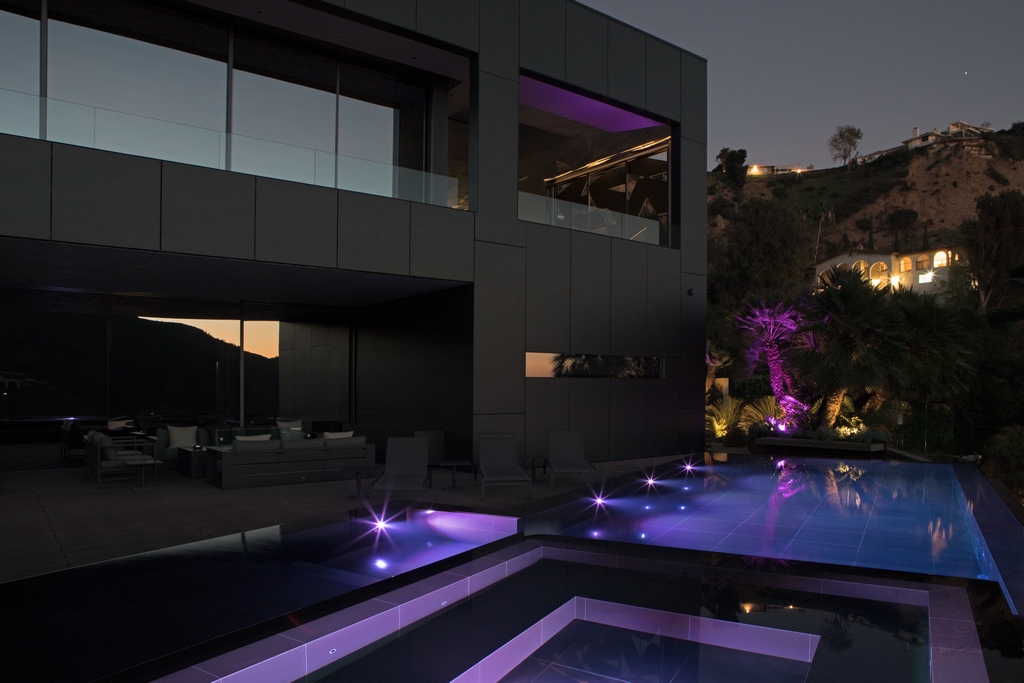
This is one of the reasons why I’m so fond of the toe-kick detail we’re finding in many spas (and even in some pools) these days: They give us the capacity to put large numbers of penetrations out of sight, which makes the interiors of these vessels less cluttered and therefore better looking.
With this client, however, it was almost a fight to get him to include some of the penetrations that actually needed to be there. He was so unconcerned with functionality, for example, that he didn’t want to include any lights in the pool. And it was surprisingly difficult to persuade him that they should be there even with LeBlanc’s logical explanation that future owners would appreciate the illumination.
It was easy to find black fittings to make the basic penetrations vanish from view, but one of our best finds for this project was the pair of suction covers that we inserted in the walls of the pool. At 12 inches square in black plastic (and made by the commercial division at Hayward Pool Products of Elizabeth, N.J.), they essentially disappear into the background on the home-side wall of the pool.
This degree of across-the-board success is the direct result of the teamwork that went into the project from the time Shane LeBlanc first contacted me and Dave Penton. We’re all accomplished, busy guys, but the point to be made here is that our collective participation didn’t really cost the client any more money – and may have even saved him some given the way the three of us worked together and the way Penton and I kept our crews on track with identical goals for excellence (and even perfection) in mind.
More than that, it was great fun in a fantastic setting – and we all enjoyed the opportunity to work with a client whose ideas about quality aligned so completely with ours.
For Shane LeBlanc’s Part 1 of this series, click here. For Part 2 by Dave Penton, click here.
Jimmy Reed is president of Rock Solid Tile, a tile design/installation firm based in Calabasas, Calif. He founded the company in 1985 after spending his teens and early 20s learning the tile-installation trade. In between, he attended Art Center College of Design (Pasadena, Calif.) and spent several years working in the entertainment industry. For the past 30 years, Reed has focused most of his creative energy on designing and installing tile finishes for high-end custom watershapes, a process that has seen him work with some of the industry’s leading designers and builders. He may be reached through his web site: www.rocksolidtile.com.