


An All-Tile Adventure

This was one of those cases where a project that offers all the indications of a direct path to success took a couple of weird turns that complicated things in unusual ways.
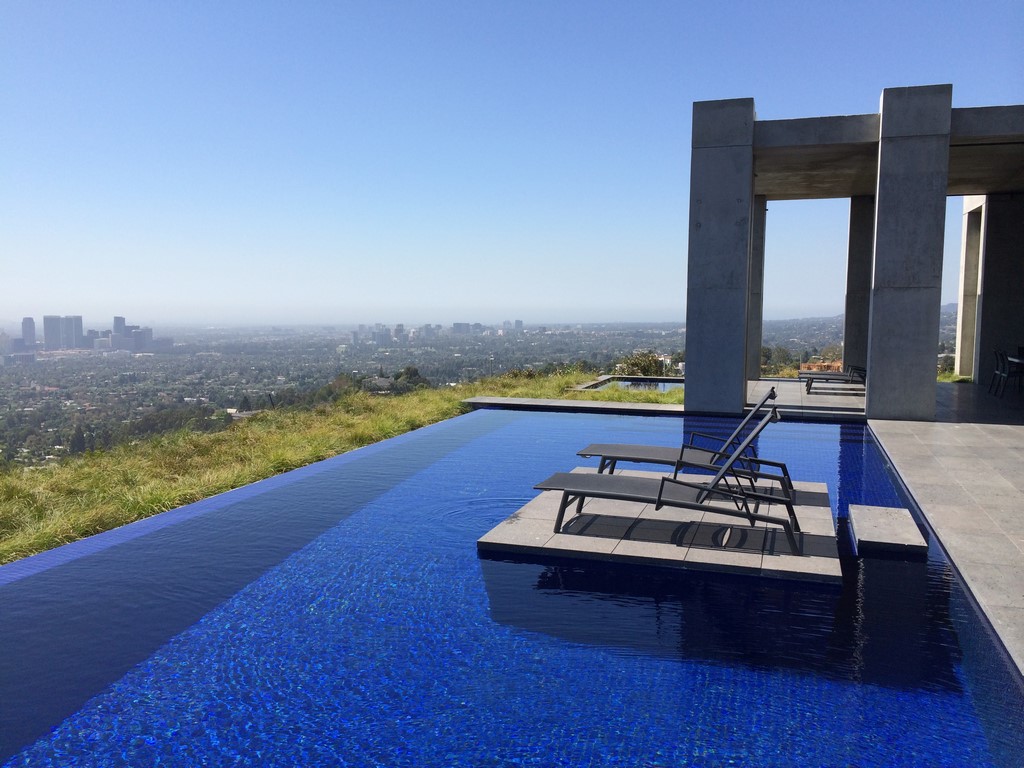
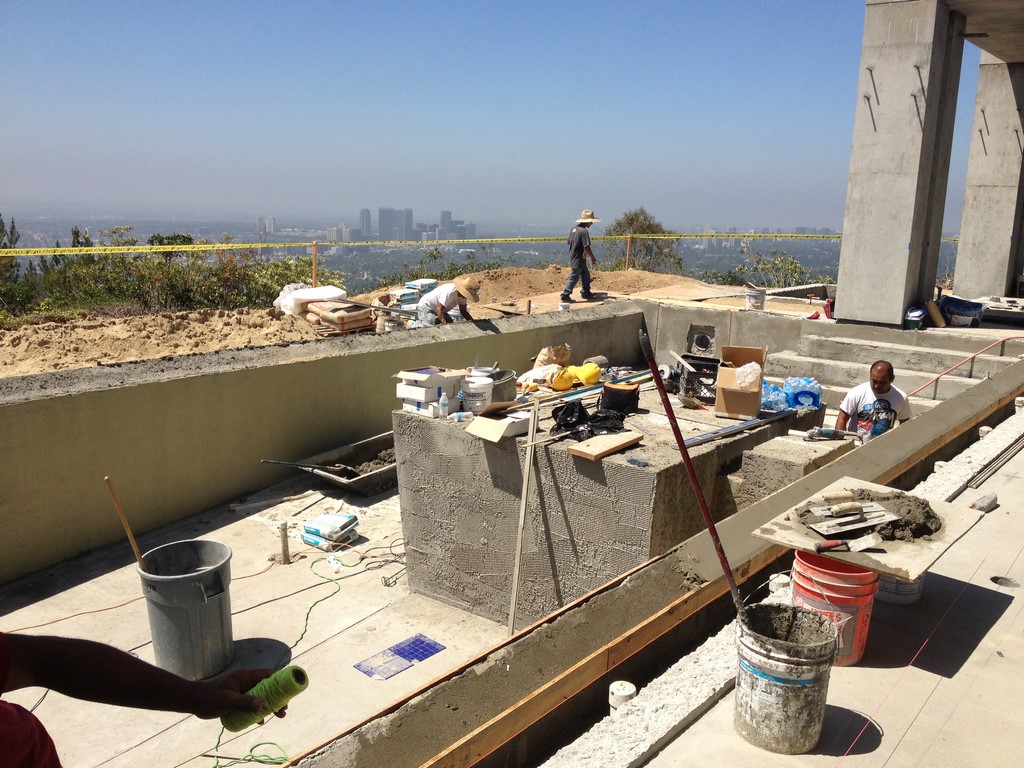
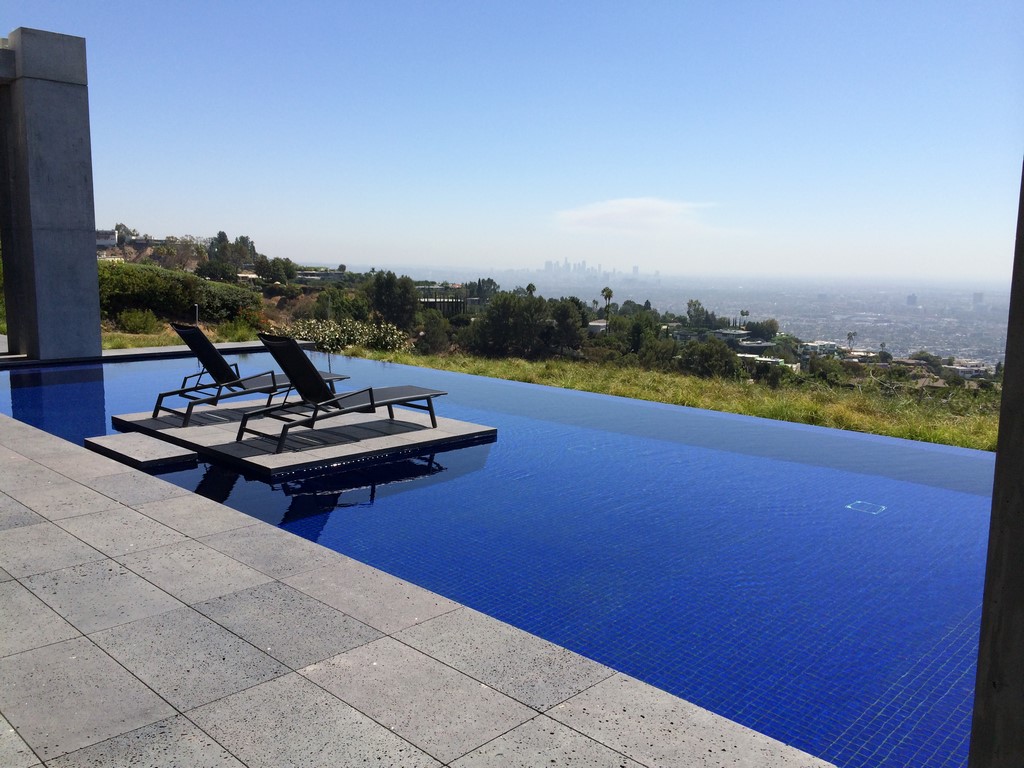
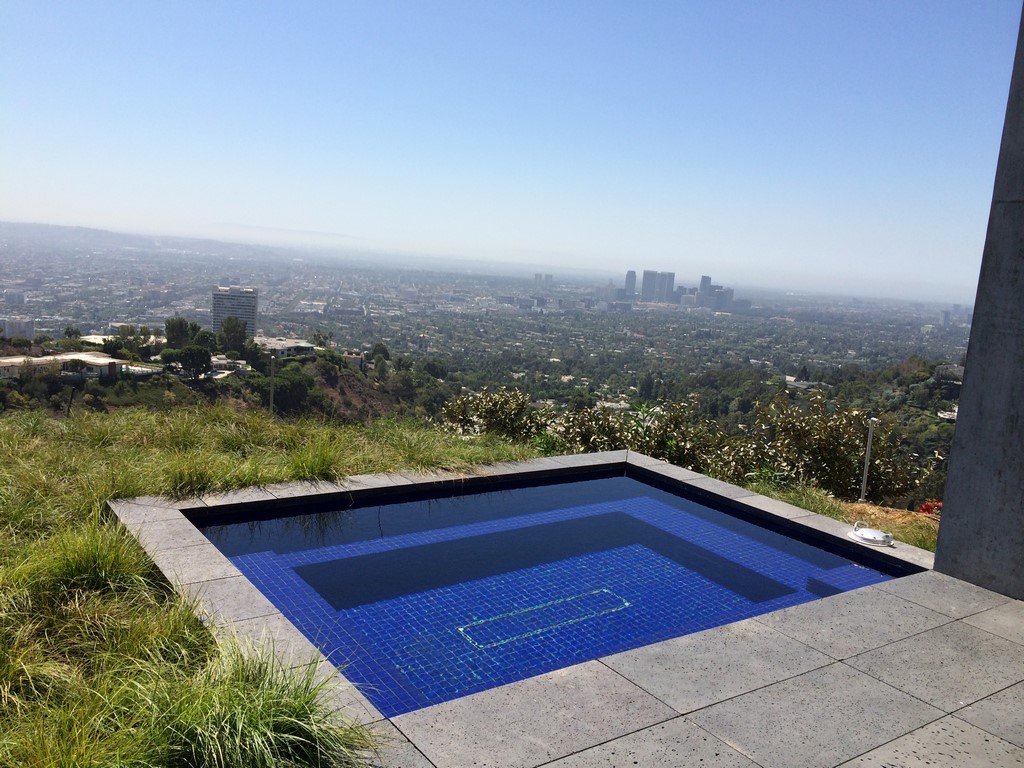
The pool and spa are located high up in Trousdale Estates, a canyon-hugging neighborhood above Beverly Hills, Calif. The views are magnificent all the way to downtown Los Angeles in one direction and to the Pacific Ocean in another – and the spaces in which the pool and separate spa had been placed took the fullest possible advantage of those prospects.
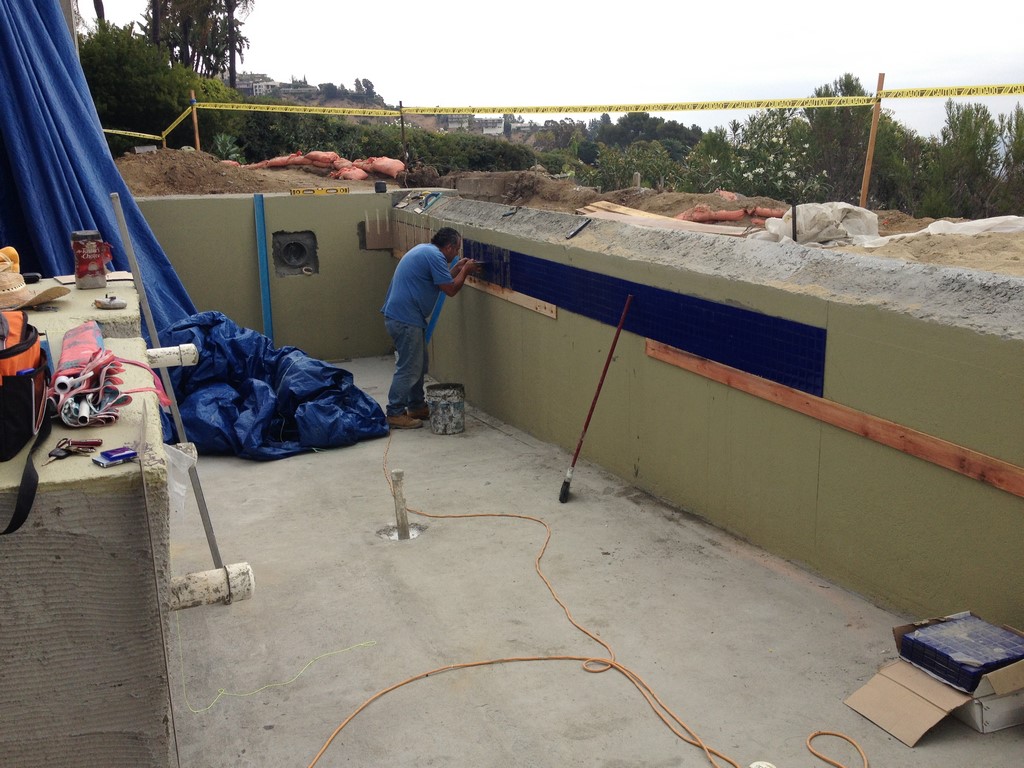
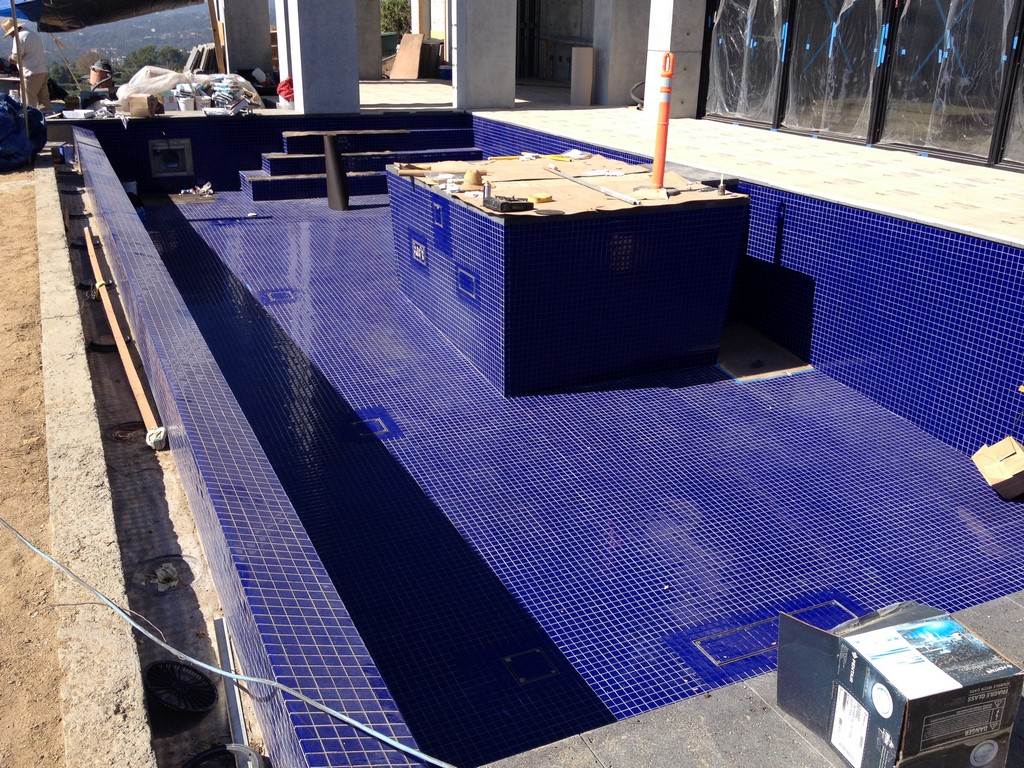
Our client was a multifaceted home-design/build company that had a distinguished track record with this sort of all-concrete construction project. The pool design in particular had a lot of character, with a central seating pedestal optimally placed to take in the views. Best of all, the shell had been shot with an all-tile finish in mind, complete with squared floor-to-wall transitions and a great setup for an unusual system that had a Lautner-style overflow edge toward the house, a traditional tile-and-coping approach on the two short sides and a vanishing edge on the far side.
But the simple fact was that the shell had been shot and tile selected before we arrived on site to size things up and make a bid. Had we seen things sooner, we might have had a helpful suggestion or two.
OFF THE MARK
We at Rock Solid Tile (Calabasas, Calif.) specialize in glass-tile finishes and generally work with the best materials available on the market. But as we learned, this was a spec house: The property’s owner was interested in saving some money on the finish and so a large quantity of what had to be one of the least expensive of all possible glass-tile options had been ordered.
That decision turned into our first problem: We had been called in to produce something beautiful in which grout lines were to match up from end to end and up and down, with all of the wall-to-floor and step transitions involving as few cuts as possible while following the key grid lines. The tile we pulled from the boxes had an inferior mesh backing attached with “mystery glue,” and I knew from experience that this would be completely inadequate.
It didn’t take much to demonstrate the problem to the client: I took a sheet of tile and dipped it in a bucket of water for a couple minutes. When I pulled it out, every one of the two-inch-square pieces slid right off the mesh. “This won’t work,” I told the client: “We’ll end up having to set thousands of these two-inch tiles by hand individually, and your cost will go through the roof.”
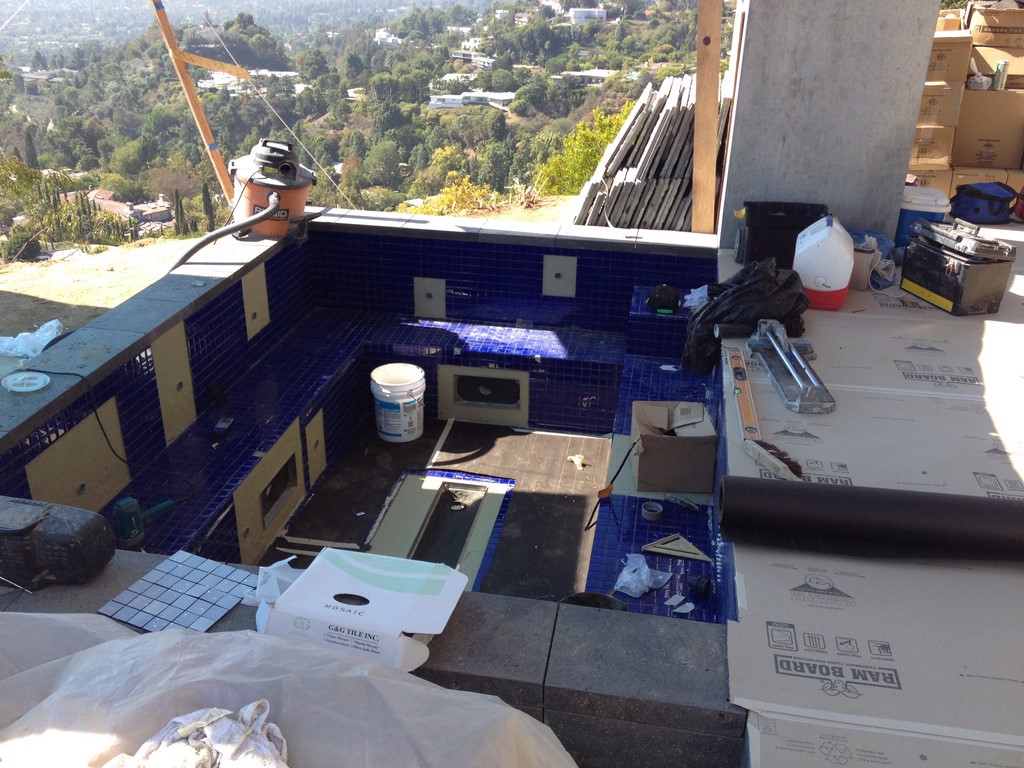
The solution was laborious but not nearly as costly as starting over: We sent all of the boxes of tile to J & J Mosaic Designs (San Fernando, Calif.) for remounting with a proper paper-face system. We often use their services to mount elaborate murals and mosaic details and knew the sheets we’d get back would be suitable for efficient application.
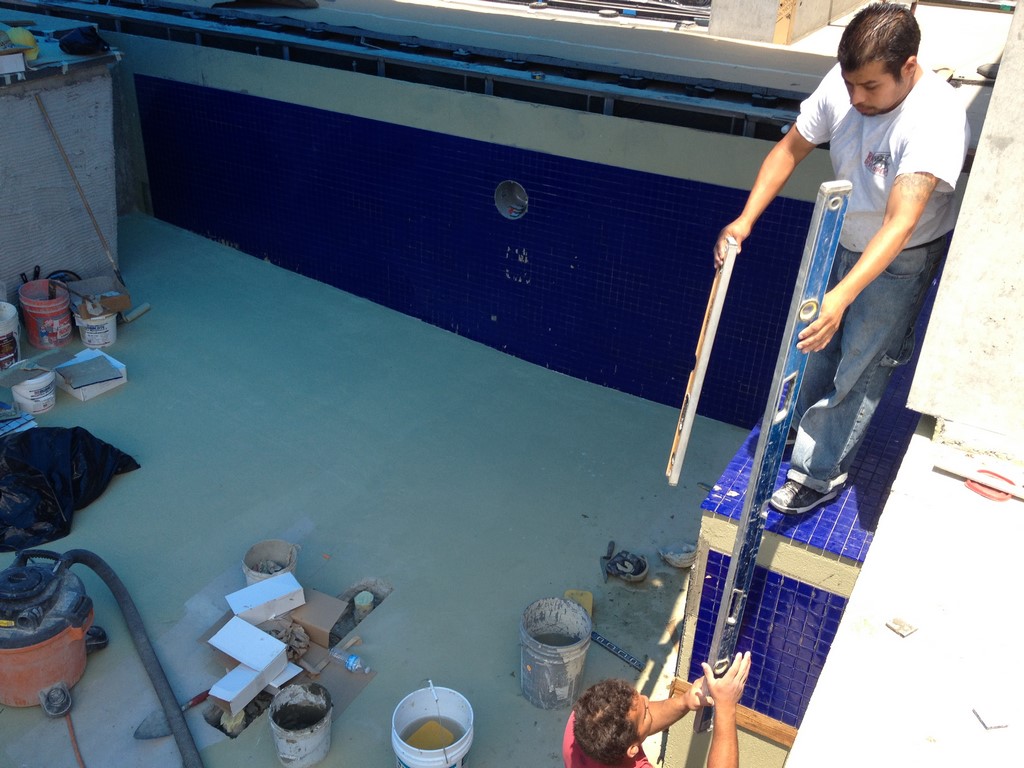
And there was one more issue: Despite the fact that the cool profile of the pool’s seating pedestal looked tremendous on paper and even looked impressive as a boldly angular raw-concrete structure in the dry shell, it was a visual effect that would essentially be lost to the world once the pool was filled with water. Its form also left us to come up with a way to apply the tile that wouldn’t disrupt the linear patterns seen on the surrounding walls and floor.
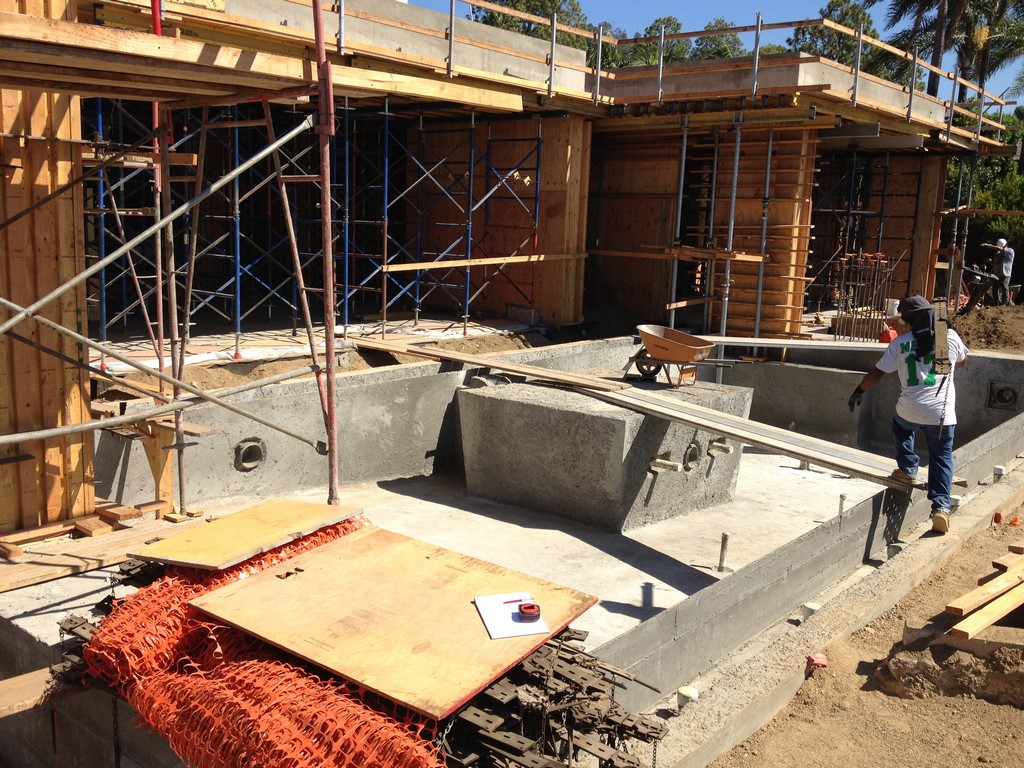
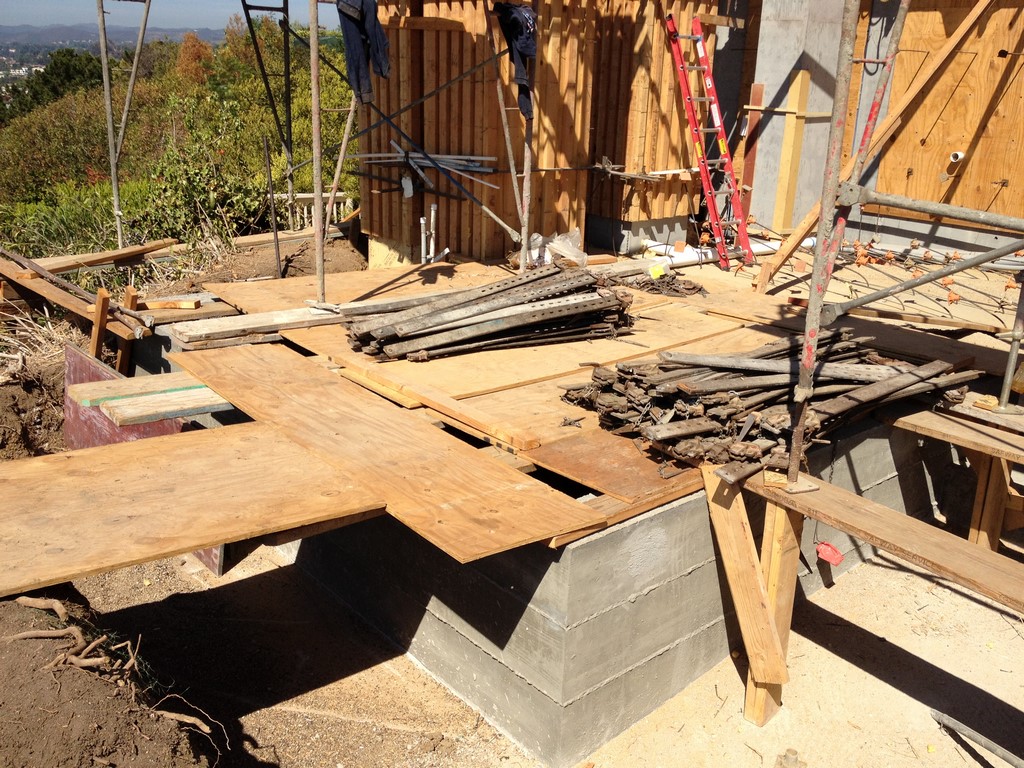
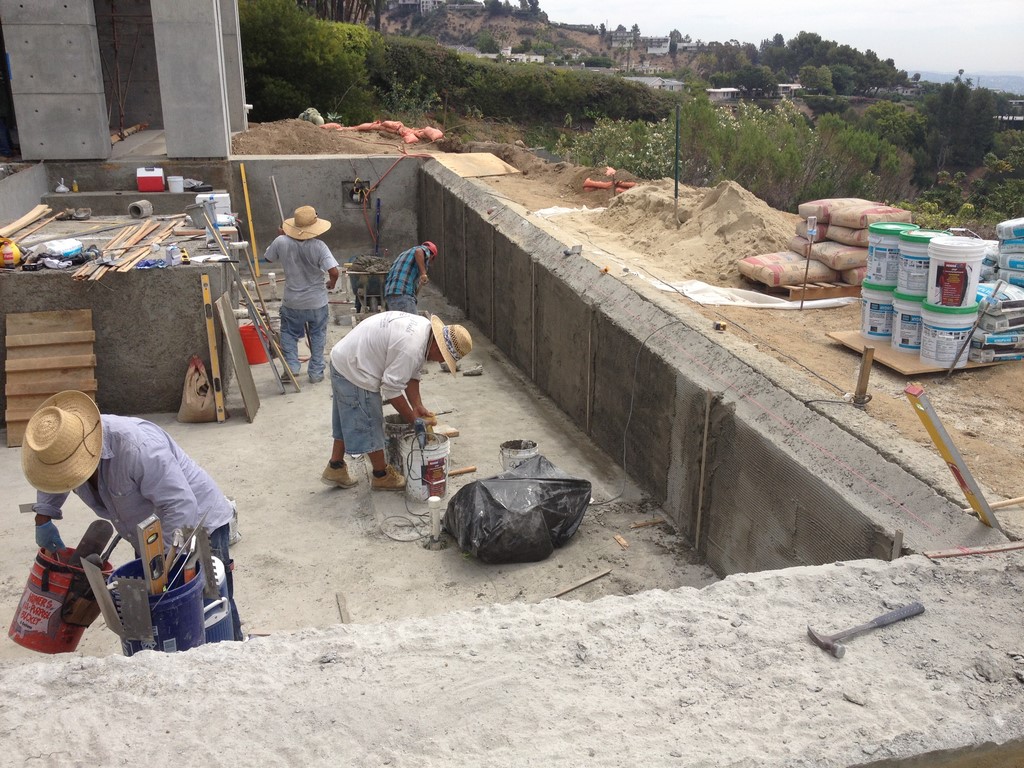

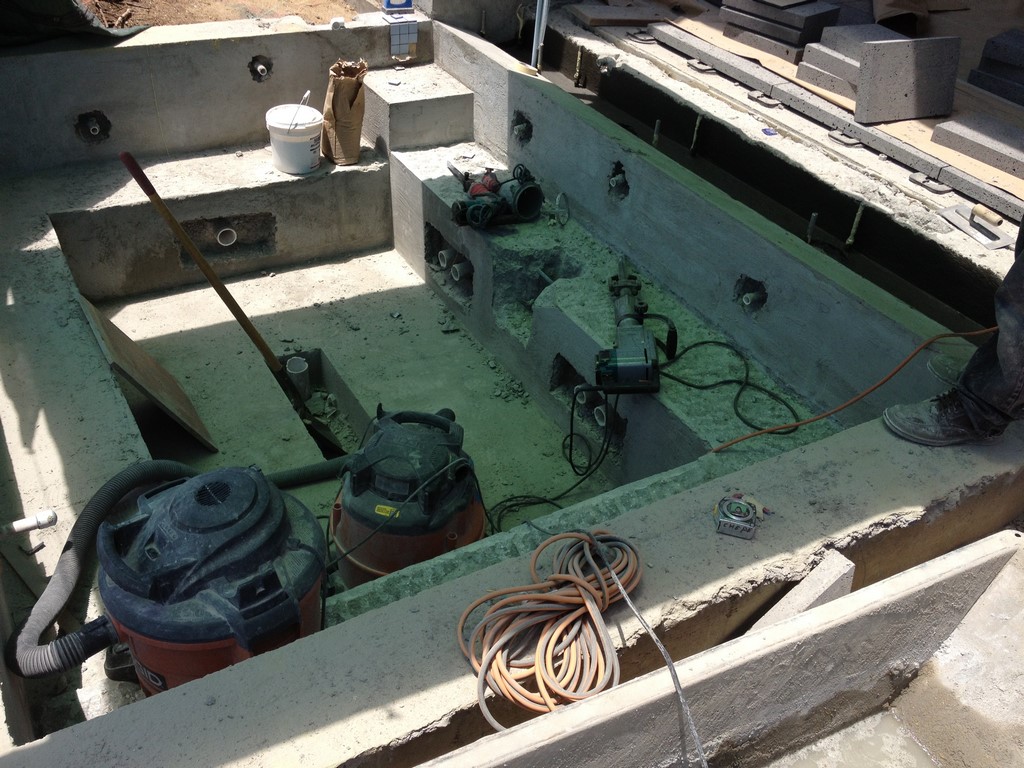
| When we arrived on site, the home was under construction and the shells for the pool and spa had been shot (although the spa was covered and serving as a bridge). By the time we actually began our work, however, the home was well on its way to completion and we had easy access to get our own crews in to prepare both vessels for their glass-tile finishes. We proceeded step by step until the walls were square and flat enough for waterproofing and then tile application. |
If the pedestal had been squared off, making everything line up would’ve been a snap. But in this case, with the pedestal set up like an inverted pyramid with outward-slanting walls, we knew immediately that there would be a large number of intricate cuts in our future.
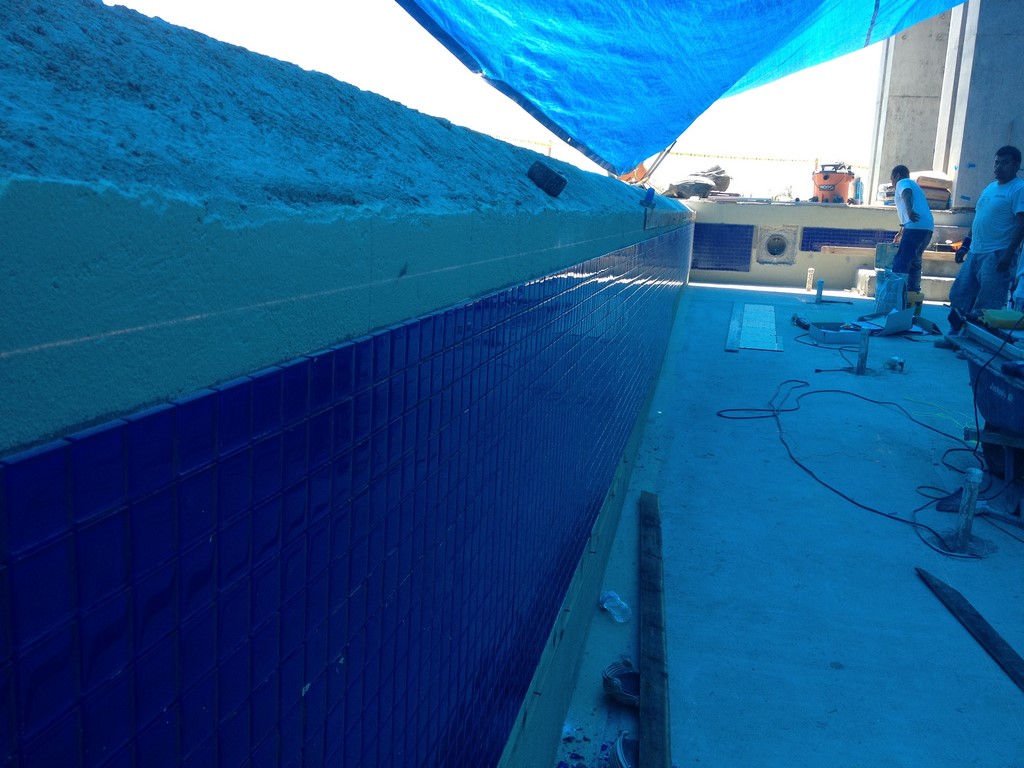
The solution was direct but not one we’d advocate as a general rule. We started by running lines of full tile straight up from the floor. Next, at the outside edges, we placed lines of tile up along the walls as frames. We then filled the open areas with descending lines of full tile as far toward the edges as we could before proceeding to fill the remaining, sharply angled gaps with precisely cut pieces of glass.
This was no fun at all – not only with respect to the labor involved, but also because we knew the result was so utilitarian. And if there’s one thing to which we at Rock Solid Tile are allergic, it’s details like these where we have no choice but to compromise on our usual practice of making these parts of a project visually interesting. And all of this to preserve a structural profile that basically vanishes under water!
MAKING READY
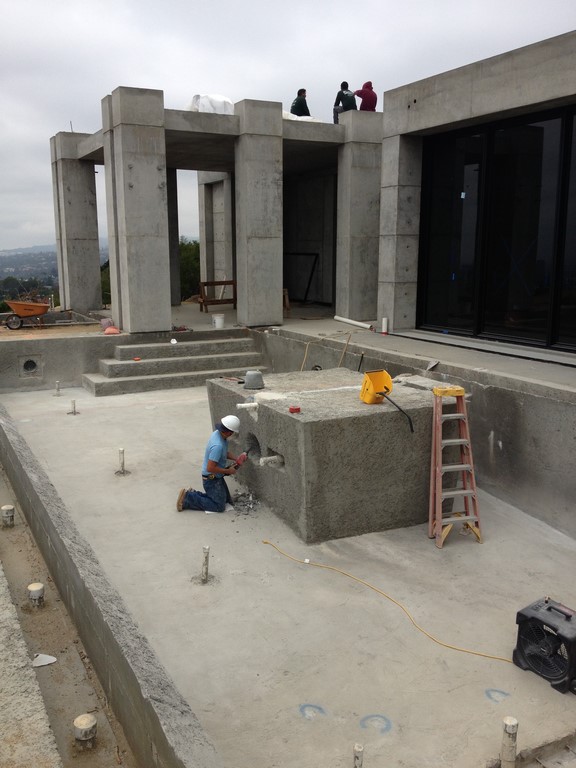
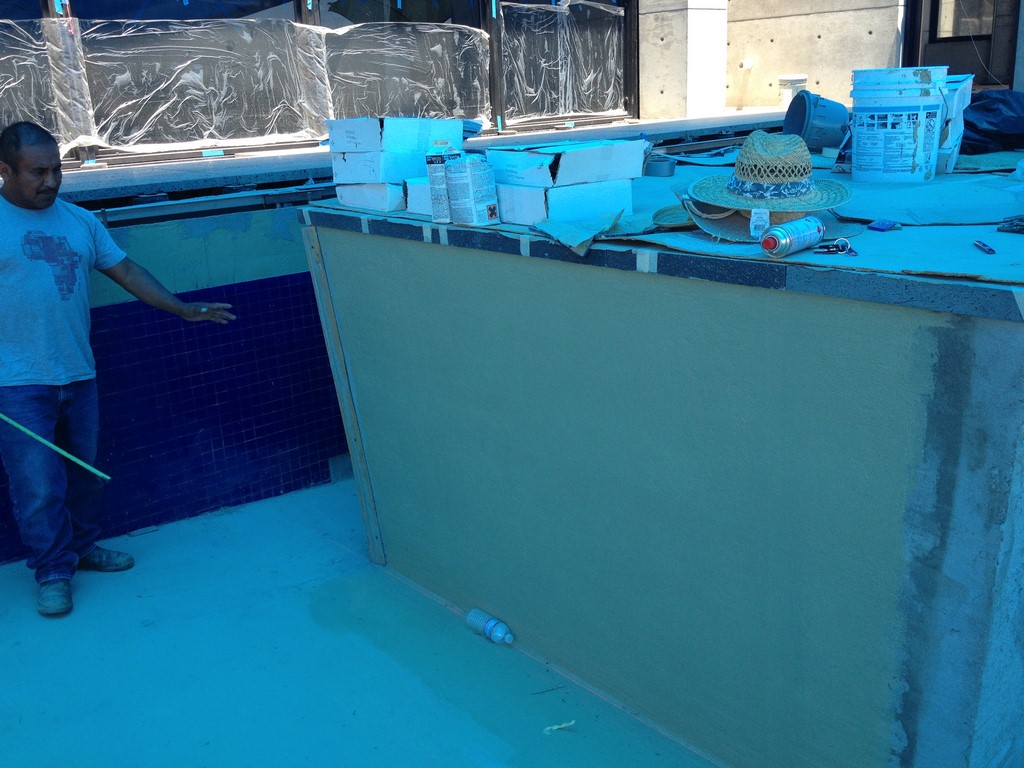
Working with the raw shell, we did our usual painstaking job of preparing the pool and spa surfaces to receive the tile. Once the sheets came back with the appropriate paper facing, we carefully measured all the dimensions and floated a fresh surface to create plumb and square planes that would allow us to work with full tiles from end to end and up and down the various walls and steps.
This preliminary process takes a good bit of time and involves both the cutting away of intrusive concrete as well as the building up of surfaces that fall short of the desired profile. Once every working surface was truly flat and squared, we applied a waterproofing membrane and began tile application.
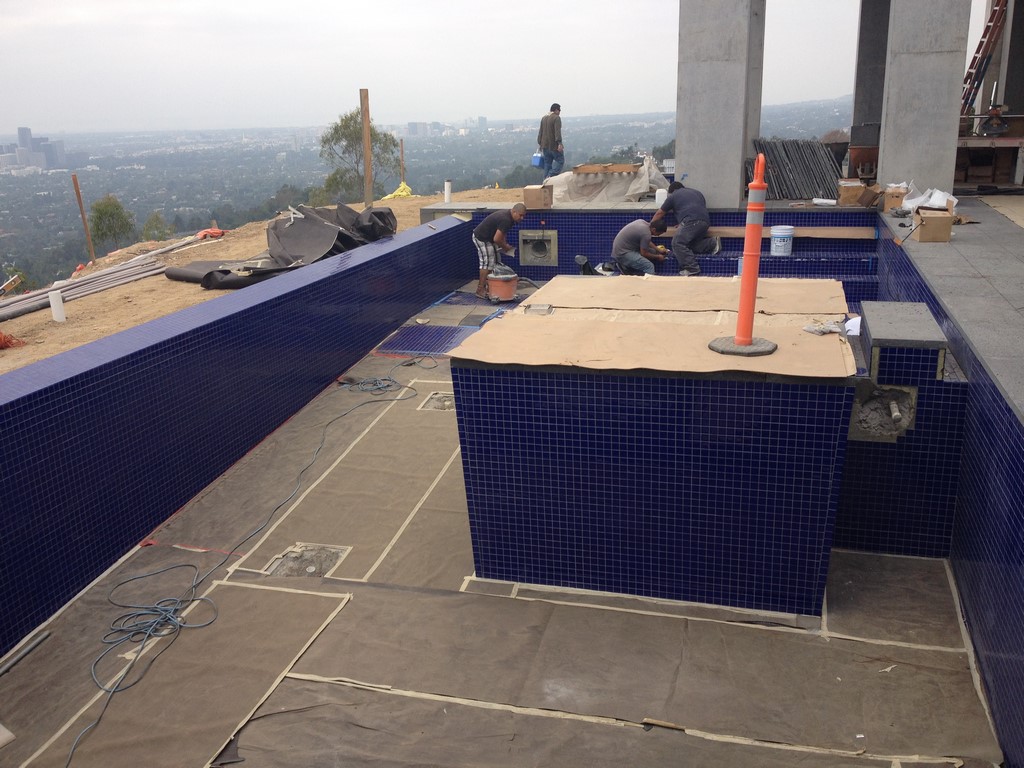
| With all preparatory steps complete to our usual demanding standards, the tile-application process unfolded smoothly across all surfaces – including the inverted pyramid seating area in the heart of the pool. Our work in the spa followed the same pattern, with lots of time invested in preparation with the aim of streamlining the tile-installation task. |
Before this step, we’d already applied a preliminary waterproofing system from Aquron (Rockwall, Texas) that was applied to the raw shell as a spray. By this point, the glass panels and windows had already been placed on the building, so we had to protect just about every directly exposed surface of the house all the way up to the roofline to prevent any overspray from adhering to the glass.
With waterproofing complete, our systematic approach to surface measurement and preparation enabled us to pursue the tile-application process with relative ease – until, of course, we ran up against the pedestal, as described above.
And although I’ve knocked the inexpensive glass tile, I must concede two things: First, using it is not as problematic here in southern California, where temperature swings are not as extreme as they are in other parts of the country and therefore don’t challenge the glass if it is installed and cared for properly. Second, in this case the tile had one characteristic that actually made our lives a bit easier in setting up the perimeter-overflow and vanishing edges: The sides of the tile were finished with a slight bullnose profile, so we were able to set them up without beveling or much grinding, polishing or detailing.

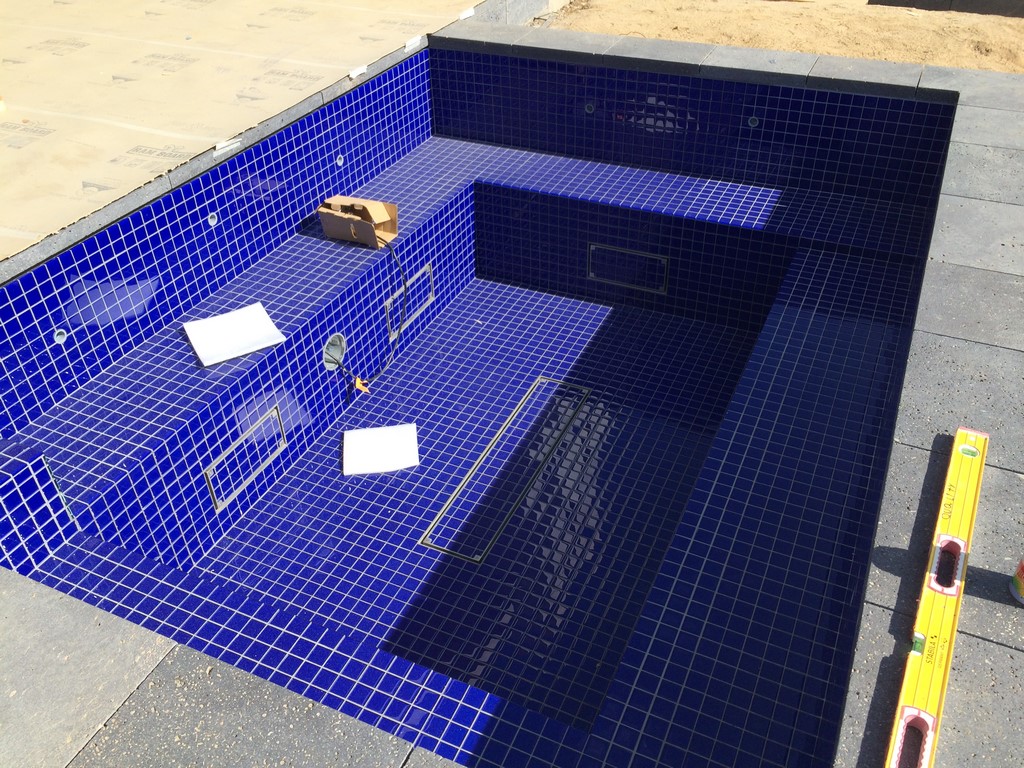
| Modern swimming pools generally include lots of penetrations – for lights, return and suction ports, speakers, main drains and more. Taking care of these areas makes us slow down and think things through: These details can present challenges to visual harmony, and it’s our job to handle them with care to minimize or even eliminate the intrusion. |
We followed a similar set of processes with the spa, which, again, had been prepared for us as a shell with skill and workable precision. In fact, precision was a goal with the entire outdoor environment: The lava-stone decking, for instance, was mounted on a pedestal structure that allowed it to be perfectly level. There is no grout; water passes through the gaps and flows to a pitched drainage system the homebuilder prepared beneath the decking.
The step in the pool leading to the pedestal’s lounging area and the top of the lounging area itself were both held at the same level as the deck, as was the decking around the spa. All in all, it was a demanding work environment – just the sort of atmosphere we use to inspire ourselves as we pursue excellence in our projects.
TEACHABLE MOMENTS
We at Rock Solid Tile have always looked at glass-tile application as a form of art – the crowning touch for projects from the simplest to the most complex. A big part of what we do is about passion: No matter the task at hand, we come to every project with a well-considered game plan and a deep well of skills and solutions that carry us through challenges that often intimidate other tile applicators.
In this particular project, we knew coming in that there were some issues we had to address, some decisions we had to make and a single compromise we needed to live with to make the rest of the project perform visually the way we knew the client wanted. Thing is, what we saw as a compromise is more a matter of our comparing the outcome to our customary level of performance rather than about the way the rest of the world will perceive the results after we leave the site.
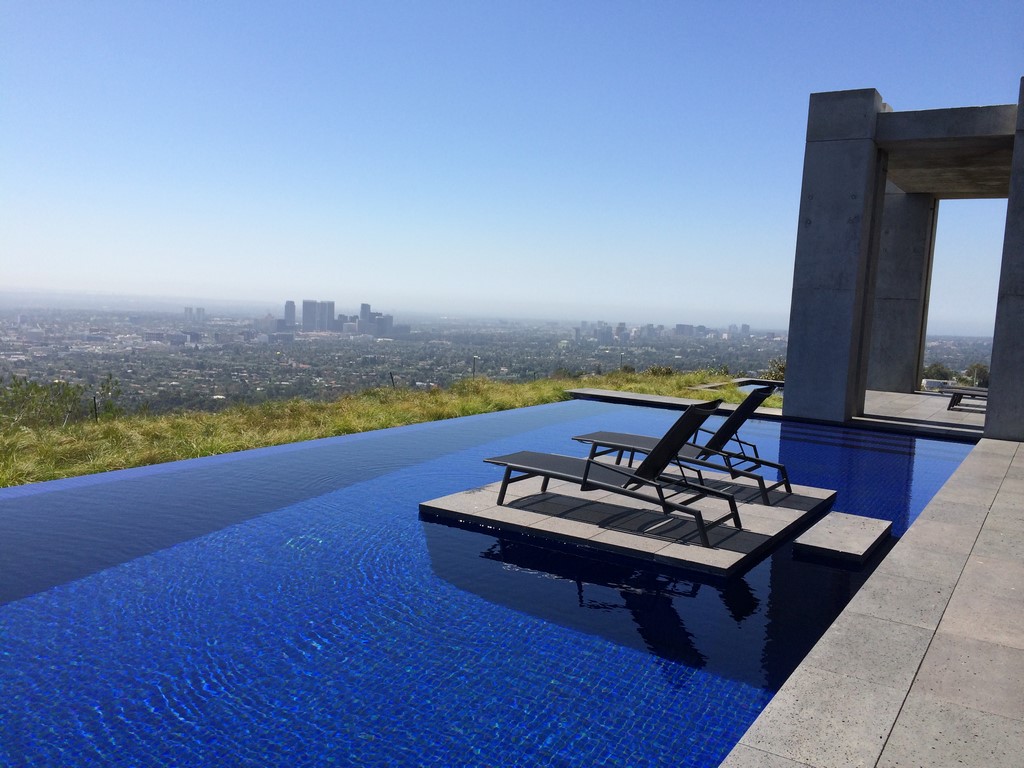
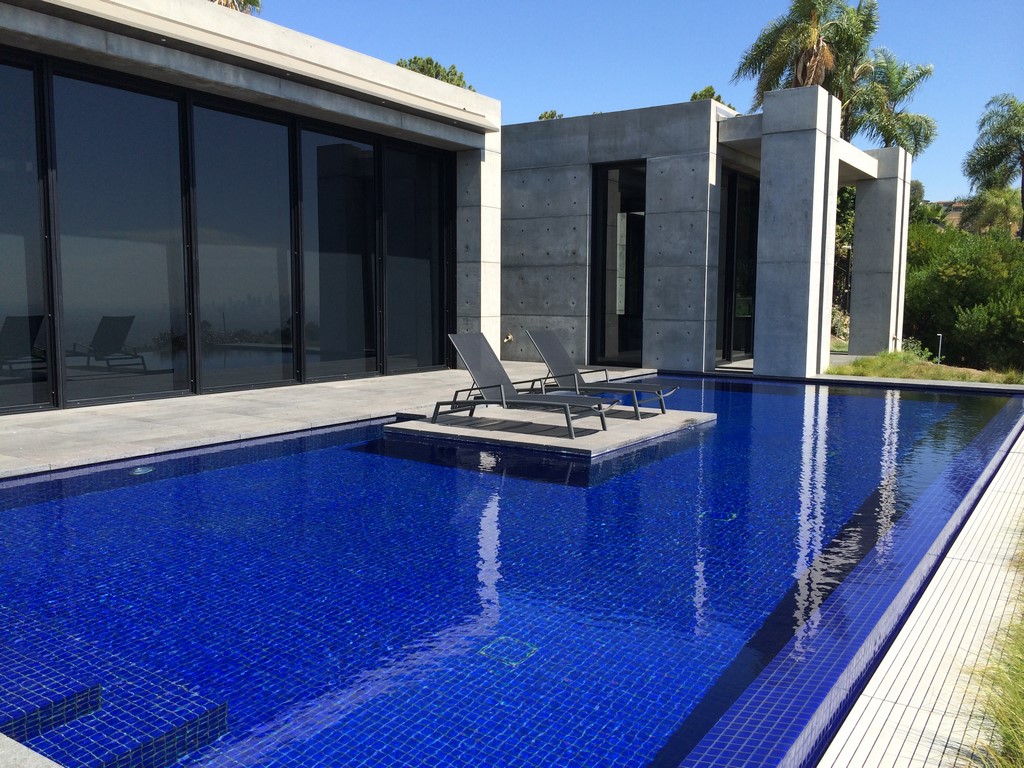
| The finished product is a visual delight – a great complement to the home’s architecture; the perfect invitation to step outside and enjoy the distant views across the water; and further evidence that we relentlessly pursue perfection in our tile-application projects. |
And this project found yet another way to be different: A while after we finished our work, we heard from our client that the homeowner who’d purchased the spec house wanted to roughen up the pool surface to make moving around in the water a bit easier. The client wondered if acid washing would do the trick, and I said no, that doing so would have no affect on the tile but would have undesirable effects on the grout.
We didn’t hear anything for a while, but then learned that the pool had been emptied and that the tile had been sandblasted to roughen the surface. This was another, even more aggressive approach that we never would have endorsed, but it gave me a chance to remind the builder that selecting the right tile – something smaller, perhaps, and recommended by someone like me who knows the dynamics of in-pool environments? – would have made both the remounting and the sandblasting unnecessary.
As I just mentioned, it’s all about passion – and we have that in abundance, right alongside large supplies of common sense and experience.
Jimmy Reed is president of Rock Solid Tile, a tile design/installation firm based in Calabasas, Calif. He founded the company in 1985 after spending his teens and early 20s learning the tile-installation trade. In between, he attended Art Center College of Design (Pasadena, Calif.) and spent several years working in the entertainment industry. For the past 30 years, Reed has focused most of his creative energy on designing and installing tile finishes for high-end custom watershapes, a process that has seen him work with some of the industry’s leading designers and builders. He may be reached through his web site: www.rocksolidtile.com.