


Edges with a Difference

Very often these days, we’re a pre-selected contractor and get involved in projects early enough that we participate in their development almost from inception. That’s great, because it gives us the opportunity to define what needs to happen to make the most of the glass-tile finishes we’re frequently asked to install.
In this case, however, another contractor had the first shot at the job, which involved extensive work on an unusual vanishing-edge pool as well as an innovative spa and a nice little waterfeature.
Long story short, that other company had apparently never done anything like this before, so the bidder expressed doubts about the general feasibility, asked pointed questions regarding obvious details and came in with a price set so high it was fairly clear he was less than keenly interested in (or qualified for) landing the job. They also promised that they could complete the entire installation in four weeks’ time – and never mentioned curing.
When it came to be my turn, the approach was distinctly different: I looked things over, saw the same complexities and had a few questions – but I never had any doubt at all that this was a project we at Rock Solid Tile (Calabasas, Calif.) wanted to tackle, come hell or high water: It was trailblazing stuff, right up our alley, and went well beyond the usual level of cool to which we aspire in all of our work.
The contrast between our attitude and that of the first bidder put us in a very good light: The job was ours, and I don’t think our pricing was the only factor.
SPICY CONCEPTS
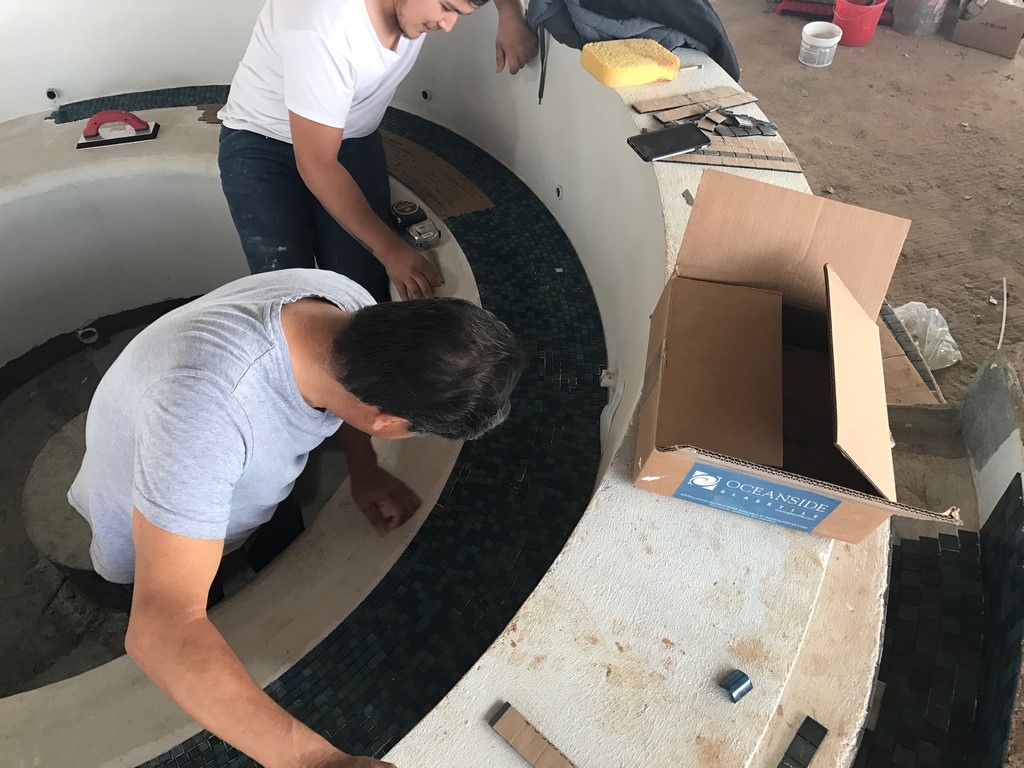
The main part of this story is told in a separate article on this project by its Atlanta-based designer, Shane LeBlanc of Selective Designs (click here). Our involvement had to do with implementing elaborate tile designs he had envisioned for the three watershapes and developed in close consultation with the technical-support staff at Oceanside Glasstile of Carlsbad, Calif.
As LeBlanc tells the story, the ideas he ultimately pursued had been percolating for a long time before he went to work on site in rural Louisiana. By the time we came aboard, those ideas were fully baked and ready for implementation.
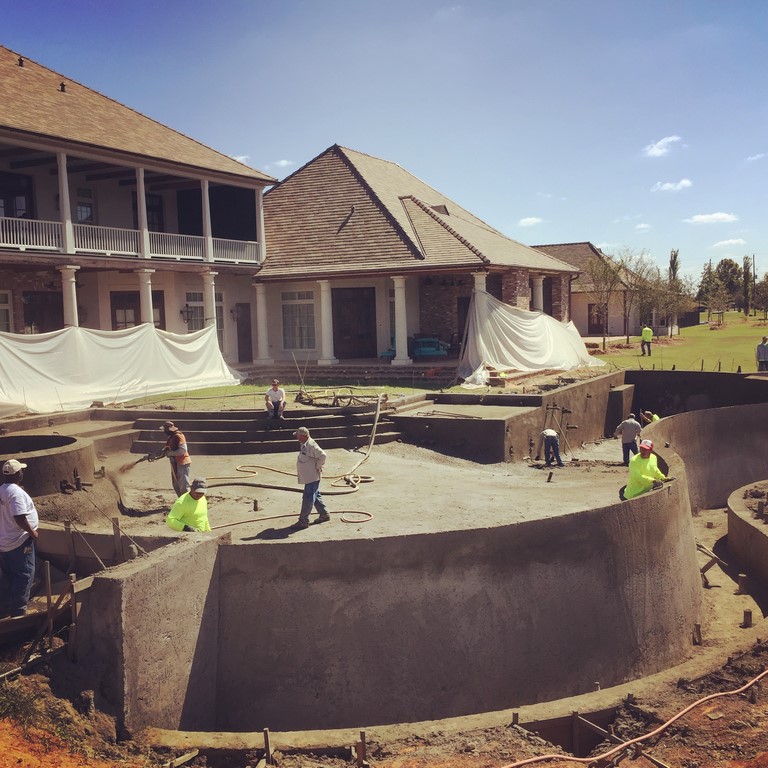
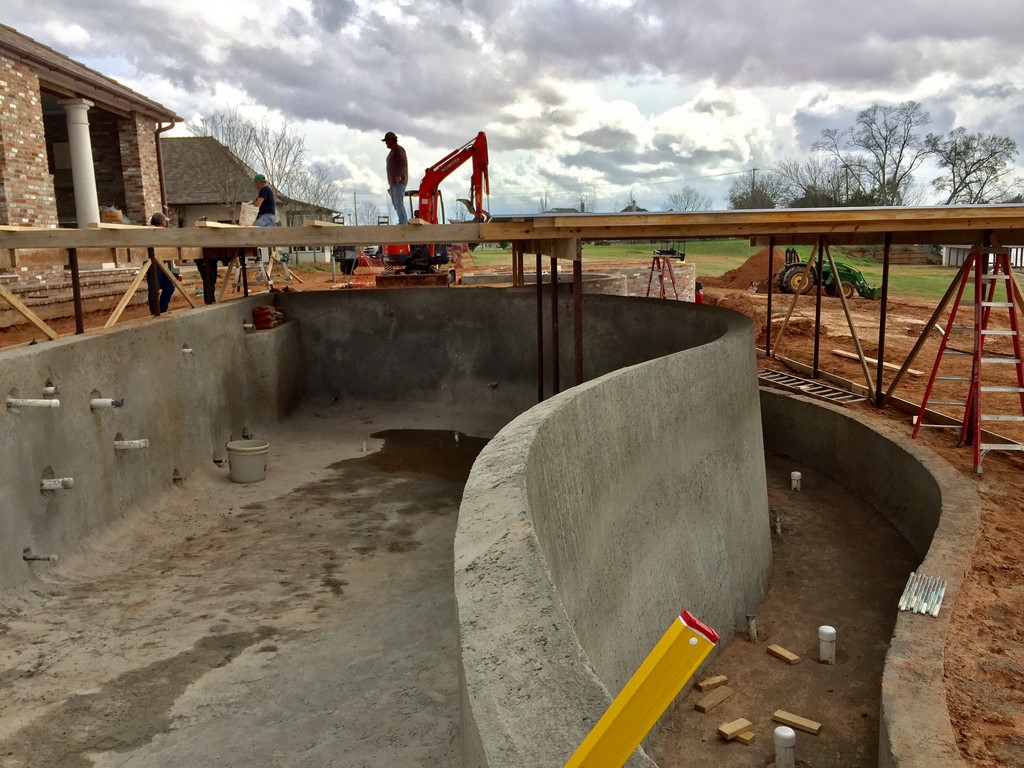
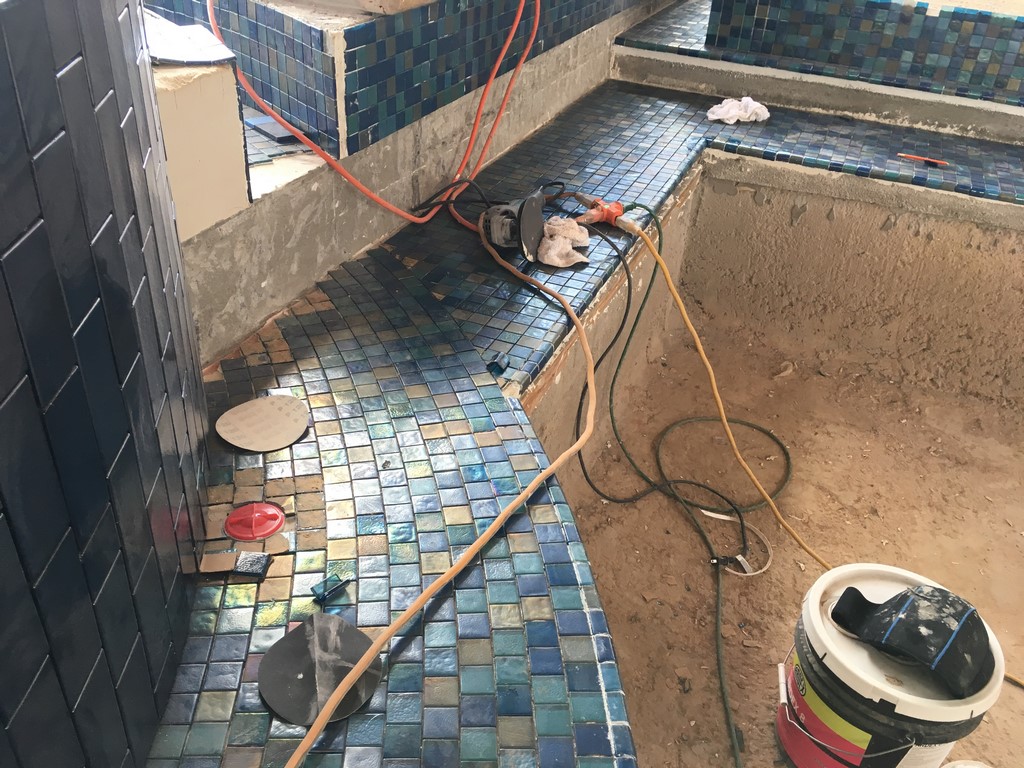
| Although the builsder’s crews prepared shells that were about as clean as they come, we still had lots of work to do in preparing both the vanishing-edge wall and the spa for application of several forms of tile – all from Oceanside Glasstile in Carlsbad, Calif. We also tuned up the tops of the steps and the lounging shelf for a tile finish – in this case leaving the risers clear for subsequent application of a Hydrazzo finish (CL Industries, Orlando, Fla.). |
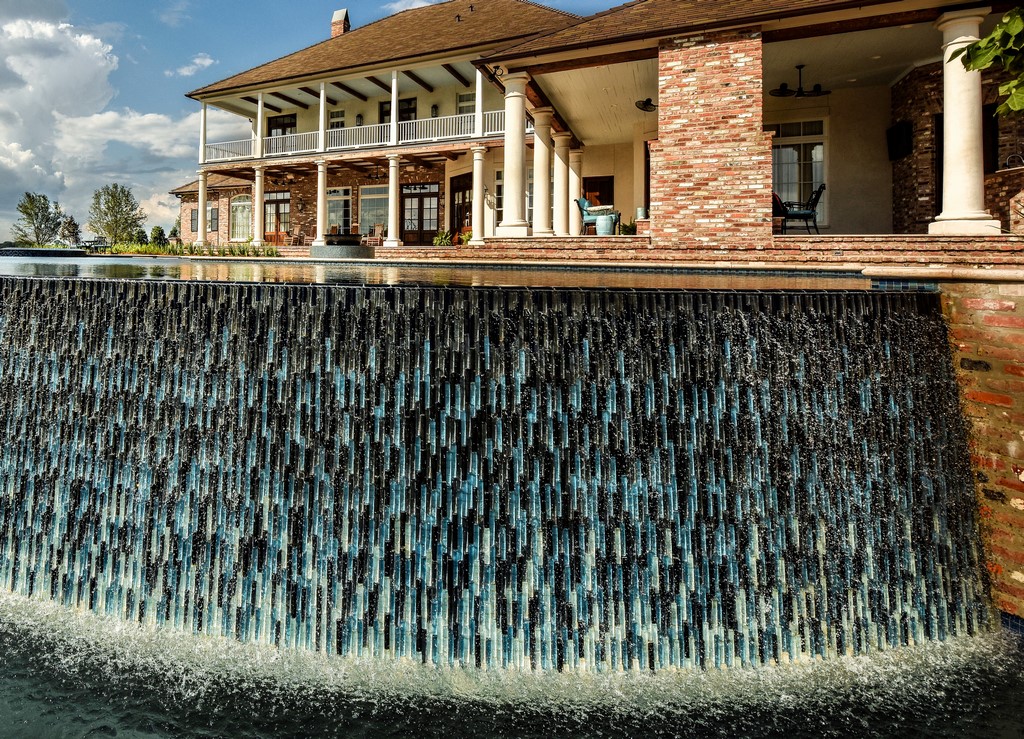
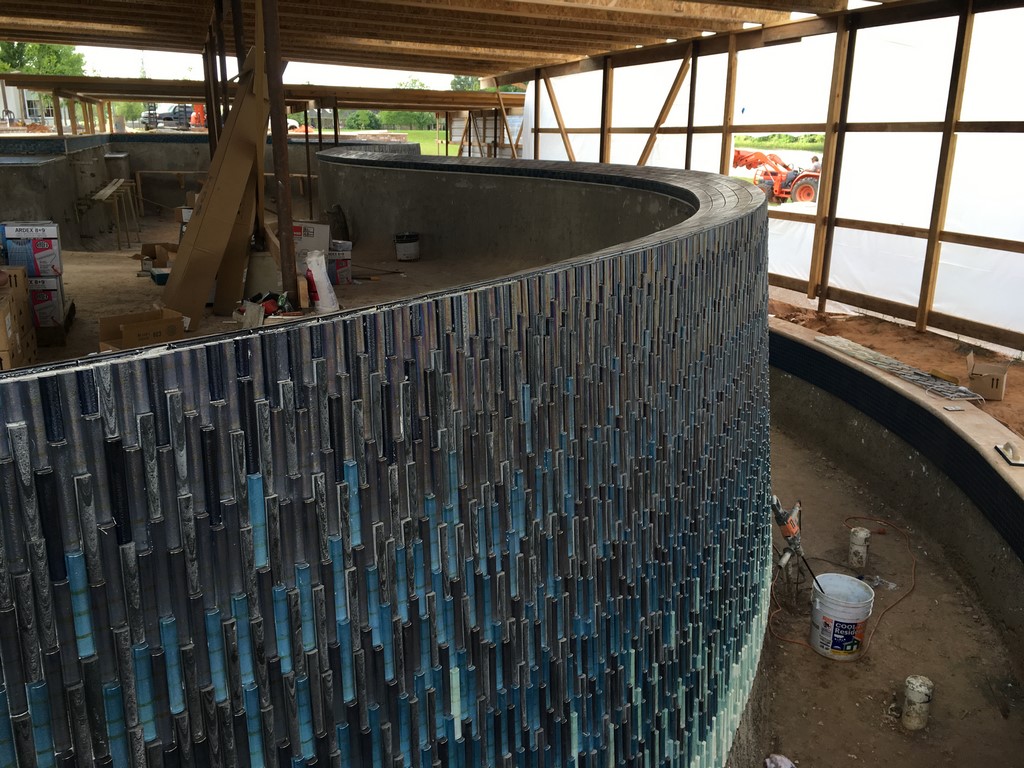
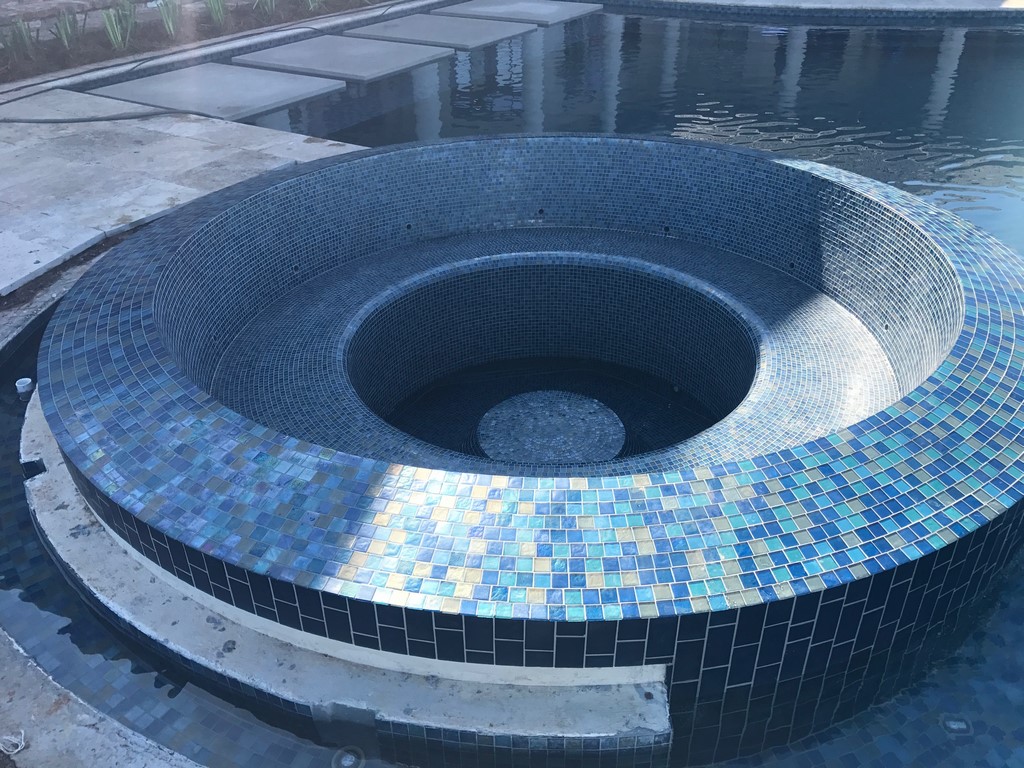
So picture this: A big, serpentine wall, six feet tall, canted back at a soft angle so that, while the top measured about 100 linear feet, the base checked in at about 106 linear feet. As LeBlanc relates, this was to be the project’s Las Vegas-inspired show-stopper, visible from the river that flows past the property and something that had to look just as spectacular when dry as it did when the water flowed.
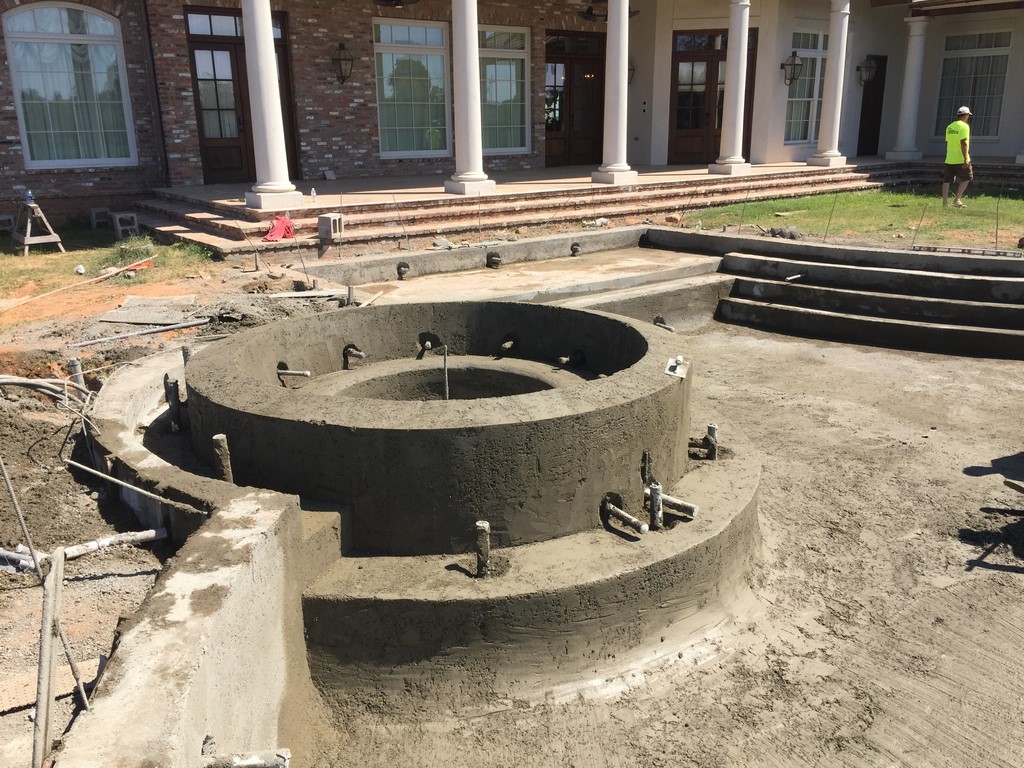
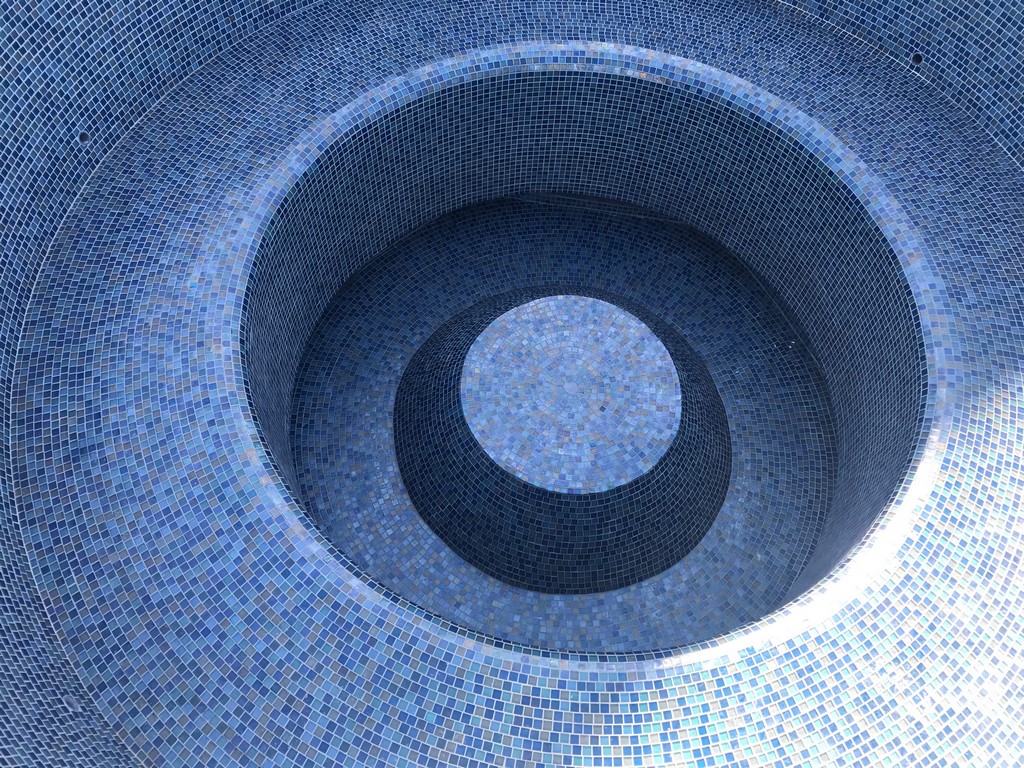
And this: A circular spa in which nearly every surface is tilted off of square, from the exposed top wall to the backrests and the seats. Only a little patch of the floor squared up, and there was a toe-kick detail all the way around the footwell to hide the suction outlets and lighting. There was also a unique footrest in the middle of the well.
The spa was to have a perimeter-overflow system, but an unconventional one where the slot into which the water was to flow was to be set a couple inches away from the wall, so the water had to cleanly and accurately shoot off the edge to reach its target.
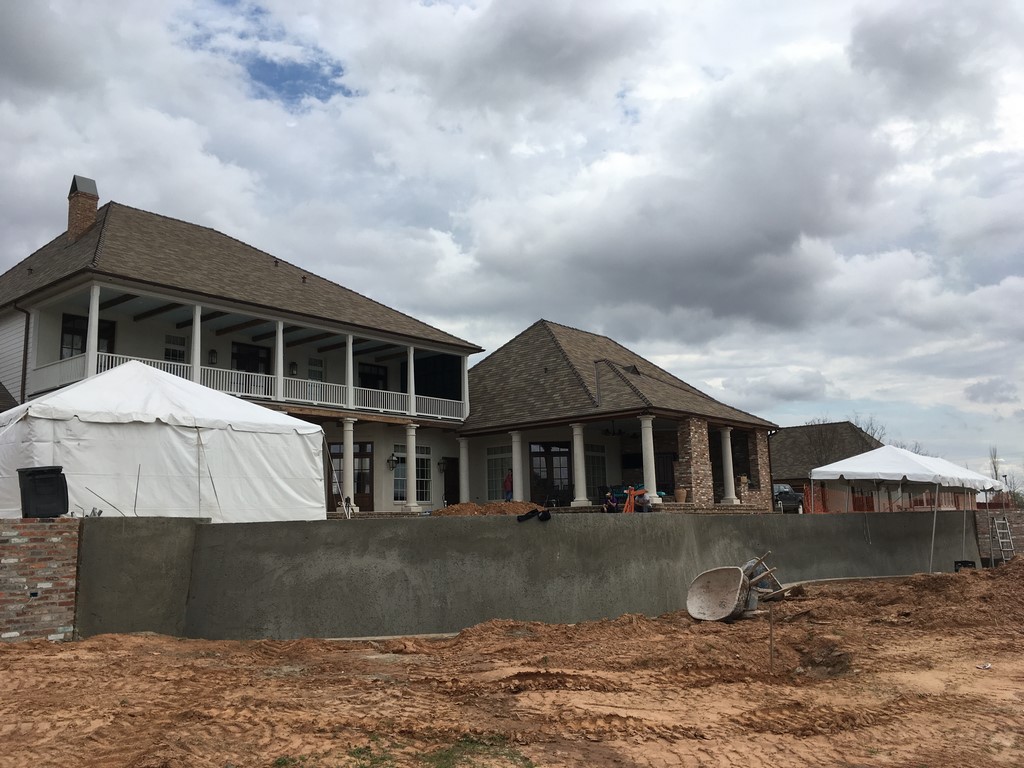
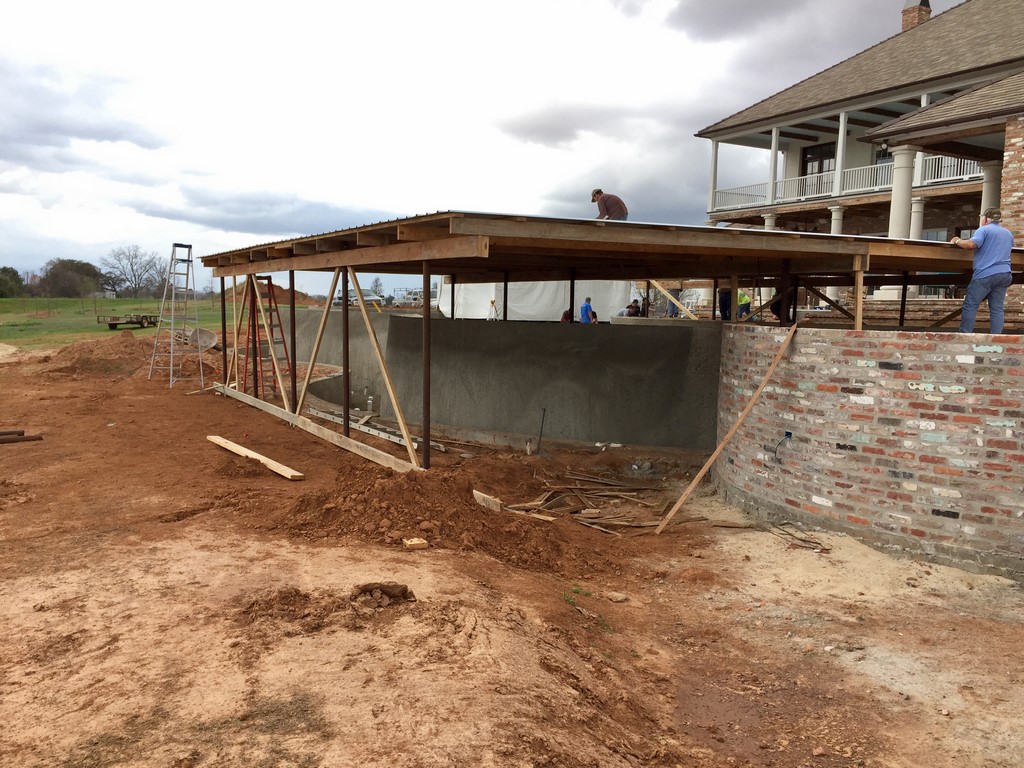
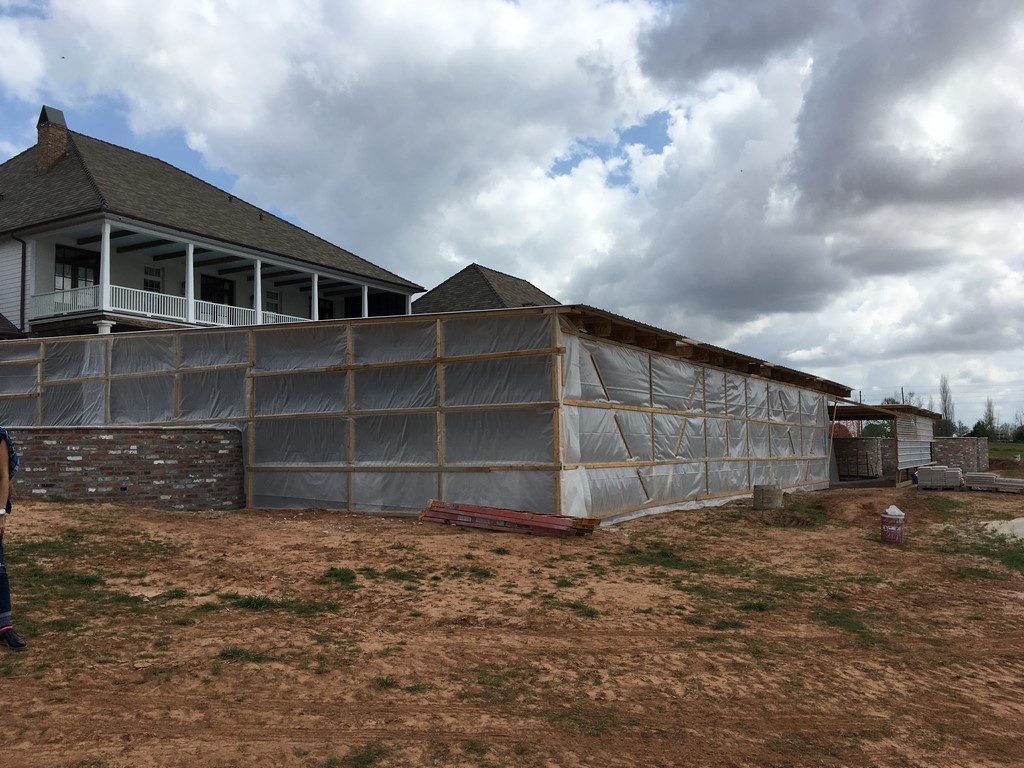
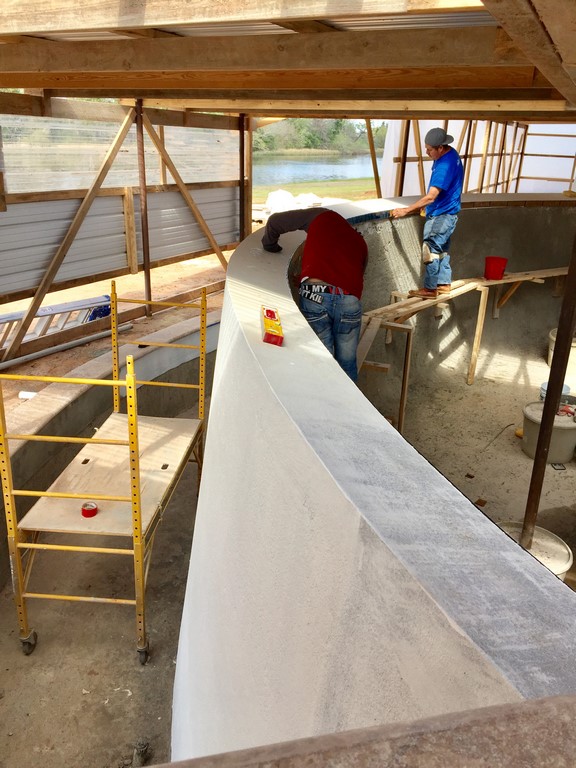
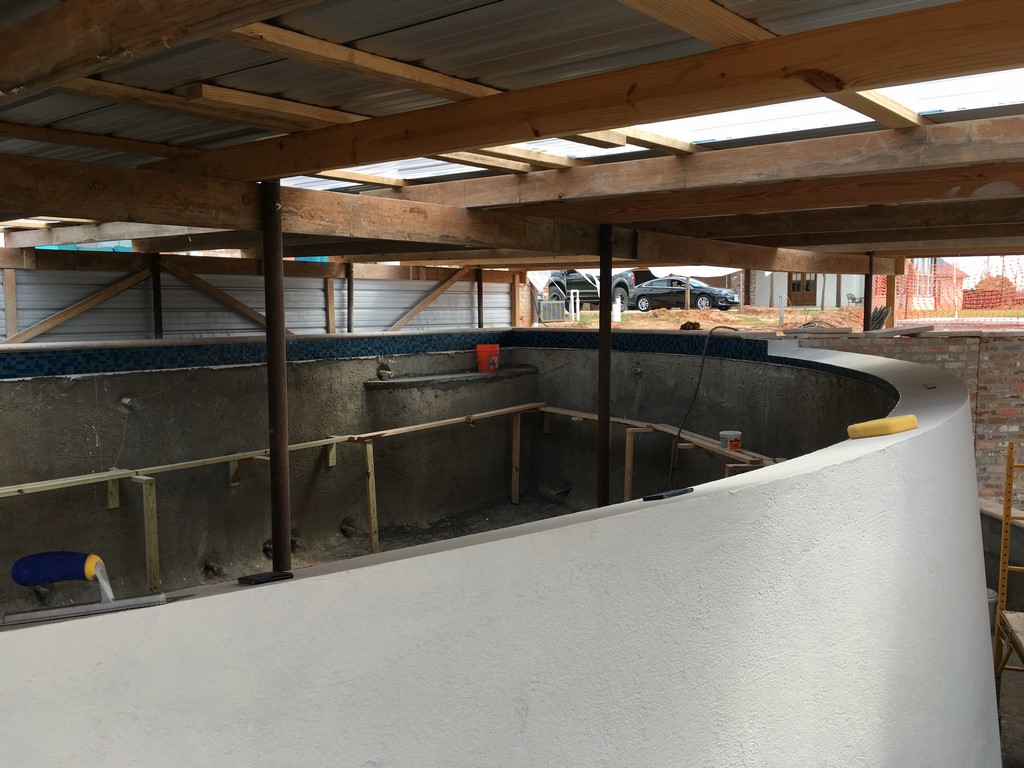
| It wasn’t long before moving the smallish rented tents around became too great a hassle. The homeowner gets the credit for the great solution: Through business connections, he brought in an extremely sturdy scaffold-type structure that was capable of covering almost the entire work area – complete with a corrugated metal roof with skylights and side panels that could easily be removed in fair weather. Quite an assist! |
“Elaborate” is probably inadequate to describe what we were asked to do, so let me add “challenging,” “detailed,” “ridiculous” and “fun” to the list. We began our involvement by engaging in just the sort of detailed thought process LeBlanc had pursued in devising the plan – but within a much more compressed time frame!
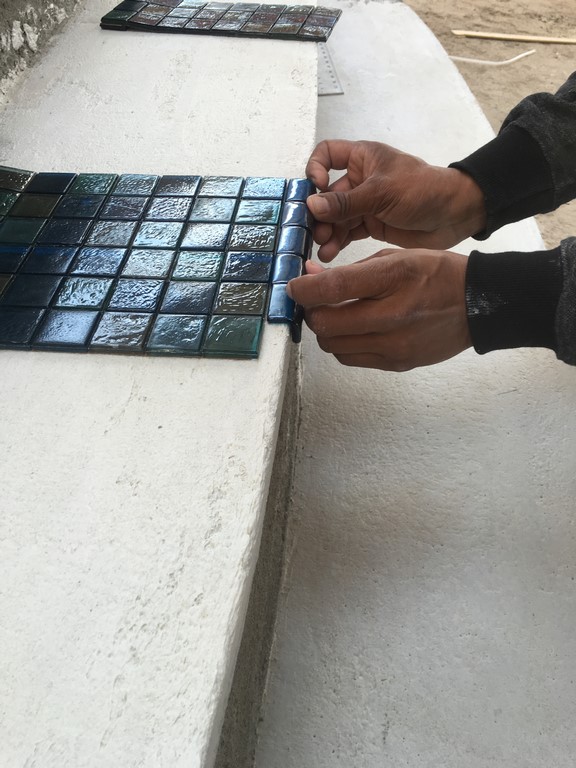
First, we had to figure out the vanishing-edge wall, which was to use a one-off material Oceanside Glasstile developed exclusively for this project. Each piece was a bit less than an inch wide, but unlike common tiles, the face rose as a semi-circle that was about an inch thick on one end, tapering to a thickness of about half an inch on the other.
The design intent was to create a tremendous amount of action down the wall, a whitewater effect that was to be generated with a relatively small volume of water in transit. And the real beauty here is in the glass and stone tile pieces: Their gradations of color from dark at the top to white at the bottom create an impression of flowing, breaking water even when the wall is completely dry.
DEVILISH ANGLES
So how we were going to get this big wall done?
First, we had to prepare the surface flawlessly from end to end. The tile was not to be grouted – Oceanside came up with an epoxy adhesive that will keep each piece in place and not display any mottling effect through the translucent pieces despite the unusually extensive water contact – which simplified installation a bit. But we still had to work with the wall’s canted undulations and cover six feet of extra linear footage at its base.
To keep ourselves on track, we marked the midpoint of the wall and used that vertical stripe as something of a keystone. We then marked the wall at short intervals with true-vertical guidelines we could use as we moved along. The tile at the top is packed in as close as Oceanside’s installation instructions allowed; down at the bottom are wider gaps – but so small that they’re virtually unnoticeable.
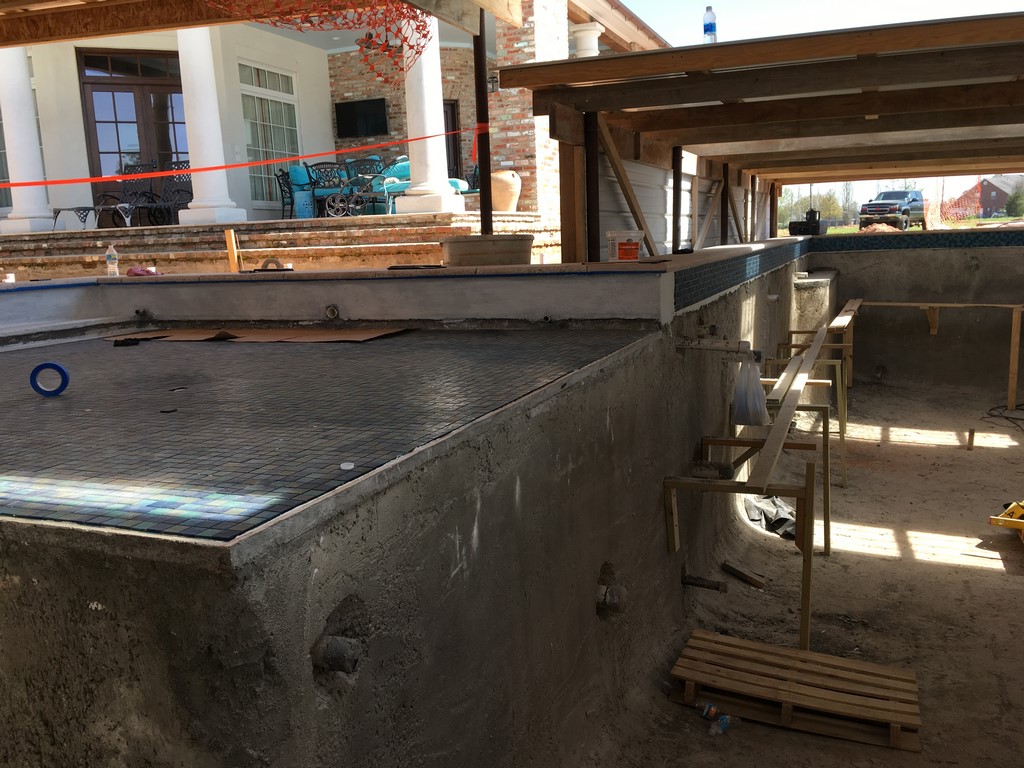
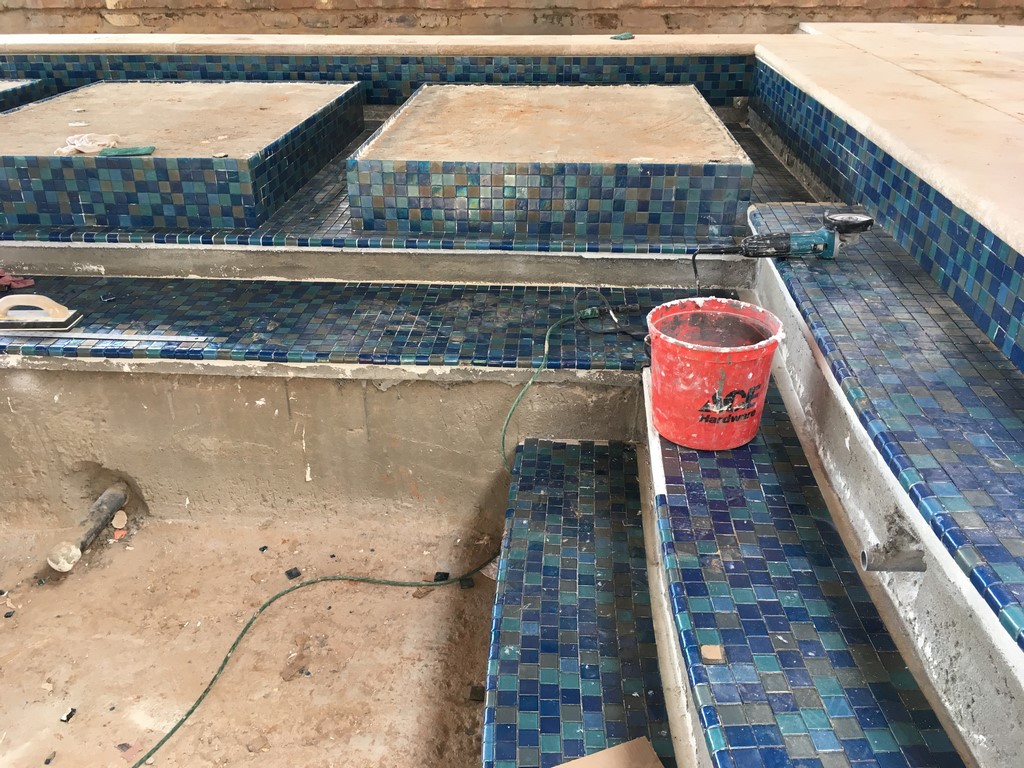
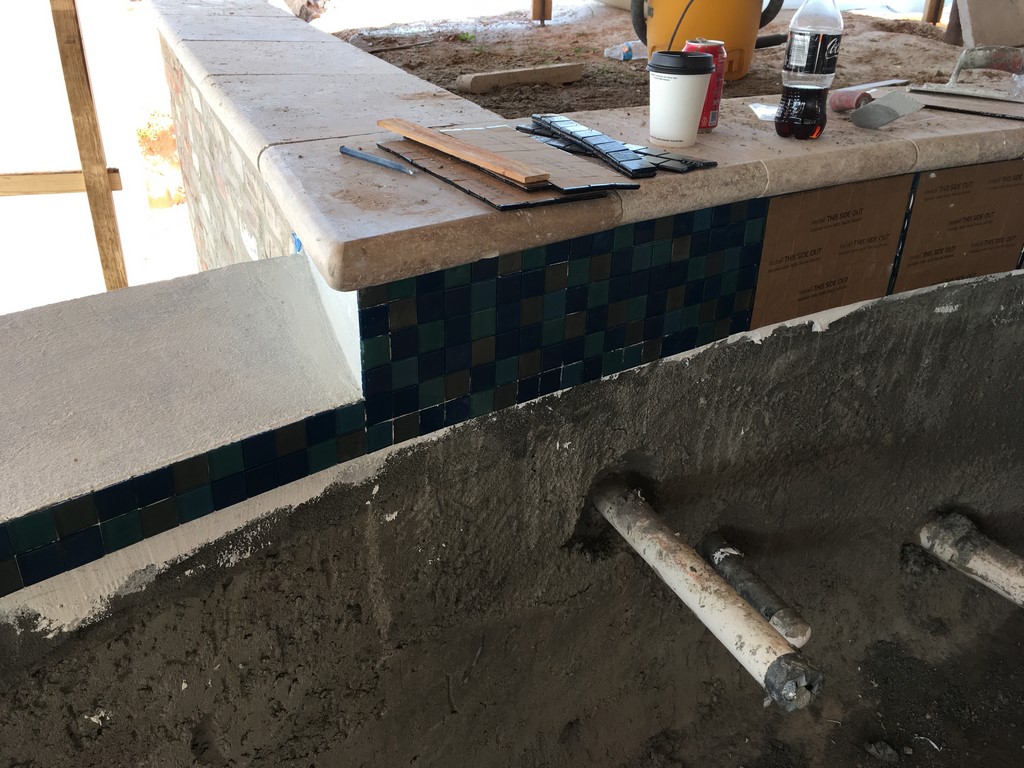
| Although the spa and vanishing edge wall get most of the attention, the project included beautiful tile throughout the space, including various steps, the lounging shelf, the benches and the pedestal supports for a footpath that crosses one edge of the pool. And let’s not forget the small perimeter-overflow waterfeature! Our work on all of these details was comparatively straightforward, but we never compromised on our impulse to pursue perfection. |
The tile arrived on site in sections six bars wide and two bars deep, but because of the need to control positioning so precisely, we effectively ended up working with more than 1,200 individual vertical strips of glass tile in a painstaking process that took more than six weeks just for the back of the wall. And all of this was complicated by the fact that the special epoxy allowed us an unusually short open time: To say we worked with all deliberate speed is putting it mildly.
For entirely different reasons, the spa was just as challenging. First, it had to be perfectly round if the sheeting effect we were after was to work as efficiently (and beautifully) as the design specified. Second, the compound contours of the walls made the application of tile as sheets impossible, so we ended up cutting each sheet of paper-face-mounted, five-eighths-inch mosaic tile apart so we could use countless single-tile strips to make things work. Third, the spa’s footwell was relatively small, so fussing with the full-circle toe-kick detail was unusually awkward and laborious. Finally, we had to make the water-sheeting effect work, flawlessly and for the long haul.
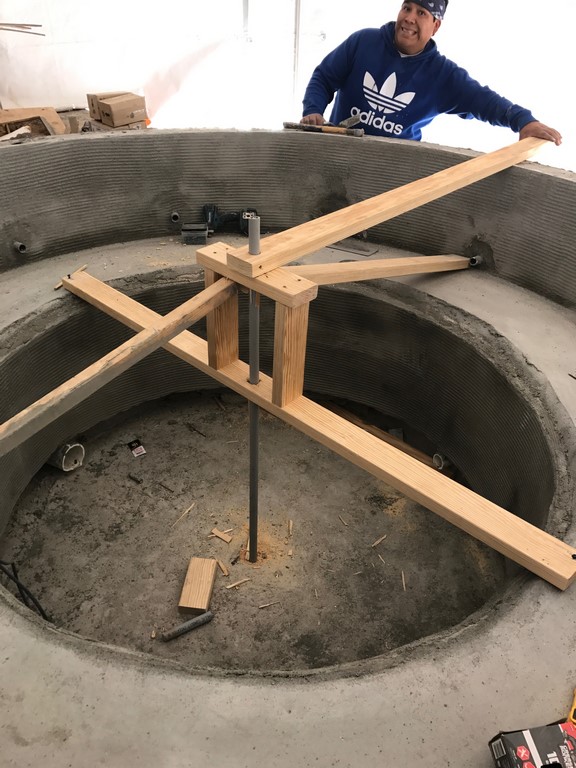
Making the spa round was the easy part. The contractor, Mike Webb, and his capable crew at Clearwater Pools & Spas (Natchitoches, La.) had marked the center of the projected circle with a sleeve in the concrete phase, so we had an easy time setting up a jig and defining and adjusting various edges and contours as needed. Once the surfaces were floated, waterproofed and ready for tile – a process that always takes extra time in compact spaces – we began applying glass mosaic, once again in a process that took several weeks because of the above-mentioned contours and details.
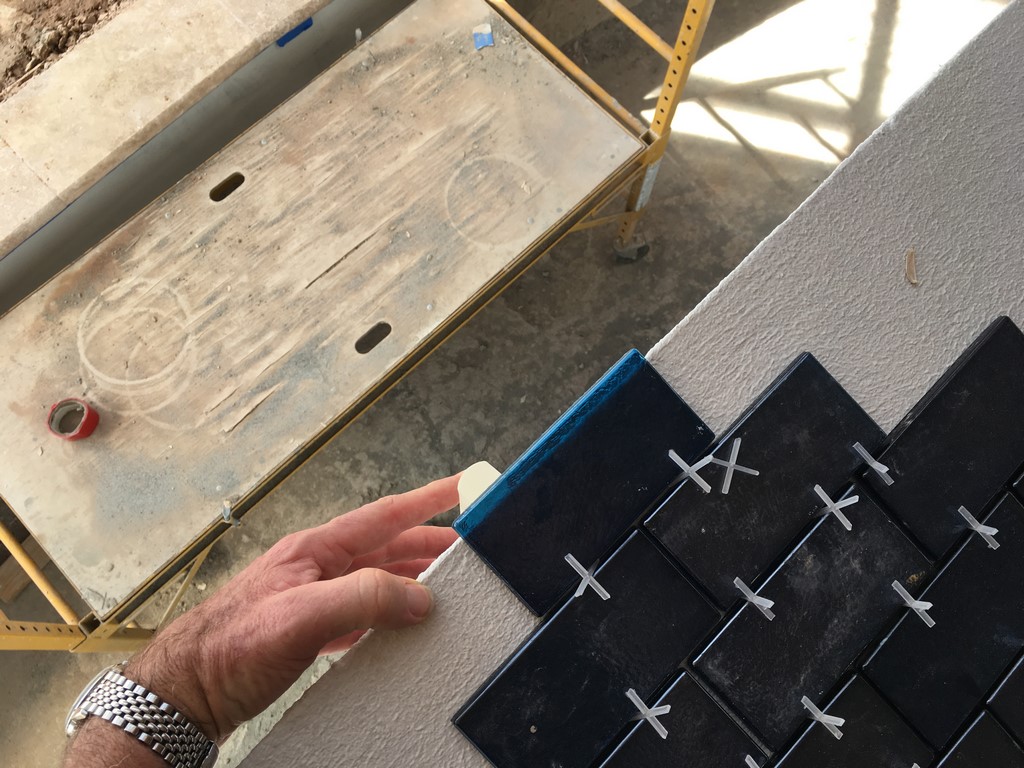

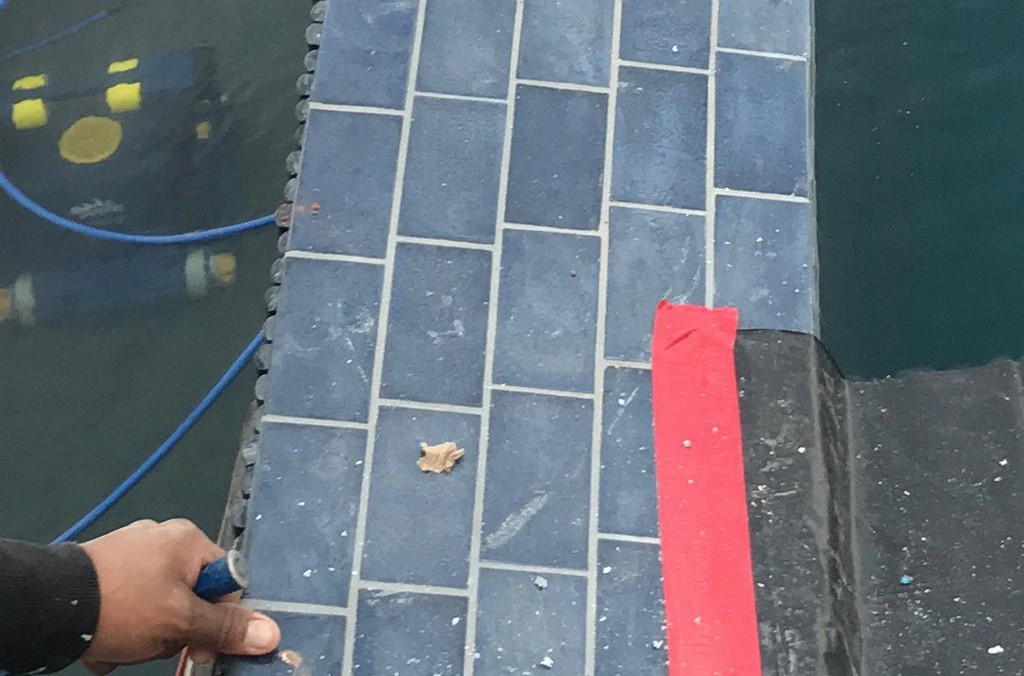
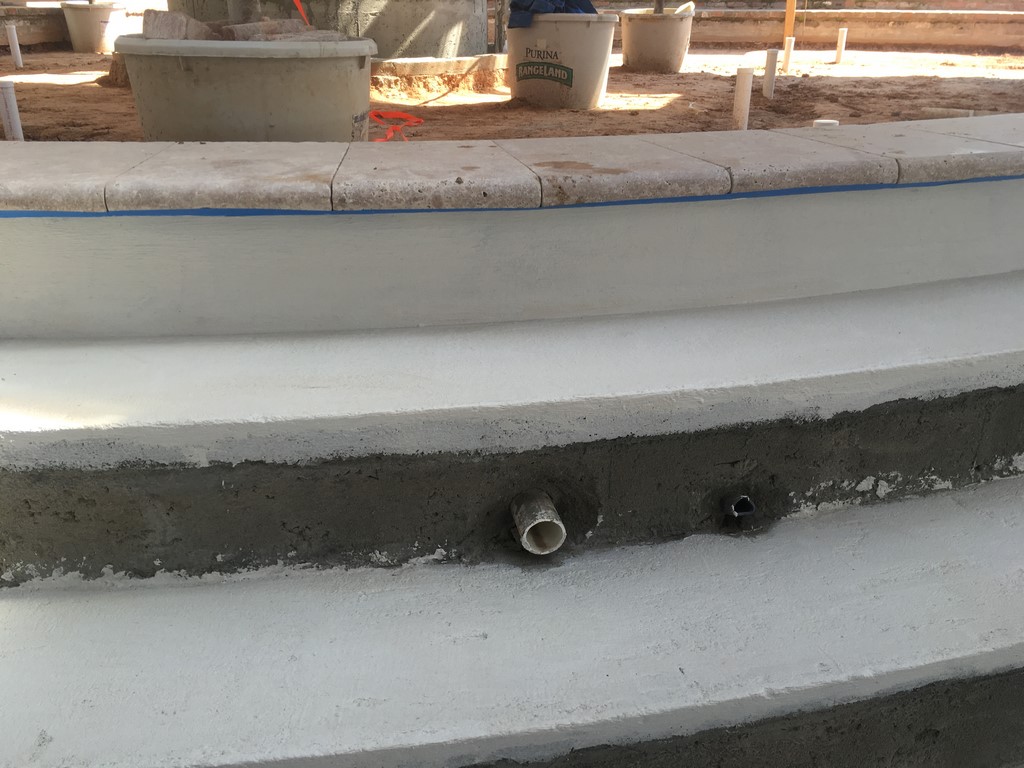
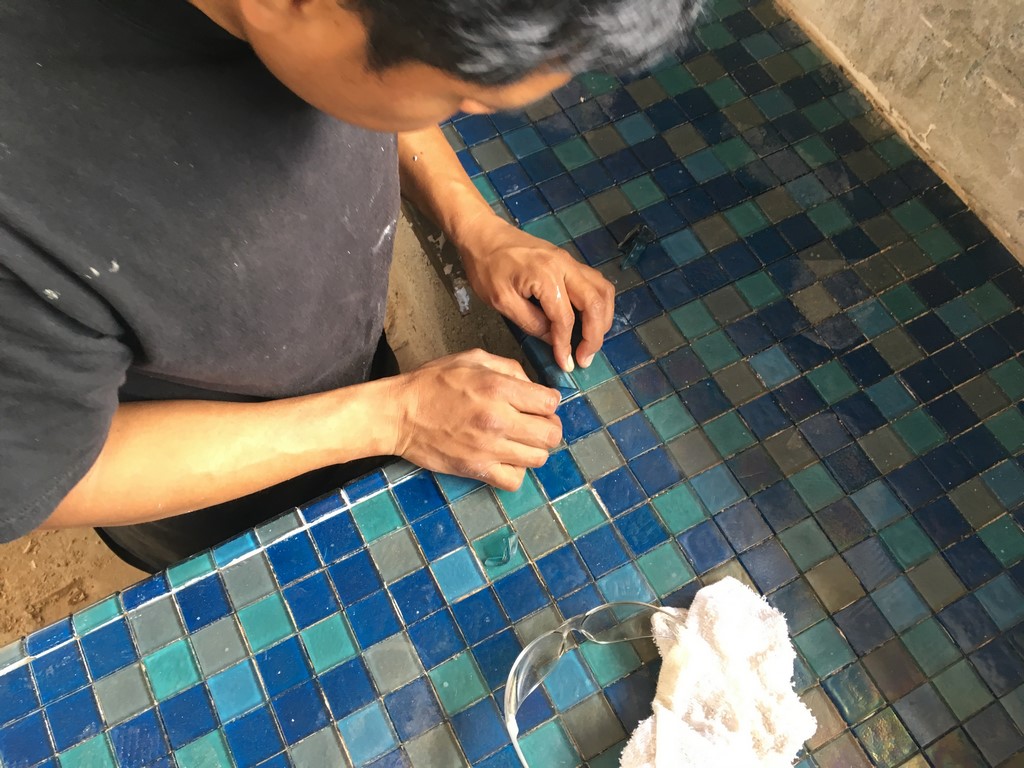
| Working on the vanishing-edge wall was a multi-dimensional, multi-planed challenge from the start. Once the surface was prepared, we began confirming tile arrangements and gauging overhangs, for example, and working out the transition from the six-piece waterline tile array to the two-piece run extending under the edge wall. With the top tile in place, we marked the wall and got to work. In the image at bottom right, note the extent to which the wall tile extends past the overhanging pieces at the top: Any water flowing over the edge will get active in a hurry. |
As soon as we could after the appropriate curing period, we filled the spa with water and started working with the much-anticipated sheeting effect. To help things out, we’d set the bottom row of tiles out a bit proud of the spa’s outer wall. We didn’t want any wicking or meniscus effect to enable the water to cling to the wall. (This protrusion is transparent, so we also had to go in with small tools and clear away any adhesive and grout material that found its way onto the exposed portions.) We’d polished the edge with great care to minimize friction and had been careful in applying grout to keep its level as flush as we could to avoid any channeling effects. Finally, we were ready to go.
At that point, the decking had yet to be placed, so when the spa overflowed for the first time we had the opportunity to observe and manipulate flow rates to deliver just the right volume of water to create the desired sheeting effect. From there, it was simply a matter of placing the deck slot where the water hit the surface – and then, of course, grinning ear to ear because it all looked so great.
After that, installing the antique sugar-cane kettle atop its perimeter-overflow basin was a bit of a break from the levels of attention and stress that went into making the other two watershapes into everything the homeowner wanted them to be. It’s a small slice of perfection in and of itself, but compared to the edge wall and the spa it was a walk in the park.
MOVING ON
Projects like this one don’t come around too often, and that’s one of the reasons why I take such a “let’s do it!” approach to them. Happily, it’s an attitude shared by my crew, which spent nearly three months on the road to make this project happen. They’re all veteran performers, of course: Although certain details of this project were new to us, we’ve specialized through the years at pushing the envelope and taking on projects that go far beyond conventional expectations.
In this case, Shane LeBlanc’s design was not only wonderfully creative but also unusually ambitious, and working with him and Mike Webb (and the staff at Clearwater Pools & Spas) was a rare pleasure – the sort of collaboration you enjoy so much that you spend a lot of time trying to recapture its spirit when you step over to other tasks.
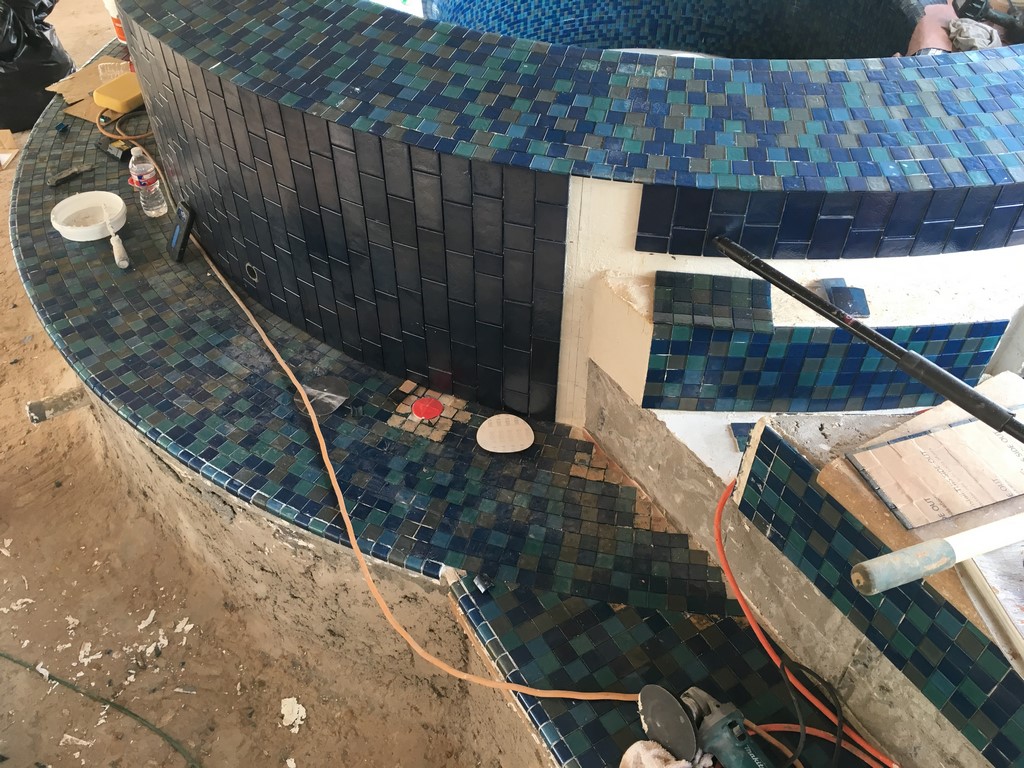
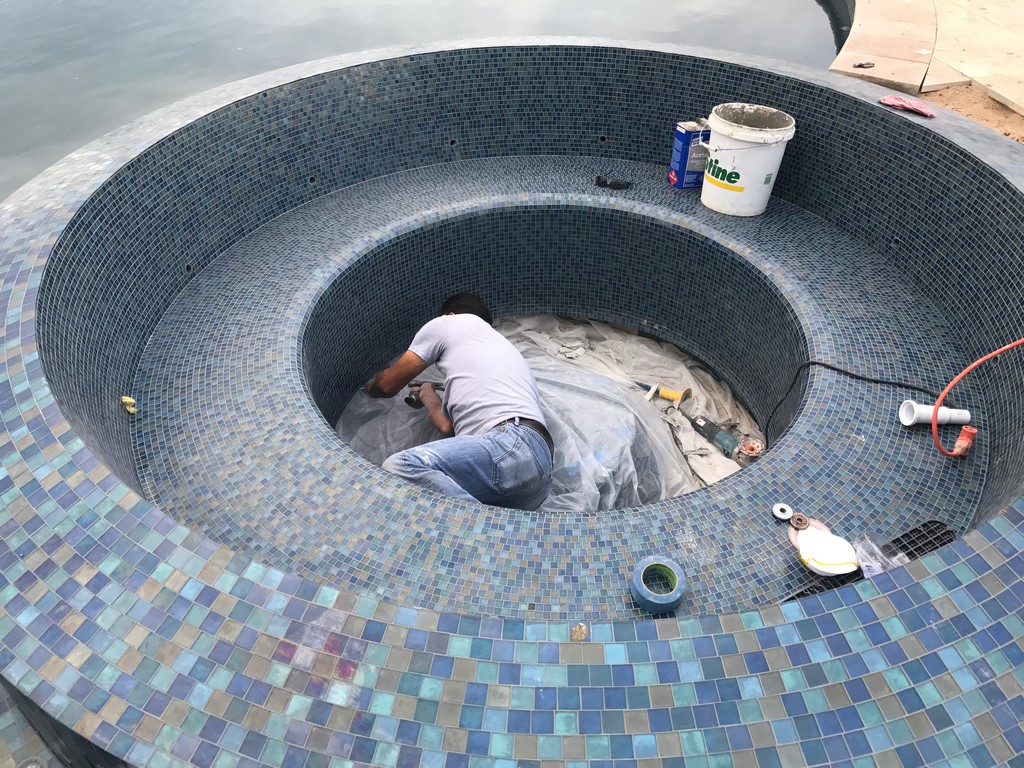
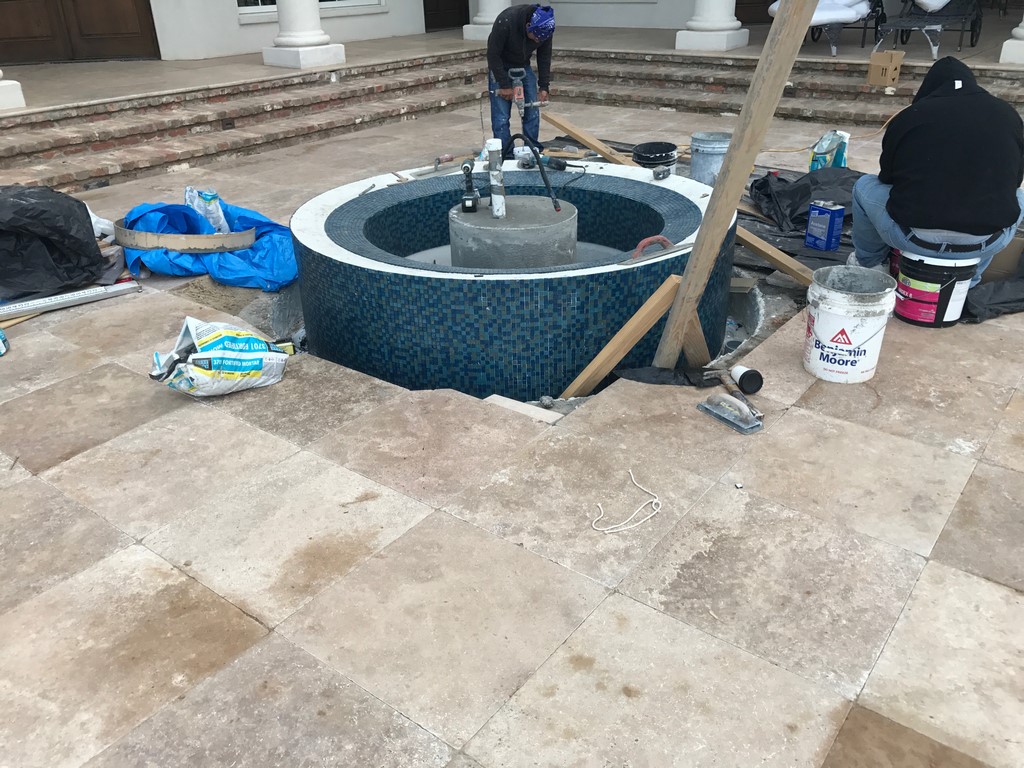
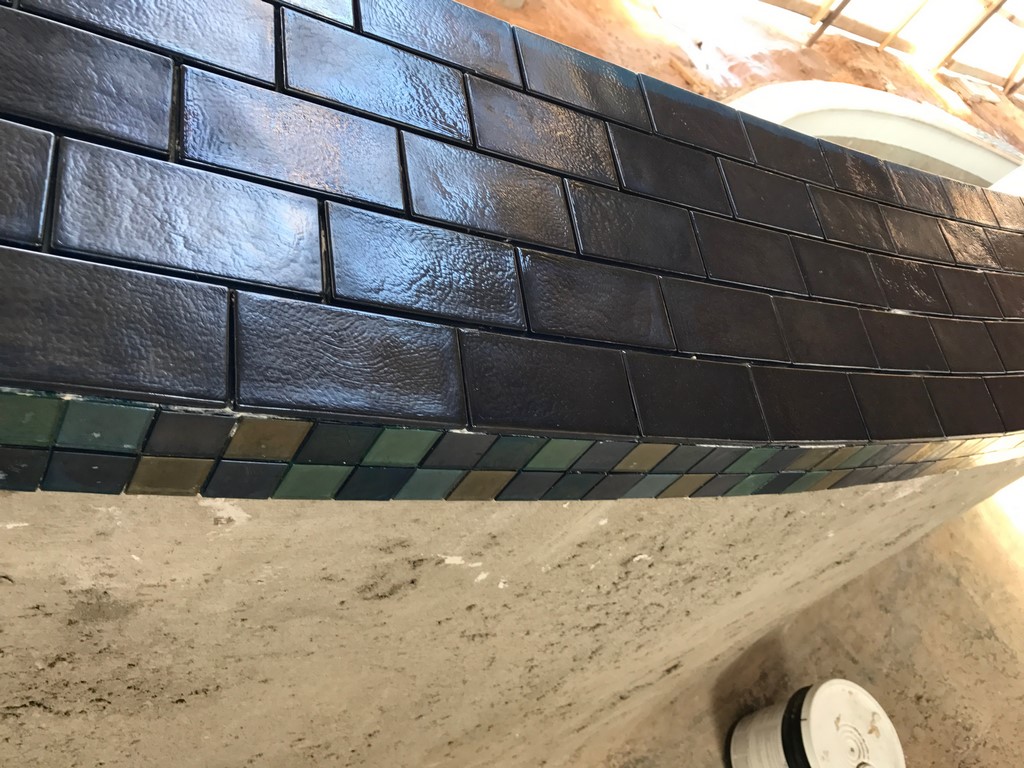
| Making the spa perfectly circular was easy. Making the tile work inside the spa with its curving contours was hard and meant working with the tile in single-piece strips throughout. The exterior was no party, either, with lots of intersections and transitions to consider and resolve. Then there was working on a toe-kick detail in a small footwell: That ranks right near the top in degree-of-difficulty rankings. But as was true all around the site with every trade, we stuck with perfection as our goal – and delivered. |
While this project took a long time to unfold, it did have a deadline: The homeowner had a big party planned, and we needed to be gone before it started, with everything functioning flawlessly. Needless to say, work always seems to expand to fill the available time, so we were there, still hard at work, while the band was setting up and the caterers had started preparing for the onslaught.
We made our last adjustments and cleared out, knowing what we had all accomplished together and fully aware that the client was thrilled beyond belief and expectations. His home may be hidden away in rural Louisiana, but he achieved his Las Vegas-scale ambition for all to see.
Bring on the crawfish!
To view images of the completed project, see Shane LeBlanc’s article by clicking here.
Jimmy Reed is president of Rock Solid Tile, Inc., a tile design/installation firm based in Calabasas, Calif. He founded the company in 1985 after spending his teens and early 20s learning the tile-installation trade. In between, he attended Art Center College of Design (Pasadena, Calif.) and spent several years working in the entertainment industry. For the past 30 years, Reed has focused most of his creative energy on designing and installing tile finishes for high-end custom watershapes, a process that has seen him work with some of the industry’s leading designers and builders. He may be reached through his web site: www.rocksolidtile.com.