


Following Lines

Through many years of applying small pieces of tile to the complex sorts of surfaces found in pools, spas and other waterfeatures, I find most of the challenges (and opportunities) come in figuring out intersections – that is, places where planes meet, contours change and, in general, a whole lot of attention needs to be paid to getting things just right visually.
We at Rock Solid Tile (Calabasas, Calif.) have been fortunate to find ourselves involved in many projects in which these intersections truly matter – on high-end, beautifully realized watershapes, for instance, where perfection is both expected and demanded. In these instances, everyone involved on site must deliver flawless results that seem utterly and completely effortless, as though everything has come together simply because that’s how these things should look.
As is true with so many aspects of fine watershaping, achieving that impression of effortlessness in tile application requires a ton of hard work – as the project and details shown and discussed here certainly illustrate.
UNDER THE TENT
The project is in Palm Desert, Calif., and if it looks familiar in some ways, it’s because the home was designed by the same architect we worked with on a project right next door to this one and covered in another WaterShapes article a while back (click here to jog your memory).
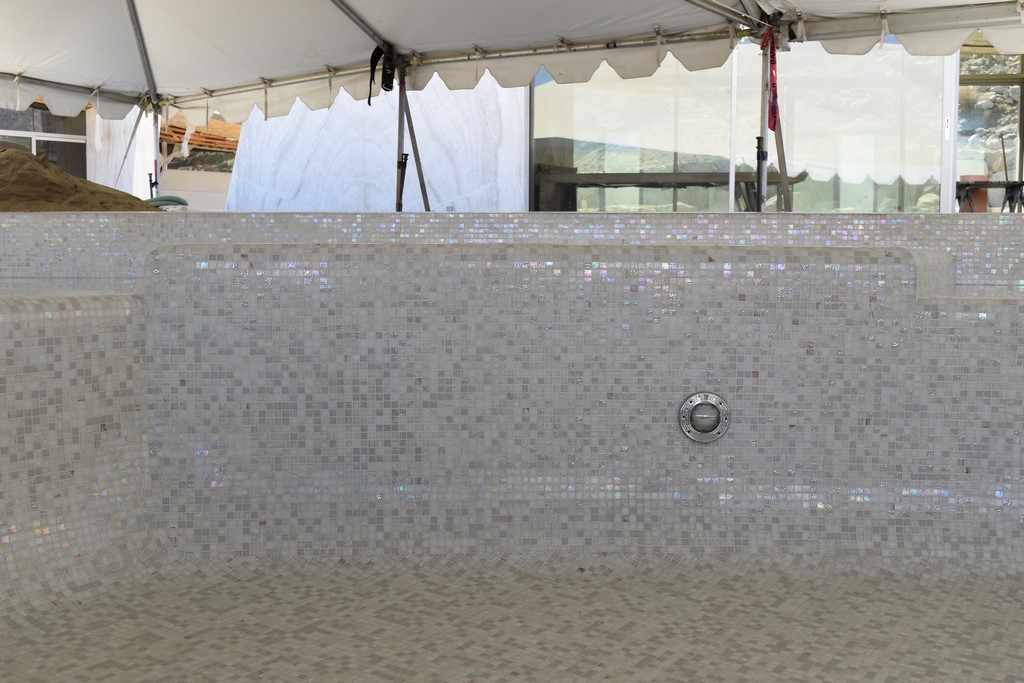
One of the challenges of working in the Mojave Desert is the heat: The daily temperatures while we were working on just the first of what will be many watershapes on site reached as high as 120 degrees F, so we worked inside a large tent that enclosed not only the pool and spa, but also a staging area where we kept our materials to acclimate and “cool” them so they stayed below the 90-degree level specified in their application instructions.
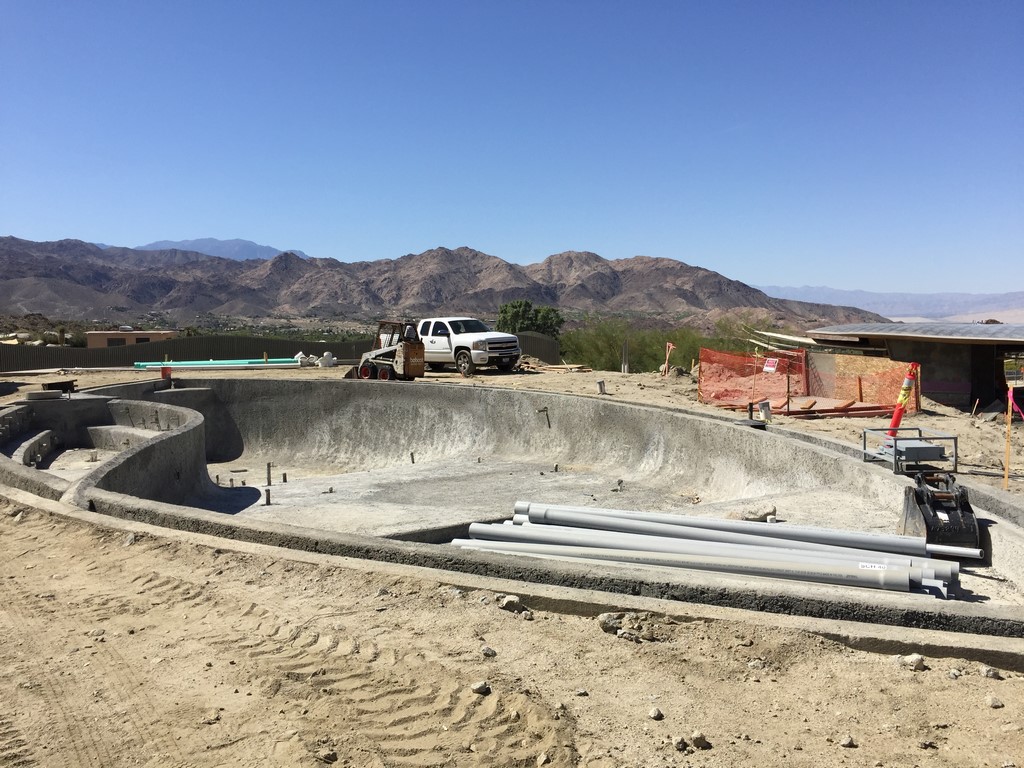
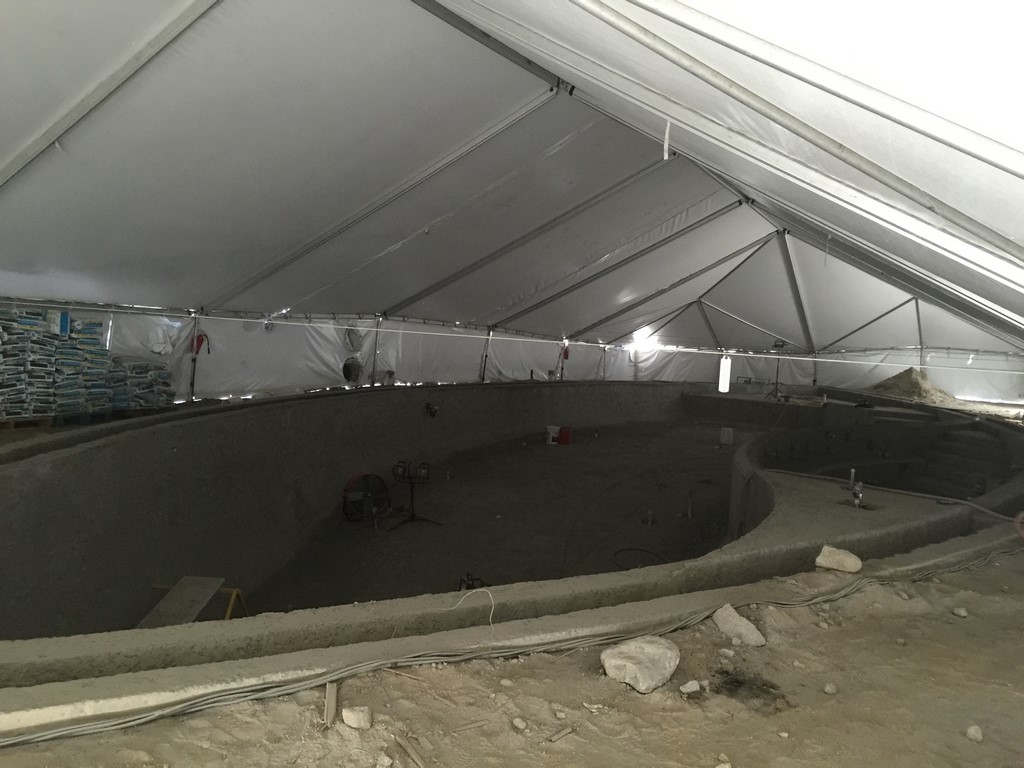
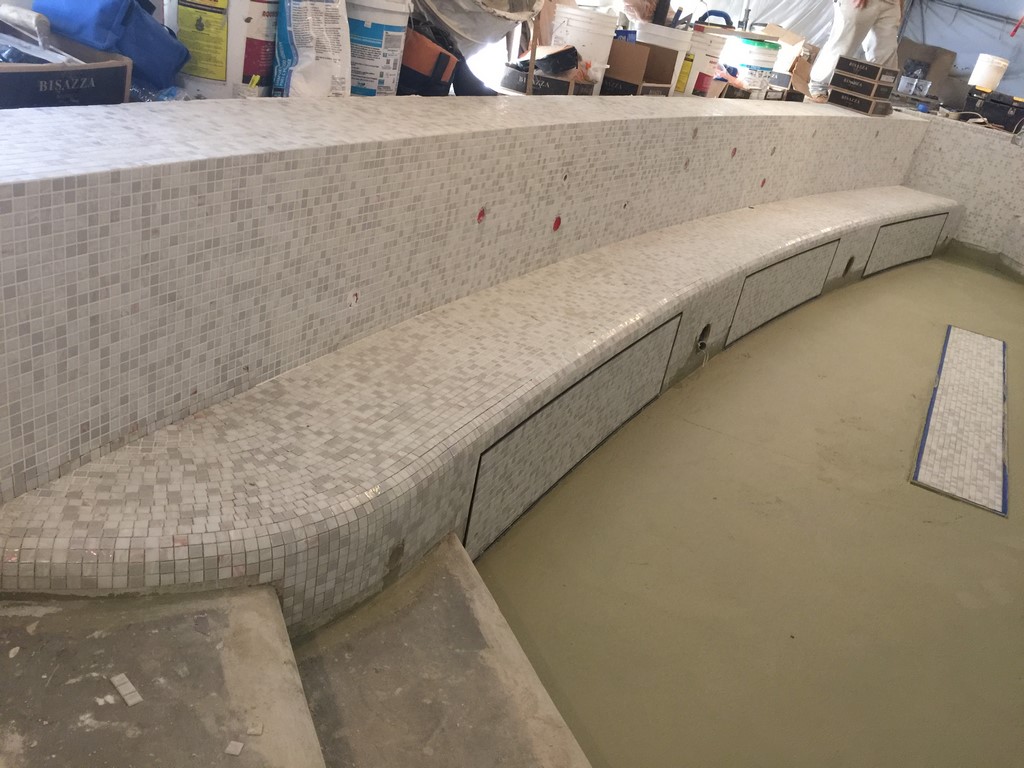
| This sort of project is no tile applicator’s dream: Instead of being a rectangle with plumb walls squared off against a level floor, this watershape is a mass of sweeping curves, complex surfaces, multiple levels and lots of tight angles. Job one was getting it enclosed under a tent that enabled us to control our working environment during a season of intense desert heat. |
We’ve used tents in our work for years, even in situations where sheltering from high heat wasn’t a key objective. Keeping cementitious materials out of the sun as they are applied and go through the curing process is always a good idea, as is tenting the work area when the weather is inclement or bitterly cold. We’ve been happy to see more and more tile applicators (and plasterers as well) taking to tents to produce optimal results.
In this case, two special factors had us moving under our tent as quickly as we could: For one thing, rental of the tent and air-conditioning system cost more than $10,000 per week; for another, the tent was positioned in such a way that it stalled work on other project phases, which meant that a whole bunch of people were more than usually interested in our daily progress reports and wanted us to finish up as soon as possible.
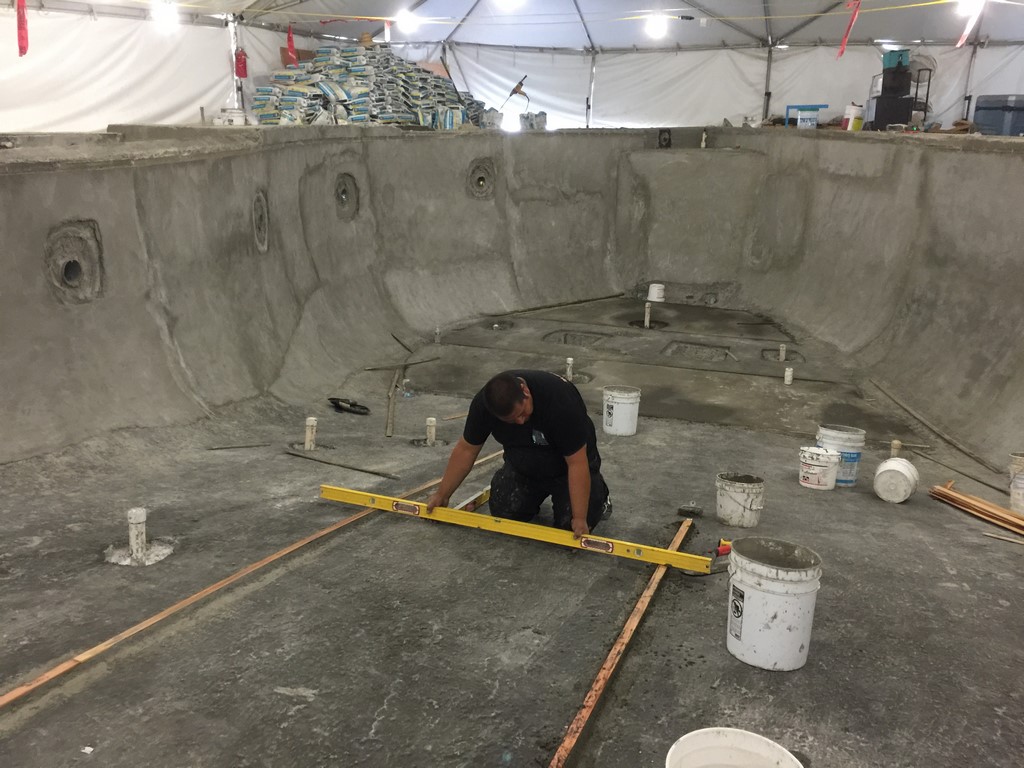
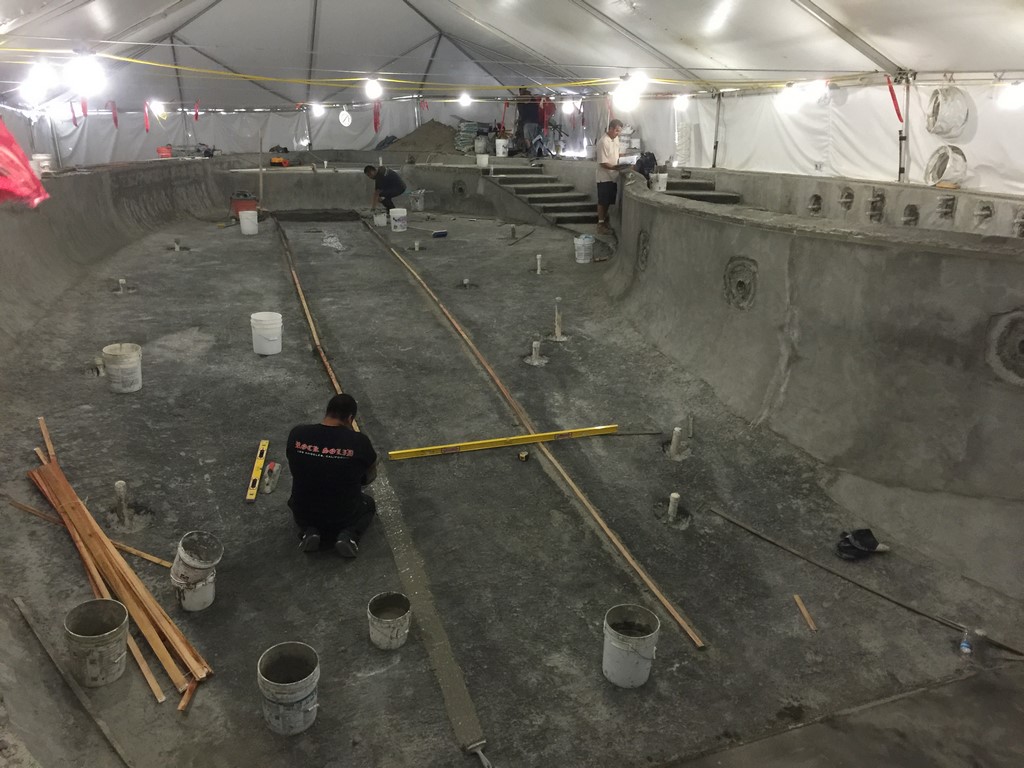
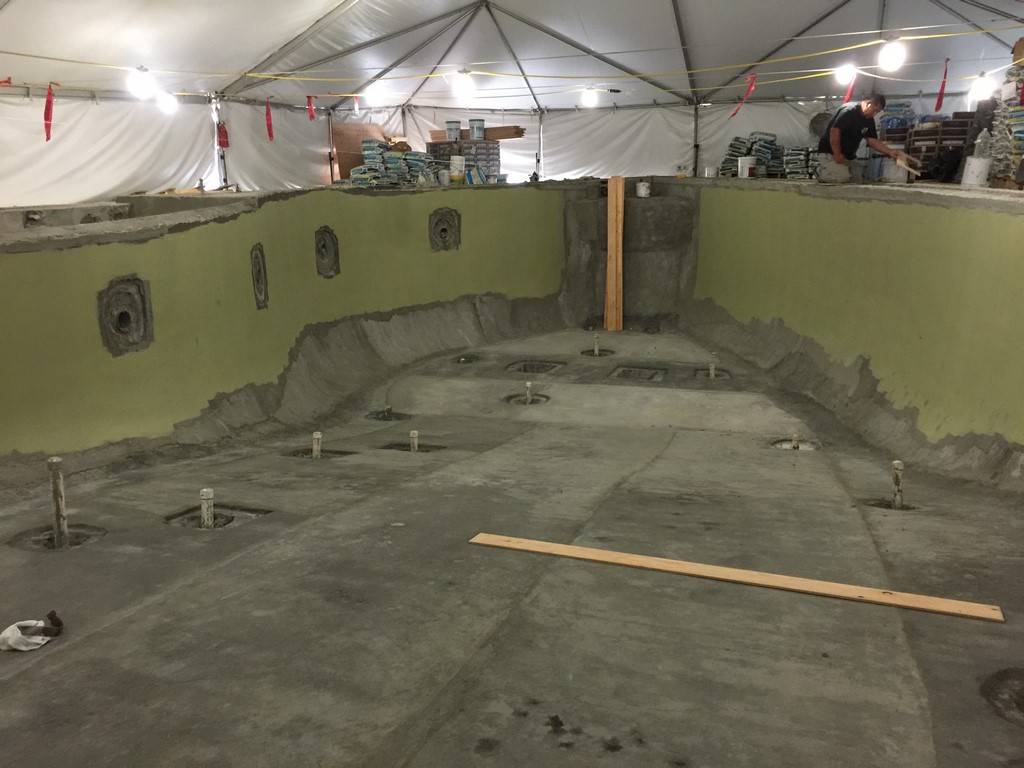
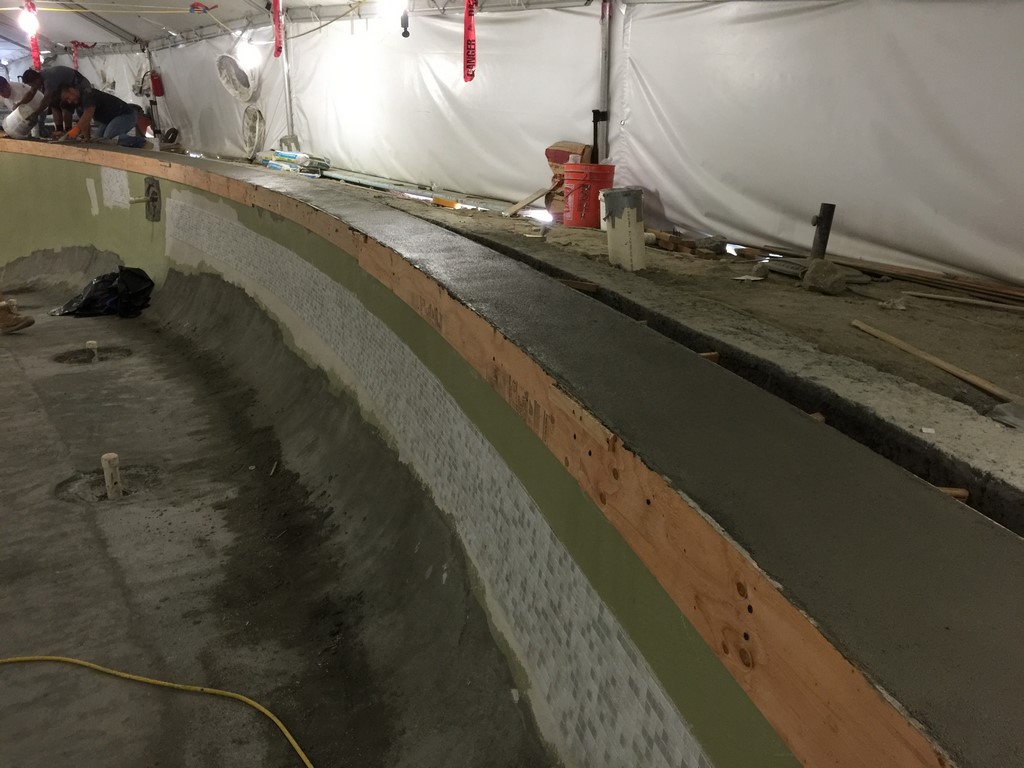
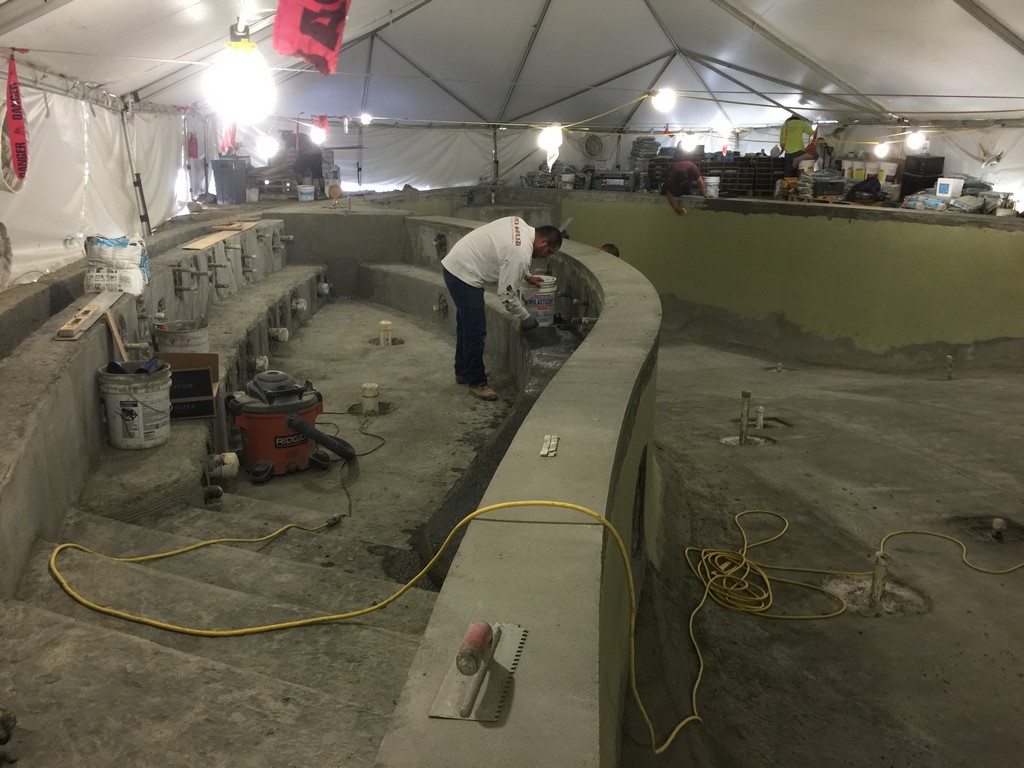
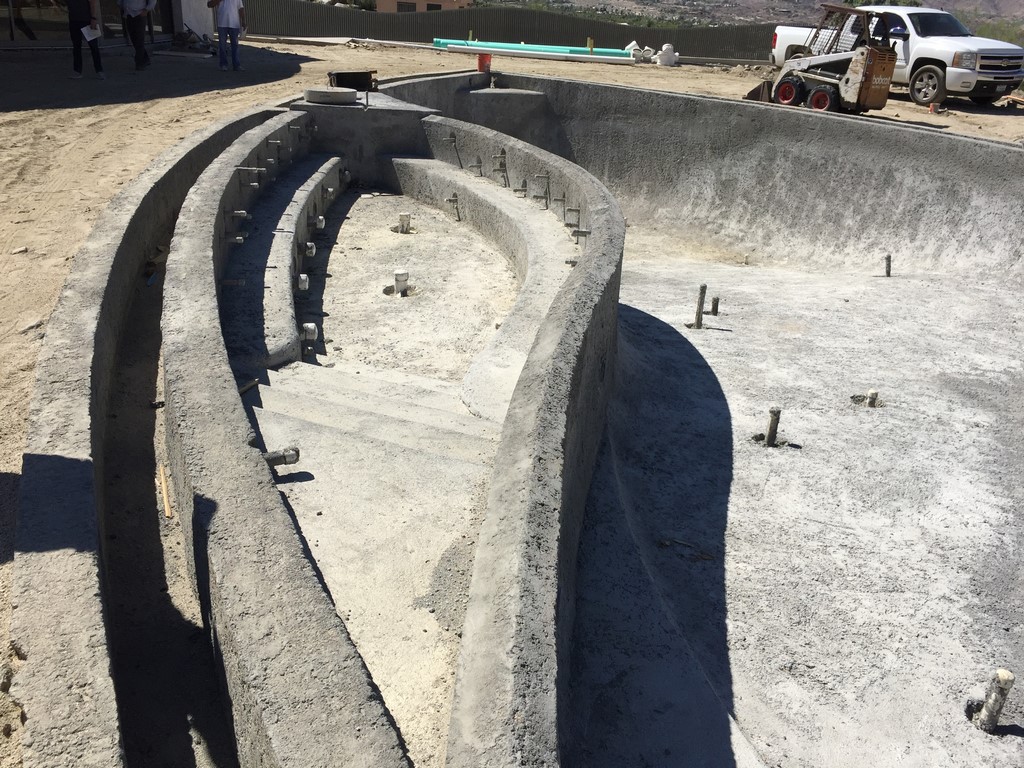
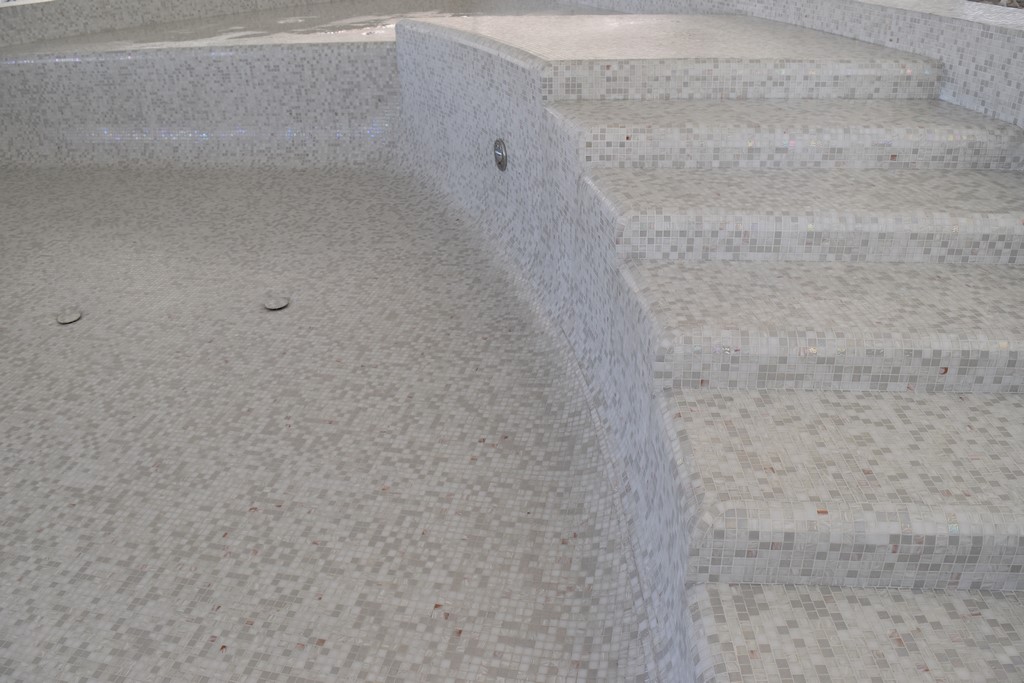
| The pool’s and spa’s intricate topographies put a premium on surface preparation – and on working with the raw concrete to set the surfaces – the floor as well as the steps, benches and shelves – at the precise levels we needed to make the applied tile flow the way we wanted. By the time we were done, the radiuses were all in place as well as the sharp angles and edges. |
The tent made for somewhat more comfortable conditions for our crews, but even so, working inside a structure with a cooling system that often labored to keep the interior space at a not particularly cool 85 degrees meant we were constantly aware of the need to take breaks and keep fully hydrated – both of which added to our sense of the time constraints.
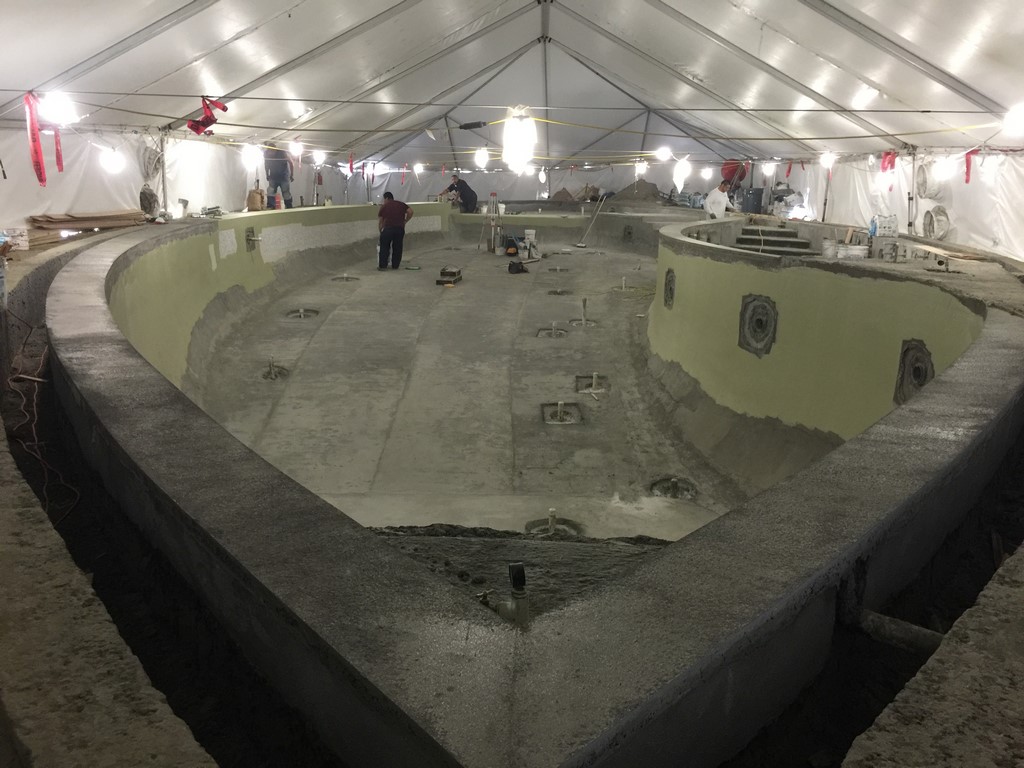
As for our work inside the pool, it was intricate not just because of interior details, but also because it had a radiused design.
In many all-tile pools, the plan will specify a rectilinear shape with plumb and straight walls intersecting with a squared-off floor. In such cases, making the tile layouts work is pretty straightforward and most of our mental energy goes into developing nice ways to deal with the corners of steps and benches. With radiuses, however, the surfaces are more complex and angular and there are more intersections to work out. This takes time, of course, and it’s nothing we can rush if we’re to meet the collective goal of visual perfection.
|
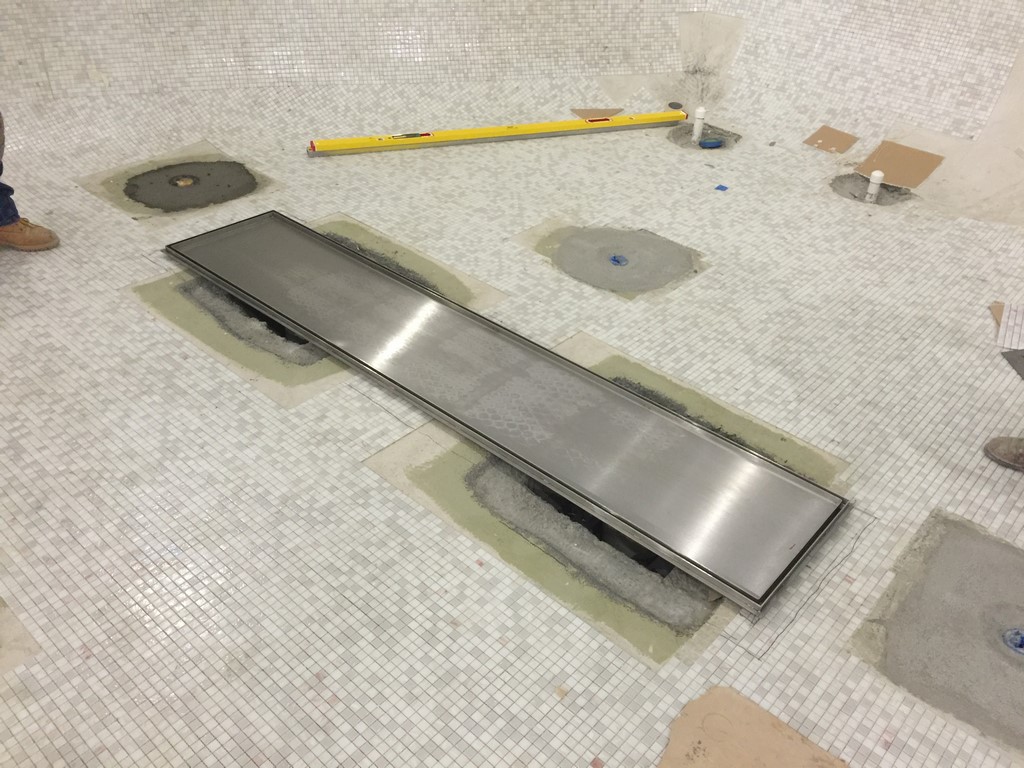
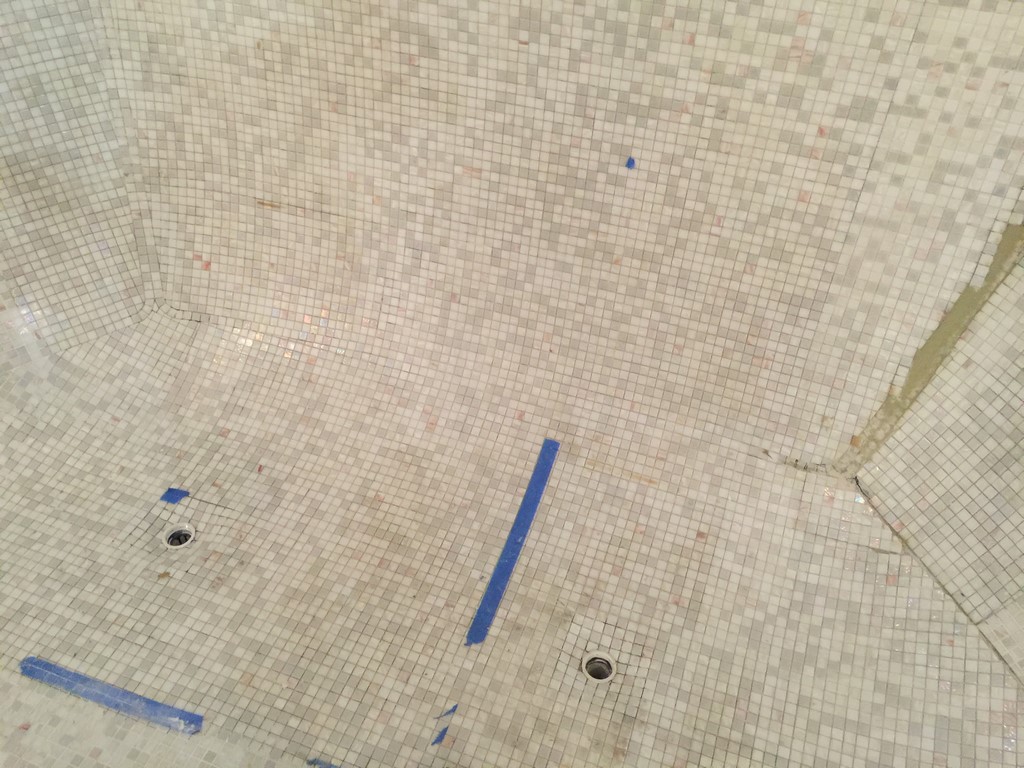
Linear Sculpture The project described in the accompanying text also involved us in preparing drain covers in an unconventional way – that is, by installing gapped, stainless steel frames that were precisely measured and custom manufactured to contain tile in such a way that the penetration represented virtually zero break in the gridded visual pattern.
When sized properly, these drains are classified as unblockable under VGBSA – and have a deft visual style as well. — J.R. |

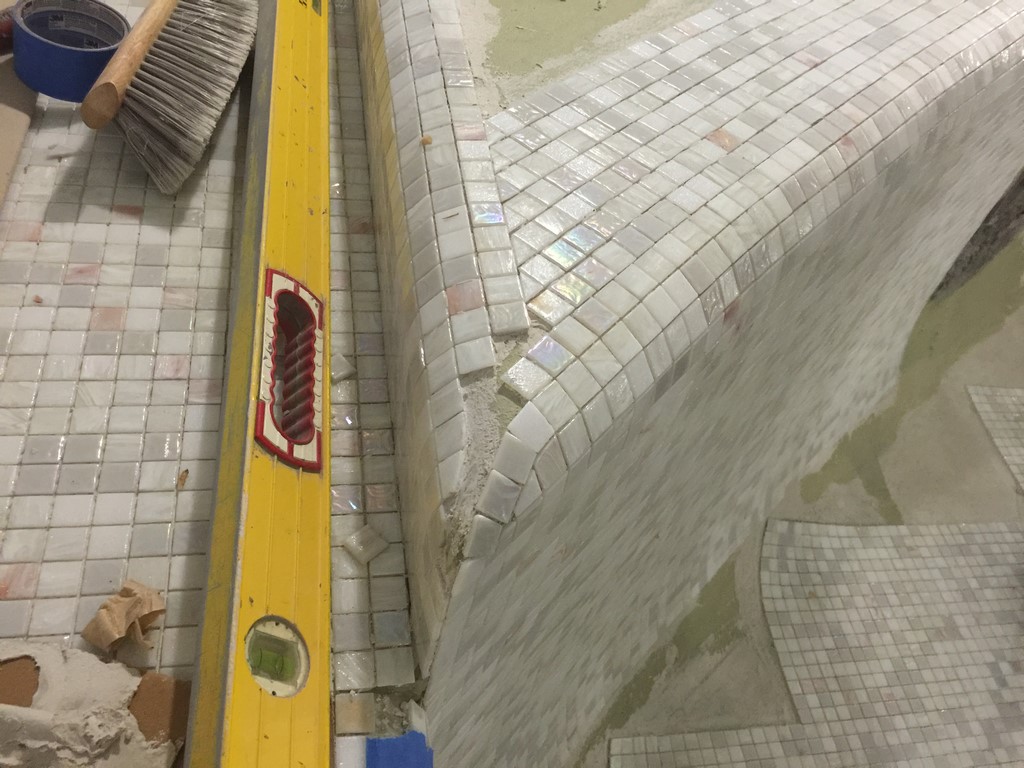
In one part of this pool, for example, we found ourselves in a section where there was a bench edge that flowed down onto curving walls. Up on top, we prepared the corner with the sort of scroll detail that’s become one of the hallmarks of our work. Flowing down from there, we had a distinct vertical line that stretched to the wall/floor intersection on changing levels.
There were a couple ways we could have handled this particular detail, but we pursued what we saw as the best solution to the design challenge: In effect, it looks a bit like a zipper, with two lines of tile passing from the scroll and dropping straight down toward the bottom of the pool. At the cove, the twin lines part, with the now-single lines of tile flowing into the intersections’ contours until the extended curves align with orderly bands of tile.
ARTFUL DIVISION
This process complicated our work, leaving us to cut and shape tiles to snug up to the twin bands of tile – two fields from the top of the pool down and one from the bottom up. And again, because we were, in effect, calling extra attention to changes in flow and plane and contour, everything had to be dead-on perfect visually and seemingly unlabored in both concept and execution.

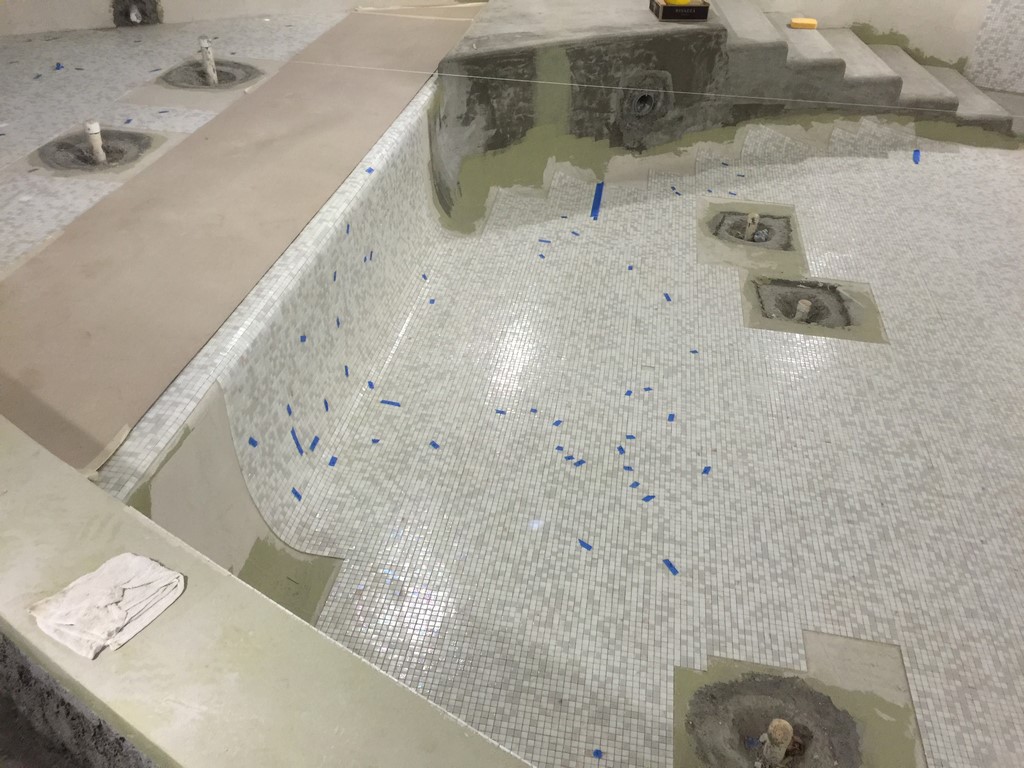
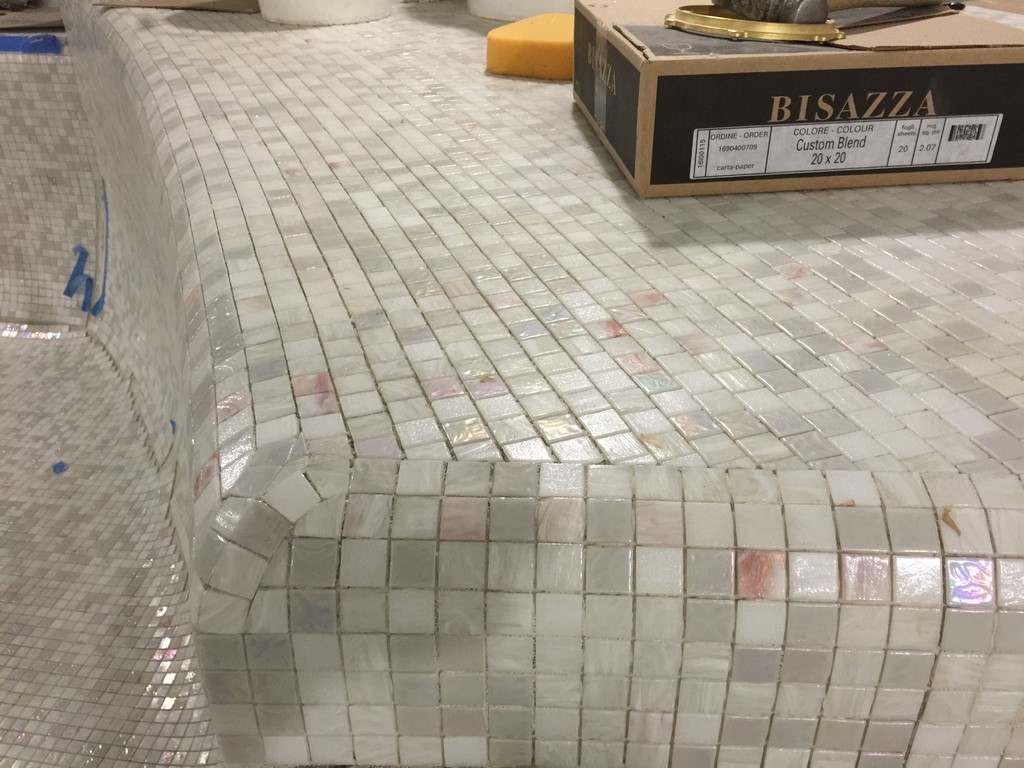
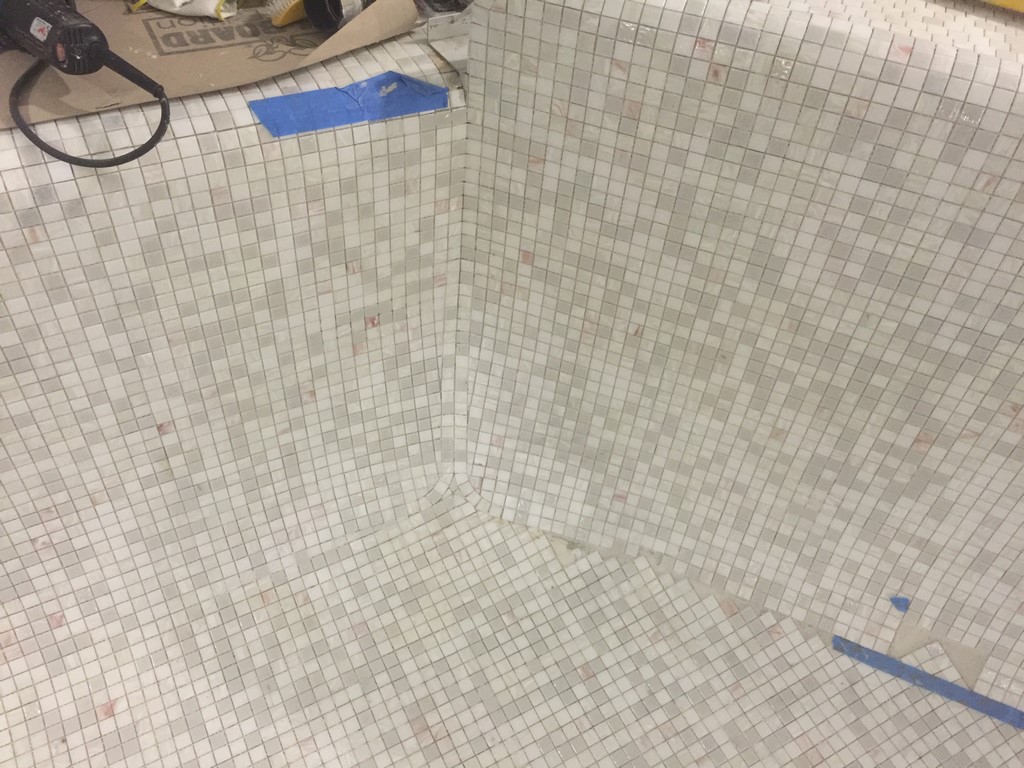
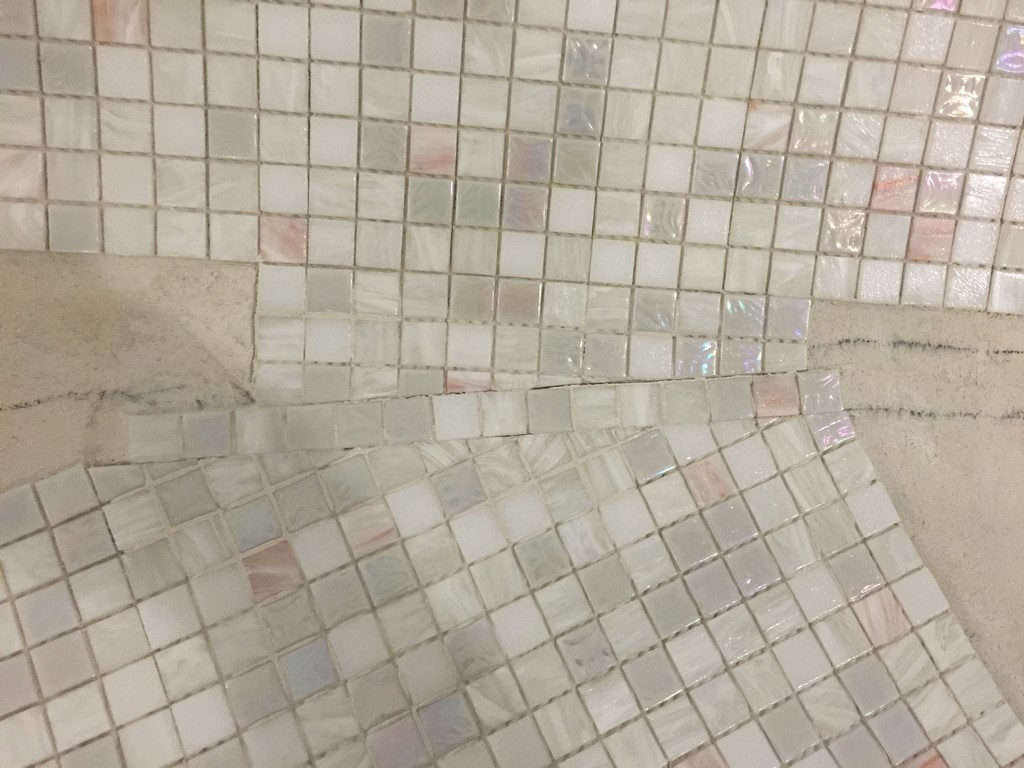
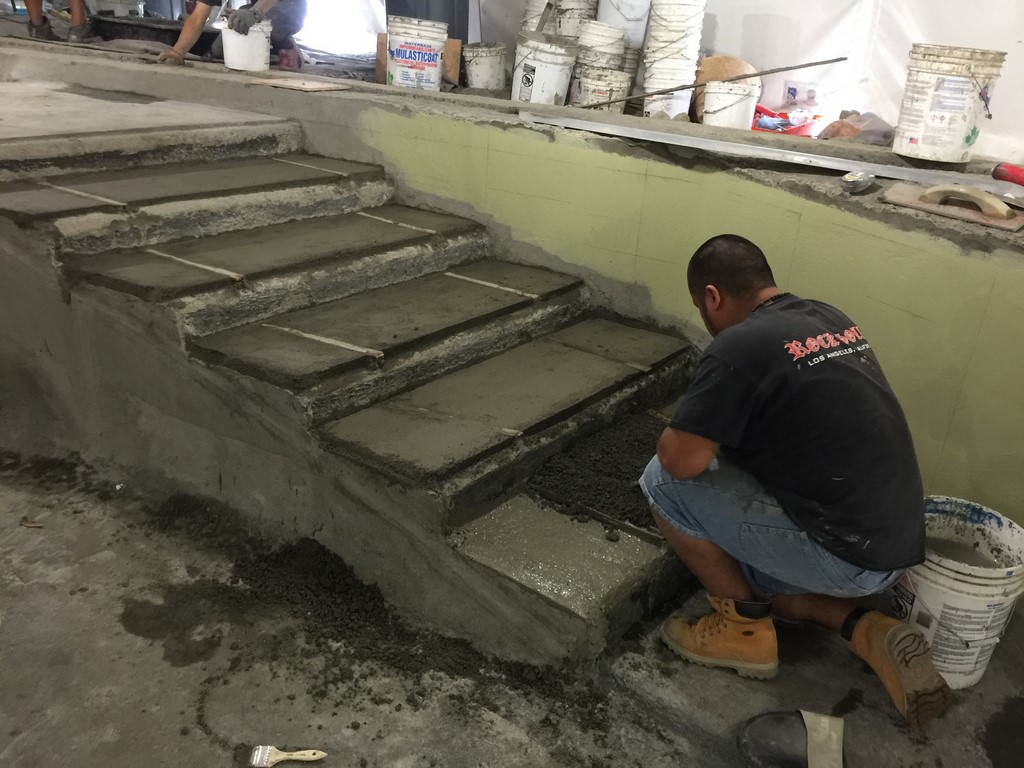
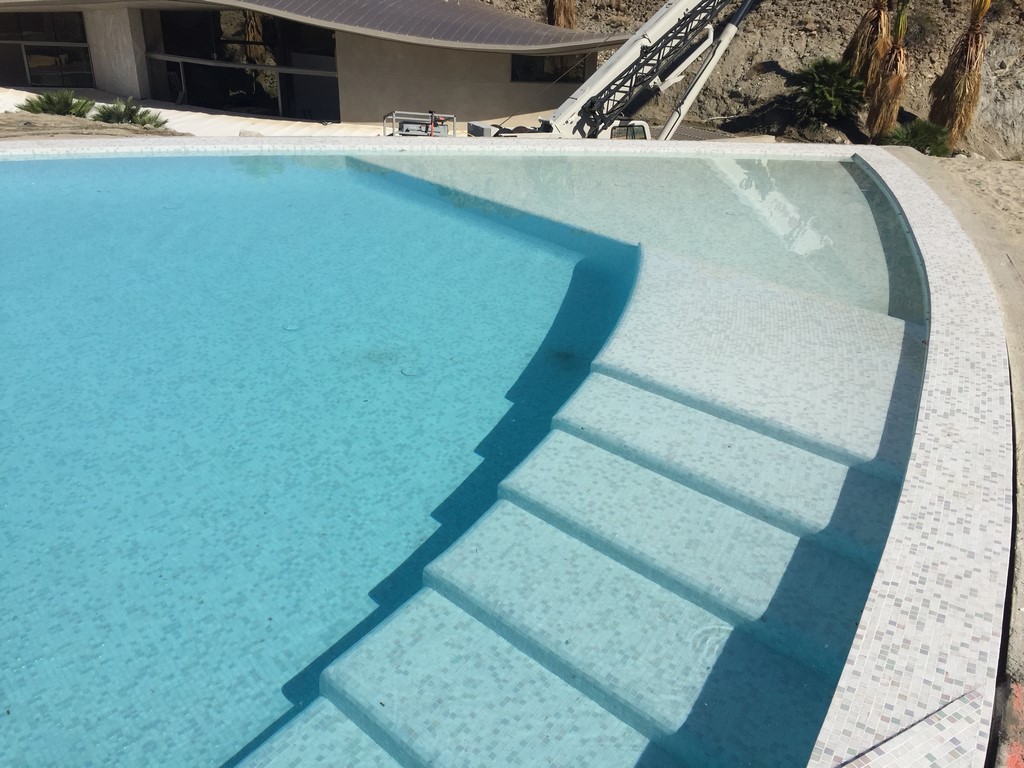
| Some parts of the surface were easy to work with (top left), but the wall section below the lounging shelf was a distinct challenge: Where the floor’s tile was to merge with the step structure, we had to create a distinct break in pattern at the base of the wall (top middle left) to create an aesthetically valid intersection with the wall. The solution: We started with the top detail and created a ‘zipper’ – a pair of tiles we dropped straight down toward the floor (top middle right and right). Looking across the step structure (bottom left), you can see the sort of line we had to develop – and get an idea of the fantastic amount of cutting, placing, chipping and replacing we had to do to make it work and follow the line we established with blue tape (bottom middle). As we finished up, what had promised to be a tricky part of the project all came together visually (bottom right). |
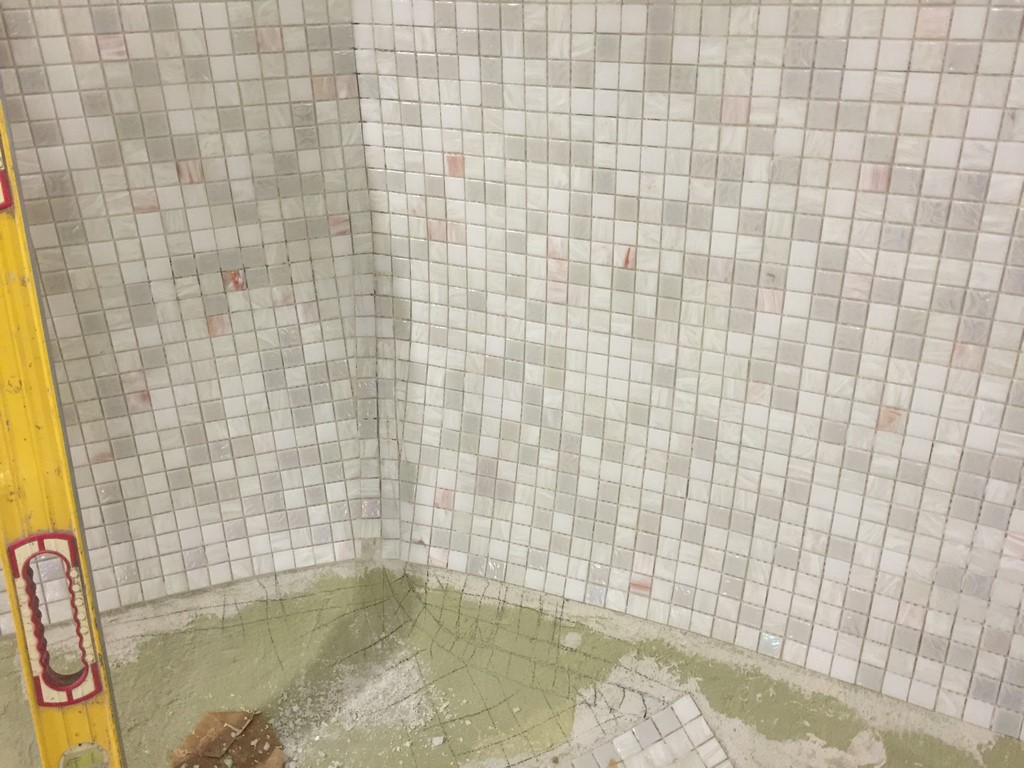
In this case, the trimming involved hundreds of glass mosaic tile pieces, each one of which had to be cut, detailed and placed individually along the zipper’s long runs. This required a certain amount of trial and error as we removed pieces that don’t quite work before trying over again. It also meant going in once all of the tiles were finally in place and using a Dremel tool with a compact diamond cutter to refine grout lines and make certain everything flowed visually along the full extent of the detail.
Achieving these results is tough under any circumstances, but when you’re in a $10,000-a-week tent; when it’s at best 85 degrees inside an air-conditioned space that’s mainly intended to protect the pool and its finish materials rather than cool things off for our crews; and when a whole lot of other crews are anxious for us to complete our work so they can get on with theirs? Well, it’s a little less fun assembling the puzzle pieces than it would be otherwise.
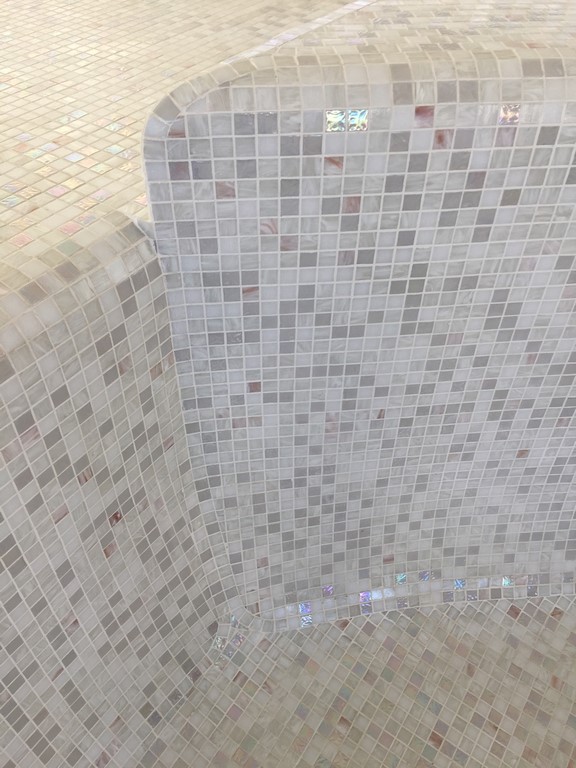
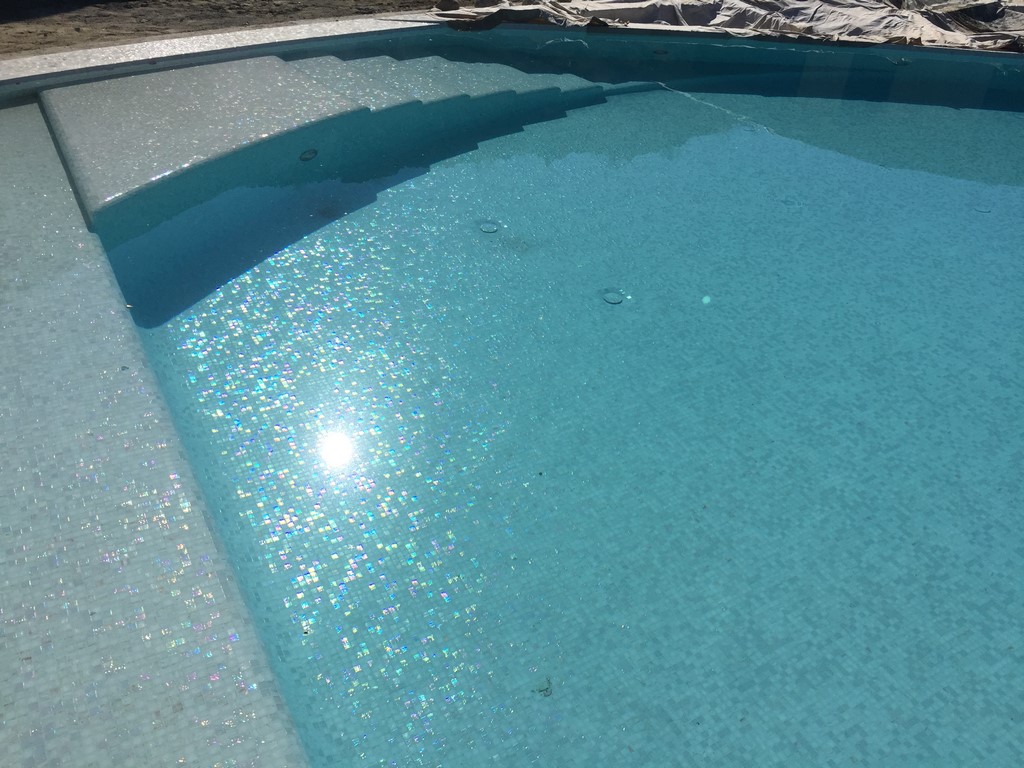

| For a crew that prepares things so meticulously that our goal is never to have to cut tile, this project was unusually challenging. An incredible amount of work went into making this step structure and all of the watershapes’ other intricate surfaces work visually. As the water rose in the completed vessels, we knew we’d done what we’d needed to do – and that the result seemed clean, easy – effortless. |
In all, this one pool – a relatively small portion of the entire project – involved placing more than 4,000 square feet of glass tile from Bisazza (with U.S offices in Los Angeles, New York and Miami). By the time we’re finished with all of the watershapes here, however, we will have applied nearly 30,000 square feet of tile. That’s a lot of material and a huge investment for the owner. But for us, it’s our artistic medium and the way we express ourselves.
In fact, great details are simply part of what we do with every project in which we participate, with our eyes fixed on beauty, elegance and visual continuity. We’re here to deliver those qualities every time, no matter how big or small the job – or how intricate its details become.
Jimmy Reed is president of Rock Solid Tile, a tile design/installation firm based in Calabasas, Calif. He founded the company in 1985 after spending his teens and early 20s learning the tile-installation trade. In between, he attended Art Center College of Design (Pasadena, Calif.) and spent several years working in the entertainment industry. For the past 25 years, Reed has focused most of his creative energy on designing and installing tile finishes for high-end custom watershapes, a process that has seen him work with some of the industry’s leading designers and builders. He may be reached through his web site: www.rocksolidtile.com.