


The Pouring of the Green

Edge treatments are important to me. They can lead the eye into the water, set up a barrier, break down a barrier. They’re simply too critical to the overall impression made by a watershape to be left to chance.
For the past ten years, I’ve found myself using one edge treatment more and more: a poured-in-place coping that uses colored concrete. I’ve now done it dozens of times, and my clients have always been thrilled by the results.
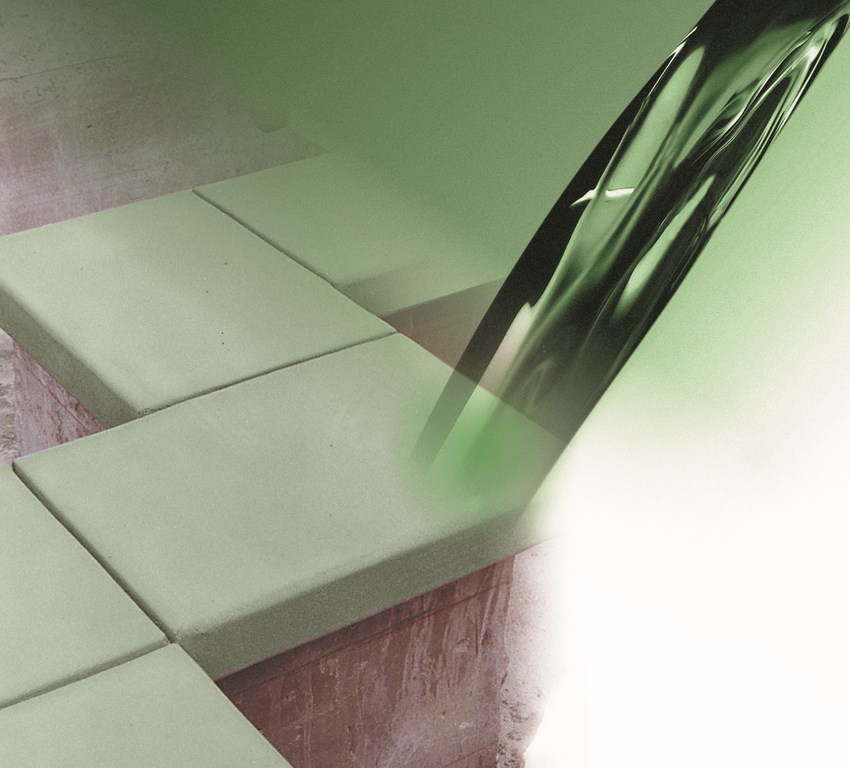
In effect, I use the concrete to create soft and subtly colored rectangular coping “stones” that cantilever two inches off both the interior and exterior sides of a raised bond beam (or off the interior side only when the coping abuts the deck). The hue is important: By using colored oxides – pale green being one of my own personal favorites – we can blend the coping with tiles and numerous types of the interior finishes.
DOWN TO DETAILS
For the project illustrated here, I set up a rectilinear slab 16 inches wide by 3-5/8 inches thick around the pool’s perimeter. The coping rests atop a raised bond beam around much of the pool, providing a perfect place to sit or even lay down. Yes, this approach takes substantially more work and costs more than most other edges (approximately $50 to $55 per linear foot, depending in part on the color), but when you want to give your customers something elegant, it’s well worth the effort and expense.
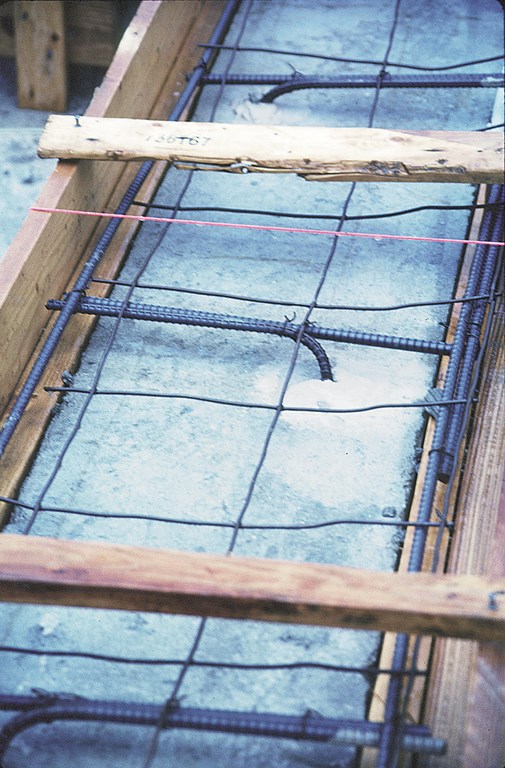 After the shell has been gunited evenly and has had time to cure, I drill #3 rebar into the top of the beam, bond it to steel in the beam left open at guniting time and bend it over into L shapes. In this case, I laid in wire mesh and tied it to the steel; in other cases, I’ll weave a mesh of black annealed wire and secure it using concrete nails.
Now I prepare the beam for its coping by banding the pool with forms. There’s nothing particularly tricky about this kind of forming for detailed concrete work, but it does require very tight tolerances and truly solid form construction.
 When you’re going for ultra-clean lines like this, any imperfection is immediately apparent. As I’ve stated repeatedly in past WaterShapes articles and when teaching at the Genesis 3 Design Schools, I insist on using real carpenters rather than pool people who “do everything.” To achieve the effect I’m after, I absolutely need secure forms of two-by-fours and two-by-sixes and sometimes two-by-eights – perfectly square, level and plumb with the pool.
And if you think you can pull this look off with bender board, styrene forms, small wood or “standard” pool-construction techniques, you have another thing coming.
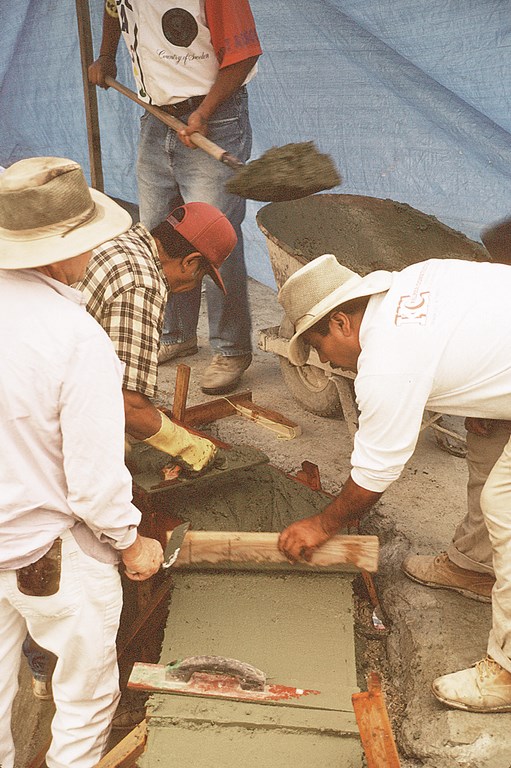
Two to three days before we pour, the mason and I get together and determine each and every deep score mark. (Corners and angles are complicated and need to be just right.) Once the pattern is marked, we set nails in the forms and string nylon twine across the beam to check the layout of the scorings for visual balance. These breaks serve two purposes: They give the coping the look of separate, pre-cast stones and also help to prevent and control cracking.
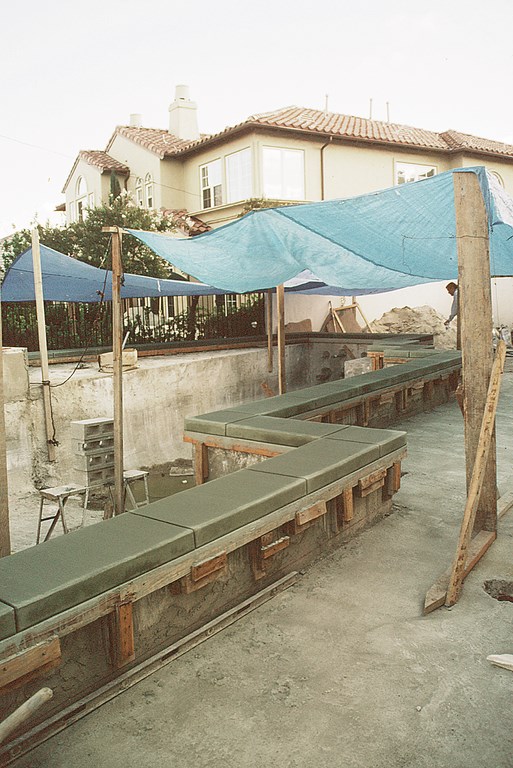 Before we pour the coping, I want to make sure that I can control the temperature to some extent. If it’s hot (as it was in this case, for example), we’ll erect shade tents to protect the work. This allows the concrete to dry slowly and evenly, giving it greater structural strength and a more uniform appearance. (It’s also a kindness to the crew.)
I order an extremely stiff concrete from my ready-mix supplier, instructing them in this instance to add three pounds of oxide per yard to the batch. The colorant I used on this job was Davis Oxide (Willow Green, #5376). Once the truck arrives on site, we wheel-barrow the concrete in – no pump, because we don’t want to add any extra water. The cost of doing things this way is substantially higher, but it shows in the quality of the work.
 The day the coping is poured, the site becomes an orderly hive of activity: Once the poured concrete has been leveled, an abundance of finishers go over every square centimeter and apply a soft, broom finish.
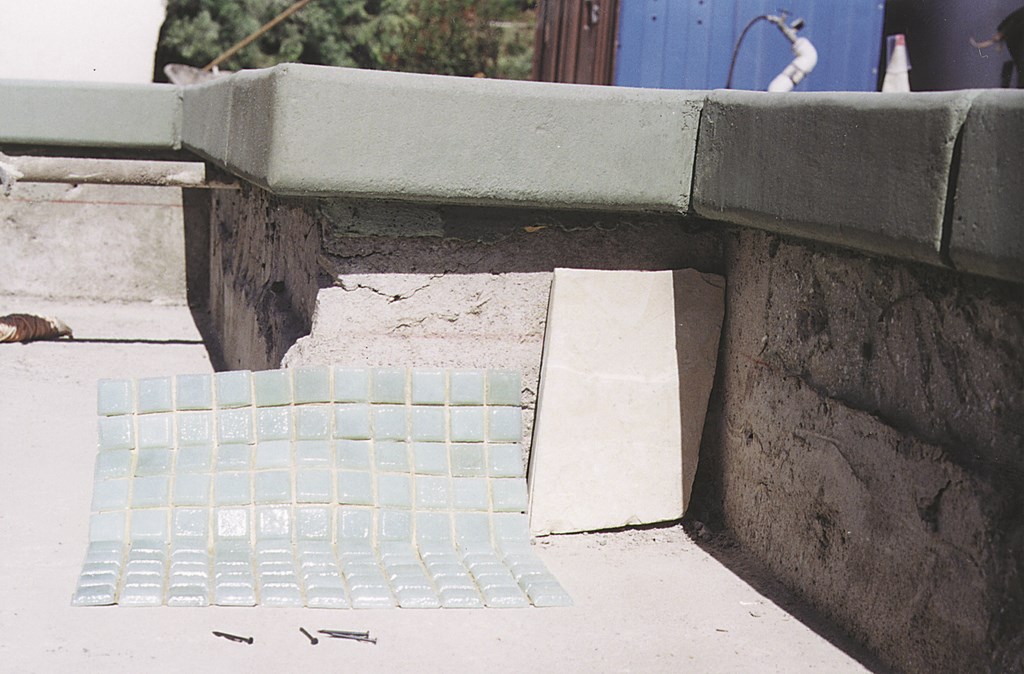
As the concrete dries and its shade lightens, the final green color slowly emerges. On this job, the coping will blend beautifully with green glass tile on the vertical faces of the pool exterior, a waterline detail and the adjoining tiled spa. In some sections, the coping abuts a blond stone decking for a gorgeous contrast.
The finished product tells the tale: It’s a great look, and one every capable builder should consider.
David Tisherman is the principal in two design/construction firms: David Tisherman’s Visuals of Manhattan Beach, Calif., and Liquid Design of Cherry Hill, N.J. He can be reached at [email protected]. He is also an instructor for Artistic Resources & Training (ART); for information on ART’s classes, visit www.theartofwater.com.