


The Designer’s Environment

To my way of thinking, professional design work requires a professional workspace in which all of the necessary professional tools are available.
In fact, for the designer creating custom watershapes, I see the space in which the work actually unfolds as being critical and cutting to the very heart of what it really means to be a “designer.” I know that term is a loaded one, which is why I put it in quotation marks. After all, anyone can say that he or she is a designer, even if all they do is sit at a coffee table and run through a set of templates while scribbling bird’s-eye-view flat plans for no other purpose than selling cookie-cutter projects.
Once you reach beyond that rudimentary level, there are some details about being a designer that absolutely have to be in place. Yes, it starts with your background and experience – a point I’ve made dozens of times in these pages – but it’s also about your work environment and the tools you should have. More important, it’s about actually using those tools on a regular basis – to the point where they become extensions of your mind and hands and operating within your studio becomes second nature.
MAKING A SPACE
Before I get to the specifics, let me note that this discussion centers on a studio to be used by someone who draws by hand.
I have and use a computer, but mostly as a communications tool. Indeed, I have always argued (vociferously at times) that there’s too much to the immediacy, warmth and creative flexibility of hand drawing for it to be seriously challenged by computer-generated imagery as a design medium. I won’t elaborate here other than to say that even those who have come to rely on computer assistance generally will acknowledge that they are at a disadvantage in working with clients day to day if they don’t also have at least a basic understanding of the art and craft of hand illustration.
That said, a design studio will always start as an empty space you select as your work area.
If possible, it should be large enough to accommodate a drafting table, flat and regular filing cabinets, a blueprint machine, a copy machine, an array of supplies and, one hopes, a large flat space for spreading out plans, catalogs, magazines, reference books and other space-eating necessities.
Having spent years in an overly cramped studio where I never found quite enough room for everything, I can attest to the importance of giving oneself enough space. In fact, when I recently remodeled my home, including a truly spacious studio with adequate storage, shelving and closets was very near the top of my list of priorities.

| My drafting table has been a stalwart companion since 1979, when I graduated from a hollow-core door to a professional model with hydraulic height and angle adjustments. The Borco cover is the original – ragged at the edges but still the perfect surface for drawing. |
Some of the things that fill the space are basic to any office – a copy machine, for example. But even here, some special thought must be given to the selection, because you want one that allows for adjustments in the size of the output image (both blow-ups and reductions). In other words, think things through, because everything you put in your studio is a tool that must serve its purpose – or it simply doesn’t belong there.
No selection is more critical than the drafting table. When I first started, I sat at a six-foot, eight-inch by three-foot hollow-core door covered in Borco (see just below) and propped up on a pair of wooden sawhorses. It worked like a charm and gave me the room and surface I needed.
Using a hollow-core door in this way is a great starting place so long as you remember the Borco, a specialized drafting-table cover that has a certain amount of give to it but doesn’t carry permanent impressions that might telegraph into subsequent drawings. It’s described as “self-healing,” so you can stick pushpins in it (an important subject discussed in detail at the Genesis 3 Level I and Drawing schools) and can draw repeatedly over the same space and always be working on a smooth surface.
Accept no substitutes for Borco! Many otherwise good-quality drafting tables are sold these days with Masonite or Melamine work surfaces. These materials are simply too hard to draw on and are simple too hard for comfortable use.
I’ve been using my current table (a Mayline professional model with hydraulic height and angle adjustments and a 48-inch parallel bar – something I picked up once I could afford to put the door and sawhorses to different uses) for more than 20 years. It still has its original Borco cover, and the surface is still good as new.
A SPECIALIZED ARRAY
Now that we have an adequate space and a good work surface, let’s fill up the rest of the studio with other tools of the design trade.
For my work, having the ability to generate technical drawings in a variety of sizes and formats is critical, so one corner of my studio is home to an old blueprint machine that enables me to run blue lines, brown lines, sepias, acetates and vellums. The downside to the convenience of having the machine on hand is that it uses an ammonia-based developer and the room must be well ventilated.
The one I have is an Ozlid #172. The company is out of business, but if you’re lucky enough to come across one of these machines for sale in the second-hand market, I’d consider it a steal to pick one up for anything under $2,000.

| This blueprint machine is a gem. It takes up plenty of space and requires lots of ventilation, but it gives me the ability to generate my finished drawings in whatever form or format is required – blue lines, brown lines, sepias, acetates or vellums. |
I also have two ordinary copy machines, both of which can use various sorts of paper in a variety of sizes. One is a digital color copier, the other black and white. Both have reduction and enlargement capabilities, which I find extremely useful in working between scales (as is often necessary).
Another important area is devoted to the proper storage of drawings and renderings. I have regular, legal-size filing cabinets for my business records and catalogs, but I also have a large, flat-file cabinet – the kind with really wide, shallow drawers. This prevents the kind of clutter I see to often in design and construction offices: I’m always amazed to see piles of plans rolled up and shoved in corners, because they inevitably will fall, get dirty, yellow at the edges and generally turn to crumpled mush. With a good set of flat files, you don’t have any of those issues.
Now we come to the heart of the matter for someone who favors hand drawing.
The list of drawing tools you can place at your disposal is long, indeed. To me, a designer’s familiarity with these items is one of the things that separate true artists and designers from the rest of the pack. From beam compasses and adjustable triangles to elliptical templates and pencil sharpeners, these are the tools that allow for generation of quality, detailed drawings.
[ ] Compasses: One of the two compass types I use is the standard version that has a radius limited to five or six inches. It’s a handy tool, but when I work with watershapes, I find that I need a compass that accommodates much larger radii – even when working at a relatively small scale in setting, for example, a soft curve on a long vanishing edge. For such applications, I’ll reach for my beam compass, which works on the same principle but has an extended arm that enables me to draw portions of extremely large radii.

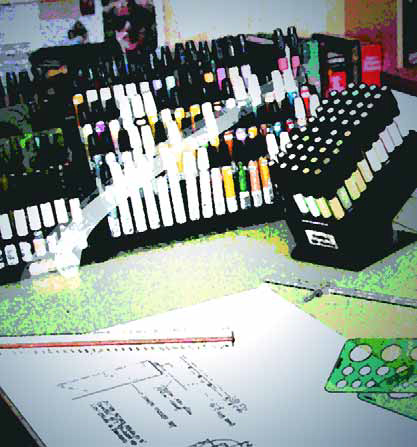
| All of these markers, compasses, triangles, circle guides, sweeps, ellipse guides and straight edges are kept close at hand on or near my work surface – well-maintained and treated with respect because I know they are tools that facilitate effective communication with clients. |
[ ] Triangles: Again, there are standard and specialized triangles. Standard versions are wonderful for applications in which I’m after the angles found in right or isosceles triangles (that is, 30, 45, 60 and 90 degrees) and I have several of these in a range of sizes. For different obtuse or acute angles, however, I keep adjustable triangles on hand, also in a range of sizes up to 14 inches. There are also triangles designed specifically for use with ink pens as well as models specifically for use with graphite pencils.
[ ] Circle/ellipse guides and sweeps: I have dozens of sets of ellipse guides ranging from five to sixty degrees in a wide range of sizes. These are great for drawing precise, tight curves on a highly consistent basis. For gentler curves and softer radiuses, I reach for a French curve or for a sweep. I particularly like working with sweeps and use these long pieces of acrylic as much as any tool in my studio.
[ ] Scales: I’ve always found it helpful to have multiple scale charts on hand to ensure accurate measuring and dimensioning. They come in two basic forms: engineering scales, which are based on the metric system, and architectural scales, which are based on standard measurements (quarters, eights and sixteenths).
[ ] Straight edges: I use aluminum, steel and cork-backed straight edges at my workstation, mostly for cutting mats of various materials for use in framing my drawings or creating sample boards. On my drafting table, I use a parallel bar that attaches to the table and helps me, as the name of the tool suggests, in keeping lines parallel at any working angle.
|
Designers Defined At a recent Genesis 3 Drawing School, I was demonstrating the use of tree stamps and completed the exercise by marking the area with color using a pale-lime marker. “That’s the wrong one,” howled one of the students, who remembered from a Level I school that I had recommended the use of a marker in a color called willow. It occurred to me later that this exchange goes a long way toward defining the difference between a designer who has a sense of his or her own creativity and uses the tools of the trade in creative and adaptable ways – and a would-be designer who latches onto an approach and uses it over and over again come hell or high water because “that’s just the way it’s done.” A designer’s graphic tools can be picked up off the shelf by anyone with the wherewithal to purchase them. The true designer’s art is in how these tools are used and the insight, education, skill and experience of the person who uses them – points that clearly relate to the design of watershapes. — D.T. |
[ ] Scum-X: This is an essential tool at the drafting table. It’s basically a bag of a fine, somewhat-absorbent, sand-like material that acts like ball bearings and helps keep a straight edge or parallel bar from smudging graphite as you slide either one over the surface of a drawing.
[ ] Lettering guides: Not everyone who draws is accomplished at the art of hand lettering. I’m fortunate to be one of them, but there are times when I’ll want to use a particular style of lettering, so I have a variety of lettering guides on hand to help me with these special fonts. These are hard to find, but inquiries at older art-supply stores often yield treasure troves of fonts. (I much prefer hand lettering to a lettering machine such as those made by Kroy, especially on a material like vellum where the background of the machine’s tape comes through and, the way I see it, can compromise an otherwise great presentation.)
[ ] Electric erasers and sharpeners: An electric eraser is a great modern convenience and an absolute design-studio necessity. They remove errant marks or smudges and allow for quick adjustment of mistakes (I know its incredible, but even I slip up from time to time). They last for years, and I use mine all the time. As for the sharpeners, I have two: an electric pencil sharpener and, more important, an electric lead-holder sharpener.
[ ] Markers: Probably more than any other component of my design studio, I consider ink markers to be the ultimate tools of the designer’s trade. Some folks work beautifully in colored pencil (not a great idea), chalk (best as a secondary medium in support of markers) or watercolors (expensive and difficult to do well). For me and my clients, however, nothing offers as much color variety and quality as the inks in marking pens. Markers are not easy to learn either, but in my book they’re the most flexible and efficient of all drawing media.
|
Catalogs on Parade If you’re like me, you have a lot of product catalogs on hand that you value either for basic information, occasional inspiration or sharing with clients. These catalogs are so important that I consider them all – whether they are about equipment, tile or whatever – to be key components of my studio. I use them all the time, which is why I carefully file them away and always request two copies, one of which I share with clients, the other of which never leaves the studio. I’ve made this a personal policy for years because catalogs that travel with me are frequently damaged, lost or simply left behind – and there’s nothing worse than needing a bit of information during the design process only to realize that you’re only copy is long gone! — D.T. |
I must have nearly 1,000 markers in every available color and with a variety of tips (either chisel points, which is the basic version, or the rounded or fine-line versions). And I don’t have just one of each: Because the market I need will almost invariably be the one to go dry at precisely the wrong moment, I always have spares at hand. It’s about efficiency: I never have to stop what I’m doing to go forth in search of the tool I need.
[ ] Paints: When I mix up colors for plaster or colored concrete, I use acrylic paints and water colors and have a variety of palettes I use. With a bit of practice and patience, the variety and subtlety of the colors you can achieve is almost limitless.
HEAD TO THE STORE
I could easily go on at far greater length – I said nothing of the glories of X-acto knives and model-making supplies and tools, for example, and I could go on for days about the handling and storage of pencils. But this is a start and covers most of the major items.
The main point here is that to use the tools, you first need to own them and, even before that, have some idea of their purposes and roles. If you don’t have a full complement of these items, common sense says that you’ll never learn to use them. It’s like working on a car without a properly stocked toolbox: You might come close, but you’ll waste lots of time improvising around the fact that you don’t have what you really need.
To this day, I love wandering around art-supply stores and asking questions about new products I see. My favorite is Graphaids, where my friends Peter and Chip have taken care of me for many, many years (for more information, visit www.graphaids.com). I’m always aware that stocking a studio is a work in progress: There’s always something new that makes a certain task a bit easier or its execution more consistent.
I’m also aware that everyone who rightly calls himself or herself a designer has a slightly different way of approaching the work and that the tools that serve me best may not be favored by everyone. Nonetheless – and starting with adequate space and a good work surface – there are certain of these items that are essentials in every studio.
David Tisherman is the principal in two design/construction firms: David Tisherman’s Visuals of Manhattan Beach, Calif., and Liquid Design of Cherry Hill, N.J. He can be reached at [email protected]. He is also an instructor for Artistic Resources & Training (ART); for information on ART’s classes, visit www.theartofwater.com.