


Retaining Wall ABCs
If you’ve been involved in major construction projects – initial work or renovations – chances are good that you’ve come across the need for retaining walls.
In many cases, even the simple leveling of a site will require some type of retaining structure to hold back the soil – whether you’re cutting fill out and need to support the slope that remains or filling an area and need to keep the new material from washing away.
No matter what site we’re talking about, retaining walls have one purpose: to hold something back. Whether you need to terrace a sloped yard, hold up a parking lot or level an area for a pond and waterfall, a retaining wall answers the need.
Although they’re simple in concept, the processes of actually designing and building these structures are quite involved, of necessity encompassing everything from soil conditions, height calculations and materials selection to water and drainage issues as well as aesthetic considerations. In designing and installing these walls through the years, I have come to recognize and accept one immutable truth: The key to success with retaining walls is all about dealing with each site on an individual basis.
STRONG FOUNDATIONS
It’s a point I find myself making over and over again: How you’ve built any other wall has absolutely no bearing on what may be needed on the site you’re now considering.
To demonstrate what I mean, let’s look at the full range of factors I recommend considering in designing and installing any soil-retention system.
[ ] Soil Conditions: In many cases, we’re called on to design and build walls on sites already finished or under construction. Here, the first thing we need to do is determine how much cutting and filling has been done by others on site. We need to be absolutely sure that the area in which we’ll be working is either virgin ground or, if filled, has been properly compacted.
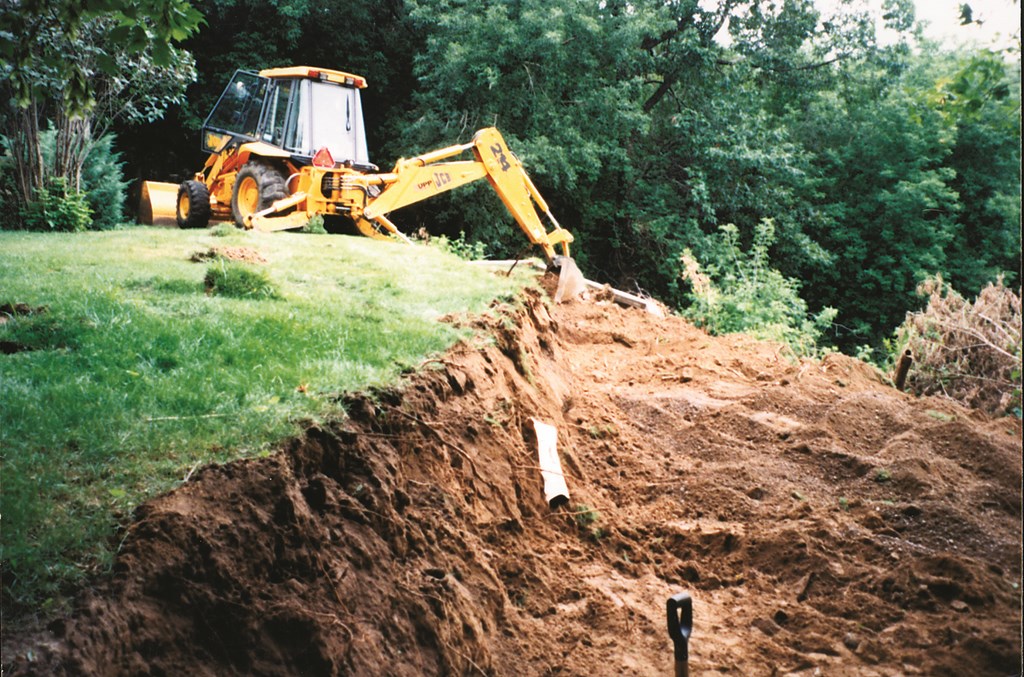
| STEP 1: Site excavation includes removing all loose soil and digging down to virgin grade. |
I once saw a site where a carpenter had installed a deck using what he considered to be proper construction techniques – that is, he’d automatically dug the footings down the required 42 inches to surpass the local frost line. Imagine his surprise when he was called back to raise the deck after it had settled 10 inches: What he hadn’t been aware of was the fact that the area had been backfilled to a depth of 15 feet because the house had been built on a severe slope.
You also need to be aware of soil type and (oversimplifying things a bit) whether you’re building in sand, gravel or clay. While clay can seem really solid when you’re digging, it can become a nightmare when it absorbs water and expands – and as a result shifts walls up and down. Sand will drain well in most cases, but it’s not the most stable of bases. The best conditions are typically found with the third common soil type: A well-drained gravel soil tends to lock into place and percolate water quickly.
In some cases, you can get the information you need on how the base for your area has been prepared and proceed accordingly, but if there are any questions, it’s time to call in a soils engineer and get detailed advice. These professionals are worth their weight in gold if they help you avoid a single problem that might become a nightmare later on.
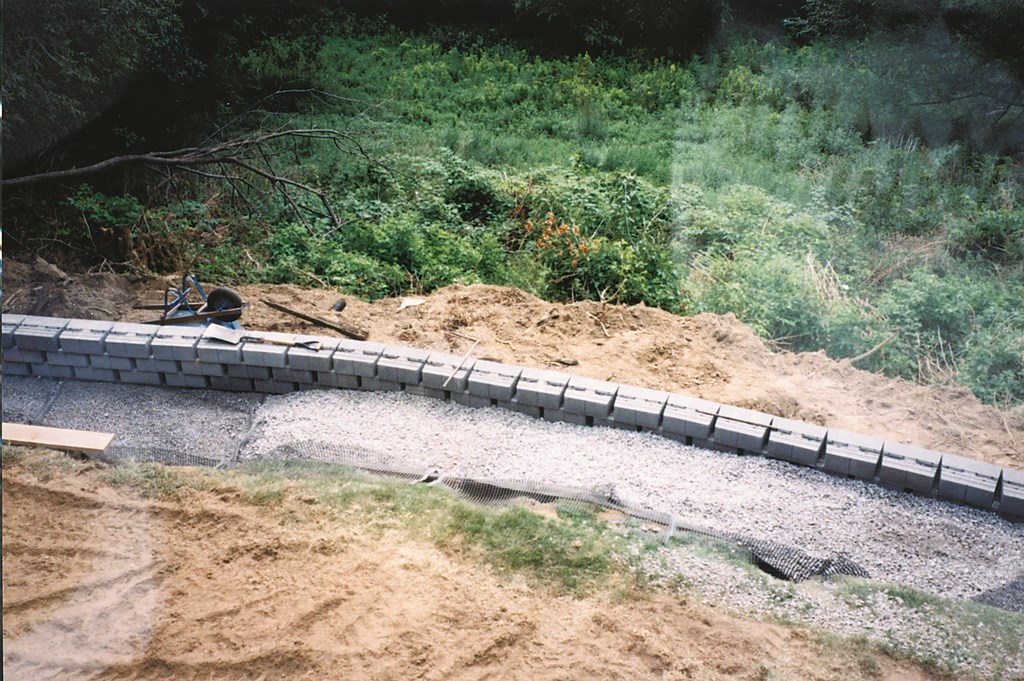
| STEP 2: We dig the wall’s base as a trench, thereby creating a passive wedge that will help to keep the two buried base courses firmly in place. Then we insert six to 12 inches of base material – in this case, crusher run #2. |
I also believe it’s best to assume control of the area in which I’ll be building. I don’t, for example, allow the site contractor to fill the area: Whenever possible, I take full responsibility and have my own crews do the work.
[ ] Angle of Repose: Related to soil condition is the angle at which different materials become self-supporting when poured onto a site – what the engineers call the angle of repose. Imagine three trucks dumping three different soils: The piles will look like rounded pyramids, but they’ll reach different heights and attain different at-rest angles relative to flat ground.
The angle at which each pile rises from the horizontal is its angle of repose, and each material has its own. As a designer or installer, you need to know what that angle is in order to determine how far back into the hill your support system (whether deadmen or geogrid) must go. For the sake of this discussion, we’ll assume the angle to be 45 degrees, but this is never something that can be taken for granted.
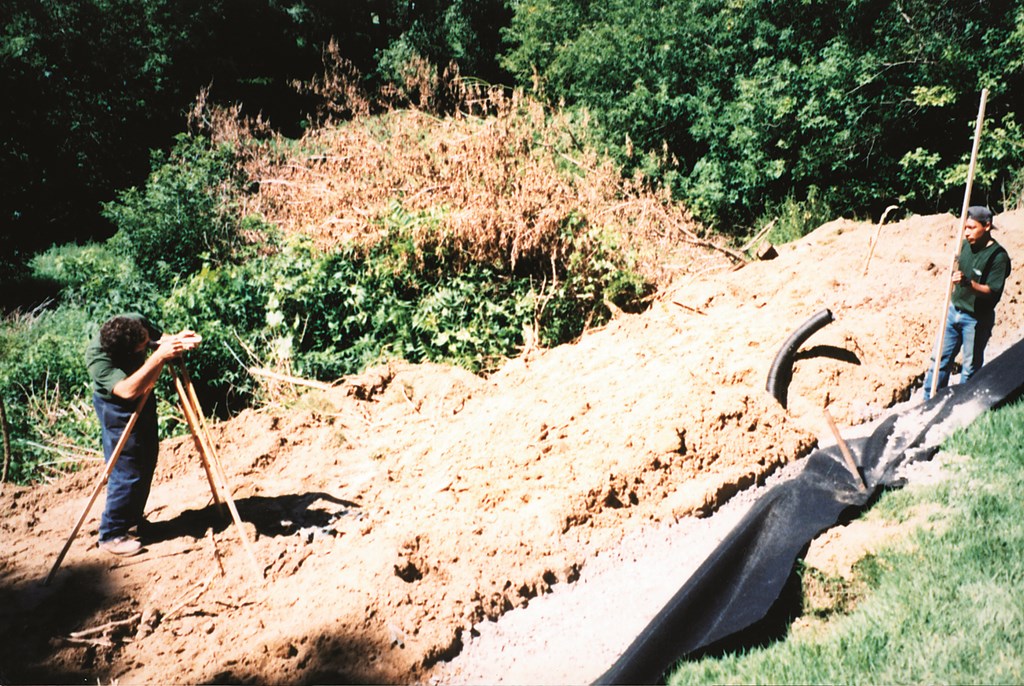
| STEP 3: We shoot the grade to ensure level placement of the base blocks. (The black pipe is tied into one of the home’s four downspouts and will clear well downslope from the wall.) |
In most critical cases (walls, for example, that hold up decks, patios, driveways or buildings), we will remove all material from behind the to-be-constructed wall until we are sure that the only thing we are supporting is a specified backfill material with a known angle of repose (Figure 1).
[ ] Materials: For this discussion, I’m only going to address “‘dry-lay” materials, which essentially come in three types: timber, natural stone and segmental systems.
* Timber walls are typically built using six-by-six-inch-by-eight-foot pressure-treated wood. As recently as 20 years ago, this was the dominant material primarily because of its relatively low cost. It seems to have slipped in popularity of late, however, because of the surge in availability of both segmental systems and natural stone.
Timber walls are essentially secured by spiking or screwing the timbers together and tying them back into the slope. Their major downside is the fact that, even with pressure treatment as a preservation measure, the wood will rot over time.
* Natural stone walls are built by stacking stone vertically using a level and our eyes to create aesthetically pleasing walls. They’re not quite 90-degree vertical, of course: We “batter” them back a bit into the grade to improve their support of the backfill material.
The use of stone rises in popularity almost daily as more clients are demanding landscape details that last a long time and architecturally match their homes and surroundings.
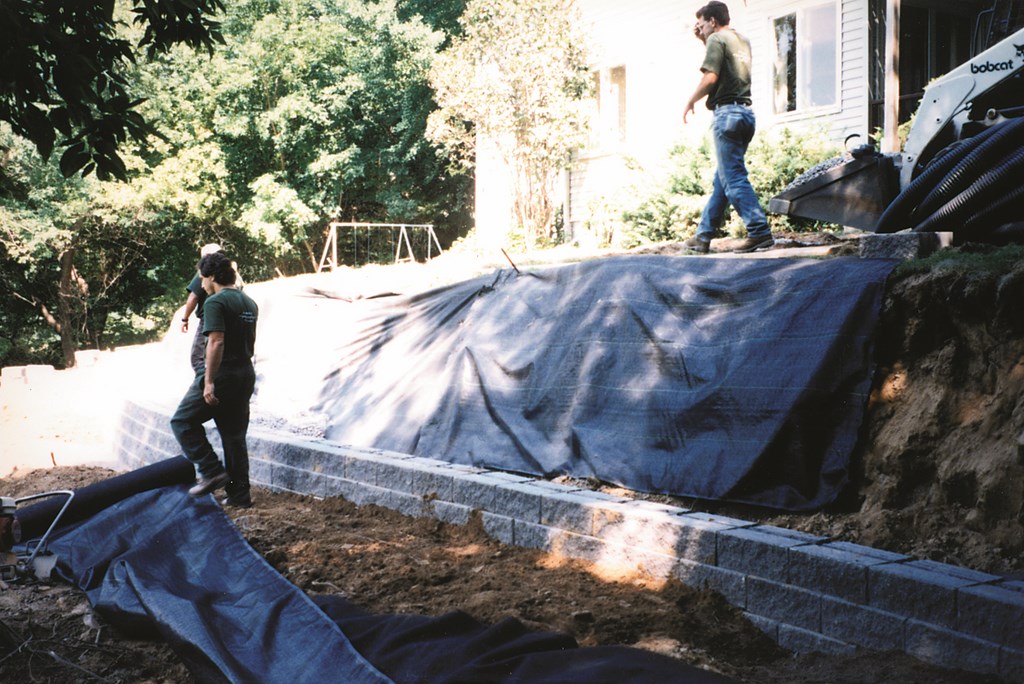
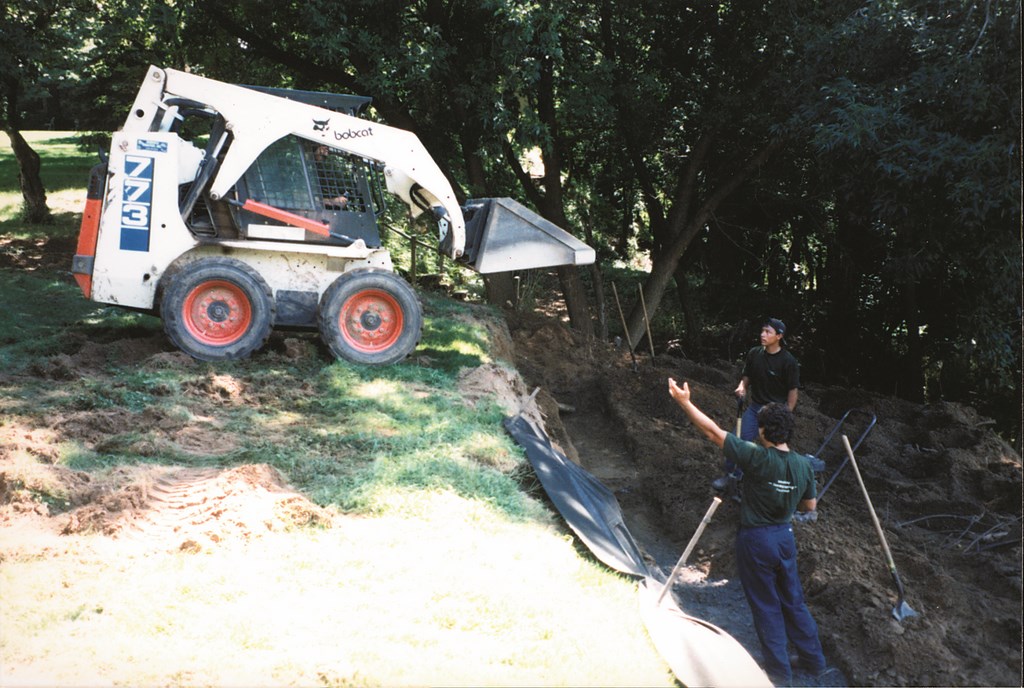
| STEP 4: Once the base is set, we place landscape fabric in the excavated area and up the slope to keep the soil from mixing with the backfill material. |
* Segmental walls are also increasingly popular. These consist of pre-cast concrete blocks that are stacked up and then either pinned or secured by flanges that hang down on the backs of the blocks. Most are set up to batter back into the hillside automatically when set according to specifications.
Available from many vendors, these walls are engineered to withstand great loads and are therefore highly reliable in critical situations. With proper engineering, they can easily be built to heights of 30 feet and more. The one knock on these walls has been the starkness of their appearance, but that’s been changing lately with the introduction of tumbled products and textures with greater visual appeal.
Although I don’t have any experience with segmental systems that allow for planting in between blocks, this configuration would offer a more “natural” look over time, but I’d assume they would need to be watered diligently because of the tendency of the concrete to pull moisture from the soil.
SETTING THE BASE
If you know the soil and have made the proper material selection for the project at hand, you’re almost ready to start building. Before the first course of wood, stone or block goes into place, however, you need to consider and make decisions about three major factors: base preparation, drainage and tiebacks.
[ ] Base Preparation: One thing goes without saying: If you do not completely compact your base, the wall will settle. This is why I am always so determined to know what’s under foot: Once I’m assured that the existing soil is virgin or that any fill has been compacted to 95-percent Standard Proctor Density (the baseline for most engineers and contractors), I’ll begin my base preparation.
| STEP 5: As we build up the wall, we backfill with a minimum of #2-size crushed stone tamped into place in six-inch lifts with a walk-behind plate tamper. |
The base material we use locally is called crusher run – essentially a crushed stone mixed with stone dust that locks so solidly into place that, when thoroughly tamped, it’s almost like concrete. The depth of this base material is determined by the height of the wall to be built. For low walls (that is, less than two feet tall), we typically use a three-to-six-inch base, and it’s always at least twice as wide as the material it will support. For larger walls, the base will reach down as much as two feet. The rule of thumb is to bury 10 percent of the height of the wall, so a 20-foot wall (exposed height) will have about two feet buried.
To ensure proper base compaction, we use walk-behind plate tampers and insert material in lifts no greater than three inches at a time. Once the base is set, we’re ready for the next step and the laying of a first course.
No matter what materials we’re using, we bury at least the first course of the wall material – what we call the base course. The extent of the base course depends on the wall’s height: No matter which material – timber, stone or segmental units – we bury half of a six-inch section for walls up to three feet tall; one full section for walls up to five feet tall, and so on. Helpfully with for really tall walls, some vendors of segmental systems make oversized base units for extra stability.
For added lateral stability with timbers and segmental wall systems that lock with pins (and therefore have holes pre-cast into them), we pound two- or three-foot pieces of rebar through the bottom course and into the ground. With timbers, we usually take the additional step of laying up the first two courses, then spike them together before drilling holes for the rebar. This is because the two courses nailed together are much more stable and less likely to shift if the rebar runs into a large rock below grade.
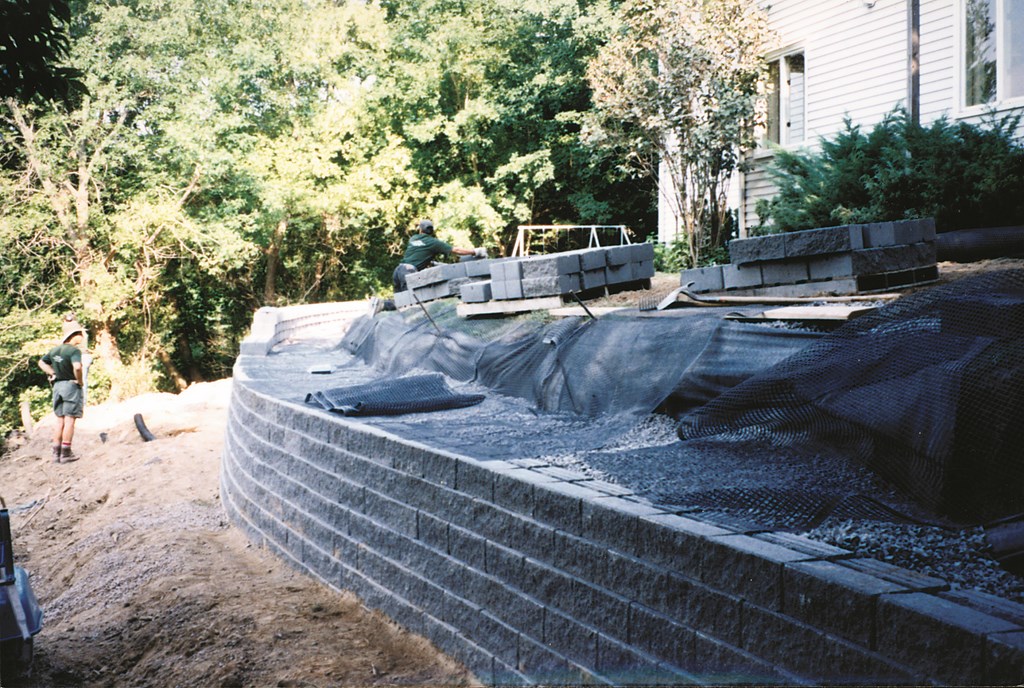
| STEP 6: We insert geogrid at the levels recommended by the block supplier (in this case, Versa-Lok Retaining Wall Systems, Oakdale, Minn.) – or, in the case of truly critical walls, by a soils engineer. This five-foot wall required the setting of three layers at various elevations; we used four, just to play it safe. |
With natural stone, it’s best for stability to use larger stones as a base, burying a course or two depending upon wall height.
[ ] Drainage: When it comes to longevity, proper drainage is without question the most critical feature of retaining-wall construction. Walls must be drained to provide relief from hydrostatic pressure and, in cold-climate areas, from heaving related to frost.
No matter where you are, it’s a good idea at the very least to bury a four-inch perforated pipe behind the wall. It should be wrapped in landscape fabric, reach daylight beyond the wall and away from the base, and should be covered with a #2 crushed stone. After that, the area above the pipe should be tamped into place in lifts no greater than six inches.
If a wall is not properly drained, there’s a good chance it will bulge in places and appear “pregnant” – a sure sign that there are big problems and that wall failure is inevitable.
[ ] Tiebacks: The approach to tiebacks depends on the material you’re using in the wall. With timber walls, for instance, we install what are called deadmen, that is, timbers set perpendicular to face of the wall and cut back into the slope behind the wall. A deadman uses friction and the weight of the soil to steady the wall in front of it. In extreme cases, a three-foot section of rebar pounded through the deadman and into the ground provides added strength.
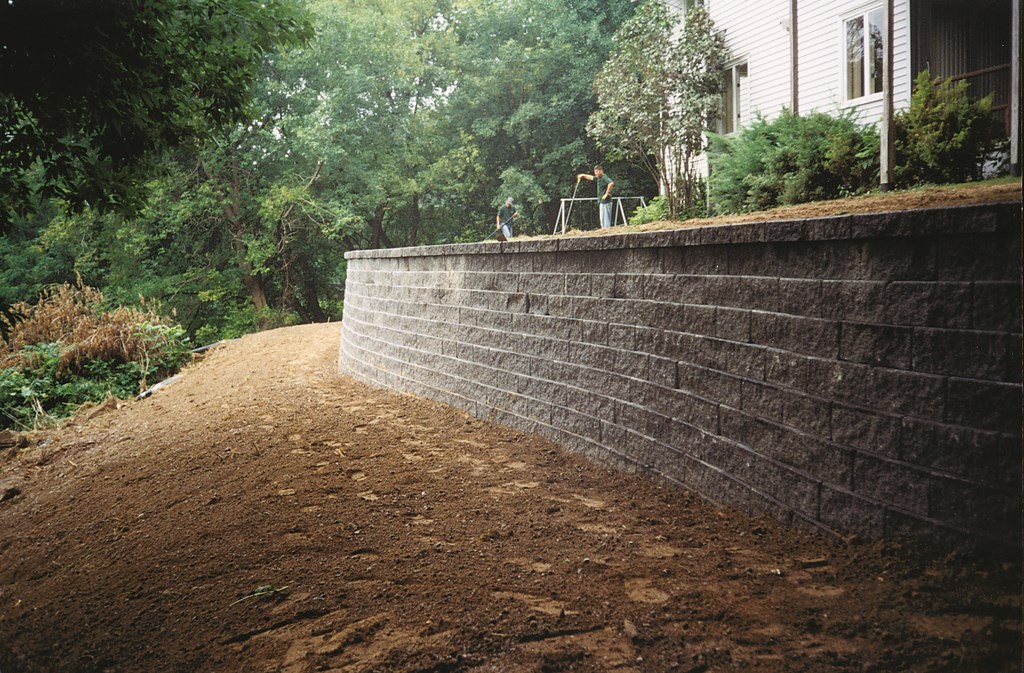
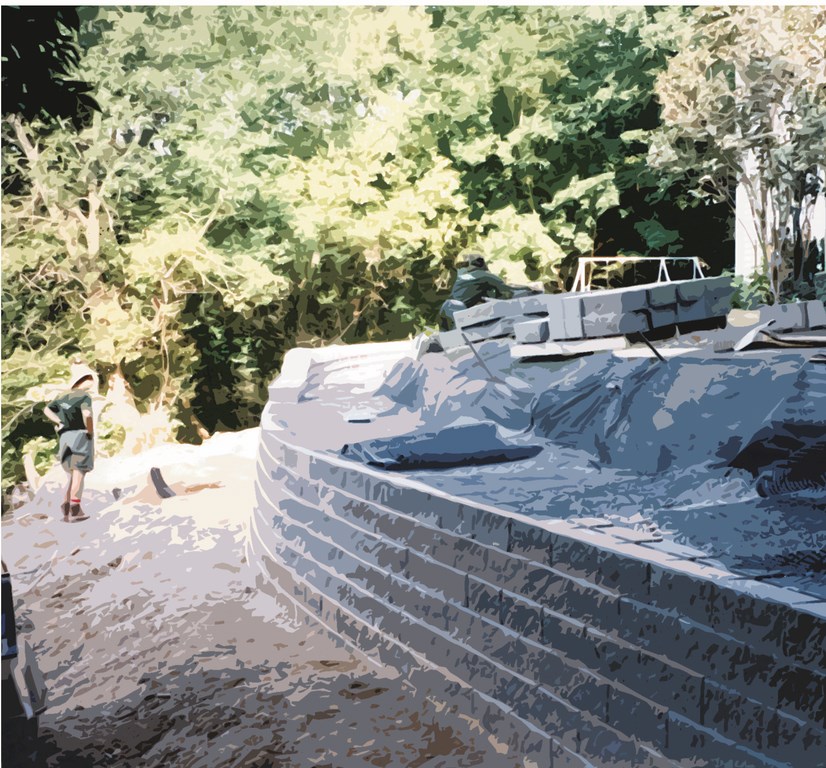
| STEP 7: In the finished retaining wall, you see ten courses of block plus a cap, resulting in a wall five-feet, three-inches tall. What you can’t see any longer are the two buried block courses atop 12 inches of crusher run; the four layers of geogrid; the two rows of four-inch perforated pipe (one at base level, the other about halfway up; or the four lengths of four-inch pipe buried below grade to clear downspout water all the way to the bottom of the ravine. |
With segmental systems we work with a product called geogrid – a woven or plastic-mesh material laid from the back face of the wall into the slope to a point beyond the angle of repose of the material being retained. This material is held in place by pins in a pin-system wall and by friction in others.
The grid not only acts as a deadman, but also separates the backfill into different components, minimizing the chance of slumping and thereby greatly increasing a wall’s stability. (Always follow the supplier’s specifications in working this material and, if there are any questions, consult with an engineer.)
With natural stone, we usually don’t build walls high enough that they require tiebacks, but when such support is needed for a taller wall – and these walls certainly can get quite tall if properly engineered – geogrid works well.
THINKING DESIGN
My point with all of this information is that the technical details need to be considered and accommodated before you can really begin thinking about aesthetics in any specific way. In other words, the wall you envision when you first approach the site may not be the one you see once the realities of the site are dealt with and the wall is actually on its way to completion.
The good news is that there are many paths you can take these days to achieve high degrees of aesthetic success: With so many options, there’s bound to be something that will fit into your design.
|
Details Terraced walls can be beautiful, but they also can be tricky – especially if you are building a terraced wall in which an upper wall will be built on the backfill of the lower wall. As a rule, you should never use a lower wall to support an upper wall. Remember the angle of repose: The upper wall must be far enough behind the lower wall that the lower wall does not have to bear its weight. In general, this means an upper wall needs to be set back at least one-and-a-half times as far as the lower wall is tall. *** When building stone retaining walls, lay landscape fabric on the slope behind the wall so dirt cannot wash up to the stone. It’s also a good idea to line the back face of a stone wall with fabric before backfilling: This will prevent material behind the wall from migrating through to the wall’s exposed face later on. — B.Z. |
Moreover, creativity can make even mundane products such as timbers look good. If the home has shiplap cedar siding, for instance, a wood wall can be a good architectural match if you face it shiplap-style and make it look as thought it had been built with the home. The same approach would work with horizontal cedar siding as well.
The suppliers of segmental-wall systems have really improved aesthetics in recent years, casting products that look like tumbled rock. Where we once could only build up to about two feet with these tumbled-wall products, systems are now available for walls of any imaginable height – and they’re visually appealing, working easily with Mediterranean-style homes as well as any that sport rustic textures.
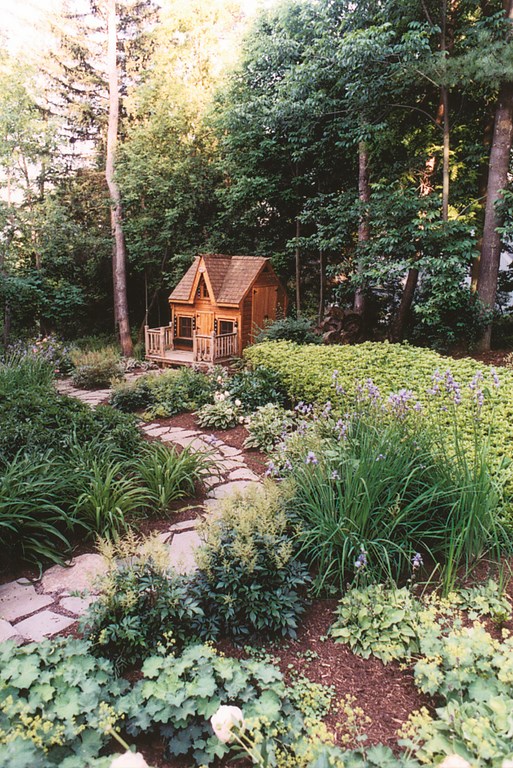
Natural stone, however, is still my first choice of material because of its timelessness. It fits virtually any type of architecture and, with skill, can be built to last a lifetime while looking as though it’s already been there for a hundred years from the moment of installation. These walls also harmonize beautifully with landscapes and plant materials and can be built in any form, so a stone retaining wall can easily be echoed elsewhere in a project by a similar-appearing freestanding wall.
For me, however, the clincher has always been shining a spotlight across a natural stone wall after dark: The beauty and possibilities are endless.
What begins as a necessary, functional project component and crucial technical challenge can become a key aesthetic asset to any landscape design. Build your retaining walls properly and they will occupy not only prime space in your portfolio, but also will be there for your grandchildren to see.
Bruce Zaretsky is president of Zaretsky and Associates, a landscape design/construction/consultation company in Rochester, N.Y. Nationally recognized for creative and inspiring residential landscapes, he also works with healthcare facilities, nursing homes and local municipalities in conceiving and installing healing and meditation gardens. You can reach him at [email protected].