


Expansive Tendencies


Oftentimes, I end up wanting to use irregularly shaped or large, dimensional stones as a coping for my clients’ pools and as a veneer in finishing their decks.
I know in doing so, of course, that the deck and its stone veneer must be isolated from the pool structure and the coping. I also know, of course, that random or dimensional stone generally doesn’t conveniently follow the isolation joint around the back edge of the bond beam. Nor, for that matter, will the stone pieces used in the deck align with the control joints I’ve established in the concrete slab.
So how do I manage to make this all work without the ugly option of cutting the coping stones or the deck veneer to follow the joints? You’ll find the answer in the approach described here:
[ ] Prepare and place the concrete substrate as usual – that is, in such a way that the decking does not touch the edge of the pool structure at any point. Typically, this entails installation of a layer of closed-cell foam. (We use a custom, half-inch-thick product that comes in eight- to 12-inch widths instead of the readily available three-and-a-half-inch-wide material to make certain there’s no chance at all of direct contact.)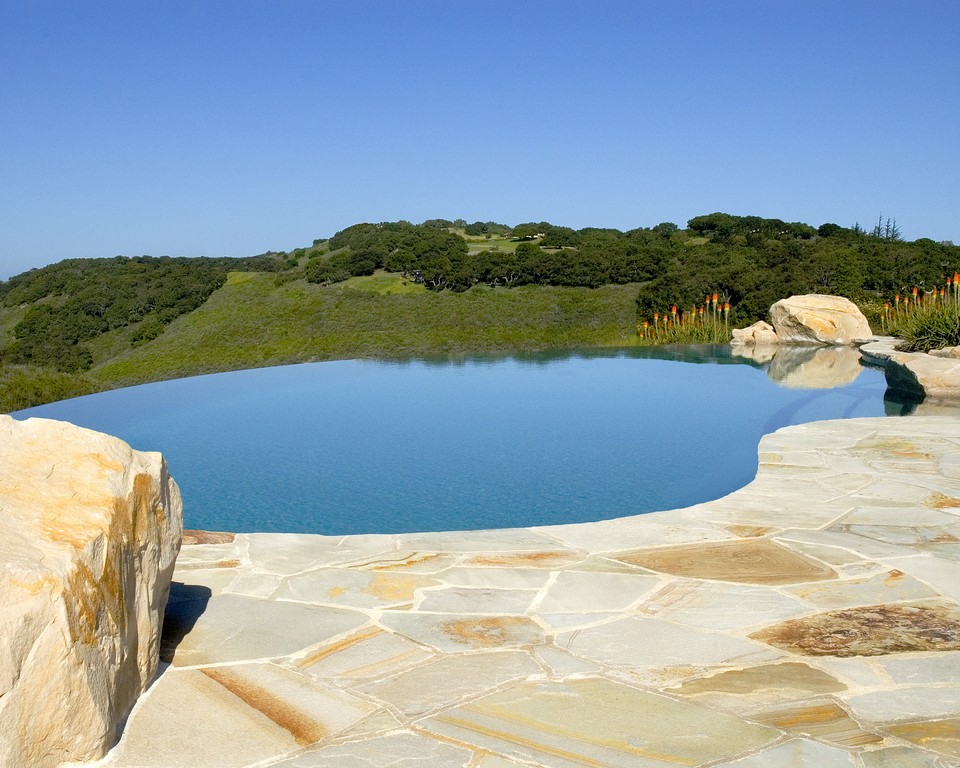
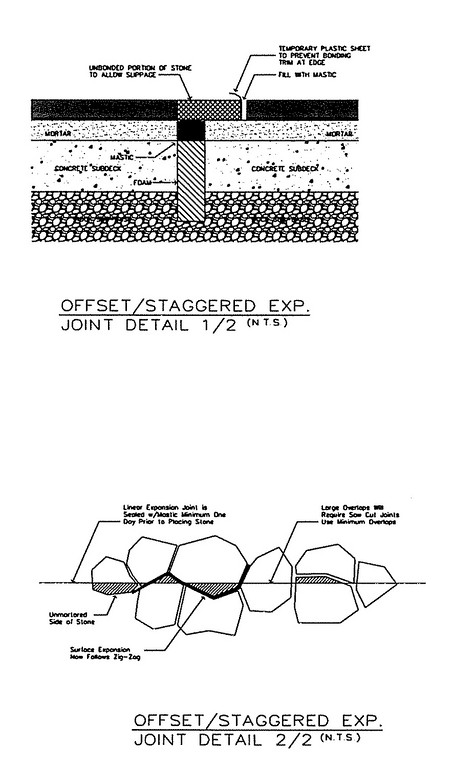
| Achieving this sort of look – that is, a beautiful stone surface without the awkward visual break that frequently marks the boundary between the coping and the surrounding deck – takes some finesse, but it’s attainable by carefully using mortar and a bond-breaking material to let part of the stone ‘float’ on one side or other of the isolation joint. |
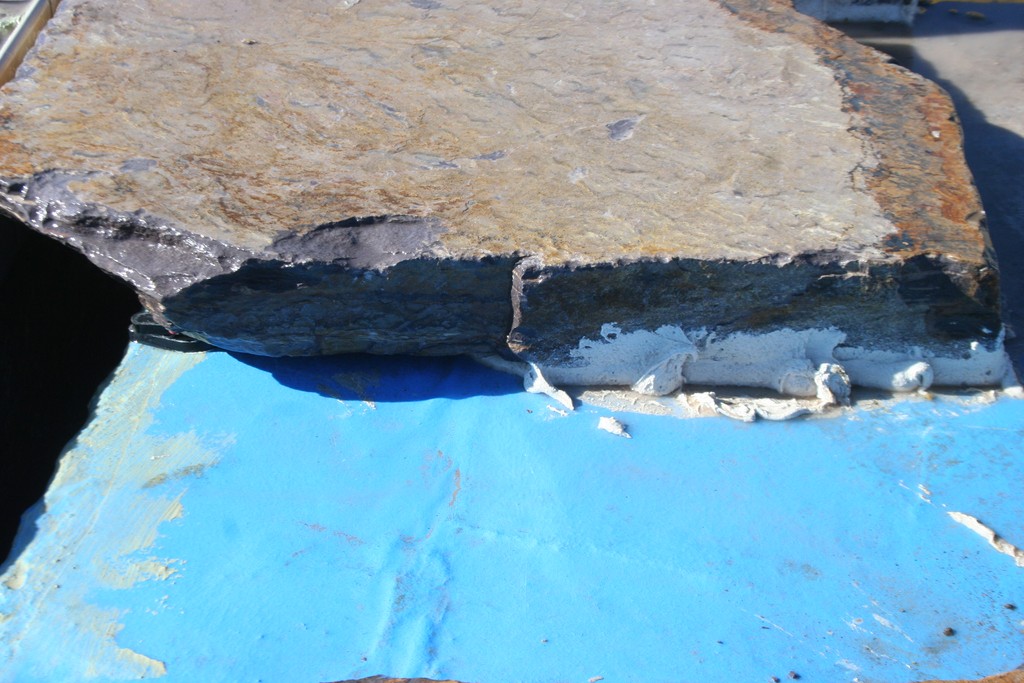
| At this point in the process, the boundary between the bond beam and the subdeck is hidden beneath a mass of mortar we applied in preparation for placement of the next stone. As you can see, only the portion of the stone to the right side of the joint has been mortared to the substrate, allowing the rest of the stone to reach over and float freely above the bond beam. |
The trick with this detail is ensuring that the stone on one side of the joint is always “floating” – in other words, that it is not bonded to the substrate. This is accomplished by placing a layer of plastic tape, visqueen or sheet plastic between the stone and the wet mortar on just one portion of the stone. In the example shown here, for instance, we chose the side of the stone with the smaller surface area to be the free-floating side.
Once installed, the stone is still in contact with the mortar bed and so is still fully supported. But the plastic functions as a “bond breaker,” allowing the stone to slip with any movement. And in those spots where we need to cantilever a rather thick stone over, say, a gutter or slot detail, we’ll epoxy the rear portion of the stone to the deck, leaving the front portion to float over the bond beam, with or without supporting mortar depending on the detail.
|
A Stable Base As is true with any flatwork project, success in the type of detail described in the accompanying text is completely dependent upon your having installed a stable concrete slab. None of the procedures described in the text will work if the stone material is applied over a thin concrete slab poured over an improperly prepared sub-base! To ensure years of crack-free enjoyment, you need to install a steel-reinforced concrete slab of adequate thickness over a properly prepared sub-base – and make certain it’s all done within parameters defined in the project’s geotechnical report. P.B. |
The coping and decking are done, and we have the satisfaction of knowing that we didn’t sacrifice the aesthetics of irregularly shaped materials to our need to respect isolation and crack-control joints.
Paolo Benedetti is principal at Aquatic Technology Pool & Spa, a design/build firm based in Morgan Hill, Calif. He may be reached at [email protected].